manuals.online logo
Brands
  1. Home
  2. •
  3. Brands
  4. •
  5. Canon
  6. •
  7. Printer
  8. •
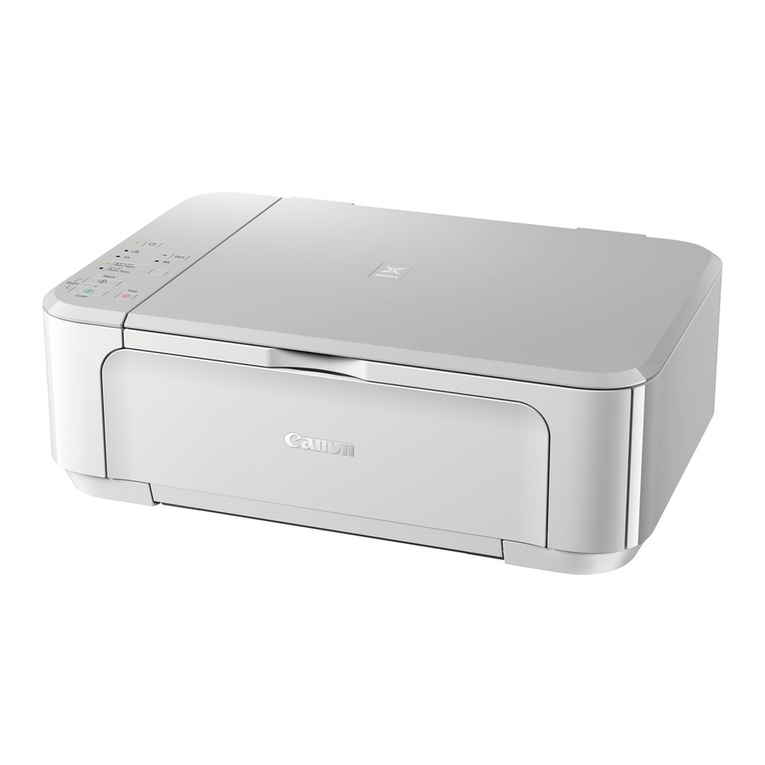
  9. Canon PIXMA iP2700 User manual

Canon PIXMA iP2700 User manual

Other manuals for PIXMA iP2700

3

This manual suits for next models

1

Other Canon Printer manuals

Canon PIXMA K10332 User manual

Canon

Canon PIXMA K10332 User manual

Canon i860 Series User manual

Canon

Canon i860 Series User manual

Canon imageCLASS MPC190 User guide

Canon

Canon imageCLASS MPC190 User guide

Canon imagePROGRAF iPF9400 User manual

Canon

Canon imagePROGRAF iPF9400 User manual

Canon imageRUNNER 1435P User manual

Canon

Canon imageRUNNER 1435P User manual

Canon PIXMA MX512 User manual

Canon

Canon PIXMA MX512 User manual

Canon i475D Series User manual

Canon

Canon i475D Series User manual

Canon PIXMA Pro9000 Mark II Series User manual

Canon

Canon PIXMA Pro9000 Mark II Series User manual

Canon imagePROGRAF iPF6200 User manual

Canon

Canon imagePROGRAF iPF6200 User manual

Canon iPF710 - imagePROGRAF Color Inkjet Printer Instruction Manual

Canon

Canon iPF710 - imagePROGRAF Color Inkjet Printer Instruction Manual

Canon ZV-223 User manual

Canon

Canon ZV-223 User manual

Canon E4200 Series Setup guide

Canon

Canon E4200 Series Setup guide

Canon S9000 User manual

Canon

Canon S9000 User manual

Canon BJ-30 User manual

Canon

Canon BJ-30 User manual

Canon PIXMA MG3210 User manual

Canon

Canon PIXMA MG3210 User manual

Canon TR7620 User manual

Canon

Canon TR7620 User manual

Canon PIXMA MG8250 User manual

Canon

Canon PIXMA MG8250 User manual

Canon PIXMA TS300 series User manual

Canon

Canon PIXMA TS300 series User manual

Canon IP2800 series Setup guide

Canon

Canon IP2800 series Setup guide

Canon BJC-6000 Series User manual

Canon

Canon BJC-6000 Series User manual

Canon 2909B002 User manual

Canon

Canon 2909B002 User manual

Canon imageclass MF244DW User manual

Canon

Canon imageclass MF244DW User manual

Canon PIXMA G7000 Series User manual

Canon

Canon PIXMA G7000 Series User manual

Canon imageClass LBP6230dw User manual

Canon

Canon imageClass LBP6230dw User manual

Popular Printer manuals by other brands

Evolis Elypso user guide

Evolis

Evolis Elypso user guide

Lexmark 522n - C Color Laser Printer Service manual

Lexmark

Lexmark 522n - C Color Laser Printer Service manual

Panduit COUGAR LS9Q Operator's manual

Panduit

Panduit COUGAR LS9Q Operator's manual

Olivetti PG L2140 Operation guide

Olivetti

Olivetti PG L2140 Operation guide

Samsung SL-M2820DW user manual

Samsung

Samsung SL-M2820DW user manual

Kyocera FS-9530DN specification

Kyocera

Kyocera FS-9530DN specification

Lexmark Infoprint 1332 user manual

Lexmark

Lexmark Infoprint 1332 user manual

Epson M1120 user guide

Epson

Epson M1120 user guide

TransAct POSJET 1500 Spare parts

TransAct

TransAct POSJET 1500 Spare parts

Telpar MTP-1500 user manual

Telpar

Telpar MTP-1500 user manual

Star DP8340 SERIES user manual

Star

Star DP8340 SERIES user manual

MGI JETVARNISH 3DS user manual

MGI

MGI JETVARNISH 3DS user manual

Kyocera TASKalfa PA4500ci Operation guide

Kyocera

Kyocera TASKalfa PA4500ci Operation guide

Emaar EP-360 user manual

Emaar

Emaar EP-360 user manual

Fujitsu DL7400 user manual

Fujitsu

Fujitsu DL7400 user manual

Centronics 101A Technical manual

Centronics

Centronics 101A Technical manual

Logic Controls LR1100 user manual

Logic Controls

Logic Controls LR1100 user manual

Epson ActionLaser Plus user manual

Epson

Epson ActionLaser Plus user manual

manuals.online logo
manuals.online logoBrands
  • About & Mission
  • Contact us
  • Privacy Policy
  • Terms and Conditions

Copyright 2025 Manuals.Online. All Rights Reserved.

FRANÇAIS
DEUTSCH
ENGLISH
ITALIANO
Guida Rapida
Leggere questo manuale prima di utilizzare la stampante. Tenerlo a portata di mano per consultarlo all’occorrenza.
Inbetriebnahme
Bitte lesen Sie dieses Handbuch vor der Verwendung des Geräts. Bewahren Sie es so auf, dass Sie es bei Bedarf zur Hand
haben.
Démarrage
Veillez à lire ce manuel avant d’utiliser l’imprimante. Conservez-le à portée de main an de pouvoir vous y reporter
ultérieurement.
Getting Started
Make sure to read this manual before using the printer. Please keep it in hand for future reference.
Simboli utilizzati in questo
documento
■
Codice modello: K10347 (iP2700)
Codice modello: K10347 (iP2702)
Note informative.
Istruzioni che includono
informazioni importanti.
Operazioni che richiedono tempo
per essere portate a termine.
Indica le operazioni in Windows.
Indica le operazioni in Macintosh.
Microsoft è un marchio registrato di Microsoft
Corporation.
Windows è un marchio o un marchio registrato
di Microsoft Corporation negli Stati Uniti e/o in
altri paesi.
Windows Vista è un marchio o un marchio
registrato di Microsoft Corporation negli Stati
Uniti e/o in altri paesi.
Internet Explorer è un marchio o un marchio
registrato di Microsoft Corporation negli Stati
Uniti e/o in altri paesi.
Macintosh, e Mac sono marchi di Apple Inc.,
registrati negli Stati Uniti e in altri paesi.
•
•
•
•
•
Azioni proibite.
In questa guida, il sistema operativo Windows
7 viene denominato Windows 7 e il sistema
operativo Windows Vista viene denominato
Windows Vista.
In diesem Dokument
verwendet Symbole
■
Modellnummer: K10347 (iP2700)
Modellnummer: K10347 (iP2702)
Informationshinweise.
Anweisungen, die wichtige
Informationen beinhalten.
Vorgänge, deren Abschluss
etwas Zeit in Anspruch nehmen.
Kennzeichnet Vorgänge unter
Windows.
Kennzeichnet Vorgänge unter
Macintosh.
Microsoft ist eine eingetragene Marke von
Microsoft Corporation.
Windows ist eine Marke oder eingetragene
Marke von Microsoft Corporation in den
Vereinigten Staaten und/oder anderen Ländern.
Windows Vista ist eine Marke oder eingetragene
Marke von Microsoft Corporation in den
Vereinigten Staaten und/oder anderen Ländern.
Internet Explorer ist eine Marke oder
eingetragene Marke von Microsoft Corporation
in den Vereinigten Staaten und/oder anderen
Ländern.
Macintosh und Mac sind Marken von Apple Inc.,
eingetragen in den Vereinigten Staaten und
anderen Ländern.
•
•
•
•
•
Unzulässige Aktionen.
In diesem Handbuch wird das Windows 7
Betriebssystem als Windows 7 bezeichnet, das
Windows Vista Betriebssystem als Windows Vista.
Symboles utilisés dans
ce document
■
Référence du modèle : K10347 (iP2700)
Référence du modèle : K10347 (iP2702)
Notes informatives.
Instructions comportant des
informations importantes.
Opérations qui peuvent être
longues.
Signale un fonctionnement sous
Windows.
Signale un fonctionnement sous
Macintosh.
Microsoft est une marque déposée de Microsoft
Corporation.
Windows est une marque ou une marque
déposée de Microsoft Corporation aux États-
Unis et/ou dans d’autres pays.
Windows Vista est une marque ou une marque
déposée de Microsoft Corporation aux États-
Unis et/ou dans d’autres pays.
Internet Explorer est une marque ou une
marque déposée de Microsoft Corporation aux
États-Unis et/ou dans d’autres pays.
Macintosh et Mac sont des marques d’Apple
Inc., déposées aux États-Unis et dans d’autres
pays.
•
•
•
•
•
Actions interdites.
Dans ce guide, le système d’exploitation
Windows 7 est appelé Windows 7 et le système
d’exploitation Windows Vista est appelé Windows
Vista.
Symbols Used in This
Document
■
Model Number: K10347 (iP2700)
Model Number: K10347 (iP2702)
Informational notes.
Instructions including important
information.
Operations that take some time
to complete.
Indicates operations in Windows.
Indicates operations in
Macintosh.
Microsoft is a registered trademark of Microsoft
Corporation.
Windows is a trademark or registered trademark
of Microsoft Corporation in the U.S. and/or other
countries.
Windows Vista is a trademark or registered
trademark of Microsoft Corporation in the U.S.
and/or other countries.
Internet Explorer is a trademark or registered
trademark of Microsoft Corporation in the U.S.
and/or other countries.
Macintosh and Mac are trademarks of Apple
Inc., registered in the U.S. and other countries.
•
•
•
•
•
Prohibited actions.
In this guide, Windows 7 operating system is
referred to as Windows 7 and Windows Vista
operating system as Windows Vista.
1
Guida Rapida
(questo manuale)
I manuali a video possono essere visualizzati su un computer. Tali manuali sono inclusi nel Setup CD-ROM e vengono installati durante l’installazione del software. È possibile che parti del manuale per
alcune lingue vengano visualizzate in lingua inglese. Per informazioni sull’apertura dei manuali a video, consultare la pagina 22.
Vengono descritti l’impostazione e l’utilizzo della stampante.
Ognuno di essi descrive le procedure
operative che consentono di utilizzare le
diverse funzioni della stampante.
Vengono forniti suggerimenti per la
risoluzione dei problemi che possono
vericarsi durante l’utilizzo della
stampante.
Guida AvanzataGuida Base Risoluzione dei problemi
Descrive le operazioni di base e i supporti
e offre un’introduzione delle altre funzioni
disponibili.
Inbetriebnahme
(dieses Handbuch)
Die Online-Handbücher können auf einem Computer angezeigt werden. Sie sind auf der Installations-CD-ROM (Setup CD-ROM) enthalten und werden zusammen mit der Software installiert. In einigen
Sprachen werden Teile des Handbuchs in Englisch angezeigt. Weitere Informationen zum Öffnen der Online-Handbücher finden Sie auf Seite 22.
Beschreibt, wie das Gerät eingerichtet und verwendet wird.
Beschreibt verschiedene Verfahren zur
Bedienung des Geräts, damit Sie dessen
Funktionalität vollständig nutzen können.
Erläutert Fehlerbehebungstipps für
Probleme, die beim Umgang mit dem
Gerät auftreten können.
Erweitertes Handbuch FehlersucheBasishandbuch
Beschreibt die grundlegende Bedienung
sowie Medien und stellt weitere
verfügbare Funktionen vor.
Démarrage
(ce manuel)
Les manuels en ligne sont consultables sur un ordinateur. Ils figurent sur le CD-ROM d’installation et sont installés en même temps que le logiciel. Dans certaines langues, des parties du manuel peuvent
s’afficher en anglais. Pour plus d’informations sur l’ouverture des manuels en ligne, reportez-vous à la page 22.
Explique comment installer et utiliser l’imprimante.
Présente diverses procédures permettant
une utilisation optimale de l’imprimante. Fournit des solutions de dépannage
face aux problèmes que vous pouvez
rencontrer en utilisant l’imprimante.
Guide d’utilisation avancéeGuide d’utilisation de base Dépannage
Explique le fonctionnement de base et les
supports, et présente les autres fonctions
disponibles.
Getting Started
(this manual) Describes various operating procedures
to make full use of printer. Describes troubleshooting tips for
problems you may encounter when using
the printer.
Advanced Guide TroubleshootingBasic Guide
Describes basic operations and media,
and gives an introduction to other
functions available.
On-screen manuals can be viewed on a computer. They are included on the Setup CD-ROM and are installed during the software installation. For some languages parts of the manual may be displayed in
English. For details on opening the on-screen manuals, refer to page 22.
Describes how to set up and use your printer.
2
Sommario■
6 Installazione del software P.12
5 Caricamento della carta P.11
4 Installazione delle cartucce FINE (FINE
Cartridges) P.7
3 Accensione della stampante P.5
2 Rimozione del materiale protettivo P.4
1 Verica degli elementi inclusi P.3
7 Utilizzo della stampante P.21
8 Manutenzione P.25
9 Speciche P.26
Stampa di foto da un computer P.23
Inhalt■
6 Installieren der Software S.12
5 Einlegen von Papier S.11
4 Einsetzen der FINE-Patronen (FINE
Cartridges) S.7
3 Einschalten des Geräts S.5
2 Entfernen des Schutzmaterials S.4
1 Prüfen des Lieferumfangs S.3
7 Testen des Geräts S.21
8 Wartung S.25
9 Technische Daten S.26
Drucken von Fotos von einem Computer S.23
Sommaire■
6 Installation du logiciel P.12
5 Chargement du papier P.11
4 Installation des cartouches FINE P.7
3 Mise sous tension P.5
2 Retrait des emballages de protection
P.4
1 Vérication des éléments présents P.3
7 Essai d’utilisation de l’imprimante P.21
8 Entretien P.25
9 Spécications P.26
Impression de photos depuis un ordinateur
P.23
Contents■
6 Install the Software P.12
5 Load Paper P.11
4 Install the FINE Cartridges P.7
3 Turn the Power On P.5
2 Remove the Protective Material P.4
1 Check the Included Items P.3
7 Try Using the Printer P.21
8 Maintenance P.25
9 Specications P.26
Print Photos from a Computer P.23
1
3
Per collegare la stampante al computer è necessario un cavo USB.•
Controllare che nella confezione siano inclusi tutti gli elementi illustrati di seguito.
Verifica degli elementi inclusi
Setup CD-ROM (contiene driver, applicazioni e manuali a video)
Altri documenti
•
•
Um das Gerät mit Ihrem Computer zu verbinden, benötigen Sie ein USB-Kabel.•
Überprüfen Sie, dass alle unten gezeigten Objekte in der Verpackung enthalten sind.
Prüfen des Lieferumfangs
Installations-CD-ROM (Setup CD-ROM) (enthält die Treiber, Anwendungen und Online-Handbücher)
sonstige Dokumente
•
•
Un câble USB est nécessaire pour connecter l’imprimante à l’ordinateur.•
Vériez que tous les éléments gurant ci-dessous sont présents dans la boîte.
Vérification des éléments présents
CD-ROM d’installation (contient les pilotes, les applications et les manuels en ligne)
Autres documents
•
•
A USB cable is necessary to connect the printer with your computer.•
Check that all the items shown below are included in the box.
Setup CD-ROM (containing the drivers, applications and on-screen manuals)
Other documents
•
•
Check the Included Items
2
1
2
1B3
24
A
A
C
4
Rimozione del materiale protettivo
Rimuovere tutti i materiali protettivi e il nastro
arancione dalla parte esterna della stampante.
Non rimuovere ancora il nastro arancione (A) presente
sulla parte anteriore.
La forma e la posizione del nastro e dei materiali
protettivi potrebbero essere diverse da quelle
effettive.
•
Rimuovere il nastro
arancione (A) presente
sulla parte anteriore
come mostrato (1),
quindi aprire il coperchio
anteriore (B) (2).
Rimuovere con cautela il nastro
arancione presente sulla parte
anteriore.
Il materiale protettivo (C) viene rimosso
insieme al nastro arancione sulla parte
anteriore.
Chiudere il coperchio
anteriore.
Entfernen Sie das Schutzmaterial und alle
orangefarbenen Klebebänder vom Äußeren
des Geräts.
Entfernen Sie noch nicht das orangefarbene Klebeband
(A) an der Vorderseite des Geräts.
Klebebänder und Schutzmaterial können in Form
und Position von der tatsächlichen Anwendung
abweichen.
•
Entfernen Sie das
orangefarbene
Klebeband (A) an der
Vorderseite des Geräts
wie angezeigt (1) und
öffnen Sie anschließend
die vordere Abdeckung
(B) (2).
Entfernen Sie vorsichtig das
orangefarbene Klebeband an
der Vorderseite des Geräts.
Das Schutzmaterial (C) wird zusammen
mit dem orangefarbenen Klebeband an
der Vorderseite des Geräts entfernt.
Schließen Sie die
vordere Abdeckung.
Entfernen des Schutzmaterials
Retirez la totalité du ruban de protection
orange et du plastique de protection à
l’extérieur de l’imprimante.
Ne retirez pas encore le ruban orange (A) de la face
avant.
La forme et la position réelles du ruban et du
plastique de protection peuvent varier.
•
Retirez le ruban orange
(A) de la face avant
comme montré par (1)
puis ouvrez le panneau
avant (B) (2).
Retirez délicatement le ruban
orange de la face avant.
Le plastique de protection (C) est retiré
avec le ruban orange de la face avant.
Fermez le panneau
avant.
Retrait des emballages de protection
Remove the Protective Material
Remove all the protective materials and
orange tape from the outside of the printer. Remove the orange tape
(A) on the front side as
shown (1), then open the
Front Cover (B) (2).
Remove the orange tape on the
front side carefully. Close the Front Cover.
Do not remove the orange tape (A) on the front side yet. The protective material (C) is removed
along with the orange tape on the front
side.
The tape and protective materials may differ in
shape and position from what they actually are.
•
3
A
12
5
Accensione della stampante
Non installare la stampante in una posizione su cui potrebbero cadere
degli oggetti. Tali oggetti potrebbero penetrare nella stampante
causandone il malfunzionamento.
Non appoggiare oggetti sulla parte superiore della stampante. Tali
oggetti potrebbero cadere nella stampante al momento dell’apertura
dei coperchi causandone un malfunzionamento.
•
•
Inserire il cavo di alimentazione nel
connettore sul lato sinistro della
stampante e nella presa a muro.
NON collegare il cavo USB in questa
fase.
•
Premere il pulsante ON
(A) per accendere la
stampante.
Einschalten des Geräts
Stellen Sie der Drucker nicht an Standorten auf, an denen
Gegenstände darauf fallen können. Gegenstände können in das Gerät
fallen, was zu einer Fehlfunktion führen würde.
Legen Sie keine Gegenstände auf das Gerät. Sie können in das Gerät
fallen, wenn Sie die Abdeckungen öffnen, was zu einer Fehlfunktion
führen würde.
•
•
Schließen Sie das Netzkabel am
Netzkabelanschluss an der linken Seite
des Geräts an, und stecken Sie das
andere Ende in die Wandsteckdose.
Schließen Sie zu diesem Zeitpunkt das
USB-Kabel noch nicht an.
•
Drücken Sie die Taste
EIN (ON) (A), um das
Gerät einzuschalten.
Mise sous tension
N’installez pas l’imprimante dans un endroit présentant un risque de
chute d’objet sur la machine. Si un objet tombe dans l’imprimante, cela
peut entraîner un dysfonctionnement.
Ne placez aucun objet sur le haut de l’imprimante. Il pourrait tomber
dans l’imprimante lors de l’ouverture des capots et entraîner un
dysfonctionnement.
•
•
Insérez le cordon d’alimentation dans
le connecteur sur le côté gauche de
l’imprimante et dans la prise secteur.
Ne branchez PAS le câble USB à ce
stade.
•
Appuyez sur le bouton
MARCHE (A) pour
mettre l’imprimante sous
tension.
Turn the Power On
Insert the power cord into the connector
on the left side of the printer and into
the wall outlet.
Do NOT connect the USB cable at this
stage.
•
Do not install the printer where an object may fall on it. The object may
fall inside the printer, resulting in malfunction.
Do not place any object on top of the printer. It may fall into the printer
when opening covers, resulting in malfunction.
•
•
Press the ON button (A)
to turn on the printer.
B
3
12
BA
6
Assicurarsi che la spia
ALIMENTAZIONE
(POWER) (B) si accenda
e diventi verde.
Spegnimento della stampante□
Prima di rimuovere la presa di alimentazione, assicurarsi che la spia
ALIMENTAZIONE (POWER) non sia accesa. Se si rimuove la presa di
alimentazione mentre la spia ALIMENTAZIONE (POWER) si accende o
lampeggia potrebbe causare l’essiccazione e l’ostruzione delle cartucce
FINE (FINE Cartridges), provocando una scarsa qualità di stampa.
•
Attenersi alla procedura illustrata di seguito.
La stampante potrebbe continuare a emettere il rumore di quando è in funzione
per massimo 25 secondi, poi si spegne.
La specica del cavo di alimentazione
varia in base al paese o alla regione.
•
1. Premere il pulsante ON (A) per spegnere la stampante.
2. Assicurarsi che la spia ALIMENTAZIONE (POWER) (B) non sia accesa.
Stellen Sie sicher, dass
die POWER-Anzeige (B)
grün leuchtet.
Ausschalten des Geräts□
Wenn Sie den Netzstecker entfernen, achten Sie darauf, dass die
POWER-Anzeige nicht leuchtet, bevor Sie den Stecker entfernen.
Entfernen Sie den Netzstecker, während die POWER-Anzeige leuchtet
oder blinkt, können die FINE-Patronen (FINE Cartridges) austrocknen und
verstopfen, wodurch sich die Druckqualität verschlechtert.
•
Gehen Sie wie nachfolgend beschrieben vor.
Die Betriebsgeräusche können bis zu 25 Sekunden andauern, bis sich das Gerät
ausschaltet.
Die Spezikationen des Netzkabels
fallen je nach Land oder Region
unterschiedlich aus.
•
1. Drücken Sie die Taste EIN (ON), um (A) das Gerät auszuschalten.
2. Stellen Sie sicher, dass die POWER-Anzeige (B) nicht leuchtet.
Assurez-vous que le
voyant ALIMENTATION
(B) est allumé en vert.
Mise hors tension□
Avant de retirer la che d’alimentation électrique, vériez que le voyant
ALIMENTATION est éteint. Si vous retirez la che d’alimentation
électrique alors que le voyant ALIMENTATION est allumé ou clignote, les
cartouches FINE risquent de sécher et de se boucher, ce qui provoque
une mauvaise qualité d’impression.
•
Le bruit de fonctionnement peut continuer jusqu’à 25 secondes, jusqu’à la mise
hors tension.
Les caractéristiques techniques du
cordon d’alimentation varient suivant le
pays ou la région.
•
Veillez à suivre la procédure ci-dessous.
1. Appuyez sur le bouton MARCHE (A) pour mettre l’imprimante hors tension.
2. Vériez que le voyant ALIMENTATION (B) est éteint.
Make sure that the
POWER lamp (B) lights
green.
Turning the power off□
Be sure to follow the procedure below.
Operating noise may continue for up to 25 seconds until the printer turns off.
When removing the power plug, make sure that the POWER lamp is not
lit before removing the plug. Removing the power plug while the POWER
lamp lights up or ashes may cause drying and clogging of the FINE
Cartridges, resulting in poor printing.
•
The specication of the power cord
differs for each country or region.
•
1. Press the ON button (A) to turn off the printer.
2. Make sure that the POWER lamp (B) is not lit.
41A2
D
3
7
Installazione delle cartucce FINE (FINE Cartridges)
Aprire il coperchio anteriore (A).
Quando si apre il coperchio anteriore, il supporto cartuccia FINE (FINE Cartridge Holder) si sposta
automaticamente.
Se il supporto cartuccia FINE (FINE Cartridge Holder) non si sposta, assicurarsi che la stampante sia accesa.
Se il coperchio anteriore viene lasciato aperto per più di 10 minuti, il supporto cartuccia FINE (FINE Cartridge
Holder) si sposta a destra. In questo caso, chiudere e riaprire il coperchio anteriore.
•
•
•
Verificare che il supporto cartuccia FINE (FINE Cartridge
Holder) (D) si sposti nella posizione di installazione. Seguire la procedura illustrata di
seguito per inserire le cartucce FINE
(FINE Cartridges) Nero e Colore
negli slot corrispondenti e .
Vedere la pagina successiva.
Einsetzen der FINE-Patronen (FINE Cartridges)
Öffnen Sie die vordere
Abdeckung (A).
Beim Öffnen der vorderen Abdeckung bewegt sich die FINE-Patronen-Halterung (FINE Cartridge Holder) automatisch.
Bewegt sich die FINE-Patronen-Halterung (FINE Cartridge Holder) nicht, stellen Sie sicher, dass das Gerät
eingeschaltet ist.
Ist die vordere Abdeckung länger als 10 Minuten geöffnet, bewegt sich die FINE-Patronen-Halterung (FINE Cartridge
Holder) nach rechts. Schließen Sie in diesem Fall die vordere Abdeckung, und öffnen Sie diese anschließend wieder.
•
•
•
Stellen Sie sicher, dass die FINE-Patronen-Halterung (FINE
Cartridge Holder) (D) in die Installationsposition gefahren
wird.
Gehen Sie wie nachfolgend beschrieben
vor, um die schwarze und die farbigen
FINE-Patronen (FINE Cartridges)
in die jeweils dafür vorgesehenen
Steckplätze und einzusetzen.
Weiter zur nächsten Seite.
Installation des cartouches FINE
Ouvrez le panneau avant (A).
Lorsque vous ouvrez le panneau avant, le porte-cartouche FINE se déplace automatiquement.
Si le porte-cartouche FINE ne se déplace pas, vériez que l’imprimante est sous tension.
Si le panneau avant reste ouvert pendant plus de 10 minutes, le porte-cartouche FINE se déplace vers la droite.
Dans ce cas, fermez puis rouvrez le panneau avant.
•
•
•
Assurez-vous que le porte-cartouche FINE (D) se place en
position d’installation. Suivez la procédure ci-après pour
insérer les cartouches FINE Noir
et Couleur dans leurs logements
correspondants et .
Allez à la page suivante.
Install the FINE Cartridges
Open the Front Cover (A).
When opening the Front Cover, the FINE Cartridge Holder moves automatically.
If the FINE Cartridge Holder does not move, make sure that the printer is turned on.
If the Front Cover is left open for more than 10 minutes, the FINE Cartridge Holder moves to the right. In this
case, close and reopen the Front Cover.
•
•
•
Make sure that the FINE Cartridge Holder (D) moves to the
installation position. Follow the next procedure to insert the
Black and Color FINE Cartridges
into their corresponding slots and .
Go to the next page.
5
E
46
F
G
H
8
Aprire il coperchio di bloccaggio della cartuccia di inchiostro
a destra.
Sollevare (E) il coperchio afferrandolo saldamente con due dita.
Estrarre la cartuccia FINE (FINE Cartridge)
Nero dalla confezione. Rimuovere con cura il nastro protettivo arancione (F)
tirandolo nella direzione indicata dalla freccia.
Maneggiare con cura le cartucce FINE (FINE Cartridges). Evitare di farle cadere o di applicarvi una pressione eccessiva.
Utilizzare le cartucce FINE (FINE Cartridges) fornite con la stampante.
Fare attenzione a non macchiarsi le mani e a non sporcare l’area circostante con l’inchiostro presente sul nastro protettivo
rimosso.
Non toccare i contatti elettrici (G) né gli ugelli della testina di stampa (H) su una cartuccia FINE (FINE Cartridge). In caso
contrario, la stampante potrebbe non stampare correttamente.
•
•
•
•
Öffnen Sie die Verriegelung der Tintenpatrone auf der
rechten Seite.
Drücken Sie fest auf die Abdeckung (E), und ziehen Sie diese nach oben.
Nehmen Sie die schwarze FINE-Patrone (FINE
Cartridges) aus der Verpackung. Ziehen Sie das orangefarbene Schutzband (F)
in Pfeilrichtung, und entfernen Sie es vorsichtig.
Gehen Sie sorgfältig mit den FINE-Patronen (FINE Cartridges) um. Lassen Sie sie nicht fallen und wenden Sie keinen
übermäßigen Druck auf sie an.
Verwenden Sie nur die mitgelieferten FINE-Patronen (FINE Cartridges).
Achten Sie darauf, dass die Tinte auf dem entfernten Klebeband nicht an Ihre Hände oder auf die umliegende
Arbeitsäche gelangt.
Berühren Sie nicht die elektrischen Kontakte (G) oder die Druckkopfdüsen (H) auf einer FINE-Patrone (FINE Cartridge).
Bei Berührung druckt das Gerät möglicherweise nicht ordnungsgemäß.
•
•
•
•
Ouvrez le couvercle de verrouillage de cartouche d’encre
sur le côté droit.
Pincez (E) fermement et soulevez le couvercle.
Retirez la cartouche FINE Noir de son
emballage. Tirez le ruban protecteur orange (F) dans le sens
de la flèche, puis retirez-le délicatement.
Manipulez les cartouches FINE avec précaution. Ne les faites pas tomber et n’exercez pas trop de pression dessus.
Veillez à utiliser les cartouches FINE fournies.
Veillez à ne pas tacher vos mains ou les objets environnants avec l’encre présente sur le ruban de protection.
Ne touchez ni les contacts électriques (G) ni les buses de tête d’impression (H) sur une cartouche FINE. L’imprimante
risque de ne pas imprimer correctement.
•
•
•
•
Open the Ink Cartridge Locking Cover on the right side.
Pinch (E) firmly and pull up the cover.
Remove the Black FINE Cartridge from its
package. Pull the orange protective tape (F) in the direction of
the arrow and remove it carefully.
Handle the FINE Cartridges carefully. Do not drop or apply excessive pressure to them.
Be sure to use the supplied FINE Cartridges.
Be careful not to stain your hands or surrounding work area with ink on the removed protective tape.
Do not touch the electrical contacts (G) or print head nozzles (H) on a FINE Cartridge. The printer may not print properly if
you touch them.
•
•
•
•