CAR-MON PRODUCTS, INC. 1225 Davis Road, Elgin, IL 60123 Phone (847) 695-9000
INSTALLATION - OPERATION - MAINTENANCE
HEIGHT ADJUSTMENT
TO ADD TENSION
1. Fully retract balancer to release tension. You may need to remove tube assembly. Do not adjust with
tube assembly attached to the balancer unless properly supported.
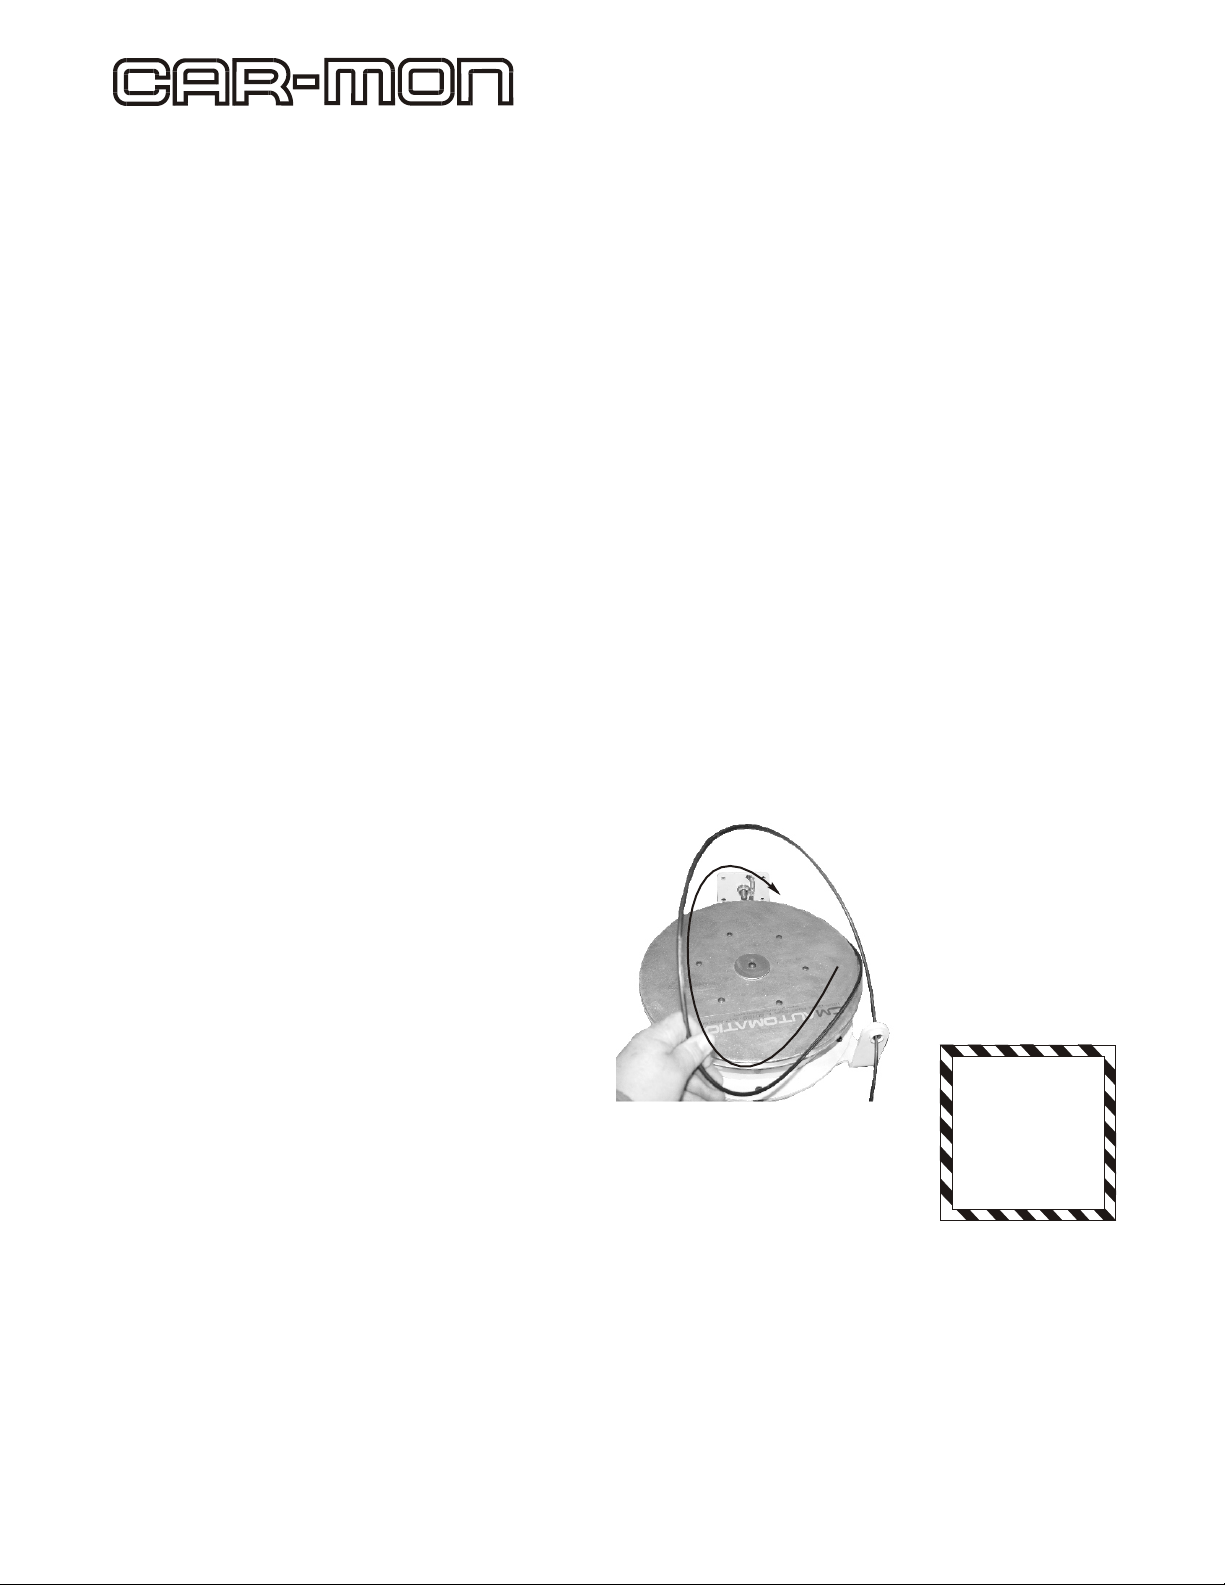
2. Manually pull the cable by the adjustable stop until about 6' of cable is hanging and ratchet stop is
engaged in one of the ratchets. Make one wrap of cable clockwise around the cable reel. Grab the
adjustable stop and carefully release the tension on the cable. Now check the position of the ratchets
and ratchet stop. The ratchet stop should not be engaged in any of the ratchets, and the ratchets on the
cable reel should be at the 9 and 3 o'clock position. If they are not, pull the cable out manually and move
the adjustable stop (make sure to tighten securely) so that when the stop is in the resting position, the
ratchet stop is not engaged.
3. Repeat the procedure if necessary, adjusting only one wrap at a time.
ADD TENSION BY WRAPPING THE CABLE
CLOCKWISE USING THE PROCEDURE
DESCRIBED.
DECREASE TENSION BY UNWRAPPING
THE CABLE COUNTERCLOCKWISE
USING THE PROCEDURE DESCRIBED.
Check cable termination condition frequently for any fraying or damage. Call factory or a Car-Mon
representative for any replacement parts or repair.
DO NOT ATTEMPT TO OPEN UNIT TO MAKE ANY REPAIRS. THERE ARE NO USER SERVICEABLE
PARTS INSIDE.
TO DECREASE TENSION
1. Fully retract balancer to release tension.
2. Manually pull the cable by the adjustable stop
until about 2’ of cable is hanging and ratchet
stop is engaged in one of the ratchets. While
supporting the tube assembly unwrap the
cable (one wrap) counter clockwise around
the cable reel.
3. Repeat procedure if necessary, adjusting only
one wrap at a time.
Grab the adjustable stop and
carefully release the tension on the cable.
Now check the position of the ratchets and
ratchet stop. The ratchet stop should not be
engaged in any of the ratchets and the
ratchets on the cable reel should be at the 9
and 3 o'clock position. If they are not pull the
cable out manually and move the adjustable
stop (make sure to tighten securely) so that
when the stop is in the resting position, the
ratchet teeth are at the 9 & 3 o'clock position.
If you have any questions on this procedure, please call the factory at 847-695-9000,
or e-mail us at the address provided below.fax at 847-695-9078,
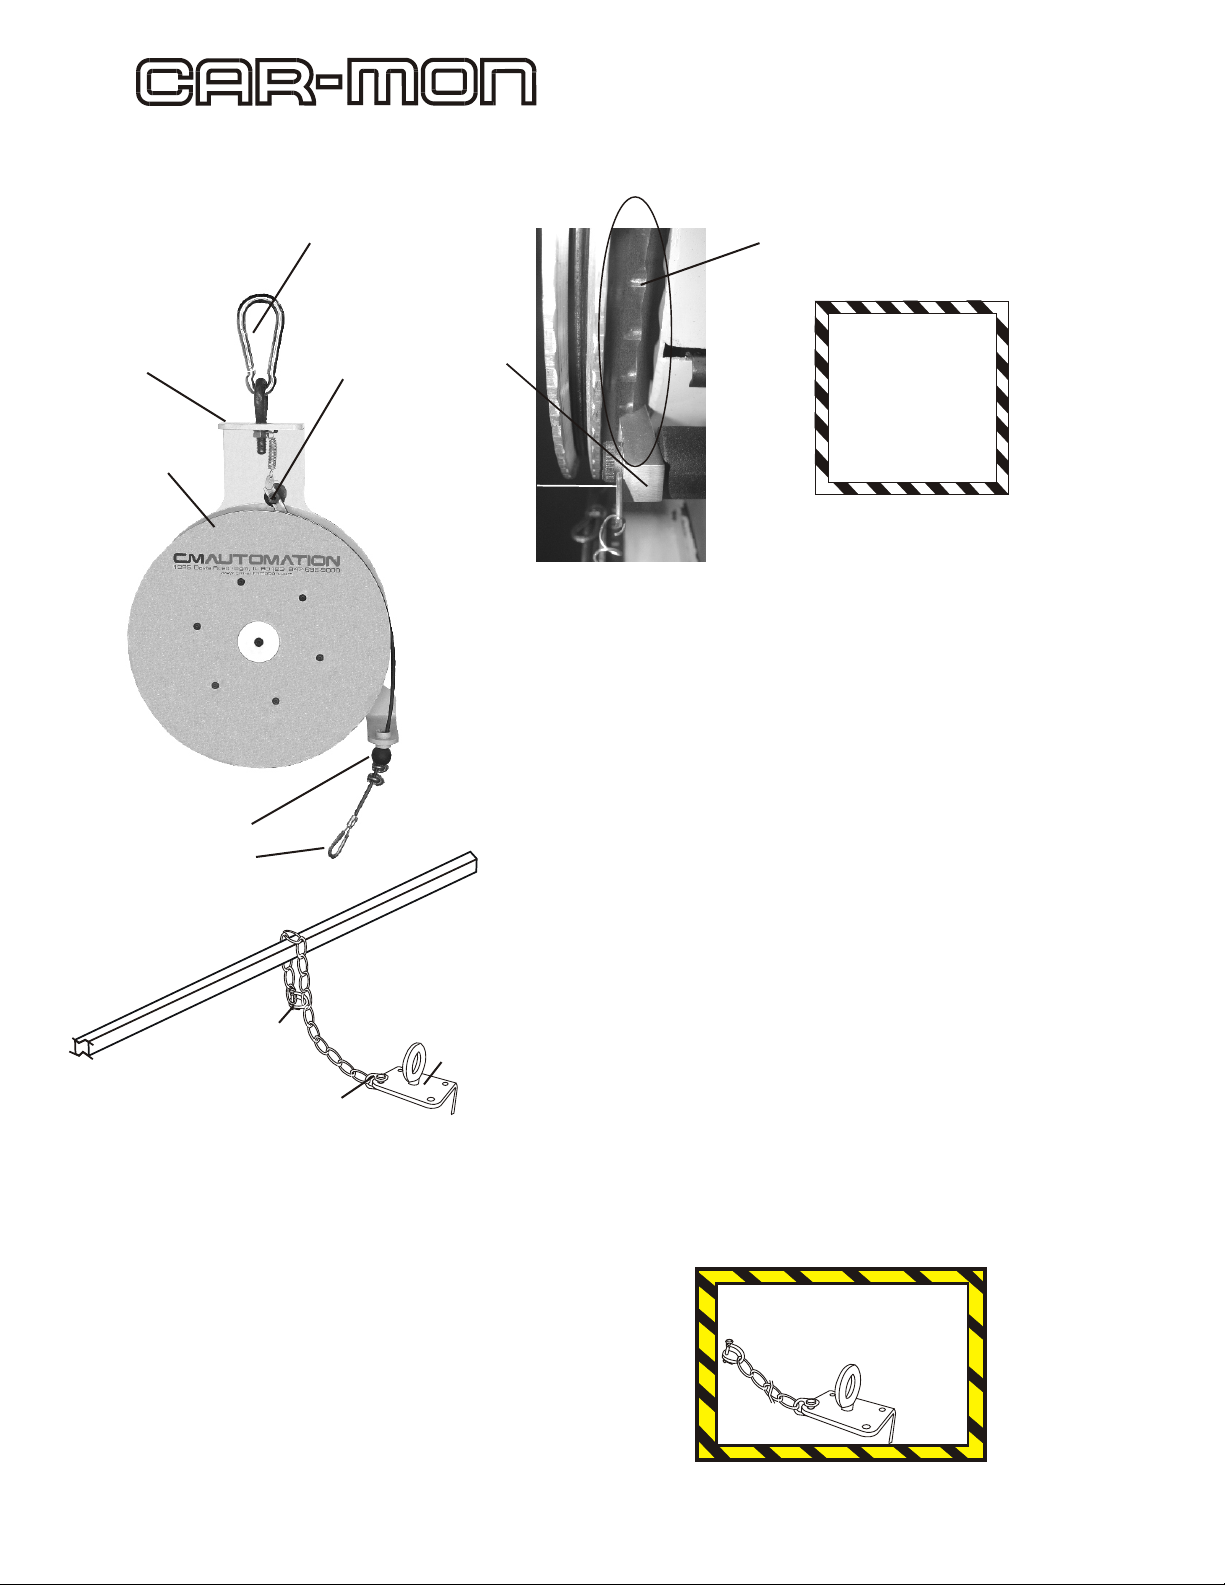
CAUTION!
DO NOT
DISASSEMBLE
LFT BALANCER.
NO USER
SERVICEABLE
PARTS INSIDE.
USE EXTREME CAUTION
AND ALWAYS MAKE SURE
THE RATCHET STOP IS
ENGAGED IN ONE OF THE
RATCHETS WHEN
WRAPPING CABLE.
NOTE: If tube assembly cannot be safely and properly supported during the adjustment process, it
should be removed.
NOTE: If tube assembly cannot be safely
and properly supported during the
adjustment process, it should be
removed.