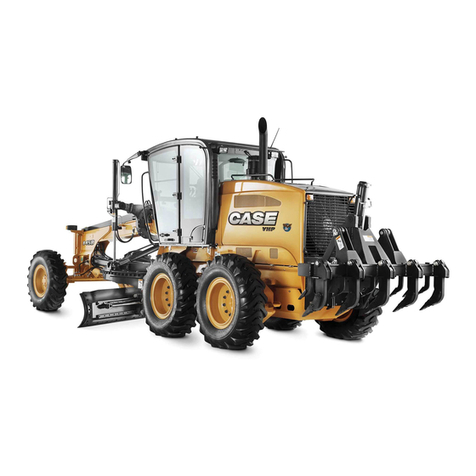
Case 750 User manual

750/760/860/960/965 LOADER BACKHOE SERVICE MANUAL
Table of contents DOWNLOAD
DIVISION/SECTION SECTION NREFERENCE N
1
GENERAL
Standard torque specifications and loctite product chart..................................1001
7-79451GB
Fluids and lubricants.........................................................................................1002
7-21280GB
2
ENGINE
Engine and radiator removal and installation ...................................................2000
7-21290GB
Specifications details .......................................................................................2401
7-21310GB
3
FUEL SYSTEM
4
ELECTRICAL
Electrical schematic .........................................................................................4001
7-21320GB
Battery .............................................................................................................4003
Starter motor ....................................................................................................4004
Removal and installation of electrical components..........................................4005
Alternator.........................................................................................................4007
Steering, loader and backhoe calibration.........................................................4008
7-21330GB
7-21340GB
7-21350GB
7-21360GB
7-26530GB
5
STEERING
Removal and installation of steering components............................................5000
Steering specifications, pressure checks and troubleshooting
(Models 750/760/860)..................................................................................5001
7-21370GB
7-21380GB
Steering specifications, pressure checks and troubleshooting
(Models960/965).........................................................................................5001 7-21900GB
Steeringcontrolvalve.......................................................................................5002 7-21390GB
Steeringcylinder..............................................................................................5003 7-21400GB
Front axle, two wheel drive machine/two wheel steer machine
(Model750).................................................................................................5005 7-21880GB
Front axle, four wheel drive machine/two wheel steer machine
(Models750/760/860)..................................................................................5006 7-21410GB
Front axle, four wheel drive machine/four wheel steer machine
6
(Models 960/965).........................................................................................5007
POWER TRAIN
7-21890GB
Removal and installation of power train components.......................................6000
Transmission specifications, pressure checks and troubleshooting .................6002
Wheelsandtyres.............................................................................................6003
Rear axle two wheel steer (models 750/760/860)............................................6004
Gearbox..........................................................................................................6007
Rearaxle-fourwhellsteer................................................................................6008
7-21420GB
7-21430GB
7-21440GB
7-21450GB
7-21460GB
7-21600GB
7
BRAKES
Removal and installation of brake components ...............................................7000
7-21470GB
Disassembly and assembly of brake components ...........................................7003
7-21480GB
Case Copyright 1999 CaseFrance
Printed inFrance
Cre 7-21271GB Issued October 1999

DIVISION/SECTION SECTION NREFERENCE N
8
HYDRAULICS
Removal and installation of hydraulic components ..........................................8001
7-21500GB
Hydraulic specifications, troubleshooting and pressure checks.......................8002
Cleaningthehydraulicsystem.........................................................................8003
Hydraulicpumpandunloader valve.................................................................8004
Loadercontrolvalve.........................................................................................8005
Cylinders ..........................................................................................................8006
Backhoecontrolvalve......................................................................................8007
Extendingdipperstickcontrolvalve..................................................................8008
Prioritydemandvalve......................................................................................8010
7-21510GB
7-21520GB
7-21530GB
7-21540GB
7-21620GB
7-21550GB
7-21560GB
7-21570GB
9
MOUNTED/EQUIPMENT
Pedals and levers .............................................................................................9001
7-21630GB
Loader ..............................................................................................................9006
CabandRops..................................................................................................9007
Backhoe ...........................................................................................................9008
Seatandseatbelt............................................................................................9009
Removal and installation of components.........................................................9011
7-21650GB
7-21660GB
7-21670GB
7-21680GB
7-21690GB
Cre 7-21271GB Issued 10-99

Section
1001
STANDARD TORQUE SPECIFICATIONS
AND LOCTITE PRODUCT CHART
Case
Cre 7-79451GB
Copyright 1999 Case France
Printed in U.K.
Issued June 1999
1001

Section
1002
FLUIDS AND LUBRICANTS
Case
Cre 7-21280GB
Copyright 1999 Case France
Printed in U.K.
Issued June 1999
1002

Engine Oil
CAPACITIES AND LUBRICANTS 1002-3
Capacity with filter replacement ............................................................................................................. 10.7litres
Type of oil ................................................................................................... refer to “Engine oil recommendations”
Engine cooling system
Capacity ................................................................................................................................................. 16.5litres
Type of collant solution .......................................................................................... refer to “Fluids and lubricants”
Fuel tank
Capacity .................................................................................................................................................. 120litres
Type of fuel..............................................................................................................refer to “Fluids and lubricants"
Hydraulic system
Total hydraulic system capacity model 750............................................................................................... 90 litres
Total hydraulic system capacity model 760................................................................................................ 90 litres
Total hydraulic system capacity model 860................................................................................................ 90 litres
Total hydraulic system capacity model 960................................................................................................ 90 litres
Total hydraulic system capacity model 965................................................................................................ 90 litres
Hydraulic reservoir filling capacity with filter replacement ......................................................................... 45 litres
Hydraulic reservoir filling capacity without filter replacement .................................................................... 43 litres
Type of fluid ............................................................................................................ refer to “Fluids and lubricants”
Transmission
2-Wheel drive
Total system .......................................................................................................................................... 19 litres
Filling with or without filter replacement ................................................................................................ 15litres
Type of oil ....................................................................................................................API cd/se grade 10W30
4-Wheel drive
Total system .......................................................................................................................................... 19 litres
Filling with or without filter replacement ............................................................................................... 15 litres
Type of oil ....................................................................................................................API cd/se grade 10W30
Front Axle
4-Wheel steer
Axle centre housing ............................................................................................................................... 8 litres
Axle hubs (each)..................................................................................................................................4.5litres
Typeof oil ..........................................................................................................................HI LOAD GEAROIL
2-Wheel steer
Axle centre housing ............................................................................................................................... 8 litres
Axle hubs (each)....................................................................................................................................1.1litre
Typeof oil ..........................................................................................................................HI LOAD GEAROIL
Cre 7-21280GB Issued 06-99

1002-4
Rear axle
4-Wheel steer
Axle centre housing ............................................................................................................................... 8 litres
Axle hubs (each).................................................................................................................................. 4.5litres
Type of oil ..........................................................................................................................HI LOAD GEAR OIL
2-Wheel steer
Capicity ............................................................................................................................................. 22.5 litres
Typeof oil ..........................................................................................................................HI LOAD GEAR OIL
Brake fluid reservoir ...........................................................................................................................LHM brake fluid
Cre 7-21280GB Issued 06-99

ENGINE OIL RECOMMENDATIONS
1002-5
The engine oil to be used depends on the ambient
temperature.
Use only oil of the API/CD category.
NOTE : Do not put any performance additive or other
additive in the sump. Oil change intervals shown in
this manual are based on tests carried out on lubri-
cants.
Oil viscosity/Oil operating range
Temperate climates
-5C to +40C
Oil type SAE 30
Hot climates
60C and +
Oil type SAE 40
Cold climates
-30C to + 10C
Oil type SAE 10W30
A
B
IO36LO
A : FAHRENHEIT TEMPERATURE
B : CENTIGRADE TEMPERATURE
Cre 7-21280GB Issued 06-99

WARNING : The conditions of use for individual fluids and lubricants must be respected.
1002-6 FLUIDS AND LUBRICANTS
Fluids and lubricants must have the correct properties for each application.
Hydraulic fluid
Hydraulic fluid is specially designed for the high pres-
sure and the hydraulic system used on machines.
The type of fluid to be used depends on the ambient
temperature.
Temperate climates
-5C to +40C
Fluid type : ISO VG 46
Hot climates
5C to +55C
Fluid type : ISO VG 68
Cold climates
-20C to +30C
Fluid type : ISO VG 32
Transmission component oil
Extreme pressure oil is used for all cased transmis-
sion components.
Extreme pressure oil type API CD/SE.
Grade 10W30 or ISO VG 150
Grease
The type of grease to be used depends on the ambi-
ent temperature.
Temperate and hot climates
-20C to + 60 C
Extreme pressure grease EP NLGI.
Grade 2 with molybdenum disulphide.
Cold climates
-40 C to + 20C
Extreme pressure grease EP NLGI
Grade 0
Anti-freeze/anti-corrosion
Use anti-freeze in all seasons to protect the cooling
system from corrosion and all risk of freezing.
For environments with a temperaturehigherthan -36C,
use a mixture of 50% ethylene-glycol based anti-
freeze.
For environments with a temperature lower than-36C,
a mixture of 40% water with 60% anti-freeze is rec-
ommended.
Fuel
The fuel to be used must be in conformity with the
D975 standard of the American Society for Testing
and Materials (ASTM).
Use No. 2 type fuel. The use of other fuels may cause
a loss of engine power and excessive fuel consump-
tion.
In cold weather, a mixture of No. 1 fuel and No. 2 fuel
is temporarily permitted. Consult your fuel supplier.
If the temperature falls below the fuel cloud point
(point at which wax appears), wax crystals in the fuel
will cause a loss of engine power or make it impossi-
ble to start the engine.
IMPORTANT : In cold weather, fill the fuel tank after
each day’s work, to prevent the formation of conden-
sation.
Fuel storage
Prolonged fuel storage causes foreign bodies or con-
densation water to accumulate in the storage tank.
Many engine failures are caused by the presence of
water in fuel.
The storage tank should be placed outdoors and the
fuel should be kept at as low a temperature as possi-
ble. Condensation water should be drained off at reg-
ular intervals.
Cre 7-21280GB Issued 06-99
ENVIRONMENT
1002-7
Before carrying out any maintenance operation on
the machine and before disposing of used fluids or
lubricants, always think of the environment. Never
throw oil or fluid on the ground and never put them in
leaky receptacles.
Consult a local recycling or environmental centre, to
obtain information on the correct method of disposing
of these materials.
PLASTIC AND RESIN PARTS
When cleaning plastic windows, the console, the instrument panel, the gauges, etc, avoid the use of petrol, paraf-
fin, paint solvents, etc. Use only water, soap and a soft cloth.
The use of petrol, paraffin, paint solvents, etc will cause discoloration, cracks or deformation of these parts.
Cre 7-21280GB Issued 06-99
Section
2000
ENGINE AND RADIATOR
REMOVAL AND INSTALLATION
Case
Cre 7-21290GB
Copyright 1999 CaseFrance
Printed in France
October 1999
2000

and you could be scalded.
! engine is hot. The circuit is still under pressure
WARNING : Do not remove the cap when the
3
3
1
1
22
2000-4 RADIATOR REMOVAL
Put identification tags on all disconnected hoses and
wires. Close disconnected hoses and fittings with
caps and plugs.
STEP 1
Park the machine on a level surface. Raise the loader
and install the support strut to hold the loader.
STEP 2
Open the hood.
STEP 3
Remove the bolts, washers, and nuts from the pivot
point on the hood.
STEP 4
Have another person help with the following proce-
dure :
A.
Remove the retainers from the hood struts and
disconnect the hood struts from the stud.
B.
Remove the hood from the machine.
STEP 5
Slowly remove the radiator cap.
NOTE : During installation, fill the radiator and cool-
ant reservoir completely. See Section 1002 for cool-
ant specifications. Start and run the engine until the
coolant is at operating temperature. Stop the engine
and check for leakage. When the coolant is cold,
check the coolant reservoir level. Add coolant as
required. Never remove the radiator cap to check the
coolant level in the radiator.
STEP 6
Depressurize the hydraulic system as follows see
section 8002.
STEP 7
Disconnect the hoses from the hydraulic filter.
STEP 8
Remove and fit blaks to the expansion reservoir
hoses.
STEP 9
Tag and disconnect the wires on the audible warning
device.
STEP 10
Tag and disconnect the wires on the hydraulic filter
obstruction indicator.
STEP 11
789M250A
Release the fluid pipes (1) and electrical connections
(2)
to the screen wash bottle (3) and tie back to the
chassis.
Cre 7-21290GB Issued 10-99

7
8
6
9
5
2
4
3
1
STEP 12 STEP 15
2000-5
Loosen the clamp and disconnect the lower radiator
hose (3).
STEP 16
Loosen the clamp and disconnect the air cleaner
hose (4).
STEP 17
CI98G516
Remove the hardwere (1), the retaining pins (2), the
washers (3) and support (4).
STEP 13
CI98G517
Disconnect the overflow hose (1) from the radiator
neck.
STEP 14
Loosen the clamp and disconnect the upper radiator
hose (2).
CI98G517
Position a suitable drainage container beneath the
hydraulic hose (5) and disconnect the hose from the
oil cooler (9).
NOTE : Fit blanks to the hose and the oil cooler con-
nection.
STEP 18
Repeat step (5) for the remaining hydraulic hoses (6),
(7) and (8).
STEP 19
Remove the for radiator retaining screw.
STEP 20
Install a suitable sling around the radiator and
remove the radiator.
NOTE : Installation of the radiator is the reverse of
removal.
Cre 7-21290GB Issued 10-99
1
4
1
3
2
3
2

2000-6 PERSPECTIVE VIEW
CI98G505
Cre 7-21290GB Issued 10-99
9 7
6
28
8
2
1
4
17
16
17
16
19
21 18
12
15
2
25
26
3
22
27
23
13
11
10
14
15
5
25
16
24
26
22
21
20
1. Hose
15.
Washer
2. Collar
16.
Nut
3. Hose
17.
Bracket
4. Collar
18.
Bracket
5. Seal
19.
Collar
6. Shroud
20.
Nut
7. Radiator
21.
Hose
8. Cap, filler
22.
Clamp
9. Cooler, oil
23.
Tank, expansion
10. Bracket
24.
Bracket
11. Nut
25.
Screw
12. Screw
26.
Washer
13. Washer
27.
Plug
14. Stanchion
28.
Grommet

ENGINE REMOVAL
2000-7
Put identification tags on all disconnected hoses and
wires. Close disconnected hoses and fittings with
caps and plugs.
STEP 1
Remove the radiator see page 4.
STEP 2
Disconnect the battery.
STEP 3
CI98G518
Remove the hose clip (4) from the air filter hose (5)at
the turbocharger inlet.
STEP 4
Support the air filter assembly (1) and remove the
three bolts (2) from the cylinder head and two bolts
(3)
from the exhaust bracket. Remove the air filter
assembly.
STEP 5
66 2
789M257A
789M256A
Install the engine lifting bracket (6) using two of the
bolts (2) from the air filter bracket. The bracket is part
of the machine tool kit.
Cre 7-21290GB Issued 10-99
5
1
4
2
3
2
2

2000-8
STEP 6 STEP 10
1
14
4
1
15
5
1
16
6
CI98G519
789M259A
Disconnect the throttle cable (15) from the fuel injec-
tion pump lever (14) and the bracket (16).
STEP 11
789M287A
Release the hose clips (19) on the heater hoses (17)
at the thermostat housing (18). Remove the hoses
and tie back under the scuttle.
Cre 7-21290GB Issued 10-99
2
1
5
7
3
6
4
Release the spring (1) and remove the exhaust pipe
(2).
1
17
7
STEP 7
Release the clip (3) on the silencer to turbocharger
1
1
8
8
connection and remove the nuts, washers and spac-
ers (4). Remove the silencer (5) from the bracket (6).
STEP 8
Remove the three bolts and washers (7) from the
exhaust bracket and remove the bracket.
1
1
9
9
STEP 9
Remove the hydraulic oil pump drive shaft (see sec-
tion 8004).

STEP 12 STEP 14
2000-9
Release the dipstick pipe coupling (25) on the trans-
mission and remove the dipstick assembly.
STEP 15
789M261A
Remove the four bolts (20) in the hydraulic pump
drive coupling (21) and remove the drive shaft (22).
STEP 13
789M262A
Release the hose clips (24) on the transmission filler
flexible pipe (26), remove the two bolts and nuts (23)
and (28) in the support bracket (27) and the nut and
bolt (29) and (30) in the dipstick pipe support.
789M263A
Remove the nut (32) from the wiring cover (31) on the
starter motor (33) and remove the cover.
STEP 16
789M264A
Remove the bolt and nut (36) in the clip (35) for the
transmission oil cooler pipe (34), and release the
pipe.
Cre 7-21290GB Issued 10-99
3
3
4
4
3
3
6
6 3
35
5
2
23
3
2
2
4
4
25
25
2266
22
77
2
29
9
, 33
00
2
2
8
8
2
2
0
0
21
21
22
22
3
31
1
3
32
2
3
33
3

2000-10
STEP 17
Disconnect and tag all wiring connections from the
engine. These include the starter motor, the alterna-
tor, the water temperature switch, the oil pressure
switch, the thermostat unit, the air filter restriction
switch and the fuel injection pump stop solenoid.
STEP 18
3
37
7
STEP 20
Remove the six screws (41) from the gear lever tower
(40) and slide the tower up the lever (42).
STEP 21
Disconnect the clutch switch wiring connection (44)
and remove the spring (46) from the shift lever.
STEP 22
Remove the bolt and nut (43) and (45) from the shift
lever and remove the lever from the transmission.
STEP 23
Put the wiring ties which attach the electrical harness
to the support rail at the rear of the engine.
STEP 24
Release the oil cooler hose clamp on the right hand
side of the chassis.
STEP 25
3
3
9
9 3
38
8
789M265A
Remove the front floor mat (37) in the cab. Remove
the four screws (39) from the centre front floor plate
(38) and remove the plate.
STEP 19
789M288A
Disconnect the fuel inlet and discharge pipe (47) and
(48) from the fuel lift pump.
CI98G501
Remove the six screws (41) from the gear lever tower
(40) and slide the tower up the lever (42).
Cre 7-21290GB Issued 10-99
41
40
42
43
46
45
44
4
48
8
4
47
7

STEP 26 STEP 28
2000-11
789M270A
Remove the four bolts (52) and the two bearing caps
(51) from the rear coupling. Lower the propshaft (49).
Make sure that the needle roller bearing cups (50) on
the rear coupling are taped to the joint.
STEP 27
5
53
3
789M272A
Remove the eight flywheel to torque converter bolts
(56) and the washers (57) from the flex plate assem-
bly (58).
STEP 29
5555 5
5
4
4
789M271A
Remove the four bolts (54) and the inspection plate
(55) from the bottom of the bell housing (53).
789M273A
Remove all except two of the spacer housing bolts
(59).
Cre 7-21290GB Issued 10-99
55
11
55
00
4
49
9
5
52
2
5
5
66
, 57
57
5566,5757
5
5
8
8
5
5
9
9

2000-12
STEP 30
Position a trolley jack under the transmission, next to
the front axle drive coupling flange. Raise the jack
into contact with the transmission but DO NOT lift the
transmission.
STEP 31
Attach the special lifting bracket to the engine.
STEP 32
789M256A
Using a suitable hoist attached to the lifting bracket,
apply tension to the lift chains. DO NOT raise the
engine.
STEP 33
789M257A
Loosen the two bolts (62) and the nuts (60) from each
engine bracket (61).
STEP 34
789M276A
Remove the centre bolt (67), the nuts (64) and the
washers (63) and (66) from each transmission
mounting plate (65).
STEP 35
Remove the rear propshaft.
STEP 36
Using the hoist and trolley jack, raise the engine/
transmission unit sufficient to remove the engine
mountings. (approximately 40 mm (1.5 in)).
STEP 37
Lower the engine/transmission unit and move it
towards the rear of the machine until the rear prop-
shaft slicing joint is completely closed.
STEP 38
Remove the two bolts in the spacer housing.
Cre 7-21290GB Issued 10-99
6
60
0
6
62
2
6
61
1
6677
6
66
6
6655
6
63
3
6
6
4
4
This manual suits for next models
4
Table of contents
Other Case Construction Equipment manuals

Case
Case TX130--30 Instruction manual

Case
Case 2050M Tier 4A interim User manual

Case
Case D150CStage IIIB User manual

Case
Case 845B VHP User manual

Case
Case 750M User manual

Case
Case CONSTRUCTION 3 Series User manual

Case
Case 1850K Operating instructions

Case
Case 2550 User manual

Case
Case SV212 User manual

Case
Case CRAWLER DOZER 650L TIER3 User manual