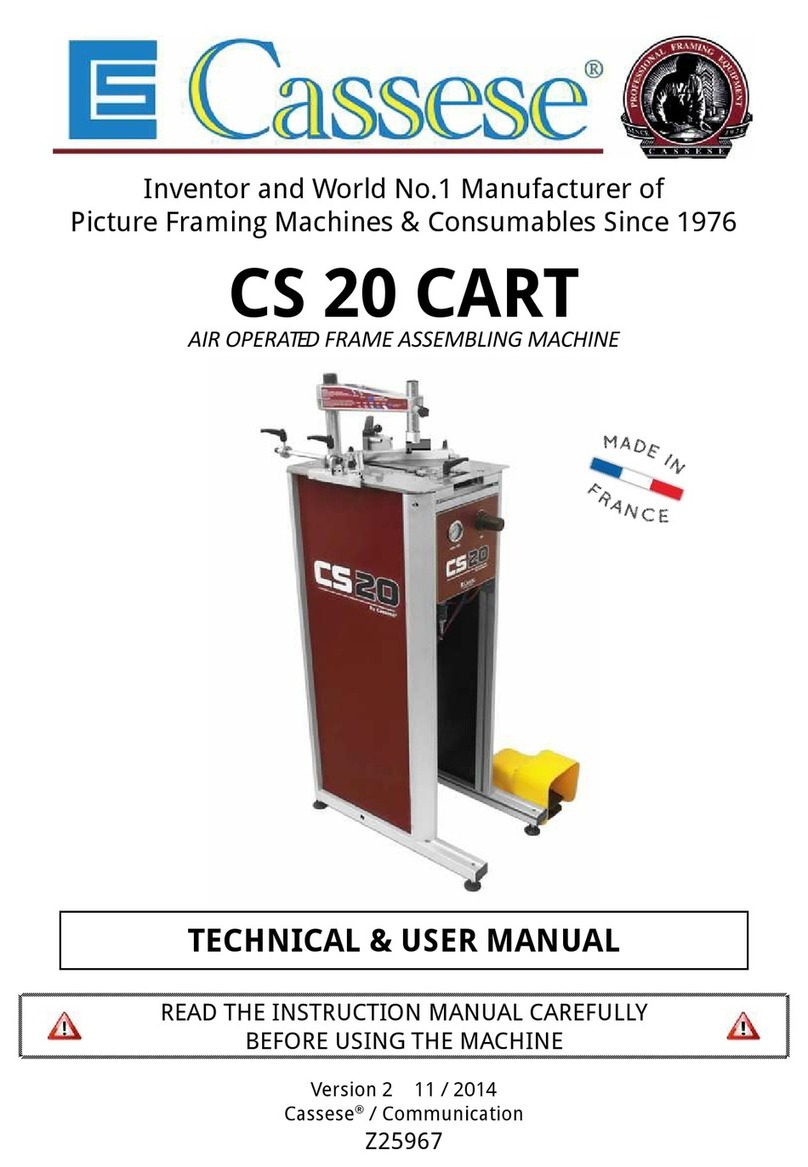
Cassese CS200 CART User manual

USER & PARTS MANUAL
Version 3
05/2018
Version 1
07/2014

USER MANUAL
CS200 CART
2

USER MANUAL
CS200 CART
3
INDEX
I. USER MANUAL / ENGLISH............................................................................................ 5
1PRESENTATION .................................................................................................................................................. 6
1.A WORKING TABLE............................................................................................................................................................6
1.B INTRODUCTION..............................................................................................................................................................6
1.C ACCESSORIES SUPPLIED WITH THE MACHINE ...............................................................................................................7
1.D TECHNICAL SPECIFICATIONS OF CS200 CART.................................................................................................................9
1.E OPTIONS.........................................................................................................................................................................9
1.F GUARANTEE ...................................................................................................................................................................9
2SETUP .............................................................................................................................................................. 10
2.A UNPACKING THE MACHINE..........................................................................................................................................10
2.BAIR LINE FITTINGS ........................................................................................................................................................11
2.C CONNECTING TO THE AIR SOURCE ..............................................................................................................................11
3ADJUSTMENTS................................................................................................................................................. 13
3.A ADJUSTMENT OF THE SLIDING TABLE..........................................................................................................................13
3.B PROPER ADJUSTMENT OF MAGNETIC ADJUSTABLE ROD CLAMP ...............................................................................13
3.C SPECIFIC USE OF THE SPACER BARS .............................................................................................................................14
3.D SELECTING THE WEDGES POSITIONS ...........................................................................................................................15
3.E THREE ESSENTIAL RULES ..............................................................................................................................................15
3.F ADJUSTING THE JOINING ANGLE .................................................................................................................................15
3.G MEANS OF JOINING .....................................................................................................................................................16
3.H LOADING OF THE WEDGES ..........................................................................................................................................16
3.I CHANGING WEDGES SIZE .................................................................................................................................................17
3.J SETTING THE SHOOTING POSITIONS ................................................................................................................................17
4JOINING THE FRAME ........................................................................................................................................ 19
5MAINTENANCE ................................................................................................................................................ 20
5.A SAFETY INSTRUCTIONS.................................................................................................................................................20
5.B MAINTENANCE PLAN ...................................................................................................................................................20
5.B.a Daily maintenance:.....................................................................................................................................................................20
5.B.b Regular maintenance:.................................................................................................................................................................20
5.B.c Every 6 months:..........................................................................................................................................................................21
5.C REMOVING THE DISTRIBUTOR HEAD...........................................................................................................................21
5.D LUBRICATING THE DISTRIBUTOR HEAD .......................................................................................................................22
5.E UNJAMMING THE MACHINE........................................................................................................................................22
5.F OPENING THE SIDE PANEL ...........................................................................................................................................23
5.G LUBRICATING THE HORIZONTAL COLUMNS ................................................................................................................23
5.H TESTING THE SAFETIES OF THE MACHINE....................................................................................................................24
5.I TROUBLE SHOOTING ........................................................................................................................................................24
II. MANUEL D’UTILISATION / FRANCAIS......................................................................... 26
1PRESENTATION ................................................................................................................................................ 27
1.A TABLE D’ASSEMBLAGE ................................................................................................................................................27
1.B INTRODUCTION............................................................................................................................................................28
1.A ACCESSOIRES FOURNIS AVEC LA MACHINE .................................................................................................................28
1.B SPECIFICATIONS TECHNIQUES .....................................................................................................................................30
1.C OPTIONS.......................................................................................................................................................................30
1.D GARANTIE.....................................................................................................................................................................30
2MISE EN ROUTE................................................................................................................................................ 31
2.A DEBALLAGE DE LA MACHINE........................................................................................................................................31

USER MANUAL
CS200 CART
4
2.B RACCORDS....................................................................................................................................................................32
2.C RACCORDEMENT A L’AIR COMPRIMÉ..........................................................................................................................32
3REGLAGES........................................................................................................................................................ 34
3.A REGLAGE DE LA TABLE COULISSANTE ..........................................................................................................................34
3.B REGLAGE DU PRESSEUR VERTICAL...............................................................................................................................34
3.C UTILISATION DU JEU DE BARRETTES............................................................................................................................35
3.D SELECTION DES POSITIONS D’AGRAFAGE ....................................................................................................................36
3.E TROIS REGLES ESSENTIELLES POUR L’ASSEMBLAGE ....................................................................................................36
3.F REGLAGE DE L’ANGLE D’ASSEMBLAGE ........................................................................................................................36
3.G MOYEN D’ASSEMBLAGE...............................................................................................................................................37
3.H CHARGEMENT DES AGRAFES .......................................................................................................................................37
3.I CHANGER DE TAILLE D’AGRAFES......................................................................................................................................38
3.J REGLAGE DES POSITIONS D’AGRAFAGE ...........................................................................................................................38
4ASSEMBLAGE DU CADRE .................................................................................................................................. 40
5MAINTENANCE ................................................................................................................................................ 41
5.A INSTRUCTIONS RELATIVES A LA SECURITE...................................................................................................................41
5.B PROGRAMME DE MAINTENANCE................................................................................................................................41
5.B.a Maintenance quotidienne: .........................................................................................................................................................41
5.B.b Maintenance préventive: ...........................................................................................................................................................41
5.B.c Tous les six mois: ........................................................................................................................................................................42
5.C DEMONTAGE DE LA TETE DE DISTRIBUTION ...............................................................................................................42
5.D LUBRIFICATION DE LA TETE DE DISTRIBUTION ............................................................................................................43
5.E DEBLOCAGE DE LA MACHINE.......................................................................................................................................43
5.F OUVERTURE DU PANNEAU LATERAL ...........................................................................................................................44
5.G LUBRIFICATION DES COLONNES HORIZONTALES.......................................................................................................44
5.H VERIFICATION DES SECURITES DE LA MACHINE ..........................................................................................................45
5.I GUIDE DE DEPANNAGE ....................................................................................................................................................46
III. EXPLODED VIEWS/ VUE ECLATEES ............................................................................. 47
IV. SPARE PARTS LIST / NOMENCLATURE........................................................................ 59
V. PNEUMATIC SCHEMATIC / SCHEMA PNEUMATIQUE.................................................. 63
VI. CE CERTIFICATE / DECLARATION DE CONFORMITE..................................................... 64

I. USER MANUAL / ENGLISH
Your safety is our priority
This symbol on the machine reminds the
operator to read this manual before operating
this joiner.
This symbol on the machine reminds the
operator to wear acoustic protections before
operating this joiner.
PRIOR TO PERFORM ANY MAINTENANCE, MACHINE MUST BE LOCKED AND UNPLUGGED FROM AIR SUPPLY,
REFER TO CHAPTER I.5.A SAFETY INSTRUCTIONS (PAGE 20). DO NOT OPERATE THE MACHINE IF COVERS OR
PROTECTIONS ARE MISSING.
This symbol in the manual is to mention some
tricks that can help you saving time or improve
your production.
This symbol in the manual is to mention safety
instructions.
This symbol in the manual is to mention needed
tools to perform a procedure.

USER MANUAL
CS200 CART
6
1PRESENTATION
1.A WORKING TABLE
Magnetic adjustable rod clamp assembly
1
Joystick
2
Crossbar
3
Word impossibSliding table handle
4
Sliding table
5
1st back fence
6
Angle adjusting screw
7
2nd back fence
8
Wedge distributor
9
Rebate clamp
10
Clamp pressure regulator
11
Air pressure gauge
12
Air pressure indicator
13
Wedge loading button
14
Pre-clamping button
15
Air valve
16
Inside stop’s position handle
17
Outside stop’s position handle
18
4
1
6
5
7
8
9
10
3
2
11
18
17
13
14
15
11
12
16

USER MANUAL
CS200 CART
7
1.B INTRODUCTION
Thanks for having purchased the CS200 CART underpinner and for your trust in Cassese® products. The CS200 CART benefits from
Cassese’s experience since 1976 in designing and manufacturing highest quality underpinners, for which we are world-famous.
The CS200 CART will allow you to join, wooden, plastic and MDF profiles (patent n° 7522814). Joining operation is carried out by
using Genuine Cassese® Cartridge Wedges, specially designed to perform perfect and tight frames’ corners.
1.C ACCESSORIES SUPPLIED WITH THE MACHINE
Z26999:
1 x Magnetic adjustable rod
clamp
Z24703:
1 x Chevron holder
Z21525:
1 x Chevron rubber assy
Z506:
1 x Wedge driver blade for
using CASSESE
®
Genuine
Cartridge Wedges
Z1882:
1 x Allen Key 3 mm
Z1884:
1 x Allen Key 4 mm
Z1885:
1 x Allen Key 5 mm
Z1879:
1 x Allen Key 2.5 mm
Z1896:
1 x Grease Tube
Z3078:
Spacer bars
1 box of 7 mm Softwood
1 box of 10mm Hardwood
1 box of 10mm Softwood
Z535:
Wedge removal tool

USER MANUAL
CS200 CART
8
Z1783:
Yellow round clamp
Z1791:
Green round clamp
Z18065:
Round clamp holder
Z21524:
1 x Chevron rubber
Z556:
Grooved connector
Z701:
Male US connector F1/4
Z749:
Quick coupling
Z1343 (x4):
Nut
Z1612 (x4):
Washer
Z25780 (x4):
Levelling feet

USER MANUAL
CS200 CART
9
1.D TECHNICAL SPECIFICATIONS OF CS200 CART
Minimum moulding width: 5mm (3/16”) / Minimum moulding height : 7 mm (1/4”)
Maximum moulding width : 150 mm ( 5 29/32“) / Maximum moulding height : 100 mm ( 4 13/32” )
Maximum stroke between first and last wedge (at 45°) : 190 mm (7 31/64”)
3 wedge types : Softwood, Hardwood & MDF. Use only Cassese® Genuine Cartridge Wedges.
Cassese® Genuine Cartridge Wedges sizes: 5, 7, 10, 12 and 15 mm.
Machine gross weight : 44 kg .
Dimensions : Width 600mm (2ft 219/64’’) x Depth 589mm (1ft 113/16”) x Height 1171mm (3ft 107/64’’).
Air Supply : Compressed air 6-7 bars
Average consumption per cycle : 2 Nl at 6 bars (we consider one cycle is a corner with 2 positions and 1 wedge per position)
1.E OPTIONS
1.F GUARANTEE
One year guarantee for parts and labor against manufacturing defects. Wearing parts* and those damaged as a
result of non-appliance with the instructions of the present manual are excluded from the guarantee.
*Chevron rubbers, round clamps and wedge driver blades are considered as wearing parts.
Z25147:
Stainless steel shelf for
wedges and accessories

USER MANUAL
CS200 CART
10
2SETUP
2.A UNPACKING THE MACHINE
After unpacking the
machine, install and
set the 4 feet to level
the machine. Make
sure the 4 feet are
touching the floor,
machine must be
steady.
When installing the machine, make sure the floor will be flat and strong enough to support its weight. It should
be installed in a dry environment providing temperate temperature. The floor should be flat and clean. Select
a location with proper lighting.
When levelling the machine, if the machine is installed against a working table, make sure a long frame will not
be risen up by the table, because this would cause bad joining. Working table and machine should be levelled
together.
Figure 2-2
Figure 2-1
Remove the 4 bolts to
free the machine from
the crate. They are
located under the
pallet.
Cut both plastic strips
in order to free the
box and lift up the
wood cover with the
help of a second
person.
Figure 2-3
Cutter
Flat span N.13 & N.17
Allen key N.5
Bubble level

USER MANUAL
CS200 CART
11
2.B AIR LINE FITTINGS
Included in the machine
Customer’s air connection
Standard hose connector - Z556
Q/R US male connector - Z701
2.C CONNECTING TO THE AIR SOURCE
The machine should be connected to a pneumatic circuit providing 6 to 8 bars pressure.
If the indicated pressure is not 6 bars (85 p.s.i.), check the pressure at the air source (compressor). Then, if pressure is correct at
the air source, it means the regulator of the machine needs fine tuning. Perform the following procedure to adjust it (Figure 2-6
and Figure 2-7)
Figure 2-4
Connect the machine
using the quick
connectors as
mentioned in chapter
0
Quick
release(Q/R)
Female
Air Connector
- Z749
Quick
release(Q/R)
Female
Air Connector
- Z749
The CS200 CART must
be connected to the
air source located on
the front panel of the
drawer. Turn the
compressed air valve
to ON by rotating its
red knob .
The air pressure
gauge should show 6
bars (85 p.s.i.)
minimum.
The red knob in Figure 2-5 must be used to secure the machine during maintenance or to prevent non desired
use. A lock can be applied to it in stop position so nobody can turn it back to ON. This will exhaust air from the
machine circuit and disconnect it from air supply. Refer to chapter
I.5.A SAFETY INSTRUCTIONS (page 20
) for
further instructions.
Figure 2-5

USER MANUAL
CS200 CART
12
Hold the top of the
panel with one
hand. Unscrew of 1
turn both screws of
the drawer panel
with a N.10 flat span.
DO NOT REMOVE
THESE SCREWS.
Then open the
drawer to have
access to the air
pressure regulator
knob.
Pull the air pressure
regulator knob and
turn it (clockwise =
more pressure) until
the needle of the air
pressure gauge
reaches 6 bars
(85p.s.i.).
Figure 2-6
Figure 2-7
Flat span N.10

USER MANUAL
CS200 CART
13
3ADJUSTMENTS
3.A ADJUSTMENT OF THE SLIDING TABLE
3.B PROPER ADJUSTMENT OF MAGNETIC ADJUSTABLE ROD CLAMP
The sliding table (see
page
6
) needs to be
adjusted to be able to
set the various
stapling positions.
To do this, switch on
the Pre-Clamp button.
Unscrew the sliding
table handle.
Install one moulding
on the table as per
picture attached.
Shift the sliding table
in order to tighten
the moulding with
the rebate clamp (see
page 6).
Then tighten the
sliding table handle .
Switch back off the
Pre-Clamp button in
order to release the
mouldings and
remove the moulding
that was against the
back fence.
Figure 3-5
When adjusting the vertical rod clamp, closer it is from the top of the moulding, and faster will be the
machine. The machine will not damage the moulding, even if the distance is very close. If the distance
is superior to 50mm, the wedge will not penetrate fully inside the wood.
A magnetic
adjustable rod
clamp comes with
your machine as a
standard feature. It
fits the crossbar
thanks to the
locking ring and
can be set at 1 to 7
positions.
Figure 3-1
Figure 3-2
Pull the black knob to
be able to adjust the
space between the
vertical clamp and
the top of the
moulding. You must
have 50mm (2”) max
between the clamp
and the top of the
moulding.
Figure 3-3
Figure 3-4
Figure 3-6

USER MANUAL
CS200 CART
14
3.C SPECIFIC USE OF THE SPACER BARS
Example of bad
setting of the
chevron.
Pay attention to
properly position the
magnetic chevron
clamp: the sides of
the chevron must be
parallel to back
fences 1 and 2.
Figure 3-7
Now with quick-
change magnetic
clamps, it is easy to
change from chevron
to a round clamp.
Simply pull down the
Z24703 to change of
clamp support.
When joining small
mouldings (lower
than the height of
the back fences), it is
necessary to use the
set of spacer bars
supplied with the
machine.
This is an example of
a bad setting, the
spacer bar not being
used will cause the
top clamp not to hold
the moulding
correctly. The
moulding will jump
up during stapling.
Figure 3-10
Figure 3-11
Figure 3-9
Figure 3-8
SPACERS
The spacer bars are
made of two steel
bars linked with a
screw locked by a
nut. The nut side is
the bottom side of
the spacer bars
Here the spacer bars
are upside down.
The nut is visible on
the top, which is not
correct.
Figure 3-12
Figure 3-13

USER MANUAL
CS200 CART
15
3.D SELECTING THE WEDGES POSITIONS
The CS200 CART is designed to join mouldings in 2 positions that will be selected using side handles, but you can stop in any other
position between the 2 extreme positons. You can stack several wedges in each position.
3.E THREE ESSENTIAL RULES
3.F ADJUSTING THE JOINING ANGLE
1- A MINIMUM 2 mm clearance (less than 1/8”) above the wedges shall be respected.
2- Same size wedges can be stacked up in order to avoid having to change the wedge
size when joining mouldings with different thickness.
3- The wedge positions should be lined up to the highest points of the moulding.
Figure 3-14
If the corner is
opened towards
outside
Tighten the
adjusting screw to
correct the defect of
the mouldings.
Check the quality of
the angle by
clamping the corner
against the back
fences again.
Figure 3-15
Figure 3-16
If the corner is
opened towards
inside.
Loosen the adjusting
screw to correct the
defect of the
mouldings.
Check the quality of
the angle by
clamping the corner
against the back
fences again.
Figure 3-17
Figure 3-18
If you get this result : it means your cutting angle is less than 45°.
Your cutting machine needs to be set to the right 45° angle (check your cutting
machine’s user manual to make this adjustment).
Figure 3-19
When selecting the position of the top clamp, always pay attention to its contact surface with the
moulding. Select positions that will provide steady seating.

USER MANUAL
CS200 CART
16
3.G MEANS OF JOINING
3.H LOADING OF THE WEDGES
Thanks to the color code, you can recognize and select easily the type of Vnails to be
used. Please note that hard wood Vnails will have a yellow pusher to help identifying
them. A white pusher will indicate soft wood Vnails.
See color chart bellow for identification.
Cassese wedges can also be supplied in MDF type dedicated to MDF or very hard wood
use. They are identified by a red pusher in the cartridge.Please contact your local agent
to try them.
Figure 3-20
It is recommended to use the proper type of wedges for joining, always using hard wood wedges in all
your frame will result in poor tightening of the corner when the wood is soft. A first approach consists
in trying to scratch the wood with your nails, if you can scratch it easily, then a soft wood wedge should
do the job perfectly and you will get the best tightening.
To load the machine,
rotate the loading
button in the ON
position.
The wedge pusher
will move back to
allow you to
introduce the
cartridge.
Load the cartridge
and turn back the
loading button to off.
Figure 3-21
Figure 3-22

USER MANUAL
CS200 CART
17
3.ICHANGING WEDGES SIZE
Repeat procedure of Figure 3-21, then remove the cartridge and insert another cartridge of a different color. Thanks to the cartridge
system, no need to adjust anything nor change any head.
Then turn back OFF the loading button.
3.J SETTING THE SHOOTING POSITIONS
After performing the adjustments of chapter 3 (ADJUSTMENTS). Perform the following procedure:
Unlock the stop
position handle.
Figure 3-25
Figure 3-26
Put on the table only
one chop of
moulding against the
fence as per picture.
This will allow easy
visualization of
stapling positions
Rotate the pre-
clamping button in
the ON position.
Figure 3-23
Figure 3-24
Rotate the joystick to
be able to move to
the inside shooting
position. Once the
desired position is
reached, release the
joystick.
Move the stop to the
joystick assy until it
hits the aluminum
support of the
joystick.
Lock the handle of
the stop. This will set
your extreme inside
position.
Figure 3-27

USER MANUAL
CS200 CART
18
Unlock the external
stop position handle.
Figure 3-29
Move the stop to the
joystick unit until it
hits the aluminum
support of the
joystick.
Lock the handle of
the stop. This will set
your extreme
external position.
Figure 3-30
Rotate back the pre-
clamping button in
the OFF position.
Figure 3-31
Rotate the joystick to
be able to move to
the outside shooting
position. Once the
desired position is
reached, release the
joystick.
Figure 3-28

USER MANUAL
CS200 CART
19
4JOINING THE FRAME
Release the pedal once the joining is done. It is possible also to shoot wedges (and even to stack them), between the two stops.
Put The right side
moulding on the
table as per image.
Then push the
moulding until it
reaches the opposite
stop.
Put the second
moulding on the
table.
Rotate the joystick
and move it to the
desired stop. Joining
can be done starting
from inside or
outside position.
Figure 4-1
Figure 4-2
Press the pedal to
clamp the mouldings
together.
The horizontal
clamps will move up
to the moulding.
Figure 4-3
Press the top button of
the joystick to insert the
wedge inside the
moulding.
Keep the button
pressed until the
machine releases the
vertical clamp.
Press a second time the
button if another wedge
needs to be stacked in
this position. Keep pedal
pressed during this
process.
Figure 4-4
Rotate the joystick
and move it to the
second stop.
Figure 4-5
Still with the pedal
pressed, press the top
button of the joystick to
insert the wedge inside
the moulding.
Keep the button
pressed until the
machine releases the
vertical clamp.
Press a second time the
button if another wedge
needs to be stacked in
this position. Keep pedal
pressed during this
process.
Figure 4-6

USER MANUAL
CS200 CART
20
5MAINTENANCE
5.A SAFETY INSTRUCTIONS
5.B MAINTENANCE PLAN
5.B.a Daily maintenance:
It is recommended once a day to clean the table surface with a clean cloth and make sure there is no debris in the distributor
head. If some glue is remaining in the distribution block, then perform procedure 5.C REMOVING THE DISTRIBUTOR HEAD (page
21) and 5.D LUBRICATING THE DISTRIBUTOR HEAD (page 22). It is important to avoid glue from drying in the distribution head as
it could prevent the cartridge from going in the distribution block correctly.
5.B.b Regular maintenance:
Once a week it is recommended to clean and lubricate the distribution block. Refer to following chapter to perform this
maintenance:
5.A SAFETY INSTRUCTIONS (page: 20)
5.C REMOVING THE DISTRIBUTOR HEAD (page 21)
5.D LUBRICATING THE DISTRIBUTOR HEAD (page 22)
Rotate red button in EXH position.
Unplug the machine from pneumatic source.
Install a locker to ensure nobody will turn back on the machine while you will be
performing the maintenance.
Figure 5-1
The CS200 CART is using pneumatic air supply. It is essential for your safety to make sure that it is disconnected
prior to make any maintenance. Please refer to instructions below prior to perform any maintenance.
If using compressed air to clean some parts, wear safety glasses. It is even recommended to use a vacuum to
clean the machine rather than compressed air that will spray dust everywhere.
All maintenance and control operations must be carried out by skilled maintenance staff.
Table of contents
Languages:
Other Cassese Tools Storage manuals
Popular Tools Storage manuals by other brands

Global Industrial
Global Industrial 800577 user manual

Craftsman
Craftsman 706.153410 Operator's manual

Craftsman
Craftsman CORNER SHELVING UNIT Operator's manual

Ranger design
Ranger design S2-RA60-2 installation guide

Axminster
Axminster PROFESSIONAL AP254SB manual

Scheppach
Scheppach TW1000 Translation from the original instruction manual