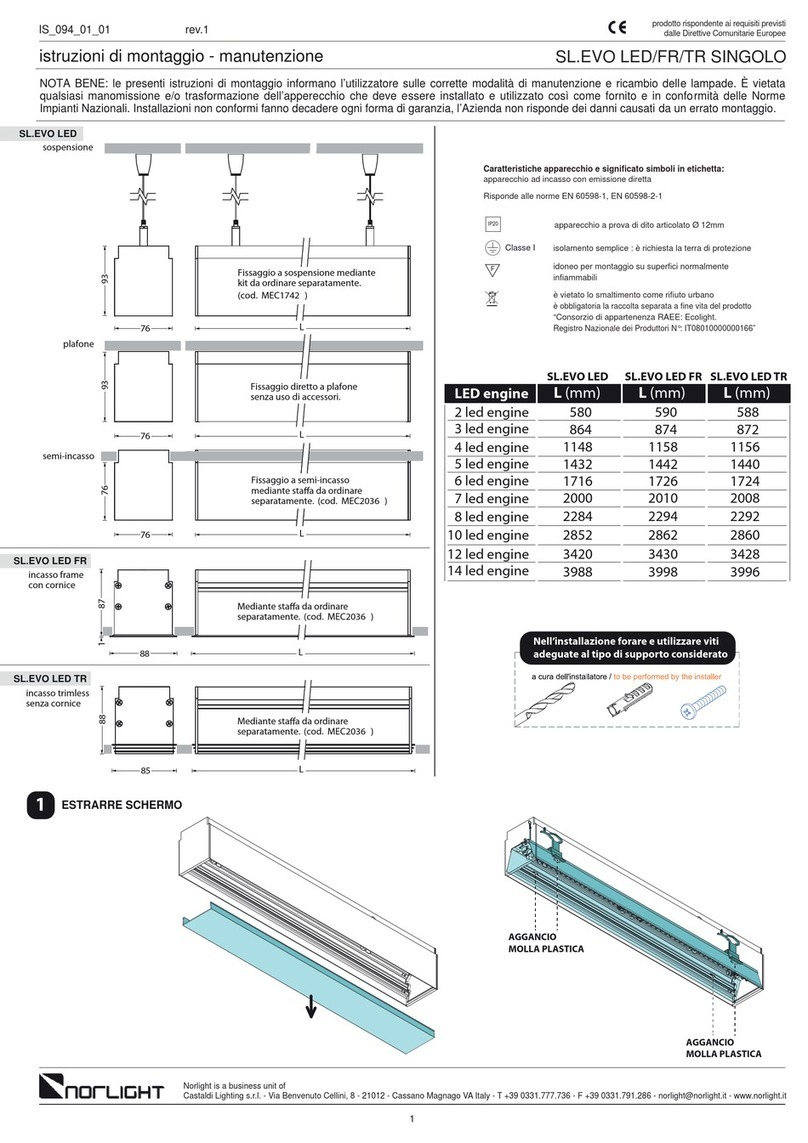
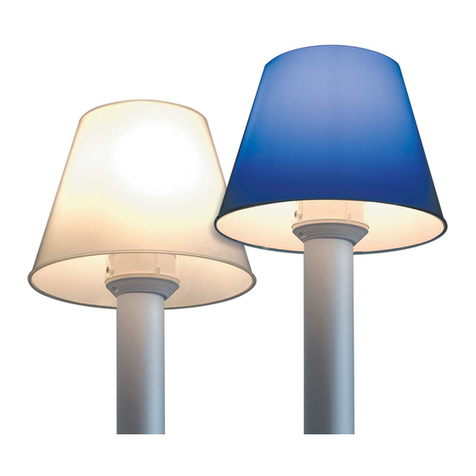
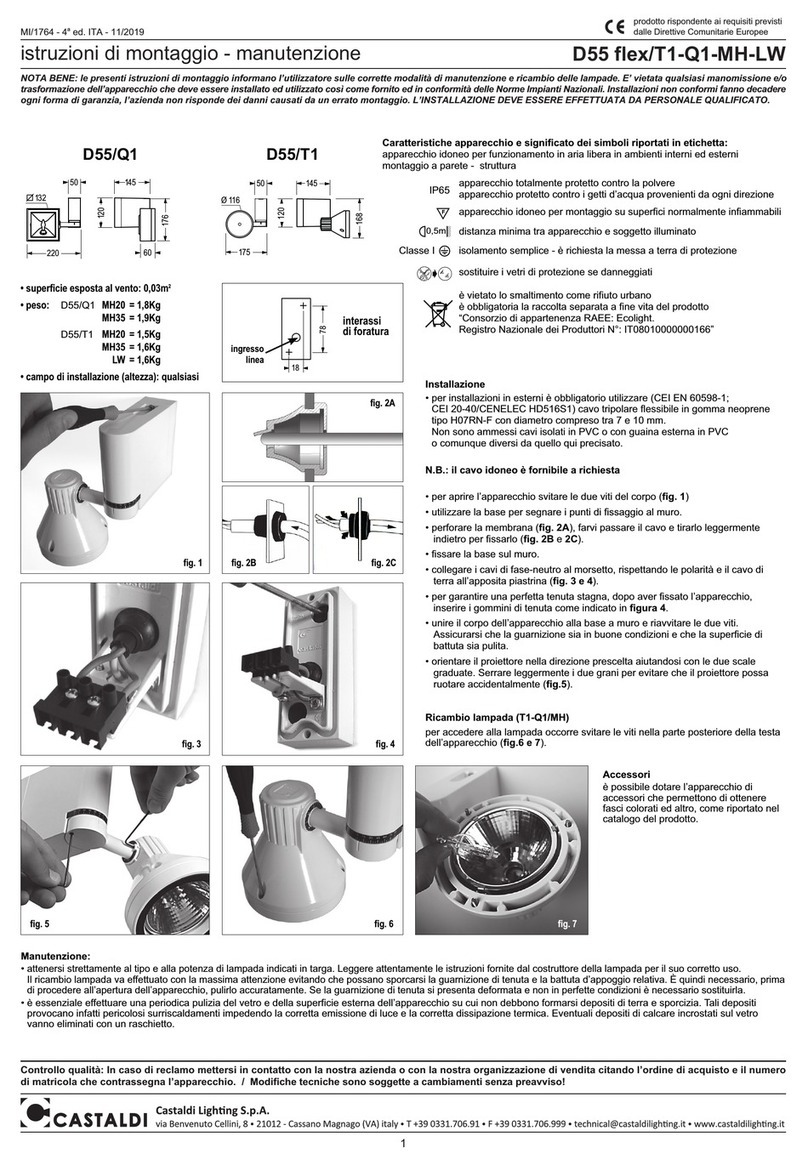
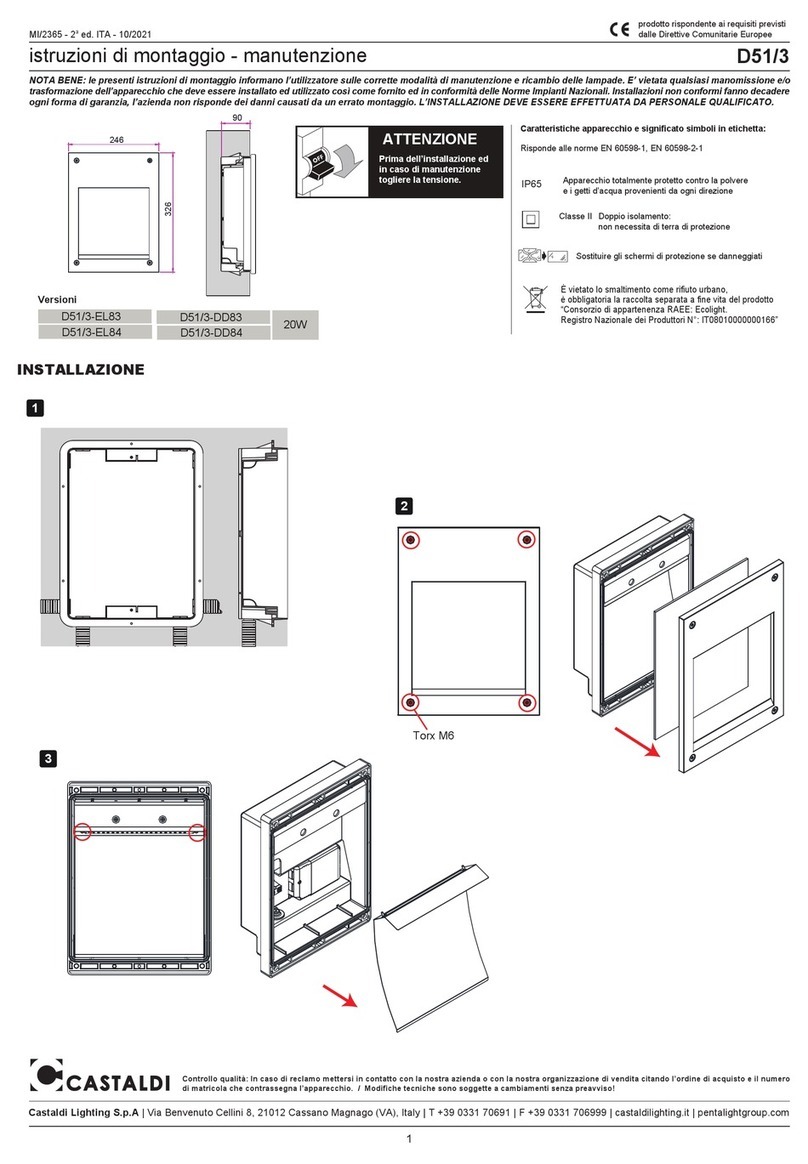
Castaldi Lighting D08 - block Instruction Manual

MI/1413 - 11aed. ITA - 11/2016
D08 - block
prodotto rispondente ai requisiti previsti
dalle Direttive Comunitarie Europee
NOTA BENE: le presenti istruzioni di montaggio informano l’utilizzatore sulle corrette modalità di manutenzione e ricambio delle lampade. E’ vietata qualsiasi manomissione e/o
trasformazione dell’apparecchio che deve essere installato ed utilizzato così come fornito ed in conformità delle Norme Impianti Nazionali. Installazioni non conformi fanno decadere
ogni forma di garanzia, l’azienda non risponde dei danni causati da un errato montaggio. L’INSTALLAZIONE DEVE ESSERE EFFETTUATA DA PERSONALE QUALIFICATO.
istruzioni di montaggio - manutenzione
1
Controllo qualità: In caso di reclamo mettersi in contatto con la nostra azienda o con la nostra organizzazione di vendita citando l’ordine di acquisto e il numero
di matricola che contrassegna l’apparecchio.
INSTALLAZIONE:
•
per installazioni in esterni è obbligatorio utilizzare ( EN 60598-1, EN 50565-2) cavo tripolare
flessibile (bipolare solo per versione classe 2) in gomma neoprene tipo H07RN-F di
diametro compreso tra 7,5 e 12 mm. Non sono ammessi cavi isolati in PVC o con guaina
esterna in PVC o comunque diversi da quello qui precisato. Procedere come indicato
in fig.2 a-b per un corretto accoppiamento cavo-pressacavo. Solo in caso di montaggio
in ambienti interni è permesso utilizzare cavetti unipolari. In tal caso utilizzare il gommino
a tre fori all’uopo predisposto per garantire la necessaria tenuta stagna (fig.2-c).
• eseguire il cablaggio a seconda della versione rispettando le polarità (fig.3-fig.4).
• LED effettuare la conessione rispettando le polarità, i cavi devono essere posizionati
sotto il riflettore. Fissare il riflettore al corpo della lampada con le viti fornite (fig.5).
• per garantire la tenuta stagna in corrispondenza dei fori di fissaggio è indispensabile
applicare le guarnizioni da noi fornite utilizzando viti di diametro 4 mm (fig.1).
• inserita la lampada o effettuata la conessione LED chiudere l’apparecchio assicurandosi
che la guarnizione sia ben posizionata nella sua sede e stringere le viti in modo
equilibrato ed in progressione per un serraggio uniforme.
MANUTENZIONE:
• è essenziale effettuare una periodica pulizia del vetro e della superficie esterna
dell’apparecchio su cui non debbono formarsi depositi di terra e sporcizia.Tali depositi
provocano infatti pericolosi surriscaldamenti impedendo la corretta emissione di luce
e la corretta dissipazione termica.Eventuali depositi di calcare incrostati sul vetro
vanno eliminati con un raschietto.
VERSIONE LAMPADA:
• attenersi strettamente al tipo e alla potenza di lampada indicati in targa. Leggere
attentamente le istruzioni fornite dal costruttore della lampada per il suo corretto uso.
Il ricambio lampada va effettuato con la massima attenzione evitando che possano
sporcarsi la guarnizione di tenuta e battuta d’appoggio relativa. E’ quindi necessario,
prima di procedere all’apertuta dell’apparecchio, pulirlo accuratamente. Se la guarnizione
di tenuta si presenta deformata e non in perfette condizioni è necessario sostituirla.
VERSIONE LED:
la sorgente luminosa contenuta in questo apparecchio deve essere sostituita solo
dal costruttore o dal suo servizio di assistenza o da personale altrettanto qualificato.
Caratteristiche apparecchio - significato dei simboli riportati in etichetta:
apparecchio idoneo per funzionamento in ambienti esterni ed interni
montaggio incassato in muratura o sporgente
N.B. - per montaggio incassato in muratura è indispensabile l’uso
della cassaforma “CI” (figura A).
1) Disporre la cassaforma nell’armatura del getto in modo che il suo bordo esterno
corrisponda al filo del muro finito.
2) Disporre nel getto il tubo di protezione del cavo elettrico.
3) Collegare l’apparecchio seguendo le istruzioni.
IP65
è vietato lo smaltimento come rifiuto urbano
è obbligatoria la raccolta separata a fine vita del prodotto
“Consorzio di appartenenza RAEE: Ecolight.
Registro Nazionale dei Produttori N°: IT08010000000166”
apparecchio totalmente protetto contro la polvere e contro i getti
d’acqua provenienti da ogni direzione
Versione Classe I isolamento semplice: è richiesta la terra
di protezione
sostituire i vetri di protezione se danneggiati
Versione Classe II doppio isolamento: non necessita di terra
di protezione
ATTENZIONE: Prima dell’installazione ed in caso di manutenzione
togliere la tensione.
A
Riflettore+scheda LED
Opale
A
B
C
C
B-A
A-B APRIRE
C-FISSAGGIO
D-CABLAGGIO (fig.4)
CHIUSURA
sedi delle viti
da utilizzare per
fissare il riflettore
al corpo della
lampada
(Fig.5)
ATTENZIONE NON MANEGGIARE
ATTENTAMENTE IL RIFLETTORE E
LA SCHEDA LED
(Fig.1)
(Fig.3) CLASSE I
c
Ø min 2,5 mm
Ø max 3,5 mm
Ø min 7,5 mm
Ø max 8,5 mm
ab
Ø min 8,5 mm
Ø max 12 mm
(Fig.2)
(Fig.4) CLASSE II
cod. D08/CI

MI/1413 - 11aed. ENG - 11/2016
D08 - block
1
product in compliance with the requirements
of the European Community Directories
installation and maintenace sheet
NB: These assembly instructions must be given to end users for correct maintenance and so that they know how to change the bulb. The appliance must not be tampered with
or transformed and it must be installed and used as supplied and in compliance with the National Rules on Installations. Any non-compliant installations will invalidate all forms
of guarantee. THE COMPANY CANNOT BE HELD RESPONSIBLE FOR DAMAGE CAUSED BY INCORRECT ASSEMBLY.
Quality control: In case of complaint please get in touch with our company or its sales organization. Please give the number of your order as well as the serial
number that recognizes the fixture.
INSTALLATION:
•
for outdoor locations it is mandatory to use (EN 60598-1, EN 50565-2) a three core (two-core
only forClass II version rubber cable type H07RN-F with a diameter between 7,5 and 12 mm.
PVC insulated cables or with outer PVC cover or anyhow cable different from the one
here prescribed are not allowed. Proceed as shown in pict.2 a-b for a correct coupling
cable-cable gland. Only for indoor applications independent single wires may be used.
In this evenience use the special three holes rubber to guarantee a perfect seal (pict.2-c).
• perform wiring operations according to the version and observe the polarity (pict.3-pict.4).
• connect the LED and observe the polarity; the cables must be positioned beneath
the reflector. Secure the reflector to the lamp body using the screws provided (pict.5).
• to guarantee the perfect watertightness it is necessary to put the supplied gaskets
on the fixing holes using 4 mm diameter screws (pict.1).
• after inserting the lamp or connecting the LED, close the fixture while making sure that
the seal is properly positioned in its housing, then tighten the screws gradually and
sequentially so as to ensure uniform tightening.
N.B. - for flush mounting in concrete or mansonry the moulded
form “CI” is mandatory (pict. A).
1) Place the form in the falsework of the mould in such a way that its outer edge
is flush with the edge of the finished wall.
2) Place the protective tube of the electric cable in the mould.
3) Connect the unit following the instructions enclosed into the unit itselself.
IP65
ATTENTION: Switch-off the power supply before
any installation and maintenance operations.
(pict.1)
(pict.5)
A
CAUTION: HANDLE THE
REFLECTOR AND LED BOARD
WITH CARE Reflector + LED board
Opal
A
B
C
C
B-A
A-B OPEN
C-FASTENING
D-WIRING (pict.4)
CLOSE
(pict.3) CLASS I
c
Ø min 2,5 mm
Ø max 3,5 mm
Ø min 7,5 mm
Ø max 8,5 mm
ab
Ø min 8,5 mm
Ø max 12 mm
(pict.2)
(pict.4) CLASS II
cod. D08/CI
Features - meaning of the symbols shown on the label:
suitable for interior and exterior applications - masonry recessed or projected
Class I Version
SIMPLE INSULATION: earth required
Class II Version
DOUBLE INSULATION: no earth required
getting rid of as urban waste forbidden
separate collection is mandatory when the product
is at the end of its life
replace the damaged protective glass screens
Totally dust proof.
Protected against water jets from any directions.
screw slots
to be used to
secure the reflector
to the lamp body
MAINTENANCE:
• it is essential to do a frequent cleaning of the glass and of the outer surface of the fixture
to avoid build up of mud and dirtiness resulting in dangerous overheating due to
uncorrect light and heath dissipation. Clean carefully the glass screen removing
limestone deposits by means of a scraper.
LED VERSION:
The light source contained in this device must only be replaced by the manufacturer
or its assistance service or by an equally qualified person.
LAMP VERSION:
• respect fully type and power of lamp as shown on the label. Read carefully the
instructions of the lamp manufacturer for proper lamp use. The relamping must be done
with maximum attention avoiding to dirty the sealing gasket and its contact surface.
It is therefore necessary before opening the fixture to clean it accurately.If the gasket is
damaged, deformed or not in perfect conditions it is necessary to change it.

MI/1413 - 11aed. FRA - 11/2016
D08 - block
1
produit avec caractéristiques selon les
Directives Communautaires Européennes
instructions de montage - entretien
REMARQUE: les instructions d’assemblage ci-jointes informent l’utilisateur des modalités d’entretien et de rechange des lampes. Il est interdit d’effectuer toute manipulation
et/ou transformation de l’appareil, qui doit être installé et utilisé tel qu’il a été fourni et selon les normes nationales pour les installations. La non conformité des installations
conduit à l’annulation de toute forme de garantie; l’entreprise ne peut pas être tenue pour responsable des dommages causés par une mauvaise installation. L’INSTALLATION
DOIT ÊTRE EFFECTUÉE PAR UN PERSONNEL QUALIFIÉ.
Contrôle qualité: Pour toute réclamation, nous vous prions de bien vouloir contacter notre société ou notre organisation de vente, en citant le numéro de
commande et le numéro qui contremarque l’appareil.
Caractéristiques de l’appareil - signification des symboles portés sur l’étiquette:
appareil d’intérieur et extérieur - montage en encastré en maçonnage ou en saillie
INSTALLATION:
•
pour fonctionnement en extérieur il est obligatoire d’utiliser (EN 60598-1, EN 50565-2) du
câble tripolaire flexible (bipolaire seulement pour version classe 2) en caoutchouc néoprène
type H07RN-F. Le diamètre du câble doit être compris entre 7,5 et 12 mm. Les câbles avec
isolation en PVC ou avec gaines externes en PVC ou quand-même différents de ceux ici
précisés ne sont pas admis. Voire fig.2 a-b pour un correct couplage câble/presse-étoupe.
Seulement pour montage en intérieur, il est possible d’utiliser des câbles unipolaires.
Dans ce cas, il faut utiliser le petit bouchon à trois trous pour garantir la nécessaire
étanchéité (fig.2-c).
• Effectuer les opérations de câblage en fonction de la version et observer le polarité (fig.3-fig.4).
• Effectuer la connexion de la Led en respectant la polarité. Placer les câbles sous
le réflecteur. Fixer le réflecteur au corps de lampe avec les vis fournies (fig.5).
• pour garantir une parfaite étanchéité il est indispensable d’appliquer les joints
d’étanchéité fournis sur les trous de fixation en employant des vis diamètre 4 mm (fig.1).
• une fois la lampe installée ou la connexion LED effectuée, fermer l'appareil en veillant
à ce que le joint soit bien inséré dans son siège. Serrer les vis de manière uniforme,
progressivement et en croix.
N.B. - pour le montage en encastré dans le mur il est indispensable d’utiliser le
boîtier d’encastrement “CI” (figura A).
1) Disposer le boîtier dans l’armature du coulage, de façon à ce que les bords
exterieurs du boîtier arrivent à fleur du mur fini.
2) Disposer dans le coulage un tube de protection des câbles électriques.
3) Faire la connexion de l’appareil suivant les instructions jointes à l’appareil même.
IP65
ATTENTION
Couper l’alimentation avant toute intervention!
A
Réflecteur+Fiche LED
Opal
A
B
C
C
B-A
A-B OUVERTURE
C-FIXATION
D-CÂBLAGE (fig.4)
FERMETURE
sièges des vis
à utiliser pour fixer
le réflecteur
au corps de lampe
(Fig.5)
ATTENTION MANIPULER LE
RÉFLECTEUR ET LA CARTE LED
AVEC PRÉCAUTION
(Fig.1)
(Fig.3) CLASSE I
c
Ø min 2,5 mm
Ø max 3,5 mm
Ø min 7,5 mm
Ø max 8,5 mm
ab
Ø min 8,5 mm
Ø max 12 mm
(Fig.2)
(Fig.4) CLASSE II
cod. D08/CI
totalement potégé contre la poussière
protégé contre les jets d’eau de toutes les directions
Classe I Version
ISOLATION SIMPLE: mise à la terre nécessaire
Classe II Version
DOUBLE ISOLATION: Il ne nécessite
pas d’une mise à la terre de protection
remplacer les verres de protection abimés
il est interdit l’élimination comme ordure urbaine
le rammassage separé est obligatoir lorsque le produit
est à la fin de sa vie
ENTRETIEN:
• il est indispensable d’effectuer régulièrement un nettoyage du verre et de la surface
extérieure de l’appareil sur lesquels il ne doit jamais se former de dépôts de terre ou de
saletés. Ces dépôts provoquent en fait un sur échauffement empéchant une émission
correcte de la lumière et une bonne dissipation thermique. Des possibles dépôts de
calcaire incrustés sur le verre doivent être enlevés avec un racloir.
LAMP VERSION:
• s’en tenir strictement au type et à la puissance de lampe indiqués sur l’étiquette.
Lire attentivement les instructions fournies par le constructeur de la lampe pour un usage
correct. Le rechange de la lampe doit être effectué avec une très grande attention en
évitant de salir le joint et sa base d’appui. Il est donc nécessaire, avant de procéder à
l’ouverture de l’appareil, de le nettoyer soigneusement. Si le joint d’étanchéité est déformé
et en mauvais état, il est nécessaire de le changer.
VERSION LED:
La source lumineuse contenue dans cet appareil doit être remplacée exclusivement
par le fabricant ou son service technique, voire par un technicien qualifié.
MI/1413 - 11aed. DEU - 11/2016
D08 - block
1
Das Produkt entspricht den Richtlinien
der Europäischen Gemeinschaft
Montageanleitung - Instandhaltung
WICHTIGER HINWEIS: diese Montageanleitung informiert den Anwender über die korrekten Wartungsmaßnahmen und den Austausch der Lampen. Jede Manipulation und/
oder Veränderung des Geräts, das in dem gelieferten Zustand installiert und verwendet werden muss und den nationalen Normen für Anlagen entspricht, ist verboten.
Bei unsachgemäßer Installation verfallen jegliche Garantieansprüche und die Firma haftet nicht für Schäden aufgrund einer unsachgemäßen Installation. DIE INSTALLATION
MUSS VON QUALIFIZIERTEM FACHPERSONAL DURCHGEFÜHRT WERDEN.
Qualitätskontrolle: Sollten Sie Reklamationen haben, wenden Sie sich an unsere Firma oder an unsere Verkaufsorganisation unter Angabe des Bestelldatums
und der Kennummer des Geräts.
Eigenschaften - Bedeutung der Symbole auf dem Typenschild:
Die Leuchte ist für den Innen - sowie den Aussenbereich geeignet - Montage Mauereinbau oder Aufbau
Absolut staubdicht - Schutz gegen Wasserstrahlen aus allen Richtungen
Schutzklasse I
EINFACHE ISOLIERUNG: Erfordert einen Schutzleiter
Schutzklasse II
DOPPELTE ISOLIERUNG:
Eine Erdung ist nicht erforderlich
INSTALLATION:
•
Bei Aussenmontage ist es Pflicht (EN 60598-1, EN 50565-2), biegsames dreipoliges Kabel
(bipolar nur für die Version in Klasse 2) aus Neoprengummi Typ H07RN-F mit Durchmesser
zwischen 7,5 und 12 mm zu verwenden. Es sind keine Kabel mit PVC - Isolierung oder mit
externem Hülsen aus PVC, jedenfalls anderen als die hier angeführte Kabeltype zulässig.
Für eine einwandfreie Verbindung Kabel/Kabeldurchgang gemäss Abb.2 a-b vorgehen.
Nur in Innenräumen sind einpolige Leitungen zugelassen, dafür die vorgesehene
Gummidichtung mit drei Durchgängen zur erforderlichen Dichtigkeit benutzen (Abb.2-c).
• Führen Sie die Verdrahtung je nach Ausführung der Polaritäten passend (Abb.3-Abb.4).
• Beim Anschluss der LED muss die richtige Polung beachtet werden. Die Kabel müssen
unter dem Reflektor positioniert werden. Befestigen Sie den Reflektor mithilfe der
mitgelieferten Schrauben am Lampenkorpus. (Abb.5).
• pour garantir une parfaite étanchéité il est indispensable d’appliquer les joints
d’étanchéité fournis sur les trous de fixation en employant des vis diamètre 4 mm (Abb.1).
• Nach Einsetzen der Lampe bzw. Anschluss der LED schließen Sie das Gerät und stellen
Sie sicher, dass die Dichtung einwandfrei eingelegt ist und die Schrauben ausgeglichen
und einheitlich festgeschraubt sind.
N.B. - Bei der Einbauversion (Mauerwerk) ist das Gehäuse
unbedingt erforderlich “CI” (Abb. A).
1) Das Gehäuse im Einbau so einsetzen, dass der externe Rand des Gehäuses
gleich mit dem der Mauer ist.
2) Schutzrohr für Zuleitungskabel im Einbau unterbringen.
3) Apparat nach den beigelegten technischen Anweisungen anschließen.
IP65
A
Opal
A
B
C
C
B-A
A-B ÖFFNEN
C-
BEFESTIGUNG
D-
VERKABELUNG
(Abb.4)
SCHLIESSEN
(Abb.5)
(Abb.1)
(Abb.3) KLASSE I
c
Ø min 2,5 mm
Ø max 3,5 mm
Ø min 7,5 mm
Ø max 8,5 mm
ab
Ø min 8,5 mm
Ø max 12 mm
(Abb.2)
(Abb.4) KLASSE II
cod. D08/CI
die beschädigten Schutzgläser ersetzen
Das Entsorgen im Hausmüll ist verboten!
Bei Ablauf der Lebensdauer bitte beachten:
Abfalltrennung ist Pflicht
ACHTUNG: Vor Installationen und Instandhaltungsarbeiten
die Spannung trennen.
ACHTUNG: REFLEKTOR
UND LED-PLATINE
VORSICHTIG HANDHABEN
Sitz der Schrauben,
die für die
Befestigung
des Reflektors
am Lampenkorpus
verwendet werden
Reflektor + LED-Platine
WARTUNG:
• Das Glas der Leuchte sowie alle Aussenflächen des Gerätes müssen regelmässig
gereinigt werden, so dass Ablagerungen von Erde oder Schmutz ausgeschlossen sind.
Eventuell auf dem Glas präsente Kalkablagerungen können mit einem Schaber entfernt
werden. Die o.a. Ablagerungen beinhalten die Gefahr einer Überhitzung und verhindern
die Vorschriftsmässige Lichtabstrahlung und Wärmedissipation.
LAMP VERSION:
• Ersetzen Sie die Lampe rechtzeitig am Ende ihrer Funktionsdauer und beachten
Sie dabei auf dem Schild ausgegebene Leistung und Typ. Die den Lampen beigelegten
Gebrauchsanweisungen aufmerksam lesen und beachten. Bevor Sie das Gerät offnen,
müssen Sie gründlich reinigen. Verformte oder nicht in einwandfreiem Zustand befindliche
Dichtungen müssen ausgetauscht werden.
LED-VERSION:
Die Lichtquelle dieses Geräts darf nur vom Hersteller, seinem Kundendienst oder
entsprechend qualifiziertem Personal ausgetauscht werden.
Table of contents
Languages:
Other Castaldi Lighting Lighting Equipment manuals

Castaldi Lighting
Castaldi Lighting D51/3-EL83 Instruction Manual

Castaldi Lighting
Castaldi Lighting D22 Instruction Manual

Castaldi Lighting
Castaldi Lighting Norlight SL.EVO LED Instruction Manual

Castaldi Lighting
Castaldi Lighting CHIARO 60 T5 Instruction Manual

Castaldi Lighting
Castaldi Lighting D55/Q1 Instruction Manual

Castaldi Lighting
Castaldi Lighting D51/0 thor Instruction Manual

Castaldi Lighting
Castaldi Lighting D26 gulliver/MH Instruction Manual