manuals.online logo
Brands
  1. Home
  2. •
  3. Brands
  4. •
  5. Castle Creations
  6. •
  7. Controllers
  8. •
  9. Castle Creations MAMBA-25 User manual

Castle Creations MAMBA-25 User manual

MAMBA
MAMBAMAMBA
MAMBA-
--
-25
2525
25
™
By
Castle Creations
25 Amp Brushless Sensorless Speed Control for RC Cars/Trucks
MAMBA-25™ User Guide Page 1 of 4 Rev 3-date 05/20/04
This document, Mamba-25™ software, and Mamba-25™ PCB layout are all Copyright 2004 by Patrick del Castillo and
Castle Creations
Warning!
High power motor systems can be very dangerous! High currents can heat wires and batteries, causing
fires and burning skin. Follow the wiring directions carefully! Models equipped with high power motors can cause serious
injury. Even though this controller is equipped with a safety arming program, you should still use caution when
connecting the main battery and always check battery polarity.
Thank you for purchasing the most technologically advanced brushless electronic speed
controller in the world for RC cars and trucks! Please take the time to read over these
instructions to ensure you get the most from your Mamba brushless power system and enjoy
years of trouble-free operation.
1.0 Features of the Mamba- 25™ :
•Extremely Low Resistance (.0022 ohms per phase)
•Up to 25 Amps continuous current, 50 amps surge
•Four to twelve cells, or 2 to 3 Lithium Polymer cells
•Proportional brake
•BEC (1. 5A) provides power to receiver and servo - eliminates separate receiver
battery
•User Programmable Features:
oBrake/Reverse Type
oReverse Throttle Amount/Brake Strength
oLow voltage cutoff (LiPo safe)
oTiming Advance
oStarting Power
•Safe “power on” arming program ensures motor will not accidentally turn on
•
Auto shut down when signal is lost or radio interference becomes severe
2.0 Making Connections on your Mamba 25 Power system
Tools required: Parts required:
Wire cutters Rosin core electrical solder
Wire stripper (optional) Battery connector
Soldering iron (30-40W)
2.1 Adding a battery connector to your Mamba 25:
The battery connector must be added to the power side of the controller (blue capacitor,
receiver connector, and red and black wire side). The red wire is the positive (+) lead, and
must match up to the positive lead from your battery. The black wire is the negative (-) lead,
and must match up to the negative lead from your battery. The polarity MUST BE
CORRECT or the controller will be damaged from reversed polarity.
Strip just enough insulation off of the battery wires to solder on your battery connector to the
controller leads. After the connector is soldered and insulated (shrink tubing or electrical
tape) check it ONE MORE TIME to make sure the polarity is correct before you plug in a
battery.
2.2 Plugging in motor leads:
With a brushless system, there is no polarity on the MOTOR side of the controller. Simply
plug in the three connections between the CM20 motor and Mamba 25 controller. After the
throttle calibration routine below – if the motor runs backwards with foreword throttle,
simply swap any two of the motor/controller connections and it will reverse the rotation of
the motor.
2.3 Connecting to the receiver:
Connect the receiver lead (the three color wires with a connector on the end) to the throttle
channel on your receiver (usually channel 2). Do not connect a battery to the receiver, as the
Mamba- 25™ will supply power to the receiver and servo through the receiver connector.
3.0 Communicating with your new Mamba 25:
When programming your Mamba 25, it will tell you where you are in the current
programming sequence using a combination of sounds and LED flashes. The controller
generates sounds through the motor, so it's best to have your motor connected whenever you
attempt to configure your Mamba 25. The controller signals the motor to make two types of
sounds; a longer multi-toned ring (hereafter referred to as a ring), and a short beep (hereafter
referred to as a beep). The controller also has THREE (3) LED’s (red, yellow, and green)
which will flash to give you further indication as to what programming state the controller is
in.
3.1 Calibrating the Mamba 25 to YOUR transmitter:
IMPORTANT NOTE: Calibration is required for the very first use of the Mamba 25
or whenever used with a new/different transmitter.
The Mamba 25 contains a throttle calibration feature that you'll want to use the first time you
power it up with a new/different transmitter. Performing this exercise will teach the
controller how your transmitter works.
•Disconnect battery
•Turn Mamba microswitch off
•Connect battery
•Mamba flashes all LED’s and rings once
•Apply full throttle
•Turn Mamba microswitch on
•Wait 2 seconds
•Mamba flashes green led and rings 4 times indicating full throttle measured
•Mamba flashes red led while beeping, indicating it's time to push full brake
•Push full brake
•Wait 1 second
•Mamba flashes red led and rings 4 times indicating full brake measured
MAMBA
MAMBAMAMBA
MAMBA-
--
-25
2525
25
™
By
Castle Creations
25 Amp Brushless Sensorless Speed Control for RC Cars/Trucks
MAMBA-25™ User Guide Page 2 of 4 Rev 3-date 05/20/04
This document, Mamba-25™ software, and Mamba-25™ PCB layout are all Copyright 2004 by Patrick del Castillo and
Castle Creations
Warning!
High power motor systems can be very dangerous! High currents can heat wires and batteries, causing
fires and burning skin. Follow the wiring directions carefully! Models equipped with high power motors can cause serious
injury. Even though this controller is equipped with a safety arming program, you should still use caution when
connecting the main battery and always check battery polarity.
•Mamba flashes yellow led while beeping indicating its time for neutral
•Put trigger to neutral (center)
•Wait 1 second
•Mamba flashes yellow led and rings4 times indicating neutral measured
•Wait for 1 second
•Mamba will flash all LED’s while and ring twice indicating that it is armed
3.2 Programming Mode
Programming the Mamba-25™ is as simple as answering a few questions. The Mamba-
25™ asks questions by flashing a setting number, followed by the possible setting values.
There are five settings that can be programmed in the Mamba-25™: 1) Brake/Reverse Type,
2) Reverse Throttle Amount/Brake Strength, 3) Cutoff Voltage, 4) Timing Advance, 5)
Starting Power.
As the programmer, you must answer “yes” or “no” to the setting values as they are
presented by the Mamba-25™. When you enter programming mode the controller will emit
a sequence of beeps and yellow LED flashes that tell you which programming step you are
in. There are two parts to the beep sequence, the first set of beeps indicates the ‘Setting’
number (e.g., Cutoff voltage type), and the second set of beeps indicates a Value (e.g 2 cell
LiPo). Answering “no” to a setting value will cause the Mamba-25™ to ask for the next
value. Answering “yes” to a setting value will store that setting in the Mamba-25™s
permanent memory. After a setting is stored, the Mamba-25™ will automatically continue
to the next setting until all settings have been stored. NOTE: If you answer “no” to all
values for a particular setting, the Mamba-25™ will keep whatever value had been
previously programmed. Only by answering “yes” to a value will the Mamba-25™
store/change that value.
When answering a question, you will need to move the trigger to the yes (full throttle)
position or the no (full brake) position and keep it there for about 5 seconds. When the
Mamba-25™ has accepted your answer it will confirm your reply by flashing the GREEN
LED for a “YES” answer or the RED LED for a “NO” answer. Release the trigger allowing
it to go to Neutral to confirm that you are ready for the Mamba-25™ to ask the next
question.
You are not required to continue through all five programming options. For example, if you
wish only to change the Brake/Reverse Type (option 1) then after programming that setting
you can disconnect power from the Mamba-25™ and you’re ready to run. Disconnecting
the controller in the middle of programming simply retains the values for the remaining
programming options that were previously set up.
3.2.1 Programming Example
The following is a simplified example demonstrating how to “skip” through a program
section, how to set a program option, and how to terminate programming early. In this
example we will: 1) skip (e.g. do not change) Brake/ReverseType setting, 2) change
Reverse Throttle Amount/Brake Strength to 25%, and 3) terminate programming after this
option.
3.2.2 Entering Programming mode
•Disconnect battery
•Turn Mamba microswitch off
•Connect battery
•Mamba flashes all led's and rings once
•Apply full throttle
•Turn Mamba microswitch on
•Wait 2 seconds
•Mamba flashes green led and rings 4 times indicating that it is ready for
CALIBRATION mode
•Continue to hold full throttle
•Mamba flashes red led while beeping
•Wait 8 seconds
•Mamba flashes all LED’s and rings 4 times
•Mamba flashes yellow led while beeping indicating that you are in
PROGRAMMING mode
•Let trigger go neutral (center)
At this point the Mamba will be flashing/beeping the following sequence:
Beep – Pause – Beep… and then Repeats
This indicates that you are at Question 1 and it is asking to accept/reject Value 1.
3.2.3 Skipping Programming Sections – No change required
Looking at the table on the last page you can see that Question 1 is ‘What reverse/brake type
do you want?’ and that Value 1 is ‘Proportional Brake with Reverse Lockout’. We don’t
want to change the current value of this option, so we will say no to each value thereby
skipping the programming option.
•Apply full brake for 1 second (NO)
•Mamba flashes RED led and rings 4 times, indicating that it has accepted your
answer
•Mamba flashes/beeps: ‘Beep – Pause – Beep - Beep’ (Question 1, Value 2)
•Apply full brake for 1 second (NO)
•Mamba flashes RED led and rings 4 times, indicating that it has accepted your
MAMBA
MAMBAMAMBA
MAMBA-
--
-25
2525
25
™
By
Castle Creations
25 Amp Brushless Sensorless Speed Control for RC Cars/Trucks
MAMBA-25™ User Guide Page 3 of 4 Rev 3-date 05/20/04
This document, Mamba-25™ software, and Mamba-25™ PCB layout are all Copyright 2004 by Patrick del Castillo and
Castle Creations
Warning!
High power motor systems can be very dangerous! High currents can heat wires and batteries, causing
fires and burning skin. Follow the wiring directions carefully! Models equipped with high power motors can cause serious
injury. Even though this controller is equipped with a safety arming program, you should still use caution when
connecting the main battery and always check battery polarity.
answer
•Mamba flashes/beeps: ‘Beep – Pause – Beep – Beep - Beep’ (Question 1, Value 3)
•Apply full brake for 1 second (NO)
•Mamba flashes RED led and rings 4 times, indicating that it has accepted your
answer
At this point you will have answered no to all of the questions in Section 1, so the Mamba
will move on to Section 2 without modifying the currently stored value.
3.2.4 Changing a Program Option
•Mamba flashes/beeps: ‘Beep – Beep – Pause – Beep’ (Question 2, Value 1)
From the Table on the last page, Question 2 is ‘Reverse Throttle Amount/Brake
Strength’ and Value 1 is ‘25%’. This is the value we want to accept.
•Apply full throttle for 1 second (YES)
•Mamba flashes GREEN led and rings 4 times, indicating that it has accepted your
answer.
•At this point the Mamba will move on to Section 3.
3.2.5 Terminating Programming Early
In this example, we do not need to change any of the remaining programming
options, therefore we can terminate the programming routine by disconnecting the
battery from the Mamba-25. This leaves the remaining programming options at
their previously stored values.
3.2.6 A Word About Cutoff Voltages
If you are running NiCad or NiMH cells, the default cutoff voltage of the Mamba 25 (4.0V)
is normally what you should use, and anything else in the programming is up to your
personal preference to change, so you are ready to run!
** IMPORTANT NOTE: Lithium Polymer Users **
If you are using Lithium Polymer (Li-Po) batteries, DO NOT operate your vehicle with the
factory default Cutoff Voltage. You must change the Cutoff Voltage BEFORE running your
vehicle.
4.0 Troubleshooting:
Everything is hooked up correctly, the BEC (receiver and servo) works, but the
throttle does not work.
The controller is not seeing the four seconds of neutral throttle and is not arming. Try
moving your throttle trigger slightly in each direction to arm the controller or follow the
calibrating function Section 3.1 above. You may also check to make sure that your endpoint
adjustments on your radio (if it has them) are set all the way open (both top and bottom, are
furthest from zero).
Every time I throttle all the way up, the controller “cuts off” after a few seconds, even
with fresh charged batteries.
The controller will automatically shut down the motor if the battery voltage falls below the
programmed voltage cutoff (factory preset at 4.0V) for more than half a second. This is to
protect your car from a loss of control caused by too low a voltage at the receiver. If the
cutoff is kicking in with fresh charged batteries, it means that the voltage is dropping very
quickly. This is usually an indication of a motor that is drawing too much current for the
batteries to handle. Try using a smaller pinion on the motor, or using batteries with a higher
rating (for example, if you are using AAA size cells, you might try going to KAN style/size
cells).
Nothing seems to work, receiver and servos are dead, and the throttle is dead.
Check all connections to ensure that they are correct, and that the polarity (+/-) battery
connections are correct. If everything is correctly connected, and the receiver and servos still
do not work, contact the dealer where you purchased your Mamba 25™ or Contact
Castle
Creations
directly. (See Section 5.0 below)
5.0 Intended Use
The Mamba-25 is intended for exclusive use with 1/18
th
scale vehicles only. Use in any
other vehicles or aircraft is not covered by warranty and will not be supported by Castle
Creations.
6.0 Contact/warranty information:
Your Mamba-25™ is warranted for one( 1) year from date of purchase to be free from
manufacturing and component defects. This warranty does not cover abuse, neglect, or
damage due to incorrect wiring, over voltage, or overloading. If you have any questions,
comments, or wish to return your Mamba 25™ for warranty or non-warranty repair/
replacement contact
Castle Creations
at:
Castle Creations
402 E. Pendleton Ave.
Wellsville, KS 66092
Tel: (785) 883- 4519 Email: info@castlecreations.com
Fax: (785) 883- 4571 Website: http://www.castlecreations.com
MAMBA
MAMBAMAMBA
MAMBA-
--
-25
2525
25
™
By
Castle Creations
25 Amp Brushless Sensorless Speed Control for RC Cars/Trucks
MAMBA-25™ User Guide Page 4 of 4 Rev 3-date 05/20/04
This document, Mamba-25™ software, and Mamba-25™ PCB layout are all Copyright 2004 by Patrick del Castillo and
Castle Creations
Warning!
High power motor systems can be very dangerous! High currents can heat wires and batteries, causing
fires and burning skin. Follow the wiring directions carefully! Models equipped with high power motors can cause serious
injury. Even though this controller is equipped with a safety arming program, you should still use caution when
connecting the main battery and always check battery polarity.
PROGRAMMABLE FEATURES
NOTE: Factory Defaults are indicated by asterisk(*)
Question Value Description
1) Brake/Reverse
Type
*1) Proportional Brake
with Reverse Lockout
Motor will only go into
reverse if the trigger has
been at neutral for 2
seconds, otherwise operates
like mode 2.
2) Proportional Brake,
no Reverse
Proportional brake will be
applied during reverse
throttle
3) Forward to Brake to
Reverse
This setting makes the car
operate freely in forward
and reverse (braking to a
stop before switching
direction)
2) Reverse Throttle
Amount/Brake
Strength
1) 25% This setting makes your
maximum brake strength,
and reverse speed equal to
25% of full power
*2) 50% This setting makes your
maximum brake strength,
and reverse speed equal to
100% of full power
3) 100% This setting makes your
maximum brake strength,
and reverse speed equal to
100% of full power
3) Cutoff Voltage
*1) No cutoff Nicad/NiMH cells
2) 4V cutoff Nicad/NiMH cells
3) 6V cutoff 2 cell Li-Po
4) 9V cutoff 3 cell Li-Po
5) 12Vcutoff Use this setting at your own
risk! Damage to the
controller as a result of
using a 4-cell LiPo pack is
not covered by the
manufacturer’s warranty.
4) Timing Advance
1) Low Max efficiency/runtime.
*2) Normal Balance power/runtime.
3) Race More power/less runtime.
4) Extreme Max power.
5) Starting power
*1) Low
2) Normal
3) High
Increase the value of this
setting if your model has
difficulty starting smoothly
under low power.

Other Castle Creations Controllers manuals

Castle Creations CC BEC User manual

Castle Creations

Castle Creations CC BEC User manual

Castle Creations Pixie-7P User manual

Castle Creations

Castle Creations Pixie-7P User manual

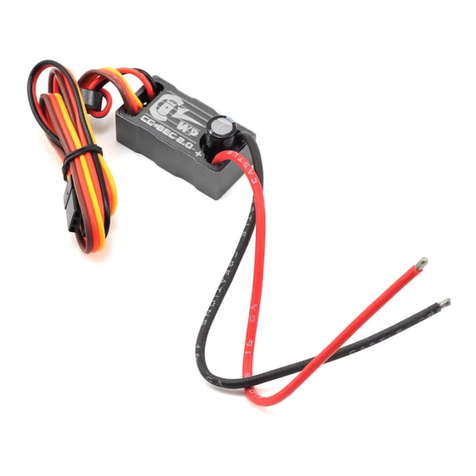
Castle Creations CC BEC 2.0 User manual

Castle Creations

Castle Creations CC BEC 2.0 User manual

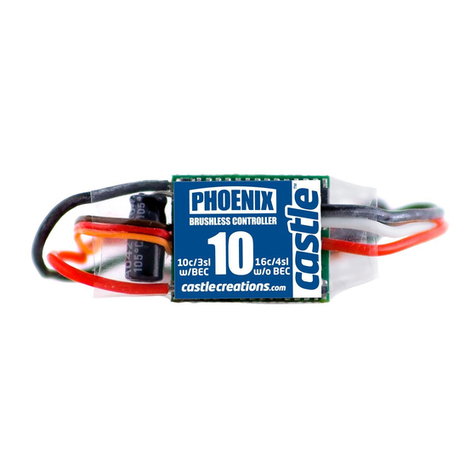
Castle Creations PHOENIX-10 User manual

Castle Creations

Castle Creations PHOENIX-10 User manual

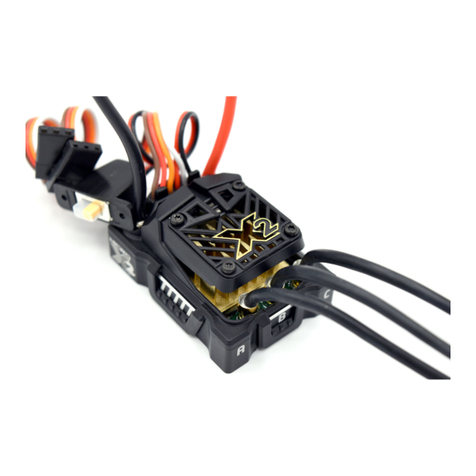
Castle Creations HYDRA XLX2 User manual

Castle Creations

Castle Creations HYDRA XLX2 User manual

Castle Creations Phoenix -25 User manual

Castle Creations

Castle Creations Phoenix -25 User manual

Castle Creations Pixie-20P User manual

Castle Creations

Castle Creations Pixie-20P User manual

Castle Creations Mamba Micro X2 User manual

Castle Creations

Castle Creations Mamba Micro X2 User manual

Castle Creations Pixie-20 User manual

Castle Creations

Castle Creations Pixie-20 User manual

Castle Creations Pixie-7 User manual

Castle Creations

Castle Creations Pixie-7 User manual

Castle Creations CC BEC 010-0004-00 User manual

Castle Creations

Castle Creations CC BEC 010-0004-00 User manual

Castle Creations PHOENIX-60 User manual

Castle Creations

Castle Creations PHOENIX-60 User manual

Castle Creations CC BEC 10006301 User manual

Castle Creations

Castle Creations CC BEC 10006301 User manual

Castle Creations MAMBA XLX2 User manual

Castle Creations

Castle Creations MAMBA XLX2 User manual

Castle Creations MAMBA XLX2 User manual

Castle Creations

Castle Creations MAMBA XLX2 User manual

Castle Creations PHOENIX-10 User manual

Castle Creations

Castle Creations PHOENIX-10 User manual

Castle Creations Phoenix-45 User manual

Castle Creations

Castle Creations Phoenix-45 User manual

Castle Creations MAMBA XL X User manual

Castle Creations

Castle Creations MAMBA XL X User manual

Castle Creations Phoenix-80 User manual

Castle Creations

Castle Creations Phoenix-80 User manual

Popular Controllers manuals by other brands

Omron 61F-GPN-BC datasheet

Omron

Omron 61F-GPN-BC datasheet

Norgren B68 Series Installation & maintenance instructions

Norgren

Norgren B68 Series Installation & maintenance instructions

Nevco 871 Hockey Operator instructions

Nevco

Nevco 871 Hockey Operator instructions

Omron CJ1W-CT021 Operation manuals

Omron

Omron CJ1W-CT021 Operation manuals

LK SmartComfort RT manual

LK

LK SmartComfort RT manual

Apeks TX100 Maintenance manual

Apeks

Apeks TX100 Maintenance manual

StepperOnline ST-6560V3 user manual

StepperOnline

StepperOnline ST-6560V3 user manual

Mitsubishi FX2N-32DP-IF user manual

Mitsubishi

Mitsubishi FX2N-32DP-IF user manual

Balboa Instruments EL8-EL84P-YCAH Tech sheet

Balboa Instruments

Balboa Instruments EL8-EL84P-YCAH Tech sheet

FISNAR RVC900N Series user manual

FISNAR

FISNAR RVC900N Series user manual

Titanium TT-U-01 quick start guide

Titanium

Titanium TT-U-01 quick start guide

Lippert Components TI-200 Operation and programming manual

Lippert Components

Lippert Components TI-200 Operation and programming manual

AIA X-SEL Operation manual

AIA

AIA X-SEL Operation manual

Krüger & Matz KM0771 owner's manual

Krüger & Matz

Krüger & Matz KM0771 owner's manual

Satel ACU-120 manual

Satel

Satel ACU-120 manual

Omron G9SP Series manual

Omron

Omron G9SP Series manual

WTI MPC Series user guide

WTI

WTI MPC Series user guide

Smartgen HGM6100U2C Series user manual

Smartgen

Smartgen HGM6100U2C Series user manual

manuals.online logo
manuals.online logoBrands
  • About & Mission
  • Contact us
  • Privacy Policy
  • Terms and Conditions

Copyright 2025 Manuals.Online. All Rights Reserved.