manuals.online logo
Brands
  1. Home
  2. •
  3. Brands
  4. •
  5. Castle Creations
  6. •
  7. Controllers
  8. •
  9. Castle Creations Pixie-20 User manual

Castle Creations Pixie-20 User manual

Pixie-20™
By
CastleCreations
Sub Micro Digital Motor Control
Pixie-20™ User Guide Page 1 of2 Rev 1-dated 10/23/01
This document, Pixie-20™ software, and Pixie-20™ PCB layout are all Copyright 2001 by Patrick del Castillo
1.0 Features of the Pixie-20™:
•Microprocessor controlled
•LowResistance (.0025 ohms)
•High rate (2800 Hz) switching (PWM)
•20 Amps continuous current (with proper air flow)
•High Output Battery Eliminator Circuit (BEC)
provides power to receiver and servos - eliminates
separate receiver battery up to 10 cells
•Five to seven cells with up to three micro servos
•Up to eight cells with two micro servos.
•Eighteen cells MAX with BEC disabled.
•Audible signal confirms system is armed
•Self Calibrating - adjusts to any transmitter
•Auto Motor Cutoff at 4.7V with Reset
•Safe “power on” arming program ensures motor will
not accidentally turn on
•Low torque “soft start” prevents damage to fragile
gearboxes
•Auto shut down when signal is lost or radio
interference becomes severe
•Rugged surface mount construction
2.0 Wiring Your Pixie-20™:
Tools required:
Wire cutters Wire strippers (optional)
Soldering Iron (25-40 watts - Do not use a soldering “gun”)
Parts required:
Solder (rosin core “electronic” solder - do not use acid core “plumbers” solder)
Battery connector
2.1 Servo Ratings with BEC Enabled
Servo Type 5-7 cells 8 cells 9-10 cells
Standard (micro) servos 3 2 Not Recommended
High Torque servos 2 Not Recommended Not Recommended
2.2 Adding the Battery Connector
The battery connector is attached to the left side of the controller (looking down at the heat sink/label).
Cut the wires to the length you require on the battery side. Strip off of the wire insulation to expose
just enough wire to attach the battery connector. (Note: if you do not have a pair of wire strippers,
you can use a modeling knife to carefully cut through the insulation around the wire. Then the
insulation should easily pull off the wire.) Attach the battery connector to the wires ENSURING
THAT THE POLARITY (red wire to battery red wire, black wire to battery black wire) IS
CORRECT, following the instructions for the battery connector.
2.3 Attaching the Motor Leads
The motor is connected to the right side of the controller (looking down at the heat sink/label). Cut the
wires to the length you require on the motor side. Strip the wire insulation to expose just enough wire
to solder the wires to the motor terminals. (Note: If you do not have a pair of wire strippers, you can
use a modeling knife to carefully cut through the insulation around the wire. Then the insulation
should easily pull off the wire). There should be a ‘+’ symbol or a RED DOT on the end of your
motor which indicates which terminal must be connected to the RED wire. Connect the other terminal
to the black wire. A fuse (5-15 amps) may be connected inline in either the black or red power wire.
A fuse is recommended for the safest operation. DO NOT PLACE A FUSE IN THE CIRCUIT
BETWEEN THE BATTERY AND SPEED CONTROL. YOU COULD LOSE CONTROL
OF THE MODEL.
Align the wires carefully and solder to the motor terminals. Ensure that all connections (battery and
motor) are correctly polarized.
IMPORTANT NOTE: YOU MUST BE SURE THAT ALL CONNECTIONS ARE CORRECT
WHEN CONNECTING THE SPEED CONTROL. Incorrectly connecting the speed control could
cause permanent damage to the controller.
Battery Connector Pixie-20™ Fuse* Motor
Fig 1: System power wiring diagram * Suggested 5-15 Amp (If installed)
2.4 Connecting the Receiver
AirTronics systems require a minor change to the wiring in the receiver connector supplied with the
speed controller. Reverse the red (power) and brown (ground) wires in the connector plug so that the
plug is orange/brown/red. Use a knife blade to lift the retention tabs on the connector plug to remove
the red and brown wires. Insert the wires back into the plug and press down the retention tab.
Connect the receiver lead (the three color, twisted wires with a connector on the end) to the throttle
channel on your receiver (usually channel 3). Do not connect a battery to the receiver, as the Pixie-
20™ will supply power to the receiver and servos through the receiver connector. If you are using ten
or more cells, you will need to use a separate receiver battery. See the section 4.0 (under the heading
BEC) for instructions on disabling the BEC to use a separate receiver battery.
Pixie-20™
←Batt Motor→
Pixie-20™
By
CastleCreations
Sub Micro Digital Motor Control
Pixie-20™ User Guide Page 2 of2 Rev 1-dated 10/23/01
This document, Pixie-20™ software, and Pixie-20™ PCB layout are all Copyright 2001 by Patrick del Castillo
3.0 Flying with Your Pixie-20™:
ALWAYS PERFORM A RANGE CHECK BEFORE FLYING WITH ANY NEW SPEED
CONTROLLER! PERFORM YOUR RANGE CHECK AT FULL THROTTLE, HALF
THROTTLE AND NO THROTTLE.
Initialization sequence:
1. Connect the speed controller receiver connector to the proper channel on your receiver (usually
channel 3)
2. Turn on your transmitter.
3. Connect the main power battery to the speed controller. The motor will emit a single beep.
4. The speed controller will remain disarmed (will not operate) until it sees more than four seconds of
“OFF” throttle. Move the throttle arm to the lowest position on your transmitter, wait at least four
seconds. The motor will emit two beeps when armed. Test the controller to make sure that the
throttle operates.
5. Go fly!
6. If the BEC cutoff occurs before you land, you may restart the motor and use low throttle if
necessary by moving the throttle stick all the way down (to the off position) and then throttling back
up. BEC cutoff will occur again if the voltage drops too low.
4.0 Using the Features of Your Pixie-20™
BEC - The BEC power is supplied to the receiver and servos through the receiver connector wires. If
you wish to disable the BEC and use a separate receiver battery (required for more than ten cells), you
must first cut the red wire in the trio of receiver wires. Simply use a pair of wire cutters to remove a
short section of the red wire near the receiver connector, and be sure to insulate the cut wire with a bit
of electrical tape. Or simply remove the pin from the connector (pry the retaining tab up, remove the
pin, and insulate the pin with electrical tape.) Then you may safely use a battery with your receiver.
Cutoff - The motor cutoff will occur when the input battery voltage drops below 4.7V for more than
one half second. Once motor cutoff has occurred, moving the throttle to the full off position can rearm
the controller. This will allow restart of the motor at low throttle after cutoff has occurred.
WARNING: Repeated restarting of the motor may drain the batteryto the point where the
radio receiver will stop operating, resulting in a loss of control of the model.
Losses of Transmitter Signal, or excessive radio noise cutoff - Motor cutoff will also occur if the
signal from the transmitter is lost, or if the radio noise becomes excessive. After radio connection has
been reestablished, moving the throttle to the braking position (full off) for four seconds can restart the
motor.
Safe Power Up- The Safe Power up feature is a “finger saver”, designed to prevent the motor from
starting accidentally on power up. To arm the controller, the transmitter stick must be held in the
“OFF” position (all the way down) for at least four seconds. Until the controller is armed, it will not
provide any power to the motor, regardless of where the throttle stick on your transmitter is positioned.
Before flying your model, be sure to “blip” the throttle to ensure that the controller is armed.
5.0 Troubleshooting
Everything is hooked up correctly, the BEC (receiver and servos) works, but the throttle does
not work.
The controller is not seeing the four seconds of “dead space” (low throttle) and is not arming. Try
moving your throttle stick all the way down, and moving the trim all the way down. Wait for four
seconds and try the throttle again. If it still does not arm, you may need to reverse the throttle control
on your transmitter (see your radio documentation). You may also check to make sure that your
endpoint adjustments on your radio (if it has them) are set all the way open.
Every time I throttle all the way up, the controller “cuts off” after a fewseconds, even with
fresh charged batteries.
The controller will automatically shut down the motor if the battery voltage falls below 4.7 volts for
more than a half second. This prevents loss of control caused by low voltage at the receiver. If the
cutoff is kicking in with freshly charged batteries, it means that the voltage is dropping very quickly.
This is usually an indication of a motor that is drawing too much current for the batteries to handle.
Try using a smaller prop on the motor, or using batteries with a higher rating (for example, if you are
using 600 AE cells, you might try going to 800 AR cells.)
It is also possible that the microprocessor on the Pixie-20™ is being overwhelmed by noise from the
motor. This can occur if the motor has no capacitors installed. If this is the case, add a capacitor
across the motor terminals, or even better, add three capacitors: one across the motor terminals, and
one from each terminal to the motor case. Capacitors can be purchased from Radio Shack. Be sure to
get “ceramic disk” style capacitors, in the range of .01uF and .1uf (.047uF being the best choice.) Do
not use electrolytic (can style) or tantalum capacitors with a high-rate control.
Nothing seems to work, receiver and servos are dead, and the throttle is dead.
Check all connections to ensure that they are correct, and that the polarity (+/-) connections are correct.
Ensure that the battery is not connected to the motor side of the speed controller. If everything is
correctly connected, and the receiver and servos still do not work, contact the dealer where you
purchased your Pixie-20™ or contact
CastleCreations
directly. (See info below)
6.0 Contact/Warranty Information
Your Pixie-20™ is warranted for 1 year from date of purchase to be free from manufacturing and
component defects. This warranty does not cover abuse, neglect, or damage due to incorrect wiring,
over voltage, or overloading. If you have any questions, comments, or wish to return your Pixie-20™
for warranty or after warranty repair/replacement contact CastleCreations
at:
CastleCreations
Email: support@castlecreations.com
18773 W 117
th
St. Fax: (913) 438-1394
Olathe KS, 66061 Website: http://www.castlecreations.com
Tel: (913) 438-6325

Other Castle Creations Controllers manuals

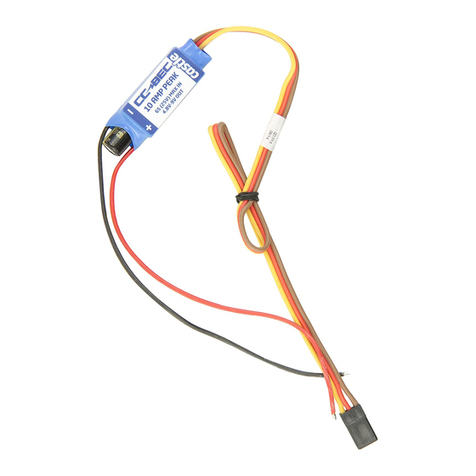
Castle Creations CC BEC 10006301 User manual

Castle Creations

Castle Creations CC BEC 10006301 User manual

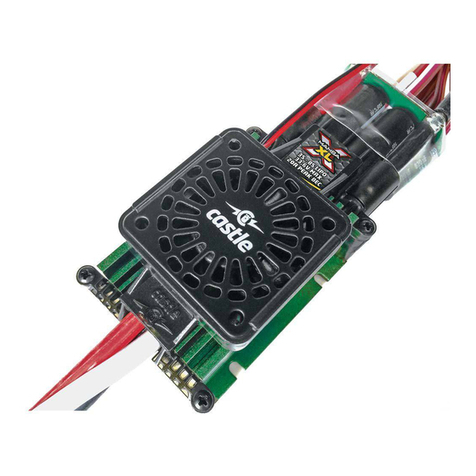
Castle Creations Phoenix-80 User manual

Castle Creations

Castle Creations Phoenix-80 User manual

Castle Creations Pixie-7 User manual

Castle Creations

Castle Creations Pixie-7 User manual

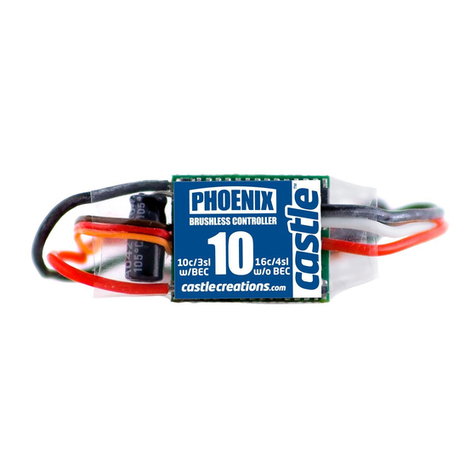
Castle Creations PHOENIX-10 User manual

Castle Creations

Castle Creations PHOENIX-10 User manual

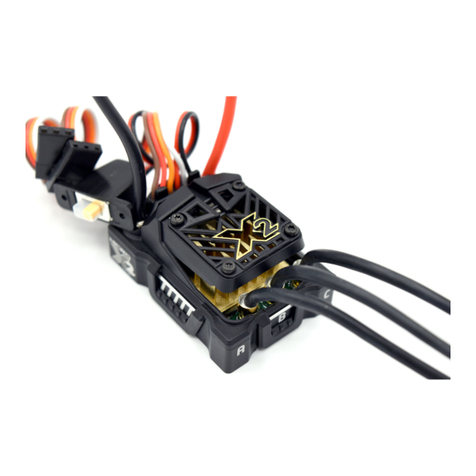
Castle Creations MAMBA XLX2 User manual

Castle Creations

Castle Creations MAMBA XLX2 User manual

Castle Creations MAMBA XL X User manual

Castle Creations

Castle Creations MAMBA XL X User manual

Castle Creations Pixie-7P User manual

Castle Creations

Castle Creations Pixie-7P User manual

Castle Creations Phoenix -25 User manual

Castle Creations

Castle Creations Phoenix -25 User manual

Castle Creations CC BEC 2.0 User manual

Castle Creations

Castle Creations CC BEC 2.0 User manual

Castle Creations MAMBA-25 User manual

Castle Creations

Castle Creations MAMBA-25 User manual

Castle Creations Pixie-20P User manual

Castle Creations

Castle Creations Pixie-20P User manual

Castle Creations Mamba Micro X2 User manual

Castle Creations

Castle Creations Mamba Micro X2 User manual

Castle Creations CC BEC User manual

Castle Creations

Castle Creations CC BEC User manual

Castle Creations HYDRA XLX2 User manual

Castle Creations

Castle Creations HYDRA XLX2 User manual

Castle Creations Phoenix-45 User manual

Castle Creations

Castle Creations Phoenix-45 User manual

Castle Creations PHOENIX-60 User manual

Castle Creations

Castle Creations PHOENIX-60 User manual

Castle Creations MAMBA XLX2 User manual

Castle Creations

Castle Creations MAMBA XLX2 User manual

Castle Creations CC BEC 010-0004-00 User manual

Castle Creations

Castle Creations CC BEC 010-0004-00 User manual

Castle Creations PHOENIX-10 User manual

Castle Creations

Castle Creations PHOENIX-10 User manual

Popular Controllers manuals by other brands

ABB Series user guide

ABB

ABB Series user guide

Frigicoll Kaysun KC-03.2 SPS Installation and owner's manual

Frigicoll

Frigicoll Kaysun KC-03.2 SPS Installation and owner's manual

MADRIX STELLA Technical Manual & Quick Start Guide

MADRIX

MADRIX STELLA Technical Manual & Quick Start Guide

Seltron WXD10B manual

Seltron

Seltron WXD10B manual

DINGO 4040P Reference manual

DINGO

DINGO 4040P Reference manual

Cepex PVC-U Installation and maintenance manual

Cepex

Cepex PVC-U Installation and maintenance manual

All Motion EZ Stepper Ez4Axis quick guide

All Motion

All Motion EZ Stepper Ez4Axis quick guide

Mitsubishi Electric MELSEC Q Series user manual

Mitsubishi Electric

Mitsubishi Electric MELSEC Q Series user manual

ECD OvenRIDER NL2+ Quick reference guide

ECD

ECD OvenRIDER NL2+ Quick reference guide

Robostar RcT Series Instruction and maintenance manual

Robostar

Robostar RcT Series Instruction and maintenance manual

Vimar ELVOX EKKO 350A Installer manual

Vimar

Vimar ELVOX EKKO 350A Installer manual

Smartgen HGM4020DC user manual

Smartgen

Smartgen HGM4020DC user manual

Victor VLINK V440 Startup guide

Victor

Victor VLINK V440 Startup guide

ACTUATECH GD15 instruction manual

ACTUATECH

ACTUATECH GD15 instruction manual

UCS RACK 230 Vac Use manual

UCS

UCS RACK 230 Vac Use manual

IAI EC-RR6*AH series instruction manual

IAI

IAI EC-RR6*AH series instruction manual

AudioCodes Mediant 9000 SBC Hardware installation manual

AudioCodes

AudioCodes Mediant 9000 SBC Hardware installation manual

HIMA HIMatrix F35 Safety manual

HIMA

HIMA HIMatrix F35 Safety manual

manuals.online logo
manuals.online logoBrands
  • About & Mission
  • Contact us
  • Privacy Policy
  • Terms and Conditions

Copyright 2025 Manuals.Online. All Rights Reserved.