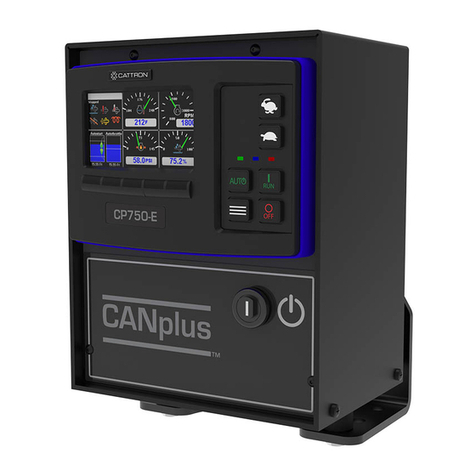
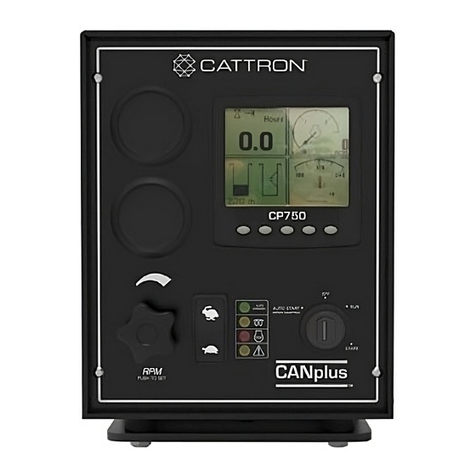
Cattron CANplus CP750-E User manual

CANplusTM CP750-E
Installation Manual
9M01-1000-A501-EN
Revision A
Due to continuous product improvement, the information provided in this document is subject to change without notice.
Cattron Support
For remote and communication control systems support, parts and repair, or technical support, visit us online at:
www.cattron.com/
contact
Cattron North
America Inc., 655 N River Rd NW, Suite A, Warren, OH 44483
CANplusTM CP750-E
Installation Manual
9M01-1000-A501-EN

CANplusTM CP750-E
Installation Manual
9M01-1000-A501-EN
Revision A
Any information furnished by Cattron™ and its agents is believed to be accurate and reliable. All specifications are subject to change without notice.
Responsibility for the use and application
of Cattron products rests with the end user since Cattron and its agents cannot be aware of all potential uses.
Cattron makes no warranties as to non-infringement nor as to the fitness, merchantability, or sustainability of any Cattron products for any specific
or general uses. Cattron Holdings, Inc., or any of its affiliates or agents shall not be liable for incidental
or consequential damages of any kind. All
Cattron products are sold pursuant to the Terms and Conditions of Sale, a copy of which will be furnished upon request. When used as a tradename
herein,
Cattron means Cattron Holdings, Inc. or one or more subsidiaries of Cattron Holdings, Inc. Cattron™, corresponding logos, and other marks
are
trademarks or registered trademarks of Cattron Holdings, Inc. Other marks may be the property of third parties. Nothing herein provides a license under
any Cattron or any third party intellectual property right.
Revision History
VERSION
DATE
NOTES
A
09-2022
Original Issue

CANplusTM CP750-E
Installation Manual
9M02-1000-A501-EN
Revision A
1.1.1 INTRODUCTION----------------------------------------------------------------------------------------------------------- 4
2MECHANICAL MOUNTING--------------------------------------------------------------------------------------------- 5
2.1 ALUFLEX™PANELS ------------------------------------------------------------------------------------------------------ 5
2.1.1 MOUNTING TEMPLATES ------------------------------------------------------------------------------------------------ 5
3CONNECTOR PINOUTS------------------------------------------------------------------------------------------------- 8
3.1 D21 TO ENGINE PIN OUT ------------------------------------------------------------------------------------------------- 9
3.2 AUTOSTART SWITCHES ------------------------------------------------------------------------------------------------ 10
3.3 TRANSDUCERS 1AND 2 ------------------------------------------------------------------------------------------------ 10
3.4 AUXIO -------------------------------------------------------------------------------------------------------------------- 10
3.5 MODBUS------------------------------------------------------------------------------------------------------------------- 11
4TYPICAL WIRING ------------------------------------------------------------------------------------------------------- 12
4.1 POWER AND GROUND -------------------------------------------------------------------------------------------------- 12
4.2 ECU POWER OUT ------------------------------------------------------------------------------------------------------- 12
4.3 STARTER POWER OUT ------------------------------------------------------------------------------------------------- 12
4.4 RESISTIVE SENDERS---------------------------------------------------------------------------------------------------- 12
4.5 CAN BUS TERMINATION ----------------------------------------------------------------------------------------------- 12
5TESTING ------------------------------------------------------------------------------------------------------------------- 13
6CERTIFICATIONS ------------------------------------------------------------------------------------------------------- 14
6.1 FCC PART 15 CERTIFICATION ---------------------------------------------------------------------------------------- 14
6.2 INDUSTRY CANADA CERTIFICATION --------------------------------------------------------------------------------- 15
7TECHNICAL SUPPORT ----------------------------------------------------------------------------------------------- 16
CANplusTM CP750-E
Installation Manual
9M02-1000-A501-EN
Revision A
1.1.1 Introduction
This manual provides general installation information for the CANplusTM CP750-E. This
manual’s target audience is professional installers for Engine Distributors and OEMs of engine-
driven machines. The engine manufacturer specific application information should be followed
for any detailed or specific requirements. Cattron sales and technical support are available at
www.cattron.com/contact to discuss specialized requirements or custom applications.

CANplusTM CP750-E
Installation Manual
9M02-1000-A501-EN
Revision A
2 Mechanical Mounting
The CP750-E control panel is adaptable to a wide variety of applications. The included engine
harness connector facilitates quick installation.
The following is a list of installation guidelines:
1) The panel mount shall be
a) Easily accessible by the operator.
b) Placed away from moving equipment.
c) Stable during equipment operation and transportation.
2) The vibration isolation mounts shall
a) Be properly installed.
b) Have normal movement.
c) Be located so the panel does not hit any adjacent structure during operation.
2.1 AluFlex™ Panels
AluFlex panel enclosures are constructed from extruded aluminum and powder-coated for
durability. The faceplate is aluminum or powder-coated galvanized steel and the backplate is
powder-coated galvanized steel. The enclosure is splash proof and includes condensation
drain holes in the bottom.
AluFlex panel isolation mounts are preinstalled to a heavy-duty mounting bracket with
mounting holes to accommodate various installations. Isolator mounts should not be twisted
when installed, as doing so will lead to premature failure.
2.1.1 Mounting Templates
The following two figures (not to scale) show the one-to-one hole template for the CP750-E
mounting bracket.

CANplusTM CP750-E
Installation Manual
9M02-1000-A501-EN
Revision A

CANplusTM CP750-E
Installation Manual
9M02-1000-A501-EN
Revision A

CANplusTM CP750-E
Installation Manual
9M02-1000-A501-EN
Revision A
3 Connector Pinouts
Depending on the panel options, the CP750-E has four (4) or six (6) connectors on the back,
as described in the following subsections.

CANplusTM CP750-E
Installation Manual
9M02-1000-A501-EN
Revision A
3.1 D21 to Engine Pin out
This connector contains the typical connections required for electronically or mechanically
governed engines.
The following is the pinout:
Pin Signal Comment Pin Signal Comment
A Pre-Heat 1 A @
System Voltage M Aux IN 2 Active Low
B B+ N Temp SW Active Low,
Normally Open
C Sender Return P Oil PSI Sender System Voltage
0 – 750 Ω
D Starter 10 A @
System Voltage R --- ---
E GND S Pulse2 Tach System Voltage
F CAN Shield T Oil PSI SW Active Low,
Normally Closed
G ECU/Solenoid 10 A @
System Voltage U CAN Low
H Temp Sender System Voltage
0 – 750 Ω V CAN High
J Ignition 1 A @
System Voltage W Aux IN 1 Active Low
K Pulse Tach System Voltage X Fuel Level
Sender
System Voltage
0 – 750 Ω
L --- --- --- --- ---

CANplusTM CP750-E
Installation Manual
9M02-1000-A501-EN
Revision A
3.2 Autostart Switches
Switches
1
SW2
2
SW1
3
GND
4
GND
3.3 Transducers 1 and 2
TR1
1
Tr1 Signal
2
Primary Tr -PWR
3
GND
4
GND
5
NC
TR2
1
Tr2 Signal
2
Secondary Tr -PWR
3
GND
4
GND
5
NC
3.4 AUXIO
AUXI/O
1
NC
2
AUXOUT 1
3
Alarm buzzer
4
AUXOUT 2
5
GND
6
NC
7
NC
8
AUX STOP
9
B+

CANplusTM CP750-E
Installation Manual
9M02-1000-A501-EN
Revision A
3.5 Modbus
MODBUS
1
NC
2
NC
3
RS485A
4
GND
5
RS458B

CANplusTM CP750-E
Installation Manual
9M02-1000-A501-EN
Revision A
4 Typical Wiring
The following subsections describe the typical engine interface wiring.
4.1 Power and Ground
The panel’s Power and Ground must connect directly to the battery posts and must not share
power and ground wiring with any other devices, especially any high current loads. The Power
line should have overcurrent protection in the form of current-limiting devices, fuses, circuit
breakers or fusible links to protect the harness wiring in the event of fault conditions.
4.2 ECU Power Out
The CP750-E can directly power the engine ECU.
4.3 Starter Power Out
The Starter Power Out is intended to power the starter relay, which is required. When power is
removed from the relay coil, the collapsing magnetic field generates a negative voltage surge.
Negative voltage surges can damage components. The CP750-E has protection against these
negative surges. However, it is still required to have a protection/suppression diode as close to
the relay as possible. Cattron recommends the use of relays that have this
protection/suppression diode built in. The protection/suppression diode must have sufficient
voltage ratings to survive and sufficiently suppress these negative voltage surges. Cattron
recommends a 1N4001 diode. Cattron sells a spike-suppressing diode kit (Part Number 630-
4007-77).
4.4 Resistive Senders
The Resistive Sender connections send system voltage out to the sender to obtain the current
value. It is required that the sender return connection be connected to a ground point (the
engine chassis, for example), as close to the sender as possible in order to get an accurate
measurement. If more than one sender is used, each sender should have a sender return
connected to a ground point near that particular sender. All sender returns should then be
connected together near the panel and the combined returns connected to the panel’s sender
return input.
4.5 CAN Bus Termination
CAN bus requires two 120 Ω termination resistors each at the extreme ends of the wiring
harness. Typically, the engine ECU provides the termination resistor on its end (see the engine
documentation to verify). The CP750-E has a termination resistor that can be turned off and on
as needed. The CP750-E’s default configuration has this termination resistor turned on.

CANplusTM CP750-E
Installation Manual
9M02-1000-A501-EN
Revision A
5 Testing
WARNING
DURING THE FOLLOWING PROCEDURE, CORRECT ANY PROBLEMS BEFORE PROCEEDING
TO THE NEXT STEP. CONTINUED TESTING MAY DAMAGE THE PANEL, HARNESS OR ENGINE.
Use the following testing procedure:
1) Turning the keyswitch ON initiates self-test; check all connections and battery polarity on
failure.
2) Test to verify overcurrent protection; identify and correct any wiring fault on failure.
3) Verify fuel run/stop solenoid or ECM energizes.
4) When the key is turned on, the fuel solenoid should be powered for until the display times
out (configurable).
a) The ECM should send CAN bus data as soon as the self-test completes.
b) Verify engine cranks when the key is turned to start; check all connections on failure.
5) If the engine does not start, check the fuel lines and bleed if necessary.
6) Verify gauges and indicators with the engine running.
a) See the CP750-E User Manual for details.
7) Test all safety shutdowns.
a) See the CP750-E User Manual for details.
8) Run the engine for an extended time to identify any temperature or connection problems.
!

CANplusTM CP750-E
Installation Manual
9M02-1000-A501-EN
Revision A
6 Certifications
6.1 FCC Part 15 Certification
This device complies with Part 15 of the FCC Rules. Operation is subject to the following two
conditions:
(1) this device may not cause harmful interference, and (2) this device must accept any
interference received, including interference that may cause undesired operation.
WARNING
CHANGES OR MODIFICATIONS NOT EXPRESSLY APPROVED BY THE PARTY RESPONSIBLE
FOR COMPLIANCE COULD VOID THE USER’S AUTHORITY TO OPERATE THE EQUIPMENT.
Note: This equipment has been tested and found to comply with the limits for a Class B digital device,
pursuant to Part 15 of the FCC Rules. These limits are designed to provide reasonable protection
against harmful interference in a residential installation. This equipment generates, uses and can
radiate radio frequency energy and, if not installed and used in accordance with the instructions, may
cause harmful interference to radio communications. However, there is no guarantee that interference
will not occur in a particular installation. If this equipment does cause harmful interference to radio or
television reception, which can be determined by turning the equipment off and on, the user is
encouraged to try to correct the interference by one or more of the following measures:
—Reorient or relocate the receiving antenna.
—Increase the separation between the equipment and receiver.
—Connect the equipment into an outlet on a circuit different from that to which the receiver is
connected.
—Consult the dealer or an experienced radio/TV technician for help.
!

CANplusTM CP750-E
Installation Manual
9M02-1000-A501-EN
Revision A
6.2 Industry Canada Certification
Note: These statements are required to be listed in both English and French Languages.
This device complies with Industry Canada licence-exempt RSS standard(s). Operation is
subject to the following two conditions: (1) this device may not cause interference, and (2) this
device must accept any interference, including interference that may cause undesired
operation of the device.
Le présent appareil est conforme aux CNR d'Industrie Canada applicables aux appareils radio
exempts de licence. L'exploitation est autorisée aux deux conditions suivantes : (1) l'appareil
ne doit pas produire de brouillage, et (2) l'utilisateur de l'appareil doit accepter tout brouillage
radioélectrique subi, même si le brouillage est susceptible d'en compromettre le
fonctionnement.
Other manuals for CANplus CP750-E
1
Table of contents
Other Cattron Control Panel manuals

Cattron
Cattron CANplus CP640 User manual

Cattron
Cattron CANplus CP1000 User manual

Cattron
Cattron DYNAGEN TR100 User manual

Cattron
Cattron LOFA MC704 Operating instructions

Cattron
Cattron DYNAGEN TR100-E User manual

Cattron
Cattron CANplus CP750 MODBUS Instruction sheet

Cattron
Cattron CANplus CP800 User manual

Cattron
Cattron CANplus CP750-E User manual

Cattron
Cattron LOFA EP250 Operating instructions

Cattron
Cattron CANplus CP750 MODBUS User manual