Technical instructions Mini Brio 2 X3 color v
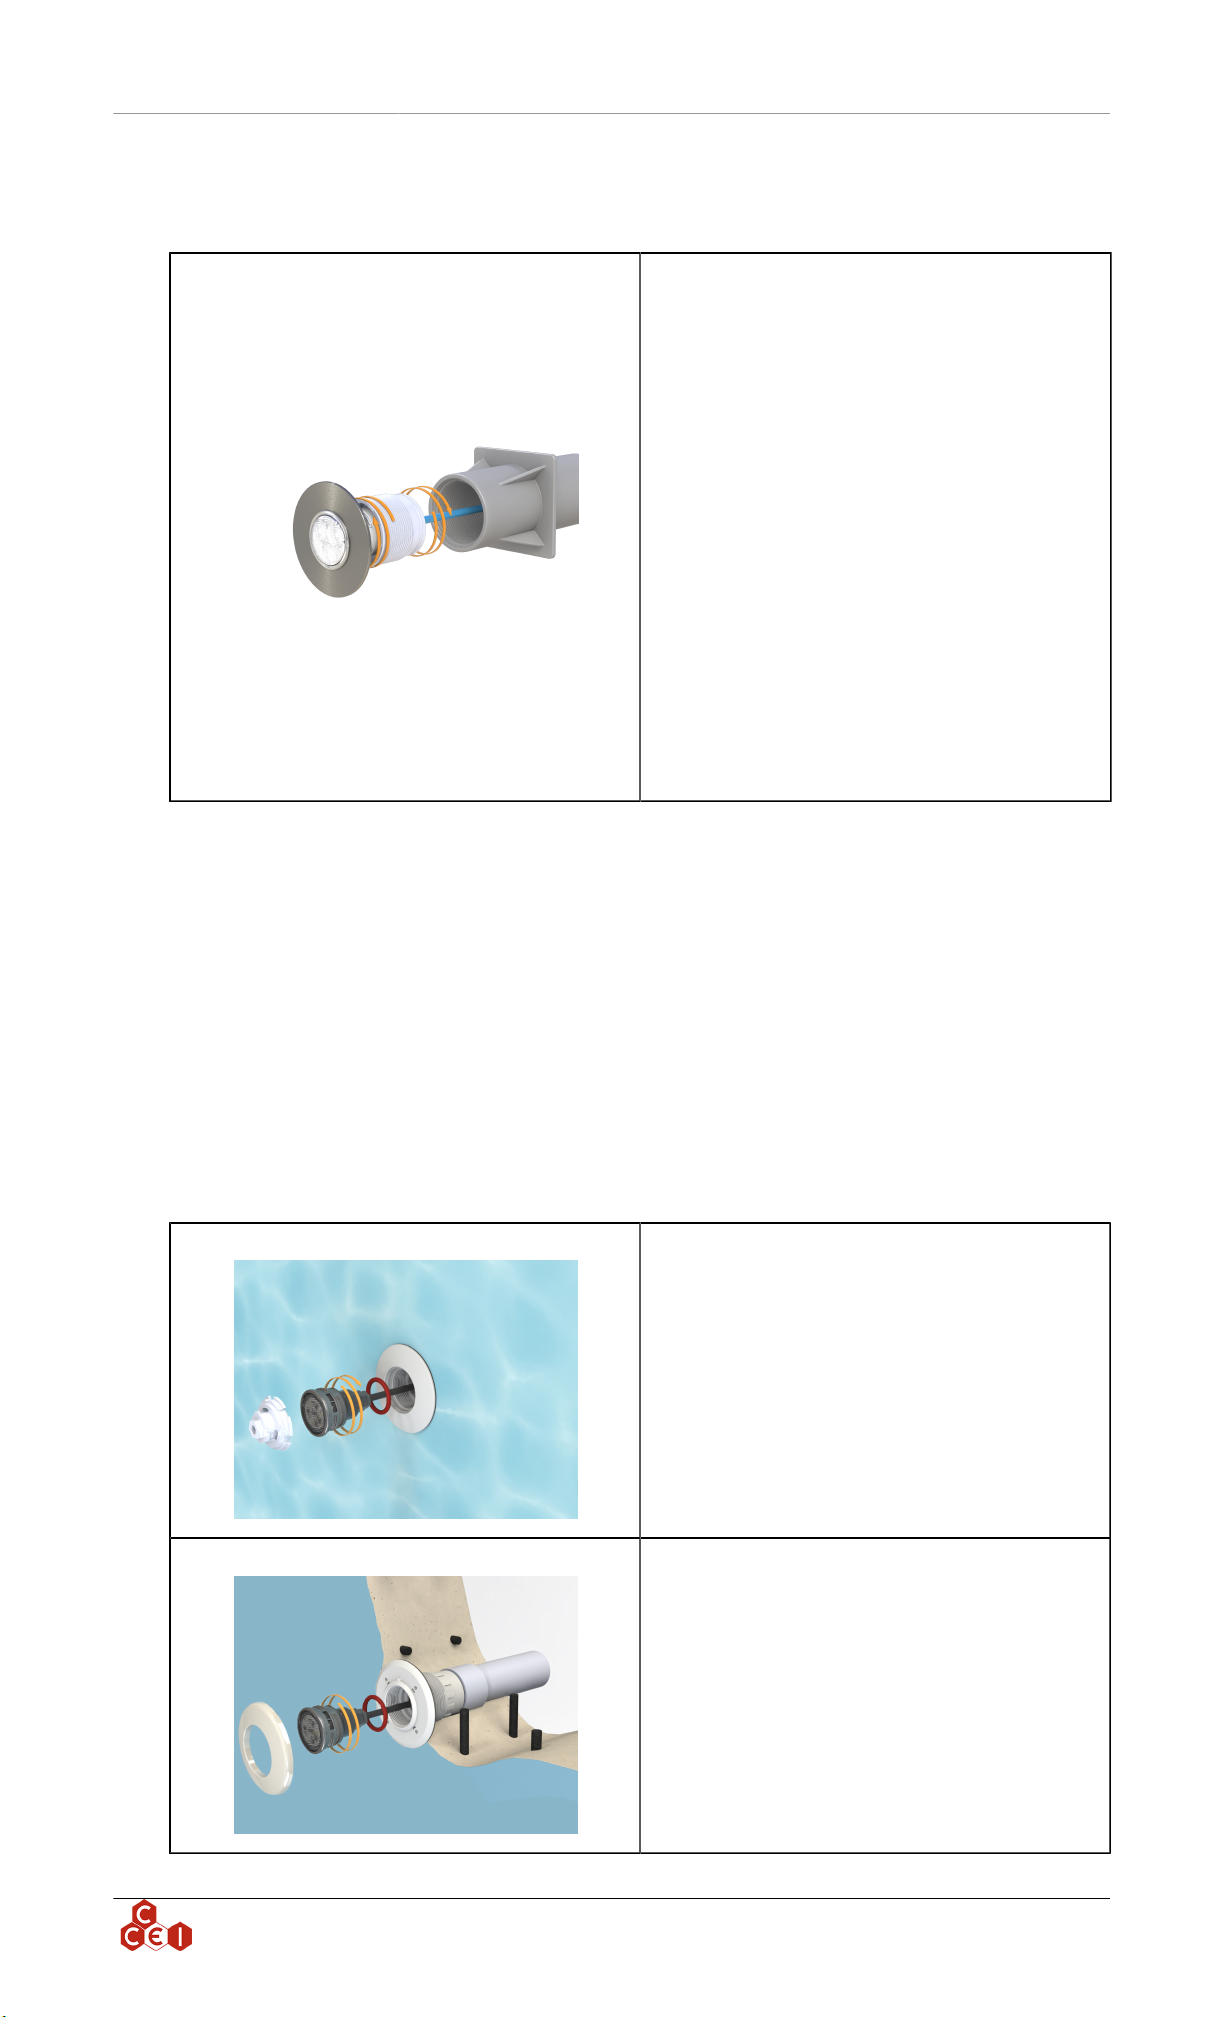
4.2. Installation in a standard 2'' feedthrough with PF10R294
2" standard threaded feedthrough :
1. Screw the fixture into the PF10R294 adapter
using the supplied clamping tool, then thread
the cable through the wall feedthrough
2. Push in and screw in the assembly
4.3. Installation in CCEI return fitting
When you install a Mini Brio 2 X3 color with a CCEI return fitting (see images below), you can mount
the O-ring between the Mini Brio 2 X3 color and the return fitting (use grease during installation).
Once you tighten thefixture, the O'ring allows for a dry casing between the rear of the fixture and the
connection box above the water level.
This increases the watertightness of the connection box and reduces the risk of freezing in the shaft.This
seal alone cannot guarantee the watertightness of the swimming pool but provides better protection for
the junction box. If the fixture is unscrewed when the water level is above it, the shaft will instanty
fill with water.
One-piece of concrete pool (PF10R291)
A. Set the O-ring in wall through and pass the ca-
ble
B. Push and screw it thoroughly
C. Use the tool included with the light to screw
it until it locks
Liner pool (PF10R292)
A. Set the O-ring in wall through and pass the ca-
ble
B. Push and screw it thoroughly
C. Use the tool included with the light to screw
it until it locks
D. Clip the supplied flange under wall though
ccei.ca 5