Ceado E37S User manual

MACINACAFFÈ
MANUALE D’USO E MANUTENZIONE
COFFEE GRINDER
USE AND MAINTENANCE MANUAL
MOULIN À CAFÉ
MANUEL D'UTILISATION
KAFFEEMÜHLE
BEDIENUNGS- UND WARTUNGSANLEITUNG
MOLINILLO DE CAFÉ
MANUAL DE USO Y MANTENIMIENTO
I
F
GB
D
E
E37S
E92

20
GB
COFFEE GRINDER models E37S and E92
Main parts (Fig. 1, Fig. 2, Fig. 3)
Motor housing
Bean hopper
Hopper lid
Grind regulating lever
Bean hopper shutter
Discharge opening
Start button
Filter-holder rest
Tray
Dosing buttons
Dosing display
10
9
8
7
6
5
4
3
2
1
11
Button + Button -
Button SET
Single shot selection
Double shot selection
ON-OFF (I-O) switch
16
15
14
13
12
Fig. 1 Fig. 2
2
8
7
1
3
9
6
5
10
4
18
17
19
20
Safety grid
Magnetic sensor
Safety arm
20
19
18
Special features of model E92
16
Special features of model E37S
SCC System (see also Fig. 5)
17

21
GB
SAFETY RECOMMENDATIONS
GENERAL INSTRUCTIONS
1. Read the following instructions carefully before using the appliance.
2. Installation and maintenance should be carried out by qualified personnel only.
3. This appliance is intended for professional use, and should therefore be used by adults and
qualified personnel only.
CLOSE ADULT SUPERVISION IS NECESSARY WHEN CHILDREN ARE NEAR THE
APPLIANCE.
4. This appliance is not intended for use by persons (including children) with reduced physical,
sensory or mental abilities, or without experience and knowledge, unless they have been
instructed in the use of the appliance and are under the supervision of a person who is
responsible for their safety. Children must be supervised to ensure that they do not play with
the appliance.
5. Never use this appliance for purposes other than grinding coffee beans. Any other use is
dangerous. Do not operate without hopper and lid in place.
6. Always work under safe conditions: do not use the appliance with wet hands or feet. Do not
use outdoors.
7. Keep the original package for possible future use. It is the most suitable protection against
damage during transport.
8. In case of fire use CO2extinguishers. Do not use water or powder extinguishers.
9. Never place the appliance in water!
10. Do not disassemble the appliance or attempt to perform any repairs inside it.
11. Always unplug the appliance before performing any maintenance or cleaning and when it is not
in use.
Fig. 3
15
14
12
11
13 12
LED

22
GB
12. Never pull the appliance by the cord to move it. Never unplug it by pulling the cord or touching
it with wet hands.
If the power cable is damaged it must be replaced by the manufacturer or by the
technical assistance service, or at any rate by a person with similar qualifications, so
as to prevent all risks.
13. WARNING: Never place any utensils, metal or other hard materials, in the bean hopper. This
is dangerous and could cause damage.
14. Do not use the appliance if it is damaged or has loose parts. Immediately contact an authorized
Service Center.
The appliance complies with European regulation CE 1935/2004.
Note: Due to statistical tests on the product in the factory, some coffee grounds may be found in the appliance.
SAVE THESE INSTRUCTIONS!
INSTALLATION
Comply with the Safety recommendations indicated above and hereafter when installing the
appliance.
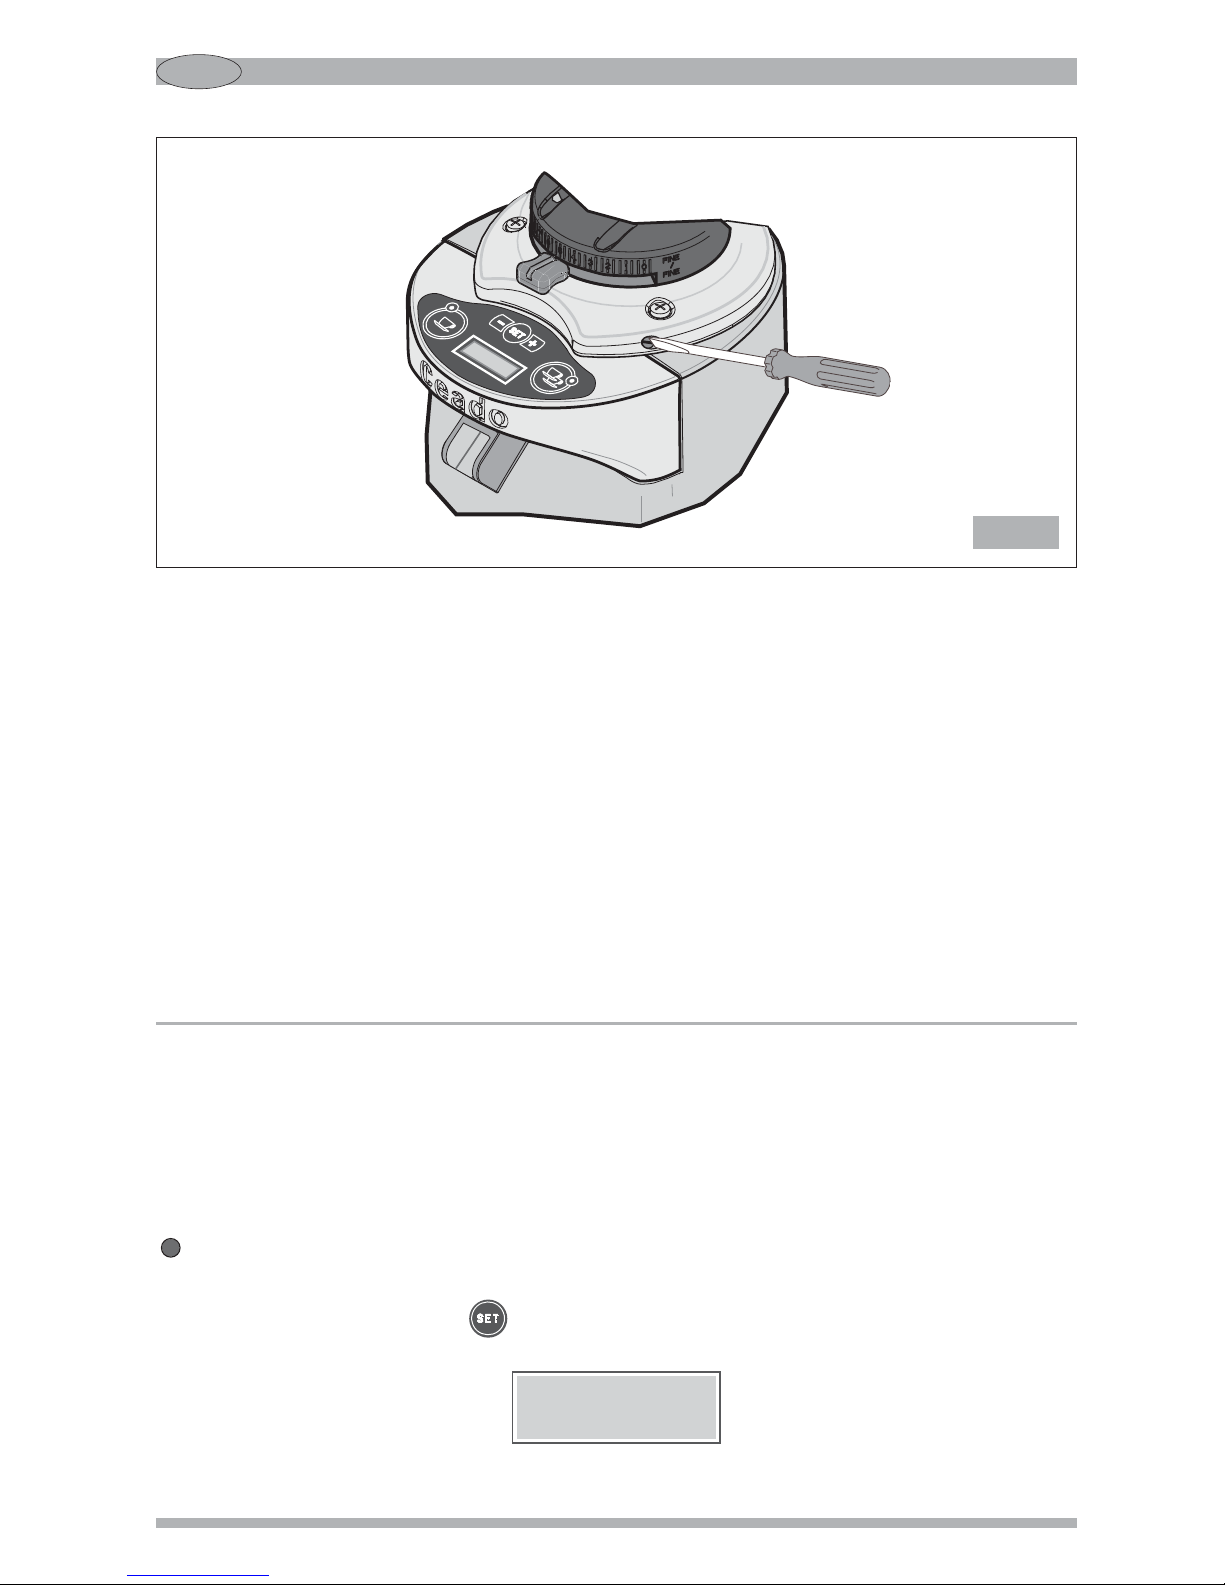
For the installation of the appliance, qualified personnel must be present who are able to check the
fineness of the grind.
1. Make sure that the mains voltage is as indicated on the rating label of the appliance and that
the electrical system is grounded and equipped with a switch.
2. Install the appliance in a DRY, PROTECTED place, far from water sprays or splashes, heat
sources, open flames and inflammable substances.
Place the appliance on a flat, horizontal, stable surface where it cannot tip over.
3. Put the tray in its housing to keep the work area as clean as possible.
Before connecting the plug to the power socket, make sure that the ON-OFF switch
(16 Fig. 2) is in position “O” (OFF).
4. Plug the power cable into a socket protected by a suitably rated circuit breaker (MCB) or fuses.
Do not use an adaptor plug.
5. Stretch the power cable out to full length. Do not let it pass over sharp edges or hot surfaces.
Do not let oil spill on it. Do not let the power cable hang loose from the counter on which the
appliance stands.
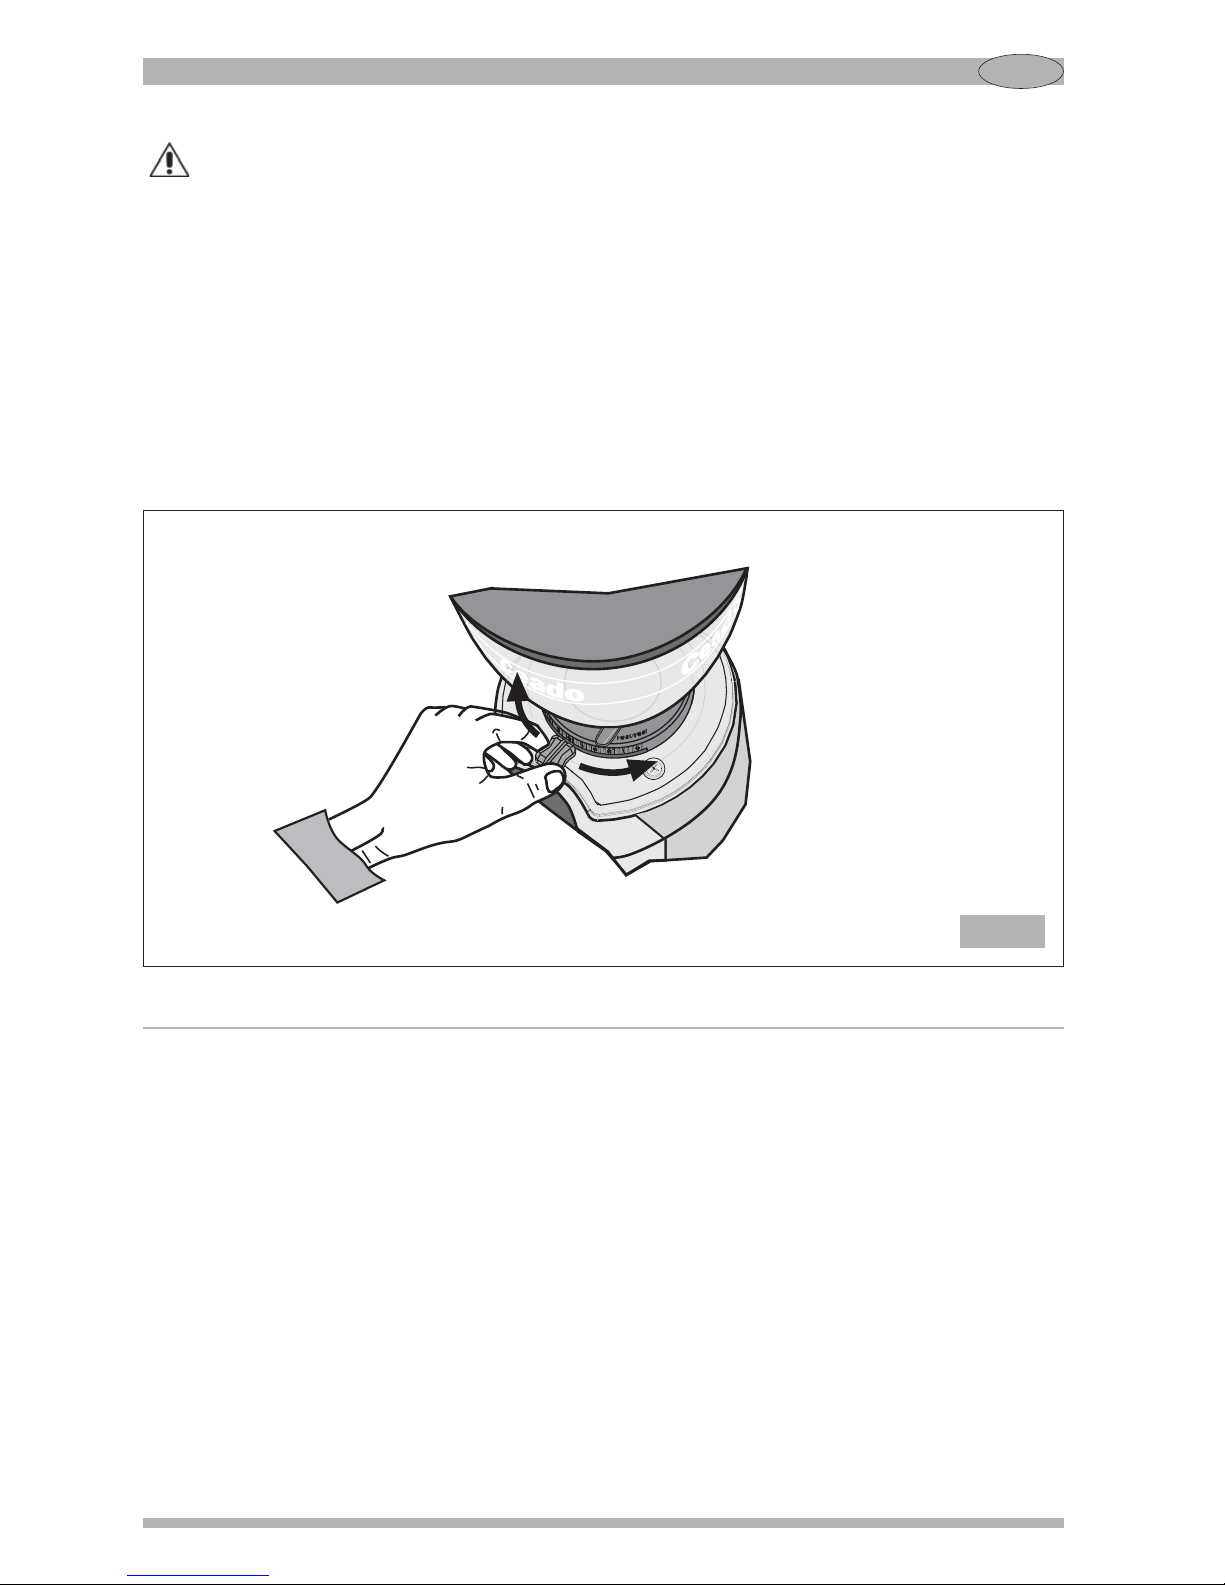
6. Make sure that the bean hopper is correctly positioned and that its shutter (5 Fig. 2) is
completely open (to the last click).
The EC declaration of conformity for this appliance is available in the Products section of our
website www.ceado.com.

23
GB
PREPARATION AND USE
Switching ON
Fill the hopper with coffee beans and close the lid.
Turn the ON-OFF switch (16 Fig. 2) to position “I”.
When the appliance is switched on the display will show:
Automatic operation
To grind the amount of coffee for a single shot press the button . The respective LED
will light up and the display will show:
meaning that the appliance is ready to grind for 2 seconds. With this factory setting, the grinder
will distribute about 8 grams of medium-grain ground coffee.
Note: The quantity of ground coffee which is distributed with this setting may noticeably change,
according to the kind of coffee blend and origin, the size of the coffee beans and the type of
roast, besides the weather conditions, the grinding settings and the mains frequency.
To grind the amount of coffee for a double shot press the button . In this case too the
respective LED will light up and the display will show:
meaning that the appliance is ready to grind for 4 seconds. With this factory setting, the grinder
will distribute about 16 grams of medium-grain ground coffee.
Note: The quantity of ground coffee which is distributed with this setting may noticeably change,
according to the kind of coffee blend and origin, the size of the coffee beans and the type of
roast, besides the weather conditions, the grinding settings and the mains frequency.
Whenever the grinding coarseness is regulated you must set a new operating time so as to
distribute the right amount of coffee required (see Par. Setting the grinding times, page 27).
Coffee Grinder
CEADO
Double shot 4.0
READY
Single shot 2.0
READY
3
2
1

24
GB
Manual operation
To grind coffee continuously, without any time setting, press the buttons and
simultaneously.
Both LEDs will light up and the display will show:
Taking out the coffee
When the appliance is READY, to start grinding press the start button (7 Fig. 1) with the filter
holder and keep the filter holder in position until distribution is ended. During operation the
respective LED flashes and the message WORKING appears on the display.
Note: Only in automatic operation, the display will also show the time remaining to complete
distribution.
At the end of distribution the appliance returns to its initial READY status, waiting to grind a new shot
the same as the last one set.
Note: When the motor is running without grinding coffee beans, it may happen that a metallic noise
is heard coming from the spout. It is normal and it is due to the vibration of the inside flap,
and it will stop when starting grinding coffee beans.
3
4
Manual dose
READY
DISTRIBUTED SHOT COUNTERS
The coffee grinder has a general counter in which it stores the number of shots distributed since it
left the factory (this value cannot be reset) and a partial counter for the number of shots distributed
since it was last reset by the user. For each type of counter, a distinction is made between the
number of single and double shots.
Note: Due to statistical tests on the product in the factory, some of the counters may be different
from zero.
Reading the counters
Press the button . The display will show first the partial counter of the total shots (single shots
+ double shots + manual doses):
By pressing the button or you can also distinguish between the single or double shots
distributed since the last reset:
Total shots from
reset

25
GB
or
Note: The value of the total shots may be different from the sum of the value of the single shots
plus double the value of the double shots, because it also allows for the shots distributed with
manual operation.
To reset a counter, hold down the button for 3 seconds until you hear a double beep.
To read the main counter, press the button again. The display will show:
In this case too, by pressing the button or can also distinguish between the single or double
shots distributed since the last reset:
or
Note: After 5 seconds without being used the system automatically leaves the counter screen and
returns to normal operation.
Single shots
ground
Double shots
ground
Total shots
ground
Sing. shots from
reset
Doub. shots from
reset
SETTINGS
In order to achieve a proper overall setting of the espresso coffee grinder, always proceed as follows:
1. Set the grinding adjustment (coarse-fine, see Par. Regulating grinding, page 25).
2. Adjust the appearance of the ground coffee (using, if necessary, the SCC system - see
Par. SCC system, page 26).
3. Set the dose weight, adjusting the grinding time (see Par. Setting the grinding times, page 27).
Note: Adjustments at points 1 and 2 affect the weight of the shot.
REGULATING GRINDING
When it leaves the factory the machine has a standard setting, but it may be necessary to adjust
grinding further due to various external factors such as the type of mixture used, the humidity,
temperature, or the particular distribution requirements of the espresso coffee machine.
The degree of grinding may be further corrected by shifting the special lever (4 Fig. 1) at the base
of the hopper (see Fig. 4).

26
GB
Fig. 4
To obtain a finer grind,
move the lever in a
counter-clockwise
direction
To obtain a coarser grind,
move the lever in a
clockwise direction
Always take care to move the lever with the motor turning and empty (without coffee between
the burrs).
To do this you can operate the shutter (5 Fig. 2) at the base of the hopper to stop or resume the
dropping of the coffee beans into the grinding mechanism.
•To obtain a finer grind, move the lever in a counter-clockwise direction.
•To obtain a coarser grind, move the lever in a clockwise direction.
Remember that the grind is related to the coffee extraction time which must be 25-30 seconds
for a cup of 25-30 ml. If the extraction time is too long, the grind must be coarser; if it is too short,
the grind must be finer.
NOTE! It is recommended to grind small amounts of coffee, letting the burrs empty with every
regulating attempt, by opening and closing the shutter each time.
SCC SYSTEM (available only on model E37S)
SCC (Static and Clumping Control) system is designed to enable the slightest tweaks of the
appearance of the ground coffee, and, when necessary, to work on issues like static and clumping,
which are in connection with humidity, temperature, composition of the coffee blend etc.
Note: Some coffee blends or origins are more prone than others to this kind of phenomenon.
SCC setting
In order to adjust the appearance of the coffee using the SCC system, use a small slotted
screwdriver and act, by small degrees, on the adjusting screw in the front-right side of the head
(see Fig. 5).
Follow this procedure:

27
GB
Fig. 5
• Close completely the flap (turning counter-clockwise the slotted screwdriver) to compact the
remaining ground coffee.
• Pull a double shot.
• Thoroughly clean the discharge opening with the brush provided.
• Adjust the SCC system through the adjusting screw, until reaching the desired appearance of
the ground coffee; note that, as it always happens when changing any setting, the very first shots
won’t immediately conform to the new adjustments.
• Adjust the weight of the dose.
Note: From an halfway/neutral position of the SCC system: turning the adjusting screw clockwise
you open the flap and reduce clumping; turning the adjusting screw counter-clockwise you
close the flap and reduce static.
In order to achieve a better adjustment, it’s advisable to use the double shot.
SETTING THE GRINDING TIMES
Note: Due to the shape and design of the burrs particularly in model E92, for the first use only, a
short run-in period of grinding coffee beans is necessary to obtain a consistent weight of the
dose.
Single shot
To change the grinding time for both the single and the double shot, you have to enter the settings
menu by holding down the button for 3 seconds until you hear a beep and the display will show:
Set time
single shot

GB
28
To set the time for the single shot press . The display will show the currently set time:
Press the button or to change this time with a precision of 0.1 seconds, then confirm your
choice with the button . If no button is pressed for 10 seconds, no change will be made.
Note: The minimum settable time is 0.1 second while the maximum, for the single shot, is
99.9 seconds.
Double shot
To change the grinding time for the double shot, you have to enter the settings menu and, when the
display shows:
Press the button once. The display will show:
At this point, by pressing the button you can set the grinding time for the double shot, in the
same was as explained above for the single shot.
Note: The minimum settable time is still 0.1 second while the maximum, for the double shot, is
99.9 seconds.
Leaving the settings menu
To leave the settings menu and return to READY status, when you are on one of the two screens
for setting the shot time:
or
press the button until you see:
Press the button to confirm.
Exit
Use button + -
t. single 2.0
Set time
single shot
Set time
double shot
Set time
double shot
Set time
single shot

GB
29
OTHER SETTINGS
Hold down the button for 3 seconds to enter the settings menu, as described in the previous
paragraph. The display will show the first screen:
Starting from this screen, you can perform the following operations:
Selecting the menu language
Press the button twice to display the page:
Press the to confirm. The display will show the screen:
Press the button or to select one of the 5 languages: Italian, English, Spanish, German
and French. Press the button to confirm.
Start button setting
According to the factory setting, the appliance distributes coffee only as long as the start button
(7 Fig. 1) is held down.
If this button is released during distribution of a shot, the motor stops, the system goes into pause
status and the display shows the time remaining to complete the shot and the message
“WORKING”. In addition, to highlight the fact that the distributed shot has not been completed, the
LED for the shot selected flashes. At this point, to complete the dose just press the start button
(7 Fig. 1) again with the filter-holder and keep it pressed until the shot is completed.
Instead, if you no longer wish to complete the dose, press one of the two shot buttons
or to cancel the current shot and return the system to READY position.
However it is possible to change this function by programming the start button (7 Fig. 1) in pulse
mode. With this setting the distribution of coffee will begin with the simple pressing of the start
button (7 Fig. 1) and will end only at the end of the time set for the distribution of the required shot.
Set time
single shot
Set
Language
Use buttons + -
Language English

30
GB
To change the operating mode of the start button, press the button five times until this
screen is displayed:
Press to confirm. The display will show:
Press the button or to set the function ON or OFF.
Leaving the settings menu
To leave the settings menu and return to READY status, press the button six times until this
screen is displayed:
Press the button to confirm.
Exit
Use buttons + -
pulse OFF
Set
start button

31
GB
WARNINGS AND SUGGESTIONS
Never operate without hopper and lid in place.
Make sure that shutter is completely open (to the last click) (see Fig. 6).
Do not let the coffee grinder run long without coffee
beans in the hopper; if this were to happen it would
cause tripping of the motor thermal overload
protection. In that case it is necessary to wait until
the overload protection is reset before starting to
grind coffee again.
For this reason, never leave the pack of coffee
beans sitting in the hopper as this prevents you
seeing how many coffee beans are left.
When the coffee grinder is not to be used during the
time when the business is closed, it should always
be switched off with the main switch.
Put only coffee beans in the hopper, not
ready-ground coffee or other
substances. Fig. 6
SAFETY GRID E92
Electronic espresso coffee grinder model E92 is equipped with a removable safety grid (18 Fig. 1).
Before operating the grinder, place the safety grid inside the bean hopper, slotting it into the only
position so that the magnetic sensor (19 Fig. 1) is in contact with the end of the safety arm (20 Fig. 1).
Note: Coffee grinder will not start if safety grid is not properly in place.
Any attempt to by-pass the safety device and use the coffee grinder without its safety
grid in place may cause personal injury and/or damage to the appliance.

32
GB
CLEANING
It is important to keep the appliance clean and in good working order to ensure optimum quality of
the products and long life of the appliance.
Always disconnect the plug of the appliance from the power socket before cleaning it.
Clean the motor housing and the tray with a cloth dampened with water or alcohol or with a
spray neutral solution.
Wipe with a dry cloth.
Never put the appliance under running water and never immerse in water.
Once the hopper has been removed it can be washed with lukewarm water and neutral soap,
then rinse it and dry well.
Always clean the discharge opening with the brush provided (Fig. 7).
Fig. 7
MAINTENANCE
Maintenance must be carried out exclusively by qualified technical personnel.
Care for the mechanical and electrical parts of the appliance is indispensable in order to guarantee
their safety and efficiency. If any parts need replaced, authentic spare parts must always be used.
The burrs are subject to normal wear and the manufacturer recommends replacing them roughly
every 600 kg for model E37S and every 1000 kg for model E92. This quantity may noticeably
change according to the kind of coffee blend/origin and the type of roast.

33
GB
TROUBLESHOOTING
(See Table on the next page)
In case of any malfunction, defect of the appliance or if you suspect any breakage after a fall, unplug
the appliance immediately.
If you are unable to solve the problem referring to the table below, contact an Authorized Service
Centre.
Only qualified experts should repair the appliance.
We are not liable for any damage caused by repairs not made correctly and/or by unauthorized
personnel. In these cases the warranty does not apply.
The efficiency of the burrs is important in order to guarantee the quality of the grind as regards size
and the temperature of the ground product; these parameters may have a considerable influence on
the success of a good espresso coffee.

34
GB
Problem
The appliance does not turn
on.
•Make sure it is plugged in.
•Make sure the safety circuit breaker is closed.
•Check that the main switch of the appliance is ON.
•If the problem occurs itself after a long period of intensive
use or overfilling, the motor could be in thermal protection
lock! Wait at least 20 minutes and try again. The waiting
time can be reduced by putting the appliance in a cool
place.
•Try grinding very coarsely for a few seconds, then return to
the correct setting.
•Call the Technical Assistance Service to check and change
the burrs.
•Check that the caffee discharge opening is free.
The coarseness of the grind
is not uniform.
The coffee is not coming out
of the discharge opening
correctly.
•If the motor gets blocked due to incorrect regulation of
grinding or to the presence of a foreign body in the burrs,
try increasing to the coarsest grain size by turning the
regulating lever clockwise (4 Fig. 1).
If this is not enough, switch off the appliance, disconnect
the plug from the socket and consult technically qualified
personnel.
The motor gets blocked.
Solution
•Check the correct position of the safety grid.
The coffee grinder doesn’t
start (only model E92).

THE MANUFACTURER RESERVES THE RIGHT TO MAKE ANY ALTERATIONS TO
THE APPLIANCE WITHOUT NOTICE
WARRANTY
This product has been manufactured to a high quality standard.
This product is guaranteed against faulty materials and workmanship for a period of three years from
the date of purchase when it is used according to the instructions in this instruction and maintenance
manual.
Please retain any receipt as proof of purchase.
During the warranty period, this product can either be repaired or replaced, at the manufacturer's
discretion, at no additional cost.
If the products needs maintenance or repairs during the warranty period, contact your retailer for
shipping instructions. The product should be shipped in its original package or other suitable
packing.
The warranty does not apply in case of neglect, misuse, abuse or unauthorized repairs. This
warranty does not apply to parts subject to deterioration through normal use such as the burrs. This
warranty does not apply to damage caused by foreign objects, substances or accident.
The warranty is limited to the costs of repair or replacement of the product or its defective parts, or
an amount equivalent to the price paid for its purchase. No additional requests of damages will be
available to the purchaser.
This guarantee is in addition to and does not affect your statutory rights.
The manufacturer will not accept any liability and the warranty will be invalidated if there is a
failure to follow these instructions and the technical and/or safety standards in the country where
the appliance is to be used.
In any case these instructions cannot cover every possible event and the user is recommended to
use the appliance responsibly.
DISPOSAL
Correct disposal of this product (waste electrical and electronic equipment)
(Applicable in the European Union and other countries with separate
collection systems in conformity with European Directive 2002/96/EC)
This product has been made from high-quality parts and materials, which
can be re-used and recycled.
Therefore, do not throw the product away with normal household waste
at the end of its working life. Take it to a collection point for recycling
electrical and electronic devices. This is indicated by this symbol on the
product and in the operating manual.
Please contact your local government office for information about the
exact location of the closer collection point.
35
GB

D
52
KAFFEEMÜHLE E37S und E92
Hauptkomponenten (Abb. 1, Abb. 2, Abb. 3)
Untersatz
Kaffeebohnenbehälter
Kaffeebohnenbehälterdeckel
Einstellhebel zum Mahlen
Kaffeebohnenbehälterverschluss
Auswurföffnung
Starttaste
Auflage des Filterbehälters
Auflage
Dosiertastatur
Dosierdisplay
10
9
8
7
6
5
4
3
2
1
11
Taste + Taste -
Taste SET
Wahl 1 Tasse
Wahl 2 Tassen
ON-OFF (I-O)-Schalte
16
15
14
13
12
Abb. 1 Abb. 2
2
8
7
1
3
9
6
5
10
4
18
17
19
20
Sicherheitsgitter
Magnetsensor
Sicherheitsstange
20
19
18
Besonderheit des Modells E92
16
Besonderheit des Modells E37S
SCC-System (siehe auch Abb. 5)
17

53
D
SICHERHEITSVORSCHRIFTEN
ALLGEMEINE HINWEISE
1. Die folgenden Anweisungen vor der Benutzung des Gerätes gründlich lesen.
2. Die Installation und sämtliche Wartungsarbeiten dürfen ausschließlich vom spezialisierten
Personal durchgeführt werden.
3. Dieses Gerät ist für den Profigebrauch bestimmt und darf daher nur von erwachsenen,
qualifizierten Personen benutzt werden.
KINDER, DIE SICH IN DER NÄHE DES GERÄTES AUFHALTEN, STETS ÜBERWACHEN.
4. Dieses Gerät darf nicht von Personen (inklusive Kinder) mit geringen körperlichen,
sensorischen bzw. geistigen Voraussetzungen sowie ohne Kenntnisse benützt werden, außer
sie werden zum Einsatz des Gerätes ausgebildet und zu ihrer Sicherheit von einer zuständigen
Person kontrolliert. Kinder müssen beaufsichtigt werden, damit sie nicht mit dem Gerät spielen.
5. Dieses Gerät darf nicht für zweckwidrige Einsätze benützt werden, sondern ausschließlich zum
Mahlen von Kaffee in Bohnenform. Jeder andere Einsatz ist gefährlich. Das Gerät darf nicht
ohne den Kaffeebohnenbehälter und seinen Kaffeebohnenbehälterdeckel benützt werden.
6. Stets für sichere Arbeitsbedingungen sorgen und das Gerät auf keinen Fall mit nassen Händen
bzw. Füßen und niemals im Freien benutzen.
7. Die Originalverpackung für eine eventuelle zukünftige Verwendung aufbewahren, denn sie
bietet den besten Schutz vor Stößen während des Transports.
8. Bei Bränden Kohlendioxyd- Feuerlöscher (CO2) verwenden. Kein Wasser bzw.
Pulverfeuerlöscher einsetzen.
9. Das Gerät nicht in Wasser eintauchen!
10. Es ist strengstens untersagt, das Gerät auseinanderzubauen bzw. Eingriffe an den Innenteilen
vorzunehmen.
11. Vor Durchführung von Wartungs- und Reinigungsarbeiten und wenn das Gerät nicht gebraucht
wird, stets den Stecker aus der Steckdose ziehen.
Abb . 3
15
14
12
11
13 12
LED

D
54
12. Das Gerät nicht verschieben, indem man ihn am Kabel zieht. Den Stecker niemals durch
Ziehen am Kabel bzw. mit nassen Händen aus der Steckdose nehmen.
Wenn das Stromkabel beschädigt ist, muss dieses, um jegliches Risiko zu vermeiden,
vom Hersteller bzw. seinem technischen Kundendienst oder einer ähnlichen,
ausgebildeten Person gewechselt werden.
13. ACHTEN SIE DARAUF, keine Gegenstände, Metalle bzw. andere harte Materialien in den
Kaffeebohnenbehälter zu geben. Dieser Vorgang könnte gefährlich sein und Schäden
verursachen.
14. Setzen Sie das Gerät niemals mit beschädigten bzw. mit lockeren Bauteilen ein, sondern
wenden Sie sich sofort an einen befugten Kundendienst.
Das Gerät entspricht der europäischen CE-Verordnung 1935/2004.
Anmerkung: Aufgrund von statistischen Produktkontrollen könnte das Gerät mit Kaffeeresten geliefert werden.
DIE VORLIEGENDE BEDIENUNGSANLEITUNG AUFBEWAHREN!
INSTALLATION
Vor der Installation des Gerätes muss man die zuvor genannten Sicherheitsvorschriften befolgen.
Zur Installation des Geräts muss ein ausgebildetes Personal anwesend sein, das in der Lage ist,
den Mahlgrad des Kaffees zu kontrollieren.
1. Sich vergewissern, dass die Netzspannung mit den Geräteschilddaten übereinstimmt und dass
die elektrische Anlage geerdet und mit einem Differentialschalter ausgestattet ist.
2. Eine TROCKENE, GESCHÜTZTE ARBEITSPOSITION weit weg von Wasserspritzern,
Wärmequellen, offenen Flammen und entzündbaren Stoffen wählen.
Das Gerät kippsicher auf eine waagrechte, stabile Fläche stellen.
3. Die Auflage in ihrem Sitz positionieren, um den Arbeitsbereich so sauber wie möglich zu halten.
Bevor der Stecker in die Steckdose gesteckt wird muss man sich vergewissern, dass sich
der ON-OFF-Schalter (16 Abb. 2) auf "O" (ausgeschaltet) befindet.
4. Das Stromkabel in eine mit Wärmschalter oder Sicherungen geschützten Steckdose einführen.
Am besten keine Adapter und Mehrfachstecker verwenden.
5. Das Speisekabel ausstrecken. Dieses darf nicht über scharfe Kanten oder heiße Oberflächen
laufen. Den Kontakt des Kabels mit Öl vermeiden.Vermeiden, dass das Speisekabel frei von
der Fläche, auf die das Gerät gestellt wurde, herunterhängt.
6. Sich vergewissern, dass der Kaffeebohnenbehälter korrekt aufsitzt und der
Kaffeebohnenbehälterverschluss (5 Abb. 2) vollständig bis zum Anschlag offen ist.
Die CE-Konformitätserklärung dieses Geräts steht im Abschnitt Produkte unserer Web-Site
www.ceado.com zur Verfügung.
This manual suits for next models
1
Table of contents
Languages:
Other Ceado Coffee Grinder manuals