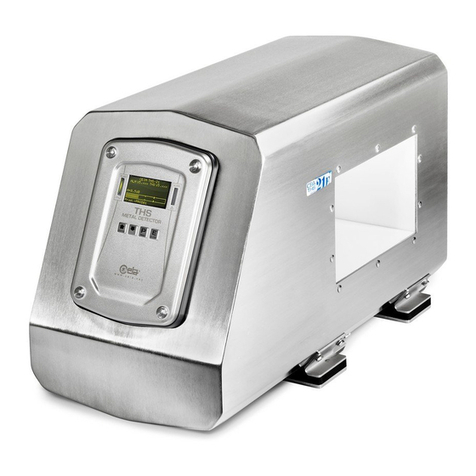
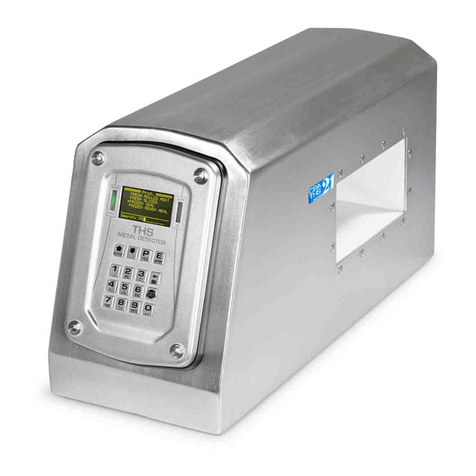
Ceia THS/21E Owner's manual

FI002K0021v1100UK – THS/21E and THS/21 Programming Manual
1
Industrial Metal Detectors
THS/21E & THS/21
Programming Manual
Document code Date Software version
FI002K0021v1100UK 20/12/2011 THSV5401 – ALMV5400
Read this Manual carefully before installing, operating or carrying out maintenance on the device. Keep the Manual in a safe
place for future reference, and in perfect condition. This Manual must accompany the device described therein in the
case of change of ownership, and until the device is broken up.

FI002K0021v1100UK – THS/21E and THS/21 Programming Manual
2
SYMBOLS
The equipment is marked with this symbol wherever the user should refer to this Manual in order to avoid possible
damage. The same symbol appears in the Manual at points where warnings or particularly important instructions,
essential for safe, correct operation of the device, are given.
The equipment is marked with this symbol in the areas where there is dangerous voltage. Only trained maintenance
personnel should carry out work in these areas. The same symbol appears in the Manual at points where warnings
essential for safe, are given.
This symbol appears in the Manual at points where suggestions, additional information or other relevant notes are given.
REVISION RECORD
Revision Date Author Reference Description
1000 09/11/2010 TP2 – SP - First Emission – Upgrading FI025GB2K8v6
1001 06/04/2011 TP2 – SP - Web server, Bin lock, USB management
1100 07/10/2011 TP2 – SP - Upgrade to THSV5401

FI002K0021v1100UK – THS/21E and THS/21 Programming Manual
3
CONTENTS
1SAFETY INSTRUCTIONS – WARNINGS.......5
1.1General warnings......................................5
1.2Correct use of the device..........................5
2PROGRAMMING .............................................6
2.1Access to Programming............................6
2.1.1Factory preset configuration.......................6
2.1.1.1Access levels.....................................6
2.1.1.2Remote Communication.....................7
2.2Administrator functions .............................7
2.3Configuration of the system by the
Administrator............................................. 7
2.3.1Programming..............................................7
2.3.2Users..........................................................7
2.4General points on programming...............8
2.4.1Keypad functions........................................8
2.4.2Entering the username...............................9
2.4.3Entering the password..............................10
2.4.4Restricted login.........................................10
2.5Exit from programming ...........................11
2.5.1Exit from programming.............................11
2.5.2Time out ...................................................11
2.6Defining a new user................................11
2.7Quick Access menu programming
procedure................................................12
2.8Programming the Metal Detector
according to the kind of product..............13
2.8.1Procedure for minimizing the "product
effect" .......................................................13
2.8.2Procedure for automatic product
acquisition ................................................13
3PROGRAMMING PARAMETERS................. 15
3.1Administrator .......................................... 15
3.1.1Remote passwords .................................. 16
3.2Reset ...................................................... 17
3.3Product selection.................................... 17
3.4Products.................................................. 18
3.4.1Save prod.to USB .................................... 20
3.4.2Load prd. from USB ................................. 22
3.5Autolearn ................................................ 24
3.6Autolearn-advanc ................................... 25
3.7Detection................................................. 26
3.8Ejection................................................... 28
3.9Counters................................................. 32
3.10Configuration .......................................... 33
3.10.1Compatibility chk...................................... 33
3.11Configuration-adv................................... 37
3.11.1Network config. ........................................ 40
3.11.2Motor config............................................. 50
3.12Barcode reader....................................... 53
3.13I/O Status................................................ 55
3.13.1Outputs .................................................... 55
3.13.2Inputs....................................................... 55
3.13.3Measures................................................. 56
3.13.4Variables.................................................. 56
3.14Diagnosis managem............................... 57
3.15MD Test.................................................. 63
3.16Fail-safe test........................................... 63
3.17Print ........................................................ 64
3.17.1With no IXC card installed........................ 64
3.17.2With IXC card installed............................. 65
3.17.2.1Save events..................................... 66
3.18Q-C setup (Quality Control).................... 68
3.19Test samples .......................................... 70
3.20Unlock bin............................................... 70
3.21Commands accessible only in Remote
Programming.......................................... 71
3.22Remote programming............................. 76
3.22.1Communication parameter settings ......... 76
3.22.1.1RS232 or RS232 Aux ...................... 76
3.22.1.2Bluetooth ......................................... 76
3.22.1.3Ethernet / WiFi connections (only
with IXC card).................................. 76
3.22.2Entering remote programming ................. 77
3.22.2.1Connecting to a Metal Detector....... 77
3.22.2.2Displaying a parameter setting........ 77
3.22.2.3Changing a parameter setting ......... 77
3.22.2.4Executing a function ........................ 77

FI002K0021v1100UK – THS/21E and THS/21 Programming Manual
4
3.23Access via Web Server...........................78
3.23.1Network configuration .............................. 78
3.23.2Functions available .................................. 78
3.23.2.1Status .............................................. 79
3.23.2.2Products .......................................... 79
3.23.2.3Products Counters........................... 80
3.23.2.4Test Diameters ................................ 80
3.23.2.5Products Export............................... 81
3.23.2.6Products Import ............................... 81
3.23.2.7Products Delete............................... 82
3.23.2.8Buffers Export.................................. 82
3.23.2.9Configuration Backup/Restore......... 83
3.23.2.10Configuration Export/Import............. 84
3.23.2.11Network ........................................... 85
3.23.2.12System upgrade (Web Server)........ 86
3.23.2.13Maintenance.................................... 86
3.23.2.14System Info...................................... 87
3.23.2.15Logout.............................................. 87
4APPENDIX..................................................... 89
4.1Parameters list – Alphabetical order....... 89
4.2Parameters list – Menu order................. 90

FI002K0021v1100UK – THS/21E and THS/21 Programming Manual
1
SAFETY INSTRUCTIONS -
W
ARNINGS
5
Read this Manual carefully before installing or operating the device and before carrying out maintenance operations.
1SAFETY INSTRUCTIONS – WARNINGS
1.1 General warnings
- All personnel operating on the device must have an adequate preparation and shall know the
procedures described in this Manual.
- Observe current regulations regarding electrical and personal safety for both the operator
and the installer when installing the device.
- Any modification to the system is forbidden and void all warranties and certifications.
- Follow the instructions contained in this Manual for all operations relating to installation, use
and maintenance of the device.
CEIA cannot be held responsible for any damage resulting from procedures which are not
expressly indicated in this Manual, or from any lack of attention, either partial or total, of the
procedures described therein.
- This Manual must accompany the device described therein in the case of change of
ownership, and until the device is broken up.
1.2 Correct use of the device
- The Metal Detectors from the THS/21E and THS/21 series are electronic devices for the
detection of metal masses transiting inside the detection antenna.
- The final user is responsible for selecting the appropriate sensitivity for their application.
After this selection has been made, and programming has been adjusted accordingly, it is
also the final user's responsibility to verify calibration using the test object(s) appropriate to
the level of security selected. Additionally, this test should be carried out periodically to
insure no changes have occurred in the equipment.

2 FI002K0021v1100UK – THS/21E and THS/21 Programming Manual
PROGRAMMING
6
2PROGRAMMING
The list of parameters and menus, accessible by each users, together with the system behaviors, can change in respect
of this Manual description, depending on the settings modifications. Contact the System Administrator for any
information.
2.1 Access to Programming
Upon access to Programming a user name and a password are requested.
Each type of operator can access a specific set of parameters, consisting of one or more menus.
2.1.1 Factory preset configuration
When first switched on, the Metal Detector is configured with predefined users with access parameters as described in
the following table:
2.1.1.1 Access levels
Predefined operators
Operator Supervisor Technician Qualit
y
Control
Operator Head of
Quality Control
Administrator
Username
000001 000002 000003 000004 000005 ADMINI
Password
000001 000002 000003 000004 000005 000000
MENU
Administrator •
Reset • • •
Product Selection • ••
Products • • •
Autolearn • • •
Autolearn-advanc • •
Detection • • •
Ejection • • •
Counters • •
Configuration • •
Configuration-adv •
Barcode reader1• • •
I/O Status • •
Diagnosis managem. • •
MD Test • • •
Fail-Safe test 2•
Print • •
Q-C setup • •
Test samples • •
Unlock bin •
1 – The Barcode reader menu is available only upon request
2 – The Fail-safe Test menu is available only with an Ejection confirmation sensor installed

FI002K0021v1100UK – THS/21E and THS/21 Programming Manual
2
PROGRAMMING
7
2.1.1.2 Remote Communication
For the Remote Communication, two access type are provided:
- Only the password (predefined password is 000006). This access type is selected by default.
- User and Password exactly as a local access (see table above).
To select which access type to use, see parameters RM and AURM.
Only the Administrator operator can manage all the users.
It is Administrator responsibility to redefine all predefined access data in order to avoid unauthorized access to
programming.
2.2 Administrator functions
The Administrator has total control over the configuration of the Metal Detector and can define the
roles of the staff that will be working with it. The Administrator's prerogatives, therefore, are the
following:
- Modifying or deleting existing operators and/or setting new passwords.
- Defining new operators and their passwords.
- Authorization for operators to access operational parameters, grouped into menus.
- Total access to all operating parameters.
2.3 Configuration of the system by the Administrator
2.3.1 Programming
The Administrator can program the detector independently to define its operational configuration, or
can delegate one or more functions to the operators.
2.3.2 Users
The Administrator defines the users that work with the detector according to their respective
responsibilities. The Administrator therefore gives the user:
- an user name and a password for access to Programming
- the indication of the operational parameters that the user can modify or display.
The Administrator can define up to 40 users (including the Administrator).
It is imperative that the Administrator responsible for the device redefines the users and passwords pre-set in the factory
in order to block access to Programming on the part of unauthorized personnel.
It is not possible to modify the username ADMINI.
THS/21 is the first system on the market that allows complete personalization of product names and of the users that work
with them (name and surname, user name, password, …).

2 FI002K0021v1100UK – THS/21E and THS/21 Programming Manual
PROGRAMMING
8
2.4 General points on programming
2.4.1 Keypad functions
The control of the Metal Detector and the setting of the device parameters are performed through
the control panel keyboard, as shown below:
On THS/xx21 and THS/xx21E
Key Function
Access and exit from the programming phase
Return back from the submenus to the previous menu
Exit from the Metal Detector Status visualization
Scroll through the sequence of instructions
Choice of the parameters to be changed
Metal Detector Status visualization
Selection of the selected submenu from the main menu
Confirmation of the data entered
Reset of some kinds of fault
Only on THS/xx21
Key Function
Cancel the last character entered
Quick access to predefined functions, with programming method complying with
CFR21 (see User Manual)
Modification of the parameter values

FI002K0021v1100UK – THS/21E and THS/21 Programming Manual
2
PROGRAMMING
9
2.4.2 Entering the username
In the following example, the way to digit the username “STEVEN” is shown.
Display Keys pressed
THS/21
THS/21E
Meaning
User
#_____
•
•
Press P to enter Programming. The cursor
blinks in the position of the first character
User
S#____
•
Press four times the key “7” to cycle through
the letters and to set the “S” as the first
character. The cursor moves automatically on.
…
•
Press 8 times the DOWN arrow to cycle back
the alphabet and select the letter “S” as the
first character. Press E to confirm.
User
ST#___
•
Press twice the key “8” to set the “T” as the
second character.
•
The cursor moves on and starts suggesting
again the last character entered. Press once
the UP arrow to select the letter “T” and press
E to confirm.
User
STE#__
•
Press three times the key “3” to set the “E” as
the third character.
…
•
Using the DOWN arrow key, cycle back the
alphabet until the letter “E” is shown. E to
confirm.
User
STEV#_
•
Press four times the key “4” to cycle through
the letters and to set the “V” as the fourth
character.
…
•
Using the UP arrow key, cycle up the alphabet
until the letter “V” is shown. E to confirm.
User
STEVE#
•
Again three times the key “3” to set the “E” as
the fifth character.
…
•
Using the DOWN arrow key, cycle back the
alphabet until the letter “E” is shown. E to
confirm.
User
STEVEN
•
Press three times the “6” to set the “N” as the
last character.
… •
Using the UP arrow key, cycle up the alphabet
until the letter “N” is shown.
User
STEVEN
•
•
Press “Enter” to confirm the username

2 FI002K0021v1100UK – THS/21E and THS/21 Programming Manual
PROGRAMMING
10
2.4.3 Entering the password
Display Keys pressed
THS/21
THS/21E
Meaning
Password
#_____
•
•
After the user name, the password is
required. As an example we will digit
“000004”.
Password
*#____
•
Push “0” to get for the letter “0” as the first
character. The cursor moves on.
•
Push the UP arrow key to select the “0” as
the first character. E to confirm.
Password
*****#
•
Continue to push “0” until the cursor reach
the last character position.
•
The cursor moves on and starts suggesting
again the last character entered. Continue
to push E until the cursor reach the last
character position.
Password
******
•
Press once the key “4” to set the number
“4” as the last character
•
Press four times the UP arrow key to set
the number “4” as the last character
Password
******
•
•
Press “Enter” to confirm the password
The display will show an asterisk in the place of each character entered.
2.4.4 Restricted login
LOGIN
RESTRICTED
This fault message appears if three consecutive attempts to access
with the wrong password or user name have been made (see
parameter FLR).
Due to this event, the detector is NOT operative and set itself on fault
status.
To reset from this fault, enter Programming at Administrator level and exit. In case the
Administrator lost the password to login, contact CEIA.

FI002K0021v1100UK – THS/21E and THS/21 Programming Manual
2
PROGRAMMING
11
2.5 Exit from programming
2.5.1 Exit from programming
Press the P key to exit from the current menu (or submenu), until the main screenshot is
shown on the display.
2.5.2 Time out
The programming session will be terminated automatically if no commands are entered for a period
of 5 minutes.
2.6 Defining a new user
Example: John Smith, product operator, password OPER01, enabled for Product selection menu.
Before creating a new user, or assigning a new operator to a pre-defined one, print the event list and erase the event
buffer.
THS/xx21E THS/xx21
Ad
m
i
n
i
s
t
ra
t
or §
Reset
Product selection
Products
Ad
m
i
n
i
s
t
ra
t
or~~~~~~~§
Reset
Product selection
Products
Autolearn
Autolearn-advanc
Detection
Ejection
Select menu Administrator, pressing .
C
rea
t
e user @
Modify user
Erase user
Remote passwords
C
rea
t
e~user~~~~~~~~~§
Modify user
Erase user
Set BlueTooth PIN
Remote passwords
Select command Create user, pressing .
====
C
rea
t
e user ===
#_____
--------------------
[
\
\
\
C
rea
t
e user
\
\
\
]
#_____
{|||||||||||||||||||}
Enter name of new user (6 alphanumeric characters) and press to
confirm.
U
ser
OPER01
@
Name USER01
Surname USER01
Descrip. USER01
U
ser~~~~~~~~~~
OPER01
@
Name USER01
Surname USER01
Descrip. USER01
Password
Reset N
Product selection N
Products N
The properties list will appear, followed by the menu list.
N
ame
JOHN
Surname SMITH
Descrip OP PROD
Password OP0001@
U
ser
OPER01
Name JOHN
Surname SMITH
Descrip. OP PROD
Password~~~~~~OP0001@
Reset N
Product selection N
Products N
Enter the name, surname, a brief description and the desired
password, by scrolling using the arrows and selecting by
pressing .
P
asswor
d
Reset N
Product selection Y@
Products N
U
ser
OPER01
Name JOHN
Surname SMITH
Descrip. OP PROD
Password OP0001
Reset N
Product~selection~~Y@
Products N
Enable the Product selection menu only by changing the menu status
from N (disabled) to Y (enabled).
C
rea
t
e user @
Modify user
Erase user
Remote passwords
C
rea
t
e~user~~~~~~~~~§
Modify user
Erase user
Set BlueTooth PIN
Remote passwords
Exit the menu with to confirm the newly-defined user.

2 FI002K0021v1100UK – THS/21E and THS/21 Programming Manual
PROGRAMMING
12
2.7 Quick Access menu programming procedure
This function is not available on THS/21E models.
The system Administrator can program up to 10 shortcuts to menus or single parameters, in order
to quickly activate them through the Quick Access and the correspondent numeric key (0-9).
Here below, as an example, we will program the Autolearn menu to the position 6of the Quick
Access list.
Display Keys pressed Meaning
Ad
m
i
n
i
s
t
ra
t
or~~~~~~~~§
Reset
Product selection
Products
Autolearn
Autolearn-advance
Detection
Ejection
Access to the parameters list.
Ad
m
i
n
i
s
t
ra
t
or
Reset
Product selection
Products
Autolearn~~~~~~~~~~~~§
Autolearn-advance
Detection
Ejection
Select command or parameter to be added in
the Quick Access function list.
C
rea
t
e~
li
nk~
t
o~~~~~~~@
Erase link
Erase all links
Press the Quick Access key and hold it
pressed until the display will change as
shown.
A
u
t
o
l
earn~~~~~~~~~~~~@
Erase link
Erase all links
The first line will alternatively show the
message Create link to and the name of the
selecterd function/parameter.
[
\
\
\
QUICK
ACCESS
\
\
\
]
0) Products
1)
2) Sensitivy
3)
4) Reset
& Scroll down
{||||||||||||||||||||}
Press E to accept. The display will show the
Quick Access list, in order to assign the right
number.
In the example beside, the number 1 and 3
are free to be used.
[
\
\
\
QUICK
ACCESS
\
\
\
]
$ Scroll up
5)+MD Test
6)
7)+Print
8)+I/O Status
9)+Counters
{||||||||||||||||||||}
Press the down arrow to scroll the Quick
Access list to the second page.
[
\
\
\
CREATE
LINK
\
\
\
\
]
[\\\\\\\\\\\\\\\\\\\\]
Link 6
created
{||||||||||||||||||||}
{||||||||||||||||||||} Press 6 to choose that position in the list.
CEIA
THS
/
PH21N
ALM V5.xxx THS V5.xxx
Product:PROD01
Press three times P to exito from
Programming
[
\
\
\
QUICK
ACCESS
\
\
\
]
$ Scroll up
5)+MD Test
6)+Autolearn
7)+Print
8)+I/O Status
9)+Counters
{||||||||||||||||||||}
or
Now the Quick Access + 6 will call for the
Autolearn menu (a menu is indicated, in the
list, with a + in front of the name)
The parameter/menu called with Quick Access will request the insertion of an username and/or a password, if needed.

FI002K0021v1100UK – THS/21E and THS/21 Programming Manual
2
PROGRAMMING
13
2.8 Programming the Metal Detector according to the kind of product
The operating mode of the Metal Detector is to be determined according to the kind of product to
be inspected, in order to obtain:
- the minimization of the ”product effect” (see below);
- the determination of the detectable metallic Test Samples (see below);
- a correct ejection mode configuration according to the product (see also Installation Manual);
The factory settings (product DEFAULT) are suitable for dry products.
It is always advisable to optimise installation in line with the criteria described in the installation Manual in order to obtain
maximum sensitivity and maximum rejection of environmental interference.
2.8.1 Procedure for minimizing the "product effect"
The goal of this procedure is to obtain the following operating mode:
a) the detector does not set off an alarm when some of the pure product, without any metallic
contamination, passes through the probe.
b) the detector sets off an alarm when some of the product containing a metallic sample passes
through the probe
2.8.2 Procedure for automatic product acquisition
This procedure comprises the automatic acquisition of non-contaminated product characteristics in
order to identify the contribution to the received signal due to the metal mass to be detected. The
characteristics are acquired progressively by making the product pass through the Metal Detector
several times.
The procedure must be completed once started. Do not change any parameter setting during the procedure.
# Display THS/xx21E Display THS/xx21 Step
1
===
N
ew pro
d
uc
t
===
BISC#________
-------------------
P
ro
d
.
SUGAR01
Rename product
[\\ New product \\\]
BISC#_______
{||||||||||||||||||}
Select a product or create a new one (see User Manual, par.
3.6.1).
2
A
u
t
o
l
earn
OFF
Multi-band ON@
Min.trans.number 1
A
u
t
o
l
earn
OFF
Aut.det.mode~sel~~ON@
Min.trans.number 1
On THS/xx21 set Autolearn > Aut.det.mode selto ON to
perform an autolearn for all detection modes. Set it to OFF to
perform it only on the current detection mode. Set it to ON if
not sure about the correct detection mode of the product.
On THS/21E-3F set Autolearn > Multi-band to ON to
perform an autolearn for all bands. Set it to OFF to perform it
only on the current band. Set it to ON if not sure about the
correct band of the product.
3
A
u
t
o
l
earn
OFF
Multi-band ON
Min.trans.number 1@
A
u
t
o
l
earn
OFF
Aut.det.mode sel ON
Min.trans.number~~~1@ Set the parameter Autolearn > Min.trans.number to a
suitable value for the product composition. The value of 1 is
suggested for products that have regular shape and
composition, higher the product non-uniformity, higher should
be the minimum transits to perform a correct autolearn
4
A
u
t
o
l
earn
ON
@
Multi-band ON
Min.trans.number 1
A
u
t
o
l
earn~~~~~~~~~
ON
@
Aut.det.mode sel ON
Min.trans.number 1 Set Autolearn > Autolearn to ON and exit from the
programming phase (push P button).

2 FI002K0021v1100UK – THS/21E and THS/21 Programming Manual
PROGRAMMING
14
# Display THS/xx21E Display THS/xx21 Step
5
PASS
PRODUCT
Prod. PROD1
^
PASS PRODUCT
Product:PROD01
Pass the non-contaminated product through the Metal
Detector each time is requested. The message PASS
PRODUCT appears on the display, and the buzzer (if
enabled) is activated.
6
PROCESS
^^^^^^^^^^---65%
^
WAIT
process ...... 65%
Product:PROD01
At the end of each transit, the Metal Detector will ask to wait
for a few seconds, in order to process the signal. In this
phase, the alarm led is blinking.
7
THS
/
21E
V5
.
3
xx
Prod. PROD1
^
CEIA
THS
/
21
ALM V5.xxx THS V5.xxx
Product:PROD01
At the end of the Autolearn procedure, the Metal Detector
exits from the autolearn phase and the standard message
appears on the display.
8
Pass some pure product through the detector: the device should not set off any alarm. If the detector gives an alarm
whenever some of the pure product passes through the probe, repeat the procedure, increasing the number of transits (see
point 3.). At the end of this second procedure, the pure product is still giving alarm, decrease the “Sensitivity” parameter
until the detector does not give an alarm (this is probably due to non-uniformity of the product).
9
Pass some of the product with the metallic sample: the detector should give an alarm. If any alarm is given,
increase the size of the metallic sample gradually, until locating its minimum dimension that will be detected with at least 5 dB,
in order to ensure the detection of the sample in every transit position.
In the case that the size of the metallic samples has been modified, communicate them
immediately to the Head of Quality Control or to the Administrator, so as to let them to change
their values in the relative menu.
If the signal given by the sample is higher than 12 dB, the Metal Detector Tests can fail. See SAC parameter.
It is responsibility of the customer to determine the diameter values of the test samples to be used in the Quality Control
Procedure. It is responsibility of the Quality Control Head to set this values on the MD Test Samples menu.
- Not available
on TH/21E
[\\\\\
STATUS
\
\
\
\
\
\
]
Sensitivity 265
Detection mode 4
FE perform. 0.80
NFE perform. 1.00
SS perform 1.20
Prd. alarms 10
{|| & Scroll down ||}
At the end of the procedure, on the Metal Detector Status
screen, will be indicated the minimum detectable diameters.
This indication is purely indicative and it is responsibility of
the customer to verify their effective detection.
The minimum detected diameters can be different from the indication on Status screen.

FI002K0021v1100UK – THS/21E and THS/21 Programming Manual
3
PROGRAMMING PARAMETERS
15
3PROGRAMMING PARAMETERS
After user logging, the list of available Local Programming Menus is
shown. The list changes according to the permission levels of the
user logged. The list beside is the example of the programming tree
for the Administrator level.
Each parameter or command is described in detail, together with
corresponding Remote Programming code (if available); moreover,
the type (global or related to the current Product) and the Models that
include it in the Programming, are reported.
Ad
m
i
n
i
s
t
ra
t
or
Reset
Product selection
Products
Autolearn
Autolearn-advanc
Detection
Ejection
Counters
Configuration
Configuration-adv
Barcode reader
I/O Status
Diagnosis managem.
MD Test
Fail-safe test
Print
Q-C setup
Test samples
Unlock bin
Some parameters require the use of Input Devices and/or Relays. Therefore, the settings of these parameters have
effect only on Metal Detectors that have Input lines and Relays involved (See Installation Manual).
The parameter standard settings can change according to the Metal Detector System. For each Metal Detector unit, they
are reported on the Factory Acceptance Test Sheet attached to the Installation and Maintenance Manual.
3.1 Administrator
List of commands available under the Administrator menu
C
rea
t
e user
Modify user
Erase user
Set Bluetooth PIN
Remote passwords
Create User Remote Possible settings Standard setting Parameter
- 6 alphanumeric chars. - Global
Description Models
Creation of a new user
Enter the name of a new user: a list of the user's properties will appear.
All models
THS/xx21E THS/xx21
- Name from 1 to 12 alphanumeric char.
- Surname from 1 to 12 alphanumeric char,
- Description from 1 to 12 alphanumeric char,
- Password 6 alphanumeric characters
- List of menus that can be enabled
U
ser
OPER01
Name JOHN
Surname SMITH
Descrip. OP PROD
U
ser
OPER01
Name JOHN
Surname SMITH
Descrip. OP PROD
Password OP0001
Reset N
Product~selection~~Y@
Products N
If the user name already exists, the command aborts.
If the user name is 000000, the access to Programming will be achieved simply by pressing P, without any username or
password request. When an username 000000 is set, to access to Programming at different levels, hold the P key
pressed for at least 3 seconds.
If the password field is left empty, the password will not be requested for this username.
It is possible to create up to 40 users (Administrator included).
If the unit is equipped with the IXC card, an additional property named “Web access” will be listed for each user.
If the property is set to “ON”, this user will be able to access the Metal Detector also from web server.
Modify User
Remote Possible settings Standard setting Parameter
- 6 alphanumeric chars. - Global
Description Models
Modify an user
Select an existing user by pressing the arrows keys: the list of the user's properties will appear:
All models

3 FI002K0021v1100UK – THS/21E and THS/21 Programming Manual
PROGRAMMING PARAMETERS
16
Erase User Remote Possible settings Standard setting Parameter
- 6 alphanumeric chars. - Global
Description Models
Delete an user All models
THS/xx21E THS/xx21
Scroll the users list through the arrow keys. Press E to
select the user to be erased, then press UP to confirm or
E to cancel.
=====================
erase
UTENTE1?
(SU)=YES ----- NO=(E)
[\\\\\\\\\\\\\
\
\
\
\
\
\
]
erase
USER01?
($)=YES |||||| NO=(E)
Set Bluetooth PIN
Remote Possible settings Standard setting Parameter
BPIN Up to 8 alphanum.
chars. 00000000 Global
Description Models
Set the Bluetooth PIN
Needed for the remote connection with a personal computer, via Bluetooth.
All models
3.1.1 Remote passwords
List of commands available under the Remote passwords submenu
RS232
passwor
d
auxRS232passw
RS232password Remote Possible settings Standard setting Parameter
RM 6 alphanum. chars. 000006 Global
Description Models
Password for the Remote Programming access via RS232
This parameter select the remote access authentication way:
- Alphanumeric value: only the password RM is required
- Empty (RM = ‘NULL’ in remote programming): username & password valid for the local access are
required.
All models
auxRS232passw Remote Possible settings Standard setting Parameter
AURM 6 alphanum. chars. 000006 Global
Description Models
Password for the Remote Programming access via Auxiliary RS232
This parameter select the remote access authentication way:
- Alphanumeric value: only the password AURM is required
- Empty (AURM = ‘NULL’ in remote programming): username & password valid for the local access
are required.
All models

FI002K0021v1100UK – THS/21E and THS/21 Programming Manual
3
PROGRAMMING PARAMETERS
17
3.2 Reset
Reset Remote Possible settings Standard setting Parameter
RS - - Global
Description Models
Alarm and fault Reset
This command restore the system from alarms and faults that require a Reset operation.
RS command does not reset the Emergency condition: in this case, the Emergency button need to
be released and the R button, if present, needs to be pressed (see Installation Manual).
All models
3.3 Product selection
List of commands available under the Product selection menu.
P
ro
d
uc
t
DEFAULT
Product Remote Possible settings Standard setting Parameter
PI 12 alphanumeric chars. - Global
Description Models
Type of product selected
Selection of a product previously entered and saved.
All models
Local programming THS/xx21E THS/xx21
The various defined products are shown on the display.
Scroll them with the arrow keys and choose the desired
product by pressing the E key. On THS/21 models,
typing letters in the search field results in a product list
restricted to the names that match that string.
======
P
ro
d
u
c
t
======
*DEFAULT
PROD01
PROD02
[\\\\\
P
ro
d
uc
t
\
\
\
\
\
]
@DEFAULT
PROD01
PROD02
POW003
BRWNSUGAR
{|||||||||||||||||||}
Search: #___________
Remote programming Remote display
This command displays the list of products: the current
product is shown by the “>” cursor.
To chan
g
e the current product, assi
g
n the correspondin
g
value to the PI setting.
#PI<ENTER>
Default
ProdA
> ProdB
ProdC
#PI ProdA<ENTER>
#PI<ENTER>
Default
> ProdA
ProdB
ProdC
#
On product DEFAULT are saved all factory settings for the detection of the reference test samples, as indicated on the
Factory Acceptance Test (FAT) of the Metal Detector, included with the Installation Manual.
It is not possible to erase or to modify the DEFAULT product.
The standard configuration includes also the product P1, as a copy of DEFAULT but modifiable (and erasable).

3 FI002K0021v1100UK – THS/21E and THS/21 Programming Manual
PROGRAMMING PARAMETERS
18
3.4 Products
List of commands available under the Products menu
P
ro
d
uc
t
Rename product
New product
Erase product
Prod. Barcode
Save prod.to USB
Load prd from USB
Product Remote Possible settings Standard setting Parameter
PI 12 alphanumeric chars. - Global
Description Models
Type of product selected
Selection of a product previously entered and saved.
All models
Local programming THS/xx21E THS/xx21
The various defined products are shown on the display.
Scroll them with the arrow keys and choose the desired
product by pressing the E key. On THS/21 models,
typing letters in the search field results in a product list
restricted to the names that match that string.
======
P
ro
d
uc
t
======
*DEFAULT
PROD01
PROD02
[\\\\\
P
ro
d
uc
t
\
\
\
\
\
]
@DEFAULT
PROD01
PROD02
POW003
BRWNSUGAR
{|||||||||||||||||||}
Search: #___________
Remote programming Remote display
This command displays the list of products: the current
product is shown by the “>” cursor.
To chan
g
e the current product, assi
g
n the correspondin
g
value to the PI setting.
#PI<ENTER>
Default
ProdA
> ProdB
ProdC
#PI ProdA<ENTER>
#PI<ENTER>
Default
> ProdA
ProdB
ProdC
#
On product DEFAULT are saved all factory settings for the detection of the reference test samples, as indicated on the
Factory Acceptance Test (FAT) of the Metal Detector, included with the Installation Manual.
It is not possible to erase or to modify the DEFAULT product.
The standard configuration includes also the product P1, as a copy of DEFAULT but modifiable (and erasable).
Rename product
Remote Possible settings Standard setting Parameter
PN 12 alphanumeric chars. - Related to the
current product
Description Models
Rename the product
P
ro
d
uc
t
SUCAR01
Rename~product~~~~~~@
All models
THS/xx21E THS/xx21
Changes the name of the current product.
It is not possible to rename the product DEFAULT.
==
R
ename pro
d
uc
t
==
SUGA#_______
--------------------
[\
R
ename pro
d
uc
t
\
\
]
SUGA#_______
{|||||||||||||||||||}

FI002K0021v1100UK – THS/21E and THS/21 Programming Manual
3
PROGRAMMING PARAMETERS
19
New product Remote Possible settings Standard setting Parameter
NW 12 alphanumeric chars. - Global
Description Models
Creation of a new product
All models
Create a new product. The maximum number of products is 500 for
the THS/21 series and 250 for the THS/21E series.
P
ro
d
uc
t
SUGAR01
Rename product
[\\\ New product \\\]
BISC#_______
{|||||||||||||||||||}
THS/xx21E THS/xx21
The initial parameters of the new product will be the
same of the product selected when the new product is
created. Cop
y
in
g
the DEFAULT product, parameters FD,
SD and ND will not be copied.
===
N
ew pro
d
uc
t
====
BISC#_______
--------------------
[\\
N
ew pro
d
uc
t
\
\
\
\
]
BISC#_______
{|||||||||||||||||||}
Erase product Remote Possible settings Standard setting Parameter
EP 12 alphanumeric chars. - Global
Description Models
Elimination of a product
All models
P
ro
d
uc
t
SUGAR01
Rename product
THS/xx21E THS/xx21
Scroll the product list using the arrow keys, and select
the product to be erased pressing the E key.
===
E
rase pro
d
uc
t
===
DEFAULT
PROD01
*PROD02
[\\
E
rase pro
d
uc
t
\
\
]
DEFAULT
PROD01
@PROD02
SUGAR01
{|||||||||||||||||||}
Search: #_________
A confirmation is needed to complete the operation.
It is not possible to erase the product DEFAULT.
=====================
erase
PROD02?
(UP)=YES ----- NO=(E)
[\\\\\\\\\\
\
\
\
\
\
\
\
\
\
]
erase
PROD02?
{|| $=YES || E=NO ||}
Prod. barcode
Remote Possible settings Standard setting Parameter
BARC - - Related to the
current product
Description Models
Product barcode
This function show the barcode related to the current product. If a barcode has not been yet
assigned, the result is “NULL”.
All models
This function is visible only if the barcode reader menu has been activated (see BE parameter).

3 FI002K0021v1100UK – THS/21E and THS/21 Programming Manual
PROGRAMMING PARAMETERS
20
3.4.1 Save prod.to USB
List of commands available under the Save prod.to USB submenu.
This menu is available only on models with IXC card installed.
S
e
l
ec
t
pro
d
uc
t(
s
)
Save all products
Select product(s) Remote Possible settings Standard setting Parameter
- - - Global
Description Models
Selection of Products to save to USB
All models
This command is available only if IXC=ON
THS/xx21E THS/xx21
Press E and select each Product to be saved.
A full circle icon identifies all selected products.
At the end, keep E key pressed for 3 seconds.
=
S
e
l
ec
t
p
ro
d
uc
t(
s
)
=
-PROD01
*-PROD03
+PROD09
[
S
e
l
ec
t
pro
d
uc
t
(
s
)
]
¼PROD01
@¼PROD03
½PROD05
¼PROD09
{||||||||||||||||||||}
Search :#___________
If an USB key is not already inserted on the Metal
Detector USB plug, a message will be shown at the
operation start.
=====================
Insert USB memory
Press P to exit
---------------------
[\\\\\\\\\\\\\\\\\\\]
Insert USB memory
Press P to exit
{|||||||||||||||||||}
In case one or more Products already exist in USB
memory, press &to overwrite all selected Products (or
P to null the saving ), otherwise decide one by one,
pressing $to overwrite or E to not overwrite.
O
verwr
it
e
PROD05?
(UP)=YES NO=(E)
(DW)=ALL NONE=(P)
[
\\\\\\\\\\\\\
\
\
\
\
\
\
\
]
Overwrite
PROD05?
$=YES NO=E
{ &=ALL |||||| NONE=P}
Each selected Product is saved as:
:/Ceia/Products/SNxxxxxxxxxxx/
ProductName.tpr
where xxxxxxxxxxx is the Metal Detector serial number.
=====================
Done
---------------------
[
\\\\\\\\\\\\\
\
\
\
\
\
\
]
Done
{|||||||||||||||||||}
Other manuals for THS/21E
2
This manual suits for next models
1
Table of contents
Other Ceia Metal Detector manuals