manuals.online logo
Brands
  1. Home
  2. •
  3. Brands
  4. •
  5. Ceia
  6. •
  7. Metal Detector
  8. •
  9. Ceia 02PN8 Series User manual

Ceia 02PN8 Series User manual

11/26/2012 Metal Detecto Set-Up Ceia 02PN8 Series Page 1 of 3
Metal Detector Set-Up Guide
Ceia 02PN8 Series
Metal Detector Placement
Generally, placement of the transmitter and
receiver coils is not critical to the installation of an
Isotec system. This is due to the isolation of the
structure against Eddie currents created by
surrounding metal. In some applications problems
with the installation can be minimized by the
proper placement of the transmitter and receiver
coils. It is recommended that the receiver coil (RX)
be place as far away as possible from the active
devices in the structure to minimize this effect as
depicted below.
32.00in.
Tx Rx
Initial Setup
Isotec has run a number of tests to determine the
correct settings necessary to detect a weapon
passing through its Weapons Control Systems.
Compliance with these settings will assure a
reliable operation with little false alarms.
The system provides for an integrated metal
detection system that prevents exit from the portal
upon detection of objects configured above the set
limits. These limits of detection are set such that it
can detect the following weapons at typical heights
of head, waist, and ankle. The three-gun test used
by the Federal Government provides the basis for
all standards used by Isotec. The three guns used
in our tests are as follows:
Steel and aluminum alloy 0.25-caliber automatic pistol,
manufactured in Italy by Armi Tanfoglio Giuseppe, sold in
the United States by Excam as Model GT27B and by F.I.E.
as the Titan (weight: about 343 grams),
Aluminum, Model 7, 0.380-caliber derringer,
manufactured by American Derringer Corporation (weight:
about 200 grams),
Stainless steel 0.22-caliber long rifle mini-revolver;
manufactured by North American Arms (weight: about 129
grams).
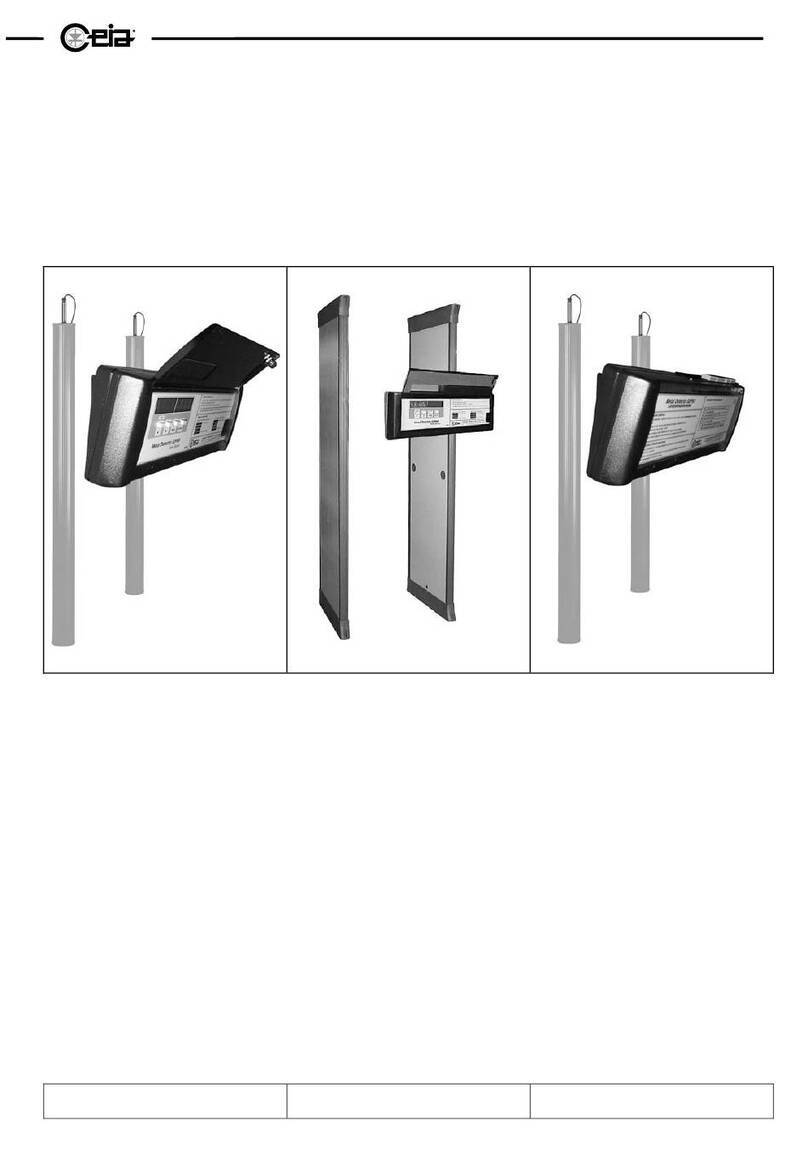
Every system has a control panel located above
the metal detector for monitoring alarms and
programmable configurations as defined below.
Ceia Control Panel
Local Programming:
To make any configuration changes under the
“User” level press the “PROG”Key then the
“ENTER” key.
Enter User Level
PROG
then
ENTER
To make any configuration changes under the
“Super-user” level press “PROG” Key then use
the (increase) and (decrease) keys
to enter the password by selecting the cyclical
sequence: of numbers and letters of 0-9 and A-Z.
Once a character is found use the “ENTER” key
to move to next character. * Once passwords
characters are entered press the “ENTER” key
one more time to enter programming.
During programming the metal detector is
deactivated.
To Exit the programming mode use the “PROG”
key and all changes will be programmed into the
metal detector.**
*To obtain the “Super-User” Password please contact Isotec Security.
**The Metal Detector may restart.
SECURITY
11/26/2012 Metal Detecto Set-Up Ceia 02PN8 Series Page 2 of 3
Selecting Command:
To select a command use the (increase)
and (decrease) keys are used to choose the
function and select the data to enter; confirmation
is via the “ENTER” key. The commands are in a
cyclical sequence:
This can occur in two direction by pressing the
and keys.
Transmission Channel: (CH)
The Transmission channel is used to set the
frequency of the metal detector this comes from
the factory set to 50. This should not be need to
change unless two metal detectors are in relation
to each other then both metal detectors need to be
on two different channels.
Factory Value: 50
Isotec Recommended Value: anything from 50-99
Possible Values: 0 –99
0 –49 is for 50Hz Power Supply
50 –99 is for 60Hz Power Supply
Gate direction: (GD)
The gate direction selects the direction of transit
through the antennae relative to the position of the
archway.
Factory Value: 1
Possible Values: 1, 2
GD=1: If you look at the gate from the point
of entry the transmitter (Tx) antenna
should be on the right.
GD=2: If you look at the gate from the point
of entry the transmitter (Tx) antenna
should be on the left.
(Only 02PN8 HI-PE & Bi Directional models)
Alarm Duration: (AD)
The Alarm duration is how long it takes the metal
detector to reset after an alarm.
Factory Value: 1C
Isotec Recommended Value: 1P
Possible Values: 0P –5P; 0C –5C
P = Proportional Alarm indication
In this case the display will always provide an indication
proportional to the metal mass in transit, using the red
sector on the right when there is an alarm.
C = Constant alarm indication
In this case, during normal operation the display will
indicate the selected sensitivity; when there is an alarm, 4
asterisks light up in the red section on the right.
0P –reset time = 0.3s 0C –reset time = 0.3s
1P –reset time = 1s 1C –reset time = 1s
2P –reset time = 2s 2C –reset time = 2s
3P –reset time = 3s 3C –reset time = 3s
4P –reset time = 4s 4C –reset time = 4s
5P –reset time = 5s 5C –reset time = 5s
Alarm Volume: (AV)
User can change the level of volume during a
alarm.
Factory Value: 3
Possible Values: 0 –9
During local programming, the device provides an audible signal using
the selected tone.
Alarm Tone: (AT)
User can change the tone of the alarm.
Factory Value: 2
Possible Values: 0 –9
5 different continuous tones ranging from 0(deep sound)
to 4(high sound)
5 different pulsed tones ranging from 5(deep sounds) to 9
(high sound)
During local programming, the device provides an audible signal using
the selected tone.
International Security Standard: (IS)
The international Security Standard is a security
level specified by international regulations. This
command allows the adjustment of the detector to
the specification of selected standard without
having to carry out the test procedure physically.
Factory Value: 1
Isotec Recommended Value:
Isotec recommended that the IS command be set to
customers preference for what they would like to detect
and adjusted the sensitivity*** of the metal detector to
allow some devices. ie cell phones, and purses
***To adjust see the Sensitivity command (SE)
Possible Values: 1 –10 (See Table 1)
NOTE: if the 02PN8 Bidirectional model is being used, this
command selects the International Security Standard to be
applied for transits in the normal (inbound) direction.
11/26/2012 Metal Detecto Set-Up Ceia 02PN8 Series Page 3 of 3
Sensitivity: (SE)
The sensitivity (alarm threshold) of the metal
detector can be adjusted for the requirements of
the metal detector. The SE command can also
modify the IS command to the customer’s request.
The adjustment of the SE command should be
completed with a test piece (listed in table 1) so there
is no location the gun can pass through the metal
detector without being detected.
Factory Value: 32
Isotec Recommended Value:
For commercial installation using security level 1 the IS
command need to be set to 1 and then adjust the SE
command to 19 –25. This recommendation should
only be completed with testing with Level 1 test piece.
Possible Value: 0 –99
0 = minimum sensitivity, detection of large
metal masses
99 = Maximum sensitivity, detection of small
metal masses
NOTE: if the 02PN8 Bidirectional model is being used, this
command selects the sensitivity (alarm threshold) to be
applied for transits in the normal (inbound) direction.
Super-User Commands:
These following commands should only be used
within conjunction with an Isotec Security factory
representative.
Lower Coefficient: (LC)
The Lower coefficient is used to adjust the
sensitivity of the electromagnetic field emitted by
the antenna at the lower level
Factory Value: 0
Possible Value: -20 –-1; 0; 1 –20
-20 = decrease sensitivity at lower level
0 = No change at the lower level
+20 = Increase sensitivity at lower level
Upper Coefficient: (UC)
The Upper coefficient is used to adjust the
sensitivity of the electromagnetic field emitted by
the antenna at the Upper level
Factory Value: 0
Possible Value: -20 –-1; 0; 1 –20
-20 = decrease sensitivity at upper level
0 = No change at the upper level
+20 = Increase sensitivity at upper level
Useful Width: (UW)
This command selects the effective useful width of
the archway, in mm. The correct value is preset in
the factory and is indicated in the Factory
Acceptance Test Report which can be found at the
end of the Ceia manual. This command can be
change only on the Ceia 02PN8-Bidirectional
model.
Factory Value: 820
Possible Values:
720mm = 28”
760mm = 30”
820mm = 32”
International Security Standard Outbound:
(ISO)
The International Security Standard outbound
command is for the reverse (outbound) directions
is only available for the 02PN8-Bidirectional model
Factory Value: 10
Possible Values: 1 –10 (see IS command)
NOTE: if the 02PN8 Bidirectional model is being used, this
command selects the International Security Standard to be
applied for transits in the reverse (outbound) direction.
Sensitivity Outbound: (SEO)
Sensitivity (alarm threshold) of Metal Detector for the
reverse (outbound) direction is only available for
the 02PN8-Bidirectional model
Factory Value: 15
Possible Values: 0 –99 (see SE command)
NOTE: if the 02PN8 Bidirectional model is being used, this
command selects the sensitivity (alarm threshold) to be
applied for transits in the reverse (outbound) direction.
For more in-depth of all the commands and
troubleshooting please refer to the Ceia 02PN8 HI-
PE Installation and Maintenance Manual provided
with your purchase of the Metal Detector.
Table 1: IS Command
PROGRAM:
IS
DISPLAY
MESSAGE*
SECURITY
LEVEL/APPLICATION
SAMPLES
1
NILECJ1
Standard: NILECJ-STD-0610.00
Security Level 1
AM9
2
NILECJ2
Standard: NILECJ-STD-0610.00
Security Level 2
AM7, AN7
3
NILECJ3
Standard: NILECJ-STD-0610.00
Security Level 3
AM5; AN5
4
NILECJ4
Standard: NILECJ-STD-0610.00
Security Level 4
AM3; AN3;
B6
5
NILECJ5
Standard: NILECJ-STD-0610.00
Security Level 5
AM1; AN1
B2
6
3GUN TST
Standard: 3-GUN-TEST
(FAA-USA)
OTP and
weapons
foreseen by
the standard
7
3GUN TSE
Standard: ENHANCED
3-GUN-TEST
OTP and
weapons
foreseen by
the standard
8
SPH.44.4
-
Sphere AISI
420 ∅44.25
9
SPH.41.3
-
Sphere AISI
420 ∅41.275

Other Ceia Metal Detector manuals

Ceia THS/21E Reference manual

Ceia

Ceia THS/21E Reference manual

Ceia THS/21E Owner's manual

Ceia

Ceia THS/21E Owner's manual

Ceia 02PN8 HI-PE/CN-AS-140 Instruction Manual

Ceia

Ceia 02PN8 HI-PE/CN-AS-140 Instruction Manual

Ceia HI-PE/CF Series Installation manual

Ceia

Ceia HI-PE/CF Series Installation manual

Ceia PD240CH User manual

Ceia

Ceia PD240CH User manual

Ceia THS/21E Reference manual

Ceia

Ceia THS/21E Reference manual

Ceia HI-PE multi-zone Series Quick start guide

Ceia

Ceia HI-PE multi-zone Series Quick start guide

Popular Metal Detector manuals by other brands

White’s Electronics Vision Guide

White’s Electronics

White’s Electronics Vision Guide

BONANZA metal detector user manual

BONANZA

BONANZA metal detector user manual

Seben MD-3009 instruction manual

Seben

Seben MD-3009 instruction manual

Minelab Musketeer ADVANTAGE instruction manual

Minelab

Minelab Musketeer ADVANTAGE instruction manual

Fisher Labs CZ-21 QuickSilver operating manual

Fisher Labs

Fisher Labs CZ-21 QuickSilver operating manual

Garrett MAGNASCANNER CS 5000 owner's manual

Garrett

Garrett MAGNASCANNER CS 5000 owner's manual

Bresser DMAX 3320001 instruction manual

Bresser

Bresser DMAX 3320001 instruction manual

Kellyco MPX Digital owner's manual

Kellyco

Kellyco MPX Digital owner's manual

Cobra Beach Magnet owner's manual

Cobra

Cobra Beach Magnet owner's manual

Discovery Kids TDK28 instruction manual

Discovery Kids

Discovery Kids TDK28 instruction manual

Minelab GO-FIND 66 manual

Minelab

Minelab GO-FIND 66 manual

Minelab The Sovereign instruction manual

Minelab

Minelab The Sovereign instruction manual

Draper 501D instructions

Draper

Draper 501D instructions

Bounty Hunter Outback owner's manual

Bounty Hunter

Bounty Hunter Outback owner's manual

Velleman CS300 user manual

Velleman

Velleman CS300 user manual

Thermo Scientific Apex quick start guide

Thermo Scientific

Thermo Scientific Apex quick start guide

GOLDEN MASK DEEP HUNTER Pro3 instruction manual

GOLDEN MASK

GOLDEN MASK DEEP HUNTER Pro3 instruction manual

Kopp 3238.0009.3 owner's manual

Kopp

Kopp 3238.0009.3 owner's manual

manuals.online logo
manuals.online logoBrands
  • About & Mission
  • Contact us
  • Privacy Policy
  • Terms and Conditions

Copyright 2025 Manuals.Online. All Rights Reserved.