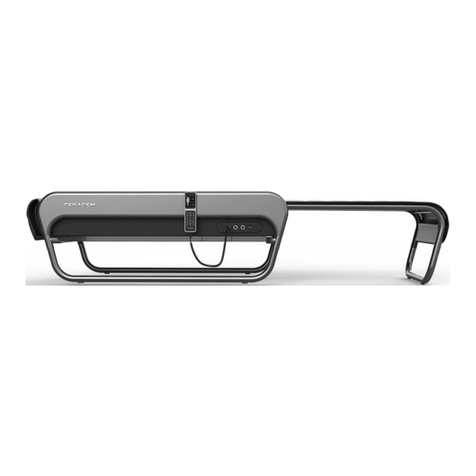
CeraGem MASTER V6 User manual

E6N0N107030 JAN/13/22
CGM MB-1701
User Manual
E358148
10, Jeongja 1-gil, Seonggeo-eup,
Seobuk-gu, Cheonan-si, Chungcheongnam-do,
31045, Korea
Tel : 82-41-523-2550 Fax : 82-41-523-2560

1
1. While using this product, do not remove all metal accessories, jewlery, or other items from
your body.
2. Please check the frame before use. If there are any signs of cracks, breaks or expiration, stop
using the product.
3. Do not use the product in humid or wet conditions.
4. Burn Hazard: the external projector must be used with the corresponding cover to prevent
direct contact between the product and skin. There is a risk of receiving burns.
5. To prevent damage to the eye (eyeball), do not place the external projector directly on the eye.
6. In case of thunder, lightning or an earthquake, please stop using the product and unplug it.
(There is risk of receiving an electric shock or a burn.)
7. Do not pull the cord to unplug or touch the power plug with wet hands.
(There is risk of receiving an electric shock or a burn.)
8. Apart from the mode for massaging the abdomen or the manual mode, do not use the
product laying face down.
(If the product is used lying down, do not use near the rib cage and only on the abdomen.)
9. The patient is an intended operator.
Danger
Please follow the instructions carefully in order to reduce potential electric shocks.
Unintended use may cause burns or physical harm.
Warnings and safety information
This appliance is not intended for use by persons (including children) with reduced physical,
sensory or mental capabilities, unless they have been given supervision or instruction
concerning use of the appliance by a person responsible for their safety. Children should be
supervised to ensure that they do not play with the appliance.
The information below stands to protect the safety of the user and to prevent any property
damage. All users must read the manual and use the product appropriately.
The "Warnings and safety information" are divided into “Danger”, “Warning” and “Caution”
and their meanings are as follows. These symbols indicate potentially dangerous situations
or control methods.
The bed should not be used by persons exceeding 298lb/135kg in weight.
SAFETY WARNING!
Warning
In case of violating the instructions, there is some possibility of serious injury
or death.
Danger
In case of violating the instructions, there is an emergent possibility of
serious damage or even death.
Caution
In case of violating the instructions, there is possibility of minor injury or
property damage.

Important safety issues
2
Warnings and safety information
3
Warnings and safety information Warnings and safety information
Important safety issues
Warning
1. Only use the product if it is in mechanically complete condition.
(If damaged products are used, there is a possibility of injury or burns.)
2. If you have finished using the product or will not use it for a long time, unplug the product.
3. Apart from the external projector cover provided by our company, do not place other products
or substances on top that may cause fires (such as fiber products, blankets, etc.)
(Overheating can cause fires and electric shocks.)
4. In case of use by a disabled person or children, guardians must be present.
*Warning! Keep children away from where this product has been installed.
*Warning! Make sure that children do not jump on the thermal massage bed.
5. Do not use the product if they are in the conditions mentioned below. Call the customer
center and request inspection or after-service.
- If the product has been dropped or is damaged
- If the product is wet
- If the cord or the power button is damaged. (There is a risk of an electric shock or a fire.)
6. Keep the power cord away from electric heating appliances or heaters.
7. This product has only been designed for indoor use. Do not use it outdoors.
8. Do not use the product where there are foreign substances in the air or places that handle
oxygen.
9. Do not use or apply skin care, cosmetic or medical products on your skin before and during
the use of this product.
10. When dismantling the product, make sure both the remote control and the main system are
switched “Off” before unplugging.
11. Be cautious of heated surfaces. (Can cause severe burns.)
12. Do not use the external projector on parts of the body that have low levels of sensitivity or
parts that have reduced blood flow.
(The heat remaining from the product may be dangerous to children or those who are in
poor health.)
13. Please do not sleep on the equipment.
14. Do not randomly disassemble, repair, or remodel the product. Call the customer center when
in need of a repair.
(There is a risk of electrick shock, fire, injury, and/or burns.)
15. Please take care not to insert your hand or any other body part into the main equipment
or supporting mat. (There is a risk of electric shock and/or injury.)
16. To avoid the risk of injury:
- Pregnant women, people who have malignancies, high fever, osteoporosis, people in
poor physical health, people in poor physical shape or undergoing any medical treatment,
and people suffering back, neck, shoulder or hip pain should consult their doctor before
using the product.
- If you have a pacemaker, defibrillator, other artificial implants or other medical devices,
consult with your doctor prior to use.
- If you have sensitive reactions or allergy to heat, you should also consult your doctor
before using the product.
Warnings and safety information
1. When using the internal projector, keep your body straight; do not twist your body.
2. When the product is set to high temperatures, there is a risk of burns, so set the projector’s
temperature at an optimal level. (Depending on the physical constitution or thickness of skin,
use the product at optimal temperature.)
3. Those with sensitive skin must use the product at lower temperatures. (There is a risk of burns)
4. Children, those who cannot control the temperature by themselves, and those who have weak
sensory skin must be cautious of using the product for an extended period even if it is set at
a low temperature because there is risk of receiving a burn.
(Warning! Please use while wearing clothing.)
5. If there are any abnormal symptoms while using the product, you must consult a doctor
before using it again.
6. Do not bend the power cord or the outer wiring by force.
(There is a risk of electric shocks and fires.)
7. Do not place flammable objects (candles, cigarettes and alcohol), objects with water in them,
heavy objects, or sharp objects on top of the product.
(They can cause electric shocks and damage.)
8. When climbing on or off the product, be cautious of the risk of falling.
9. Use according to the instruction manual and do not exceed the duration and methods
instructed in the manual.
(Use 1~2 times a day and do not use other products unless supplied by the manufacturer.)
- Do not use on bare skin; always wear clothing while using the product.
- Do not use if you have had any major surgeries, including back and/or hip surgeries.
- Consult your doctor prior to use if you have any external wound(s) or infection(s) on
the skin where the product will come into direct contact with your skin.
- Immediately stop using the unit if you start to feel sick or uncomfortable, or if the
massage seems too painful.
- As of now, there is no evidence to suggest that this product interferes with or influences
medications. Those taking any prescribed medications should consult their doctor before
using this product.
- Do not go to sleep while using the unit.
- Do not use the unit after drinking alcohol.
- Do not allow children or pets to play on or around the unit, especially during operation.
- Consult with your physician before using the product if you suffer from circulatory insuffiency
or weak circulation in legs or heart diseases.
- Consult with your physician before using the product if you suffer from pain of unidentified
cause.
17. Using the cable incorrectly may lead to strangulation. Please be careful.
18. Please keep RFIDs and cellphones 20cm/8 in from the device.
Caution

45
10. Do not use the external projector(s) for more than 2~3 minutes on one part of the body.
(The projector must be moved to another part of the body after 2~3 minutes.)
11. Do not apply shock to the product.
12. Do not close the supporting mat or detach the remote control during use.
(The active mode is automatically terminated.
13. The appliance has a heated surface. Persons insensitive to heat must be careful when using
the appliance.
14. Please take care not to spill any foreign substance in between the main equipment and the
supporting mat.
(It can cause electric shock, fire, injury, and/or equipment failure.)
15. Please do not throw the remote control or pull on the connecting cable.
(It can cause injury and equipment failure.)
16. The device must not be located in a location where it is hard to remove the detachable
power plug.
17. When a set period of time has passed after setting the mode, the internal projector will
move automatically. Lie down in the appropriate body position (as shown next page).
18. Do not pull or throw the air cell massager parts forcefully.
19. Do not twist the air hose of the air cell massager.
20. If the pressure is too strong when using the air cell massager, stop using
the product immediately.
21. Sticking a sharp object into air cell massager parts may cause malfunction.
22. A level of noise may be heard while the air cell massager is operating.
23. If the pressure when using the air cell massager differs significantly from that
felt during previous use, contact the customer service center.
24. Do not wash or soak the air cell massager/air massage module in water.
25. Wipe the air cell massager/air massage module gently with a wet cloth or towel.
26. When sitting or lying down on the product, the product senses body shape
automatically and the internal projector may move.
27. Data in the USB memory may be damaged while using the product.
Store important data on a separate device.
(Ceragem is not responsible for any loss of data).
28. Twisting may occur due to the characteristics of the remote control cable
component, so check its condition after using the product.
(If the cable is twisted, it may be difficult to store.)
29. Be sure to fully open or close the supporting mat before use.
(Applying a load without fully opening or closing the supporting mat may cause product
damage or failure.)
30. Do not connect more than one electrical product into the same outlet.
31. When using the product in the abdominal area, avoid using it in the rib area.
32. This product is not a processed product under the act on Protective action
guidelines against radiation in the natural environment.
Important safety issues
Important safety issues Warnings and safety information
Caution
1. Only use the product if it is in mechanically complete condition.
(If damaged products are used, there is a possibility of injury or burns.)
2. If you have finished using the product or will not use it for a long time, unplug the product.
3. Apart from the external projector cover provided by our company, do not place other products
or substances on top that may cause fires (such as fiber products, blankets, etc.)
(Overheating can cause fires and electric shocks.)
4. In case of use by a disabled person or children, guardians must be present.
*Warning! Keep children away from where this product has been installed.
*Warning! Make sure that children do not jump on the thermal massage bed.
5. Do not use the product if they are in the conditions mentioned below. Call the customer
center and request inspection or after-service.
- If the product has been dropped or is damaged
- If the product is wet
- If the cord or the power button is damaged. (There is a risk of an electric shock or a fire.)
6. Keep the power cord away from electric heating appliances or heaters.
7. This product has only been designed for indoor use. Do not use it outdoors.
8. Do not use the product where there are foreign substances in the air or places that handle
oxygen.
9. Do not use or apply skin care, cosmetic or medical products on your skin before and during
the use of this product.
10. When dismantling the product, make sure both the remote control and the main system are
switched “Off” before unplugging.
11. Be cautious of heated surfaces. (Can cause severe burns.)
12. Do not use the external projector on parts of the body that have low levels of sensitivity or
parts that have reduced blood flow.
(The heat remaining from the product may be dangerous to children or those who are in
poor health.)
13. Please do not sleep on the equipment.
14. Do not randomly disassemble, repair, or remodel the product. Call the customer center when
in need of a repair.
(There is a risk of electrick shock, fire, injury, and/or burns.)
15. Please take care not to insert your hand or any other body part into the main equipment
or supporting mat. (There is a risk of electric shock and/or injury.)
16. To avoid the risk of injury:
- Pregnant women, people who have malignancies, high fever, osteoporosis, people in
poor physical health, people in poor physical shape or undergoing any medical treatment,
and people suffering back, neck, shoulder or hip pain should consult their doctor before
using the product.
- If you have a pacemaker, defibrillator, other artificial implants or other medical devices,
consult with your doctor prior to use.
- If you have sensitive reactions or allergy to heat, you should also consult your doctor
before using the product.
※ Important information on symptoms
Persons with pre-existing conditions (i.e. spinal conditions, distinct hypertension, high blood pressure,
cardiovascular disease, dizziness, etc.) should moderate massage intensity, temperature, duration,
and frequency of use. If adverse reactions are encountered during or immediately following use,
immediately stop use and consult your physician.
Caution
Changes or modifications not expressly approved by the party responsible
for compliance could void the user's authority to operate the equipment.
Notice to users
User must report a suspected medical device-related serious injury to both the authority and
manufacturer.
Also, if user encounters a situation that user consider to be an adverse event when using the device,
user should also report it to the authorities and manufacturer.
This device is designed for home use.
Contents
This device complies with Part 15 of the FCC Rules. Operation is subject to the following two conditions:
(1) this device may not cause harmful interference, and (2) this device must accept any interference
received, including interference that may cause undesired operation.
NOTE: This equipment has been tested and found to comply with the limit for a Class B
digital device, pursuant to Part 15 of the FCC Rules. These limits are designed to provide
reasonable protection against harmful interference in a residential installation. This equipment generates,
uses and can radiate radio frequency energy and, if not installed and used in accordance with the
instructions, may cause harmful interference to radio communications. However, there is no guarantee
that interference will not occur in a particular
installation, which can be determined by turning the equipment off and on, the user is
encouraged to try to correct the interference by one or more of the following measures:
- Reorient or relocate the receiving antenna.
- Increase the separation between the equipment and receiver.
- Connect the equipment into an outlet on a circuit different from that to which the receiver is connected.
3) Align the user’s head with the logo on the top of the device. (marked with a circle)
1) Extend the device by pulling the supporting mat as shown below.
2) Lay your body on the device as shown below.
Proper body position for use
Warnings and safety information
Contents
7
6
Warnings and safety information
1. Indications for use
2. Product features
3. Parts and components
Ⅰ. Introduction to the Master V6 07
1. Check product components
2. Before installation
3. Installation
4. After installation
Ⅱ. Installation and preparation 11
Ⅲ. Using the Master V6 17
2. Remote control layout
3. Using the remote control
4. Moving the product
1. Before using the product
1. User checklist (Before & After use procedure)
2. Maintenance and storage
3. Troubleshooting
4. Diagnostic codes
5. Product specifications
Ⅳ. Maintenance and troubleshooting 41
- Danger
- Warning
- Caution
01
Ⅰ. Introduction
to the Master V6
1. Indications for use
2. Product features
3. Parts and components
Ⅴ. Service Manual 49

89
1
2
4
8
- Connector connection unit -
(Main body side down)
5
10
6
7
9
Power
switch
Power
cable
Abdominal vibration
projector
USB
- Internal projector -
11
3. Parts and components
Air cell massager
Low-noise air cell massager that helps blood circulation (air massage apparatus)
Specialized 3D motion internal heating projector
The pressure to the cervical vertebral is reinforced and optimized 3D motion close massage
is provided along the spine.
Functions customized to the body shape of the user
The length and curve of the spine are measured precisely and a customized massage that suits
the body shape of each user is delivered.
Adjustment of speed at three levels
Enhanced feeling of massaging effectiveness through the massage speed adjustment function
for slow or fast operation.
Auto start
When the user lies down with the product turned on, the massage begins automatically through
the weight detection sensor.
Easy sliding
Convenient sliding function through auxiliary wheels integrated with the actuator technology.
22 massage modes
Select a massage that fits the body condition through 17 automatic modes, semi-automatic mode,
manual mode, and master mode.
Head cushion
Outer fabric
Supporting mat
(Heating element, applied part)
Remote control(Wired cable)
Power switch(Main body side down)
Internal projector(Heating element)
Sliding handle
Internal heating element
(Heating element)
Abdominal vibration projector
(Heating element, applied part)
Main mat
Accessory storage Box
Air cell massager(Applied part)
* Design (color) and the cover pattern may vary according to the product.
1. Indications for use
2. Product feature
The intended use of the Ceragem Automatic Thermal Massager.
Model CGM MB-1701 is to provide muscle relaxation therapy by delivering heat and soothing massage.
Additionally, the product provides topical radiant infrared heat for:
- Temporary relief of minor muscle and joint pain stiffness
- Temporary relief of minor joint pain associated with arthritis
- Temporary increase in local circulation where applied
- Relaxation of muscles
The Air Cell Massager is indicated for the temporary relief of minor muscle aches and pains and for temporary
increase in blood circulation to the treated areas.
The Air Cell Massager stimulates kneading and stroking of tissues by using an inflatable garment.

10
MEMO
11
1. Check product components
2. Before installation
3. Installation
4. After installation
Ⅱ. Installation
and preparation

13
12
1
2
4
3
5
6
7
Try and avoid installation where there is a lot of humidity or dust.
(To avoid risking electric shocks or fire.)
Install according to the designated order.
Do not drop the product or apply any force to it.
(This could cause malfunctioning.)
Please check the rated voltage(100-127V~.) when installing the product.
(This can also cause circuit breakage and fire.)
Do not use old outlets and damaged power cables or plugs.
(There is a risk of electric shock.)
After you purchase the product, a professional installation technician will
install it. Do not assemble or disassemble the product yourself.
Abdominal vibration projector cover
Can be used to cover the abdominal vibration projector.
User manual
Explains use of the product.
Abdominal vibration projector
This can be connected to the main body and used on the abdomen.
Main body
Use it lying down as a device that helps relieve muscle pain.
Remote control
Used to check the product functions and operating condition of the product.
Remote control back label
Explanation of the buttons on the remote control (attaches to the back of the remote
control.
Outer fabric
Protects against product contamination and burns; this detachable
fabric makes washing easy.
Head cushion
This is attached to the top of the product.
Assembly guide
Product assembly methods are described.
Power cord
Connects with the main body and plugs into an outlet for use.
Air cell massager
It helps blood circulation and is worn on the legs.
Waterproof cover
Use the waterproof cover to protect your product when transporting or storing.
1
2
3
4
5
6
7
8
9
10
11
12
13 Rug
To protect the product and floor, you can put it under the main body and use it
1. Check product components
Install where the ground is flat to avoid the risk of damaging the product.
2. Before installation

Remove the product and its components from the box.
1
2
4
3
Check and connect the abdominal vibration projector correctly.
(Insert the connector correctly and fix it properly by turning the fixture.)
Connect the power cord to the main body first and plug
the power cord into an electrical outlet.
1
Press the POWER button on the remote control and check
that the screen turns on.
2
Caution
1. Set the correct temperature for each user.
2. Sit on or use the product after opening the supporting mat to its end.
Turn on the power (located at the bottom of the main body).
Remove the film from the LCD and the keypad on the
remote control.
* Refer to Page 21 for the screen of the remote control.
* When power is supplied to the main body, the LED on the side of the remote control turns on,
and when the remote control turns on, the LED will turn off.
15
14
* After you purchase the product, a professional installation technician will carry out
the basic assembly process.
4. After installation3. Installation

1. Before using the product
2. Remote control layout
3. Using the remote control
4. Moving the product
Ⅲ. Using
the Master V6
4
17
16
Caution
- When using the air massage, do not sit on or lean against the supporting mat.
- Be careful not to fold the air hose. (Product failure may occur.)
When assembling the air cell massager, insert it into the insertion hole with the arrow
on the connection unit pointing up.
When using the air massage
텅~
4. After installation

Wait!
- Mode, Start/Pause, and Strength can be adjusted only when the abdominal vibration projector is connected.
- Mode, Start/Pause, and Strength can be adjusted only when the air massage is connected.
Composition of buttons on the remote control
19
18
Power On/Off button
Manual mode button
Temperature select button
Intensive mode button
-Internal projector
-Abdominal vibration projector
-Main mat, supporting mat
Control button
-Massage speed control :
press and hold
Automatic mode button
(Automatic A, 1~16)
All mode Start/Pause button
Semi-automatic mode button
Strength select button (1~9)
Abdominal vibration
projector mode (1~3)/Strength (1~3)
(Selection and control)
Air massage mode(1~3)/Strength(1~9)
Sound selection/Volume
Using the product correctly
Lie down in a way that your neck is placed on the internal projector.
Internal projector location
If you do not lie down correctly, the body icon may not appear on the remote control screen.
This is not a product failure. Press the mode start button and use the product immediately.
Wait!
Abdominal vibration projector connection
Wait!
- Before using the product, check if the abdominal vibration projector
is connected correctly. (The image is displayed on the remote control
only when the abdominal vibration projector is connected.)
2After turning on the main body, check if the abdominal vibration projector
icon is displayed on the screen of the remote control.
1Connect the abdominal vibration projector to the main body.
(Insert the connector correctly and fix it by turning the fixture.)
Abdominal vibration projector
①
②
2. Remote control layout1. Before using the product
Manual mode
Intensive mode
Semi-automatic mode
Automatic mode
Selection mode
Back labelButton layout
Mode A(Standard)
Mode 1(Special)
Mode 9(Body line)
Mode 3(Stable)
Mode 5(Basic health)
Mode 7(Study)
Mode 12(Golf)
Mode 14
(Meditation-Relax)
Mode 10(Stretching)
Mode 2(Relax)
Mode 4(Circulation)
Mode 6(Energy)
Mode 8(Rest)
Mode 13
(Meditation-Golf)
Mode 15
(Meditation-Stable)
Mode 11(Growth)
Mode 16
(Meditation-Breathing)

3. Using the remote control
1. Check the cable and the power switch on the main body
of the product, and press the power button on the
remote control.
2. The Ceragem logo will appear on the screen of the
remote control and the remote control will turn on.
3. When the main screen is displayed, use the product
by pressing the desired button.
Wait!
- When the product is closed, the closed product image will be displayed.
- To turn off the remote control, press the power button for approximately
2 seconds.
- The last-used set value will be displayed.
(The set value will not be stored if the product is turned off abnormally.)
Turning on the product
- Main screen -
8
Time remaining (in minutes)
Mode
(Automatic mode A,1-16/Intensive/Semi-automatic/Manual)
Strength display (1-9)
Volume (0-20)
Sound source
(Ceragem sound/USB/Bluetooth/Voice guidance)
Sound pause
3
2
Display of speed of the internal projector
(low speed/constant speed/high speed)
1
4
5
Internal projector location
6
7
8
9
Internal projector temperature (86℉-149℉)
10
Abdominal vibration projector
Screen display
Wait!
21
20
When setting
abdominal vibration projector
When setting
the air massage
If there is any discomfort or emergency while operating the product,
press the on/off button on the remote control to stop the operation.
When setting
the temperature
Wait!
- When the supporting mat is closed, the closed supporting mat image will be displayed as the product image.
- When 10 seconds have passed after the remote control was last operated, the screen will become dark.
(When a button is operated, the screen will become bright again.)
- Before using the product, check if the power cord
is connected to the product and the electrical
outlet correctly.
(If the power is not turned on, refer to Page 42.)
2. Remote control layout

Wait!
- When the product is closed, the closed product image will be displayed.
Setting the temperature
3. Check the changed strength setting on the screen of the
remote control.
Wait!
- When the product is closed, the closed product image will be displayed.
Setting the intensity
1. Check the current strength and press the strength
button.
- The current strength of the internal projector will be displayed on the
main screen.
23
22
3. Using the remote control
- Temperature selection order: Internal projector→Main mat→Supporting mat→
Abdominal vibration projector(3-Sphere projector, etc.)
- The abdominal vibration projector and 3-sphere projector will only be displayed
when connected and the position may vary according to the installation order.
- When using No. 13 meditation mode (golf), the temperature of the internal projector can be set
between 86℉ and 113℉
Internal projector Main mat Supporting mat Abdominal vibration
projector
Off, 86~149℉ Off, 86~140℉
Deletespeed
Stored music5 / Volume5
Bodyicon
Internal projectorYellowSelect
Wholetemperature55
3-sphere projector/
Deletespeed
Stored music5 / Volume5
Bodyicon
Main body matYellowSelect
Wholetemperature55
3-sphere projector/
Deletespeed
Stored music5 / Volume5
Bodyicon
Abdominal projectorYellowSelect
Wholetemperature55
3-sphere projector/
Deletespeed
Stored music5 / Volume5
Bodyicon
supporting matYellowSelect
Wholetemperature55
3-sphere projector/
Deletespeed
Stored music5 / Volume5
Bodyicon
3-sphere projectorYellowSelect
Wholetemperature55
3-sphere projector/
3-Sphere projector
(optional product)
2. To cycle through the heating elements and select the
desired item, repeatedly click the temperature select button,
until the item you'd like to adjust is highlighted in red.
3. Upon selecting the desired item, toggle the up/down
button to increase/decrease the temperature setting.
- The main screen will be displayed after the temperature adjustment has
been recognized.
2. Adjust the strength to the desired level by repeatedly
clicking the strength button or toggling between the
up/down button to increase/decrease the intensity.
- The window containing the strength icon and setting will be highlighted
in yellow.
- Strength can be set at Levels 1 ~ 9.
Low temperature burns may occur, so avoid any direct skin contact with
the abdominal vibration projector and 3-sphere projector(optional product)
and do not use the product on body parts which are less sensitive or with
poor blood circulation (around eyes, neck, armpits, backs of knees, etc.)
for a long period of time.
Caution
1. Check the current temperature and then press the
temperature select button.
- By default, the temperature of the internal projector will be displayed on
the screen (as shown).

3. Using the remote control
2
Setting the thermal sofa mode(the supporting mat is closed)
1
- When the thermal sofa mode is used, the temperature (preheating) can be adjusted.
- The abdominal vibration projector and 3-sphere projector will only be displayed when connected.
- When a temperature is selected, the image of the relevant item will be displayed in red.
3. After setting the temperature, the current temperature
will be displayed.
- If the remote control is operated while using the product, the time
remaining will be initialized.
3. Using the remote control
1. Check the speed of the current mode.
2. Press the up/down button and set the desired speed.
3. Check the changed speed of the mode on the screen of
the remote control.
- The internal projector speed can be set only from the main screen of the remote control.
Wait!
Setting the internal projector speed
* When using the automatic mode, the internal projector speed will be displayed, allowing you to set the internal
projector speed. (speed setting is not available in some modes.)
Low speed Constant speed High speed
Off, 86~149℉ Off, 86~140℉
25
24
Internal
projector Main mat Supporting mat Abdominal vibration
projector 3-Sphere projector
(optional product)
1. When the supporting mat is closed, the device can
be operated as a thermal sofa for comfortable seating.
The "thermal sofa" icon will be displayed. When the
remote control is turned on, check the display.
2. To adjust the temperature of the thermal sofa, press
the temperature select button until the desired item is
highlighted in red, then toggle between the up/down
button to increase/decrease the temperature setting.
Low temperature burns may occur, so avoid any direct skin contact with
the abdominal vibration projector and 3-sphere projector(optional product)
and do not use the product on body parts which are less sensitive or with
poor blood circulation (around eyes, neck, armpits, backs of knees, etc.)
for a long period of time.
Caution

3. Using the remote control 3. Using the remote control
1. Check the current sound status.
* The user can listen to Ceragem sound stored in the product or preferred sound by connecting an external
sound source.
1. Check the current volume status.
3. Check the changed volume status on the screen of the
remote control.
- Noise may be heard as a result of electromagnetic waves.
Wait!
2
1
- A sound source will not be played while using the meditation mode.
2. To cycle through the audio input, repeatedly press the
sound select button until the desired sound source is
selected. Cycle through audio tracks by either repeatdly
pressing the Play button or the up/down button
3. Check the changed sound status on the screen of the
remote control.
- File recognition time may be delayed according to the USB specifications
or storage capacity.
27
26
( )
Ceragem sound → USB → Bluetooth →
When any external sound source is connected
Voice guidance activation
(deactivation)
- If a USB is connected but there is no sound source, the icon will not be
displayed.
- If Bluetooth or USB are connected, the corresponding icon will be displayed.
- Voice guidance will halt if the sound is paused or the volume is set to level 0.
Wait!
- When the Main mode is paused, the sound will be paused also.
The sound will play back when the Sound Start button is pressed again.
- When the sound is paused while using the product, the pause symbol
will be displayed.
- Noise may be heard as a result of electromagnetic waves.
Using the sound Using the volume
2. To adjust the volume, repeatedly press the volume
("speaker" icon) button or toggle between the up/down
button to increase/decrease the volume.
- When setting the sound status, the symbols for the relevant item will be
highlighted in yellow, the desired sound and volume may be set at this time.
- Volume can be set at levels 0~20.
- The volume of voice guidance can be adjusted using the volume button
only when the setting is selected.

3. Using the remote control 3. Using the remote control
3. After setting the mode, operation will start in the
selected mode.
- Shortly after setting is complete, the screen will return to the main screen.
Wait!
- When the Main mode is paused, the abdominal vibration mode will be paused also,
and will resume when the abdominal vibration projector start button is pressed.
- When the abdominal vibration projector mode is paused while using the product,
the pause image will be displayed.
Wait!
- When the product is closed, the closed product image will be displayed.
Sequential pressing(Strengths 1-3 are selected sequentially)
Using the abdominal vibration projector mode Adjusting the abdominal vibration projector strength
5 5
3
Deletespeed
Stored music5 / Volume5
Vibration projectormodeShade
Automaticmode1
Strength3
3-sphere projector/ Abdominal vibration projector
1. Check if the abdominal vibration projector is connected
correctly.
- The current status will be displayed.
1
1
221
121
2
29
28
- The mode can be adjusted by clicking on the icon or toggling between
the up/down buttons to cycle through modes 1-3.
2. To initiate the abdominal vibration projector, click
the appropriate icon and press the start/pause button.
Caution
- Do not operate the abdominal vibration projector on the floor.
(The surface of the product may be damaged.)
Mode 1~3 Approximately 18 minutes
Sequential press (Modes 1~3 are selected sequentially)
2. Adjust the strength of the abdominal vibration projector
by selecting the appropriate icon, then pressing
the start/pause button.
- You can set the desired mode by using the vibration projector strength
button or the up/down button while the relevant item is highlighted in
yellow.
- Strength can be set at levels 1~3.
1. Check the screen of the remote control.
- If properly connected and recognized, the icon will be displayed.
3. After the adjustments are made and recognized,
the mode will start at the selected strength.
- Shortly after the setting is complete, the screen will return to the
main screen.
Low temperature burns may occur, so avoid any direct skin contact with
the abdominal vibration projector and 3-sphere projector(optional product)
and do not use the product on body parts which are less sensitive or with
poor blood circulation (around eyes, neck, armpits, backs of knees, etc.)
for a long period of time.
Caution

3. Using the remote control 3. Using the remote control
Using the air massage mode
- You can set the desired mode by using the air cell massage button or
the up/down button while the relevant item is displayed in yellow.
- Modes 1-3 can be used.
2. Set the mode by pressing the air massage button
and press the start/pause button.
3. After setting the mode, operation will start in the
selected mode.
2. Set the strength by pressing the air massage strength
button and press the start/pause button.
3. After setting is complete, the mode will start at the
selected strength.
- Shortly after setting is complete, the screen will return to the main screen.
- You can set the desired mode by using the air massage strength button
or the up/down button while the relevant item is displayed in yellow.
- Strength can be set at levels 1-9.
- Shortly after setting is complete, the screen will return to the main screen.
1. Check the screen of the remote control.
- The current status will be displayed.
Wait!
- When the Main mode is paused, the air massage will be paused also, and will not resume
when the main massage begins. (It is necessary to re-start the air massage separately.)
- When massage is paused while using the product, the pause image will be displayed.
Sequential pressing(Modes 1-3 are selected sequentially)
Using the air massage strength
5 5
5 5 5 5
Modes 1-3 Approximately 18 minutes
Deletespeed
3
Deletespeed
Stored music5 / Volume5
Body icon
VibrationStrengthShade
Vibration projectorAutomatic mode
Strength5
Temperature55
3-sphere projector/ Abdominal vibration projector
1. Make sure that the air cell massager is connected
properly.
- The current status will be displayed.
1
Wait!
- When the product is closed, the closed product image will be displayed.
- When using the air cell massage, even if motion sounds (woo~ng, tak tak)
of the air pump and solenoid occur, it is not a failure. It is safe to use it.
Sequential pressing(Strengths 1-9 are selected sequentially)
1
2
12
31
30
* Be sure to use the air cell massager after connecting it to the main body.
- Use the air cell massager after raising the zipper to the end.
- Do not use the product on other areas except for the legs.
Caution

Wait!
- When the product is paused and left the internal projector will move down vertically
in order to prevent injury. (When the mode is executed again, the set strength will be restored.)
- When 5 minutes have passed after pausing, the product will turn off automatically.
1. Turn on the remote control, check the current status, and press
the automatic mode button. (mode and time in case of standard speed)
1. Turn on the remote control, check the current status,
and press the Intensive mode button.
- If you cancel the position setting by pressing the Intensive mode button
again, the internal projector will move.
- When 90 minutes have passed after setting the remote control,
the remote control will turn off automatically and the mode will end.
3. Using the remote control 3. Using the remote control
Using the automatic mode Using the intensive mode
Approximately
90 minutes
Duration of mode
A
Sequential pressing(Mode A, 1-16 are selected sequentially)
33
32
Mode A (Standard) Approximately 36 minutes and 30 seconds.
Mode 1 (Special)
Mode 9 (Body line) Approximately
36 minutes and 30 seconds.
Approximately
18 minutes
Mode 3 (Stable) Approximately
36 minutes and 30 seconds.
Mode 5 (Basic health) Approximately
36 minutesand 30 seconds.
Mode 7 (Study) Approximately
36 minutes and 30 seconds.
Mode 12
(Meditation - Golf)
Approximately
36 minutes and 30seconds. Mode 14
(Meditation - Relax)
Approximately
36 minutes and 30 seconds.
Approximately
75 minutes
Approximately
36 minutes and 30 seconds.
Approximately
36 minutes and 30 seconds.
Approximately
36 minutes and 30 seconds.
Approximately
36 minutes and 30 seconds.
Approximately
36 minutes and 30 seconds.
Approximately
18 minutes
Mode 16
(Meditation - Breathing)Approximately
36 minutes and 30 seconds.
Mode 10 (Stretching)
Mode 2 (Relax)
Mode 4 (Circulation)
Mode 6 (Energy)
Mode 8 (Rest)
Mode 13
(Meditation - Golf)
Mode 15
(Meditation - Stable)
Mode 11 (Growth) Approximately
36 minutes and 30 seconds.
* The duration of modes may vary according to the speed of the internal projector.
2. When scanning is completed, the intensive mode
will begin. Maintain proper body position.
- The time remaining will be displayed at the top of the human body icon.
3. To specify the area for intense massage, move the
internal projector by holding down on the up/down
button until the location is found.
Wait!
- When pausing, the internal projector will move down vertically in order to
prevent burns and injury.
(When the mode is executed again, the set strength will be restored.)
- When 5 minutes have passed after pausing, the product will turn off automatically.
* If you press and hold the Mode button, there will be a voice guide on the Mode A (Default) Massage.
3. Once scanning is completed, the massage program
will start. Please remain in the proper position.
- The time remaining will be displayed at the top of the human body icon.
- Massage mode can be chosen either by repeatedly pressing the automatic
mode button or by selecting the automatic mode button then toggling
between the up/down button while the mode display is highlighted in yellow.
- When the mode begins, the ceragem sound will commence.
(A sound source will not be played back while using the meditation mode.)
- The mode cannot be paused during scanning.
- The body type graph varies from person to person.
2. Cycle through the modes by repeatedly pressing the
automatic mode button until the desired massage
program is chosen. Scanning will begin. Remain in
the proper body position--supine and relaxed, lying on
your back, legs outstretched.

2. Move the internal projector to the desired position
using the up/down button.
1. Turn on the remote control, check the current status
and press the manual mode button twice.
Using the manual (master) mode
- The time remaining will be displayed at the top of the human body icon.
- If the remote control is operated while using the product,
the time remaining will be initialized.
- When 5 minutes have passed after setting the remote control,
the internal projector will move automatically in order to prevent burns.
- When 60 minutes have passed after setting the remote control,
the remote control will turn off automatically and the mode will end.
2. Specify the target area for massage by holding down
either the up/down buttons until the desired position
is found.
1. Turn on the remote control, check the current status,
and press the manual mode button.
3. Using the remote control 3. Using the remote control
Using the manual mode
Volume5
T1 icon
3
55
- The selected position will be displayed in green.
Neck area (cervical spine)
Back area (thoracic vertebrae)
Waist area (lumbar vertebrae)
Position Screen display (24 segments)
C1~7
T1~12
L1~5
35
34
Approximately
60 minutes
Duration of mode
Approximately
60 minutes
Duration of mode
3. The manual mode will begin at the chosen location.
Remain in the proper body postion.
3. Once scanning is complete, the manual master mode
will begin. Remain in the proper body position.
- The remaining time is displayed at the upper left corner of the screen.
If the remote control is operated while in use, the remaining time is reset.
- When 5 minutes have passed after setting the position, the internal
projector will move automatically in order to prevent burns.
- When 60 minutes have passed after operating the remote control,
the remote control will turn off automatically and the mode will end.
Wait!
- When pausing, the internal projector will move down vertically in order to
prevent burns and injury.
(When the mode is executed again, the set strength will be restored.)
- When 5 minutes have passed after pausing, the product will turn off automatically.
Wait!
- When pausing, the internal projector will move down vertically in order to
prevent burns and injury.
(When the mode is executed again, the set strength will be restored.)
- When 5 minutes have passed after pausing, the product will turn off automatically.

1. Turn on the remote control, check the current status
and press the semi-automatic mode button twice.
2. Move the internal projector to the desired position
using the up/down button.
1. Turn on the remote control, check the current status
and press the semi-automatic mode button.
Using the semi-automatic mode Using the semi-automatic (master) mode
- The selected position will be displayed in green.
* In Semi-automatic mode, the internal projector will not move to
the cervical spine after the mode ends.
37
36
* In Semi-automatic master mode, the internal projector will not move to
the cervical spine after the mode ends.
3. Using the remote control 3. Using the remote control
Approximately
60 minutes
Duration of mode Approximately
60 minutes
Duration of mode
Neck area (cervical spine)
Back area (thoracic vertebrae)
Waist area (lumbar vertebrae)
Position Screen display (24 segments)
C1~7
T1~12
L1~5
- The remaining time is displayed at the upper left corner of the screen.
- If the remote control is operated while in use, the remaining time is reset.
- When 60 minutes have passed after operating the remote control,
the remote control will turn off automatically and the mode will end.
- The remaining time is displayed at the upper left corner of the screen.
- If the remote control is operated while in use, the remaining time is reset.
- When 60 minutes have passed after operating the remote control,
the remote control will turn off automatically and the mode will end.
2. Specify the target area for massage by holding down
either the up/down buttons until the desired position
is found.
3. The semi-automatic mode will begin at the chosen
location. Remain in the proper body postion.
3. Once scanning is complete, the semi-automatic master
mode will begin. Remain in the proper body position.
Wait!
- When pausing, the internal projector will move down vertically in order to
prevent burns and injury.
(When the mode is executed again, the set strength will be restored.)
- When 5 minutes have passed after pausing, the product will turn off automatically.
Wait!
- When pausing, the internal projector will move down vertically in order to
prevent burns and injury.
(When the mode is executed again, the set strength will be restored.)
- When 5 minutes have passed after pausing, the product will turn off automatically.
This manual suits for next models
1
Table of contents
Other CeraGem Massager manuals

CeraGem
CeraGem MASTER V4 User manual

CeraGem
CeraGem CGM EB-1101 User manual

CeraGem
CeraGem CGM EMT-CS1302 User manual

CeraGem
CeraGem PAUSE M2 User manual

CeraGem
CeraGem CGM ESA-AD1101 User manual

CeraGem
CeraGem Healax User manual

CeraGem
CeraGem Master V4 CGM EB-1901 User manual

CeraGem
CeraGem CGM MCB-1201 User manual

CeraGem
CeraGem PAUSE M4 User manual

CeraGem
CeraGem CGM MB-1101 User manual