
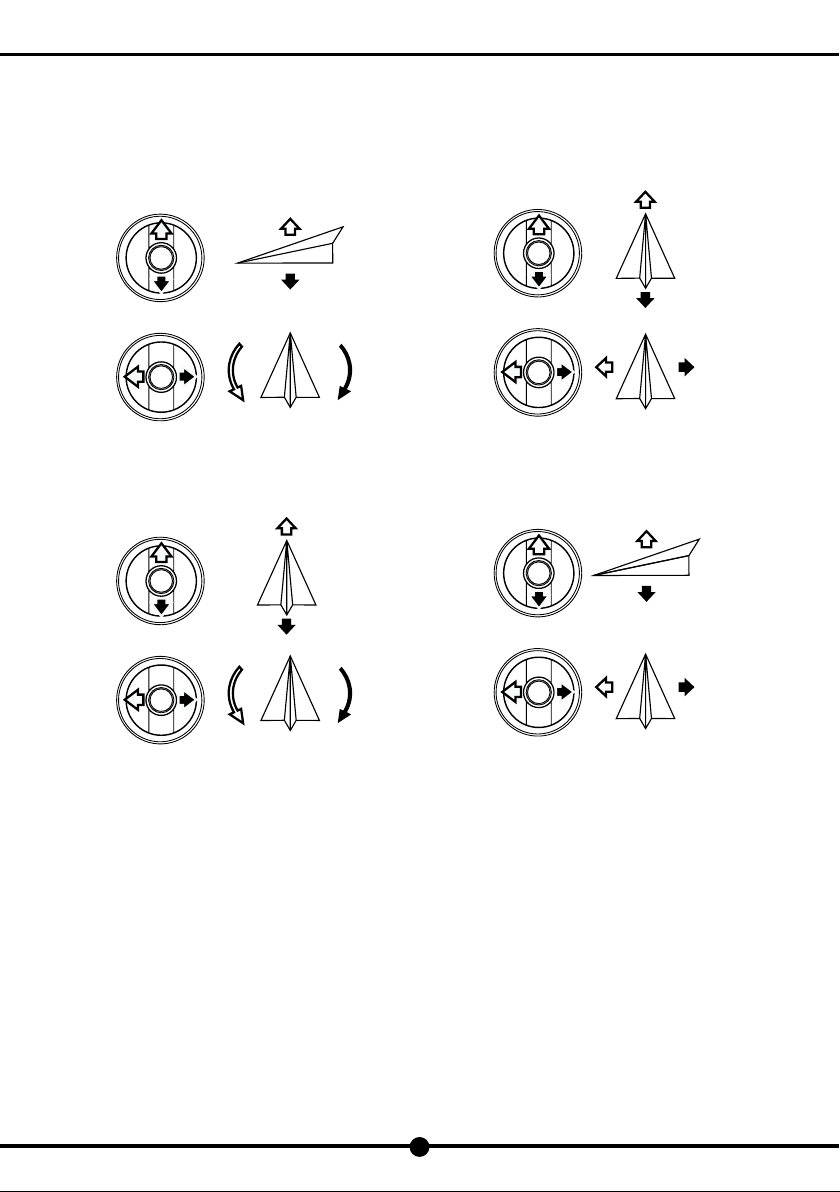
Forward
Left Right
Forward/Backward
Backward
6
DF801
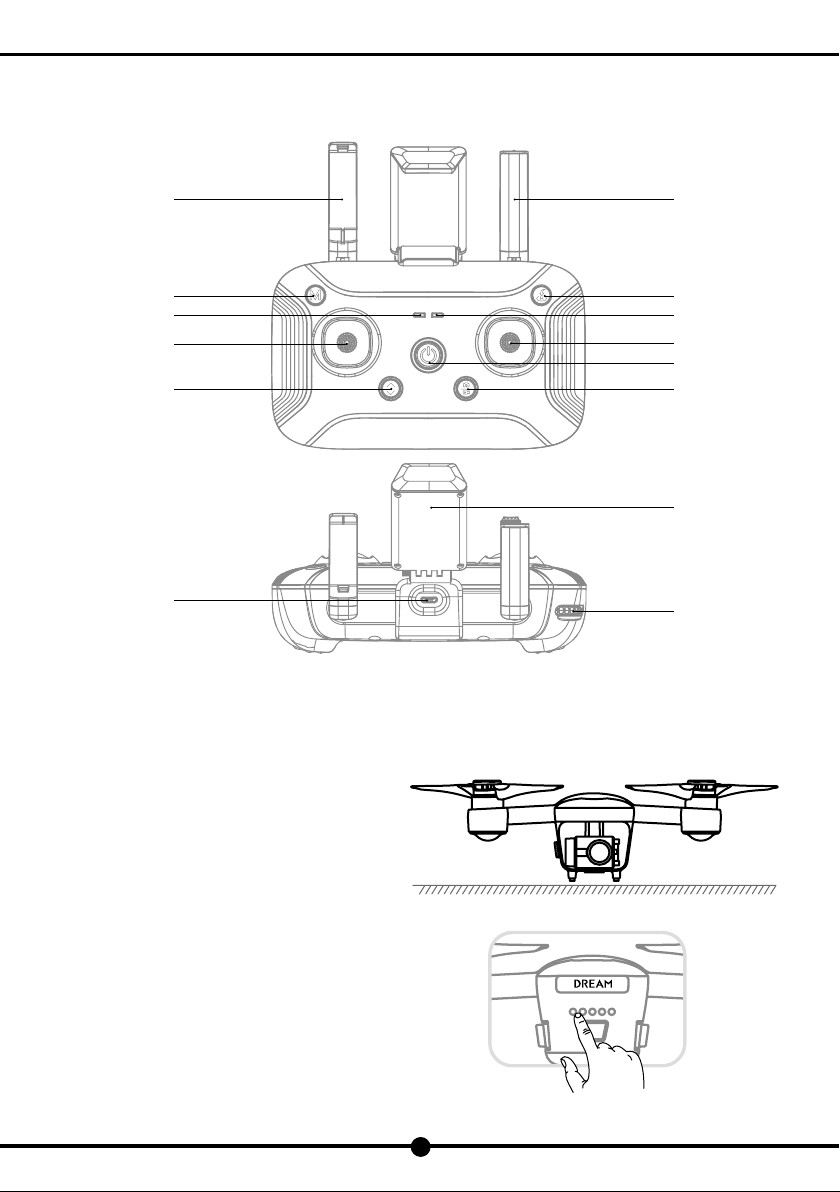
8). Return To Home
In GPS positioning mode, you can press the “One Key Return”button to return the aircraft. Do not control any functions
during the process of return or ascent. When the aircraft is landing, you can toggle the joystick as to control it to land on your
desired location. When the aircraft is returning to home point, long press the “Return”button to exit auto return mode.
Note: As for the return to home point as precise as possible, please ensure the GPS positioning function
has been turned on to record the aircraft’s position before its takeoff and choose an area with no
obstacles.
With the GPS positioning mode turned on, it will automatically enter auto return to home mode if the
remote controller loses control.
Once the auto return to home mode is enabled, if the aircraft flies below 30 meters of altitude, the
aircraft will automatically ascend to 30 meters before returning to home point. However, if the aircraft
flies over 30 meters of altitude, the aircraft will return to home point at the current altitude. Please do
not control other functions during the process of return. Please ensure there are no obstacles in way of
return in case of any potential accidents.
After the aircraft lands and the propellers stop rotating, long press the power switch to turn off the aircraft and the remote controller.
Caution:Please stay away from aircraft until propellers stop rotating completely.
9). Remove the battery and store it separately
(1). When finishing flight,please remove the batteries from the aircraft and remote controller and store them separately.
(2). Keep batteries out ofthe reach of children. Keep the battery dry. DO NOT leave the battery near heat sources such as a
furnace or heater. The ideal storage temperature is 22℃-28℃.
(3). If a battery is found to be damaged,please discharge the battery and dispose them properly according to the local
regulations and laws.
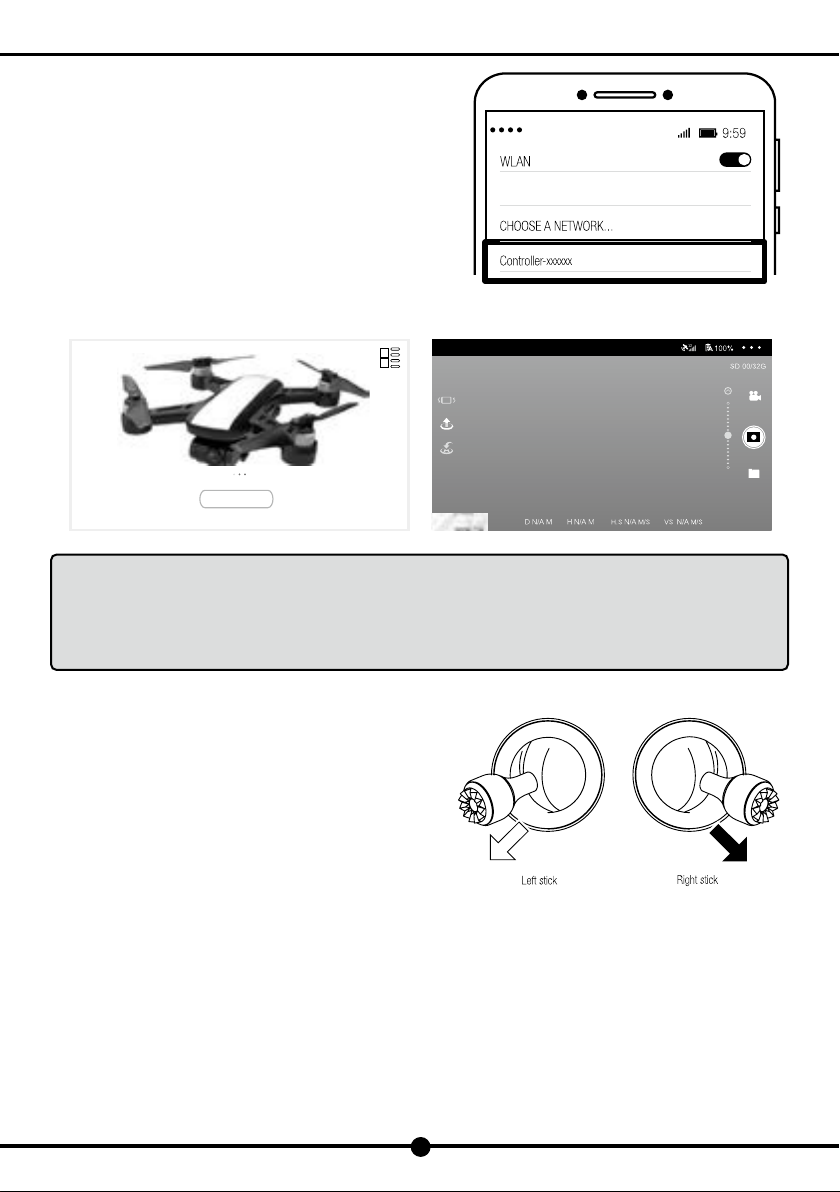
10). Pair the Aircraft with the Remote Controller
The aircraft has already paired with the remote controller by default. If the remote controller has been replaced, please pair again
complying with the following steps:
1) Switch on the drone and the remote controller.
2) Unlock your mobile phone, enter the menu “Settings-
WLAN” to view the Wi-Fi network list, among which you
can see “Drone-xxxxxx” (xxxxxx consists of characters
and numbers) of the drone and “Controller-xxxxxx” of
the remote controller (xxxxxx consists of characters and
numbers). Please take down the serial number of the
remote controller for further reference.
3) Click the Wi-Fi network of the drone to connect.
4) Enter the APP interface and click “…” in the top right
corner to enter the menu.


 user manual")