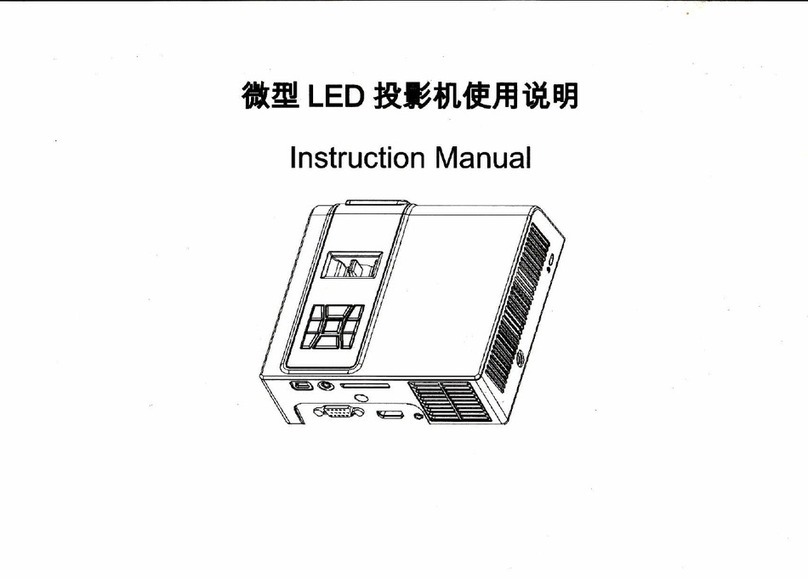
chinavasion CVJV-E178 User manual

INSTRUGTION MANUAL
Please read this manual carefully before operating your projector and retain for future
reference.

It
..1t. .
r:TABLE pj.C.0NTgN,fS1lr";....' o- -lari - i.::.-ar:iirr,a;a;irr:i-'::r.:;r.: jt:rfl;.}T; + - t,- - - -.=,r - 1
-----;::-+-'-2
SAFEry INFORMATION - - - - - - - - - : i
rueOnr4ryrglfirVrNST,SUCIIQNS,,''1*r.--ii:--:,-----:----nq-}rx;.--t,ta:;t,*7-,-1-;,2
tNrRoqucrlgN '---'--- -, -- --.;--l---_.-----,_,- -- , lli"l',la;,.,;rt.,,,
SFfIIPINGCONTENTS ---''-'-----.r:-"--------ra+-r-:-:-t-r------r-.-i-:------4
'1'' , ,.'. n., 1r -l . .',,,
r ;ii
| .: : t ,:1r. :&.
!!i:!'i!;$14
,1" !ir..!i}1,ral-i'l i!1. I
illJ'l'i
,fl.tilr*r
. rlil', i;,ill:{.i,r ; ,'
)';1a.lt .i ,,:;. ::'
;;,lrJ,tir:fft Yltt,
":.'t 1;r:;yr ri',r -,,r",
ii.':t .):i:;;;'.-i:
. .,1 l,
CONSR@|I8,{A[&f;,I4NOTI@N9;&'* r]i+:firrit/*.6 i;,i5'sl{rri;rr t.r*J.:1+,tiq"t:ar.l+L':1}sp:r--x.';':;$

SAFETY INFORMATION
Please read the manual carefully before using this DVD projector, and keep it safe for future
reference.
All contents subject to change without notice
rffiFxmEr
This equipment has been tested and found to comply with the limits for a Class A digital
device, pursuant to Part 15 of the FCC Rules. These limits are designed to provide
reasonable protection against harmful interference when the equipment is operated in a
commercial environment. This equipment generates, uses, and can radiate radio
frequency energy and, if not installed and used in accordance with the instruction
manual, may cause harmful interference to radio communications. Operation of this
equipment in a residential area is likely to cause harmful interference in which case the
user will be required to correct the interference at his own expense.
You are cautioned that any changes or modifications not expressly approved in this
manual could void your authority to operate this equipment. The shielded interface cable
recommended in this manual must be used with this equipment in order to comply with
the limits for a digital device pursuant to Subpart B of Part 15 of FCC Rules.
rwfrim
This is a ClassAproduct. ln a domestic environment, this product may cause radio.
interference in which case the user may be required to take adequate measures.
l-wARNrNGl
ln order to prevent the risk of fire or electric shock, do not expose the machine to rain or
ahy moisture. Do not open the case of the unit because of the risk of electric shock. Repair
work must be undertaken by qualified personnel.
[rrxmmm
lf the unit is moved from a cold to warm environment condensation may develop on the
lens of the laser. To ensure correct operation switch the unit off and leave it for one hour
before using.
I M PORTANT SAFETY I N FORMATION
1) Read these instructions.
2) Keep these instructions.
3) Heed all warnings.
4) Follow all instructions.
5) Do not use this apparatus near
6) Clean only with dry cloth.
7) Do not block any ventilation openings. lnstall in accordance with the manufacturer's
instructions.
8) Do not install near any heat sources such as radiators, heat registers, Stoves, or other
apparatus (including amplifiers) that produce heat.
9) Do not defeat the safety purpose of the polarized or grounding-type plug. A polarized
plug has two blades with one wider than the other. A grounding type plug has two
blades and a third grounding prong. The wide blade or the thi,r.d prong are provided
for your safety. lf the provided plug does not fit into your outlet, consult an electrician
for replacement of the obsolete outlet.
10) Protect t he power cord from being walked on or pinched particularly at plugs.
Convenience receptacles, and the point where they exit from the apparatus.
11) Only use attachments/accessories specified by the manufacturer.
12) Use only with the cart, stand, tripod, bracket, or table specified by the manufacturer.
or sold with the apparatus. When a cart is used, use caution when moving the cart /
apparatus combination to avoid injury from tip-over.
13) Unplug this apparatus during lightning storms or when unused for long periods of
time.
14) Refer all servicing to qualified service personnel. Servicing is required when the
apparatus has been damaged in any way, such as power-supply cord or plug is
damaged, liquid has been spilled or objects have fallen into the apparatus, the
apparatus has been exposed to rain or moisture, does not operate normally, or has
been dropped.
15) Operate the unit on AC 200-240 I 110-240 V , 50/60 Hz to DC 12V power adaptor.
16) Should any liquid or solid object fall into the cabinet, unplug the unit and have it
checked by qualified personnel before operating it further.
17) Unplug the unit from the wall outlet or set the power switch to OFF position if it is not
to be used for several days.
18) To disconnect the cord, pull it out by the plug. Never pull the cord itself.
19) The wall outlet should be near the unit and easily accessible.
20) The unit is not disconnected from the AC power source (mains) as long as it is
connected to the wall outlet and the power switch is set to the OFF position.
21) Do not look into the lens while the lamp is on.
22) Do not place your hand or objects near the ventilation holes. The air coming out is hot.
23) Avoid using an extension cord with a low voltage limit, as it may cause short-
circuiting and physical injury.
24) Do not catch your finger between the unit and surface of the floor when moving the
projector installed on the floor.
@
water.

INTRODUCTION
Projector features:
The LED projector integrates high-performance optical engine projection and a user-
friendly design to deliver high reliability and ease of use.
The projector offers the following features:
[Model ]:GD-300PG
[Function] : LCOS Projector with DVD Playbacl</card reader
[Projection method] : FronVTop/Ceiling
[Maximum resolution] : 1024x768 pixel
[Zoom ratio] : Fixed zoom
[Focus] : Manual focus
[Brightness] :200Lumens Maximum
[Screen size):2l" - 120"
[Aspect ratios] :4:3, 16:9
[Operation Temp.] : 10 - 40 degree
[Acoustic] : < 40dB
[Full compatibility with disc ]:
Quick cooling time
DivX / MPEG4 / DVD / VCD / SVCD / CD / CD-R / DVD
Mp3 / DVDRW
Portable multi-function unit
Multi-language on-screen menus
Built-in speakers for stereo audio(2W x 2PCS)
Built-in SD/MMC/MS cards reader, USB host module
Powerful AV function to provide high quality AV picture
External PowerAdapter with Universal AC Voltage input 110-240V DC12V
output
SHIPPING CONTENTS
The projector is shipped with the cables required for connection to a TV and video output
devices. Carefully unpack and verify that you have all of the items shown below. lf any of
these items are missing, please contact your place of purchase.
The supplied accessories will be suitable for your region, and may differ from those
illustrated.
ru Q
@ry

Projection Lens & Focus adju
lR remote sensor
Speaker (Left)
Air exhaust vent (Left)
PROJECTOR EXTERIOR VI EW CONTROLSAND FUNCTIONS
1. Control panel
2. Remote Controller Layout & Functions
1. Left / upper side
2. Right / upper side
3. Front side
Foot
Air intake vent (right)
HDMI in port
USB port
SD/MMC/MS card reader
Audio Line-in jack
VGA in Jack
Coaxial jack
S-Video in jack
A/V out jack
Speaker right
Volume Up / Down button Play / Pause / Enter button
Power button: Press to turn Off/On
the device.
UpiDowniLeft/F
(OSD control only)
Setup button to DVD Menu
TV Menu button: Press to enter the
TV Menu. 4:3 I 16:9 change button
Source button to change Source. Next i Pre, Forward/backward

REMOTE CONTROL BUTTON
Chapter setting, 1, 2, 3.".
4:3 /16:9
L/R StereoSwitch
Jump to track,
title or time
POSITION ING YOUR PROJECTOR
Choosing a location
Your projector is designed tg be installed in two possible installation locations:
1, Floor in front of screen.
Select this location with the projector placed near the floor in front of the screen. This is
the most common way to position the projector for quick setup and portability.
2, Ceiling
Select this location with the projector suspended upside-down from the ceiling in
front of the screen.
Your room layout or personal preference will dictate which installation location you
select.
Take into consideration the size and position of your screen, the location of a suitable
power outlet, as well as the location and distance between the projector and the rest of
your equipment.

CABLE CONNECTION
Cable TV Connection
Cable TV
Use a supplied antenna cable to connect the TV signal to the Projector's TV Cable
term inal.
ff$ Connect the adaptor to Projector and press the POWER key to Turn ON the Projector
ffi er"., the Source button on the top panel or Remote control to select TV item
\*d
Connecting a PC
-E. 0
ilH
I I n,auc.m
I t- iflalh
t* m
Use a D-SUB(VGA) cable to connect the PC' s
VGA input jack. Use an audio cable to connect
m
qjp Connect the adaptor to Projector and press the POWER key to Turn ON the Projector
D-SUB(VGA) output jack to the Projector
the Projector audio Line-in jack.
ffi er".. the Source button on the top panel or Remote control to select VGA item. .
s@5,
@
CABLE CONNECTION
Connecting an A/V Device with Composite Connne ctor
q
q
@
Use a composite cable to connect the externalA/V device's composite Video/Audio
jacks to the Projector's Video/Audio lN jacks.
Connect all AC power sources, before turning on the power switch of the projector
or other connected equipment-
Press the POWER button on the Top panel or remote control to turn on the Projector.
To view the A/V device's with component input, press the SOURCE button on the
top key or remote control to select AV item(Source Menu as above AV item).
+
&Hfl
f
@
@
@
ffi
SATELLITE RECEIVER

CABLE CONNECTION
S-Video in Gonnection
Use a S-Video cable to connect the external
lnput Jack. S-Video out jack to the Projector's S-Video
^&.
ffi Connect the adaptor to Projector and press the POWER key to Turn ON the Projector
& tr".. the Source button on the top panel or Remote control to select S-VIDEO item
Connecting HDMI Source
E
use a HDMI cable to connect the external HDMI output jack to the projector HDMI
input jack.
& Connect the adaptor to Projector and press the POWER key to Turn ON the Projector
& tr"". the Source button on the top panel or Remote control to select HDMI item .
CABLE CONNECTION
Audio/Video out Connection
w@
Use a composlte cable to connect the external TV's composite Video/Audio-in
jacks to the Projector's Video/Audio out jacks.
@ er"r" the Source button on the Top panel or remote eontrol to select DVD item.
To view the A,/V device's with component input, and turn on the TV to change
AA/-in item.(Source Menu as above DVD item).
USB, Card Reader and Earphone Connection
.&.
ffi S Use a SD/MMC/MS Card or USB to in set the jack, Earphone to the earphone jack.
w
&.
W. Connect the adaptor to Projector and press the POWER key to Turn ON the Projector
ffi tr"." the " USB or Card " or Remote control to select " USB or Card " item
w

CABLE CONNECTION
Goaxial Digital Audio out Connection
Use a Coaxial cable to connect the externalAudio Receiver Coaxial in jack to
the Projector's Coaxial out jack.
Connect all AC power sources, before turning on the power switch of the projector
or other connected equipment.
Press the POWER button on the Top panel or remote control to turn on the Projector
Press the SOURCE button on the top key or remote control to select DVD item and
select SPDIF audio output.
Press TV button to enter the TV set up menu, use function buttons select image, sound,
feature and TV menu, press the TV button and you can exit the menu settings.
(Remote control settings).
Press OSD button to enter the set up menu, use OSD and VOL+ keys, select
image, sound,menu, function, TV setting, press the OSD button and you can
exit the menu settings (Machine button settings).
Following is TV set method, according to remote control illustrate steps, if user need to
use machine button, please check " machine button set steps.
OSD SETUP MENU
I
I
@
@
ffi
@
@
lmage set up menu......
Press OSD button to enter the
set up
menu, use"lefUright"direction
keys,select image, sound,menu,
function, TV setting,press the
OSD button and you can exit
the menu settings.
Gontrast
Press "left / right" direction keys,
select the image you want to set the
Contrast, press the OSD keys
exit the setting.
Brightness
Press "left / right" direction keys to set
the Brightness you want press the OSD
keys to exit the setting.
Press "left / right" direction keys to set the
saturation you want press the OSD keys
to exit the
Sharpness.
Press "left / right " direction keys to
set the sharpness you want press
the OSD keys to exit the setting.
I
Hue......
Press "left / right" direction keys to set
the hue you want press the OSD

OSD SETUP MENU
Picture mode.
Press "left / right" direction keys to set
the Color Temperature you want, press
the TV menu to exit the setting.
Golor Temperature.
Press "left / right" direction keys to set
the Color Temperature you want, press
the OSD keys to exit the setting.
SOUND SETTING......
According to the main OSD menu l
Press "updown" button, pop up
a sound option, you can set
the bass, treble, balance,
sound mode, AVC, press the
OSD keys to exit the setting.
Scale(lmage ratio). . . . . .
Press "left / right" direction keys to set
the Scale you want press the OSD
keys to exit the setting.
Bass......
Press "left / right" direction keys to set
the bass you want, press the
OSD keys to exit the setting.
OSD SETUP MENU
Treble.
Press "left / right" direction keys to set
the Treble you want, press the OSD to
exit the setting.
Blance.
Press "left / right" direction keys to set
the Blance you want, press the OSD to
exit the setting.
MENU SETTING
According to the main TV menu: Press
"up / down " button, pop-up
options, you can set the
Language
Press "left / right" direction keys to set
the Language Time you want, press the
OSD to exit the setting.
Menuhorizontal Position
Press "left / right" direction keys to set
the Menu horizontal Position you
want, press the OSD menu to exit the
Menu vertical position
Press "left / right" direction keys to set
the Menu vertical position , press the
OSD to exit the setting.
language,menu horizontal position,
menu vertical position, duration,
halftone, menu size, memory recall,
information, press the OSD keys to
exit the settinq.
Press "left / right" direction keys to sel
the Sound mode you want, press

OSD SETUP MENU OSD SETUP MENU
Menu duration
Press "left / right" direction keys to set
the menu duration you want, press the
Menu halftone
Press "left / right" direction keys to set
the menu halftone you want, press the
OSD keys to exit the setting.
MENU SIZE
Press "left / right" direction keys to set
the menu size you want, press the OSD
keys to exit the setting.
Press "left / right" direction keys to set
the reset you want, press the OSD
keys to exit the setting.
lnformation
Press "left / right" direction keys to set
the information you want, press the
OSD keys to exit the setting.
FUNCTION SETTING
According to the main rv ,"nr, itess
"up / down"button, pop-up options,
you can set the sleep
timer, advance, press the OSD
keys to exit the setting.
Press "left / right" direction keys to set
the Sleep timer you want, press the
OSD keys to exit the setting.
Advance
Press "left / right" direction keys to set
theAdvance you want, press the OSD
keys to exit the setting.
TV SETTING
According to the main TV menu: Press
the "up / down" button, pop-up TV set
options, you can set the color-SYS,
sound-SYS, auto scan, manual search,
fine,skip;AREA freq, freq from,
press the OSD keys to exit the
setting.
Golor-SYS
Press "left i right" direction keys to set
the Color-SYS you want, press the
OSD keys to exit the setting.
Sound-SYS
Press "left / right" direction keys to set
the Sound-SYS you want, press the
OSD keys to exit the setting.
Auto scan
Press "left / right" direction keys to set
the Auto scan you want, press the OSD
keys to exit the setting.
Manual search .
Press "left / right" direction keys to set
the Manual search you want, press the
OSD keys to exit the setting.
Press "left / right" direction keys to set
the Fine you want, press the OSD keys
to exit the setting.
CHANNEL EDIT .
Press "left / right" direction keys to set
the Skip you want, press the OSD keys
to exit the setting.
Sleep timer

DVD SETUP MENU DVD SETUP MENU
................
Area freq
Press "left / right" direction keys to set
the Area freq you want, press the OSD
keys to exit the setting.
Freq from
Press "left / right" direction keys to set
the Area freq you want, press the OSD
keys to exit the setting.
DVD SETUP MENU
Press the SETUP button to enter the
SETUP MENU. Use the direction buttons
to select SYSTEM, LANGUAGE, AUDIO,
VIDEO, SPEAKER and DIGITAL SETUP
screens, and press the ENTER button to
confirm.
SYSTEM SETUP..,..,.,,
Under the main SETUP MENU: Press the
'LEFT / RIGHT' button to highlight the
SYSTEM SETUP item, then you can setup
the TV SYSTEM, SCREEN SAVE, TV TYPE
by pressing the direction button and the
ENTER button.
TV SYSTEM
There are three kinds ofTV system you
can select by pressing the direction
button NTSC, PAL, AUTO. Press ENTER to
confirm.
SCREEN SAVER
ON, OFF. You can select either of them
by pressing the direction buttons and t-
hen pressing the ENTER button to co-
nfirm .
PASSWORD
Move the cursor to the Password item
and press the ENTER button to confirm
and then input the secret code "8888"
(factory default).After confirmation, you
are required to input new secret code
and then press the ENTER button to
confirm.
* lf the password is lost, please enter the
super password 1126 to override the
password lock. Then enter your new
password and press "Enter" to confirm.
RATING
The Rating feature is a rating limit
system, like movie ratings. lt works with
DVD discs that have been assigned a
rating. This helps you control the types
of DVDs that your family watches.
Available ratings are listed when you
enter the RATINGS screen"
The default setting is ADULT.
NOTE:
lf the Password option is locked, you
cannot set the ratings limit.
DEFAULT
This is the factory default setting, when
you choose "RESTORE', the previous
setting by the user will be cancelled and
the player will return to the default
factory settings.
LANGUAGE SETUP.........
Under the main SETUP MENU:
Press LEFT/RIGHT button to hightight
the LANGUAGE item, then you can setup
the OSD, MENU, AUDIO and SUBTTTLE
languages by pressing the direction and
ENTER buttons.
OSD LANGUAGE
English, German, Spanish, French, ltalian,
you can select any of them that you want
by pressing the direction buttons to
select, and then pressing the ENTER
button to confirm.
AUDIO LANG
Chinese, English, ltalian, French, Spanish,
Portuguese, German and Latin, you can
select any of them, but it also depends
on whether your disc supports that
language.
f
,iL

DVD SETUP MENU
AUDIO SETUP......,.,
Under the main SETUP MENU:
Press"LEFT / RlGHT"button to highlight
the AUDIO SETUP item, then you can
setup DOWN SAMPLE by pressing the
direction button and the ENTER button.
Press the direction buttons to select, and
then press the ENTER button to confirm.
SUBTITLE LANG
Chinese, English, ltalian, French, Spanish,
Portuguese, German and Off. you can
select any of them, but it also depends
on if your disc supports that language. AUDIO OUT
SPDIF / OFF, SPDIF / RAW, SPDIF / PCM.
You can select any of them that you want
by pressing the direction buttons, and
then pressing the "ENTER" button to
conf irm.
MENU LANG
Chinese, English, ltalian, French, Spanish,
Portuguese, German and Latin you can
select any of them, but it also depends
on if your disc supports that language. VIDEO SETUP....,.....
NOTE:
ln order to adjust the brightness,
contrast, hue and saturation, it is advised
that you use the following setup menu
process before using any other
adjustment method. once you have
adjusted the screen settings to a desired
level, you may use the "mode" button on
Pressing the direction buttons to select,
and then pressing the ENTER button to
confirm.
DVD SETUP MENU
the side of each lcd to "fine tune" your
settings. the "mode" button on the
remote control and on the side of the
lcd-dvd unit adjusts the picture settings
of the lcd-dvd unit only.
(Note: the on-screen-display will appear
on the 2nd monitor, however adjusting
the settings will not effect the 2nd
monitor).
Remark: The super password 1126 is
unchangeable.
ln order to "fine tune" the settings of
the 2nd monitor, please use the "mode"
button on the side of the 2nd monitor.
Under the main SETUP menu:
Press the "LEFT/RlGHT" button to
highlight VIDEO SETUP item, then you
can setup the BRIGHTNESS, CONTRAST,
HUE and SATURATION by pressing the
direction buttons and the'ENTER"
button.
BRIGHTNESS:
You can adjust the BRIGHTNESS from
0 to 12 by pressing the "UP/DOWN"
button, and then pressing the "ENTER"
button to confirm-
CONTRAST
You can adjust the CONTRAST from 0 to
12 by pressing the "UP / DOWN' button,
and then pressing the "ENTER" button to
confirm.
HUE
You can adjust the HUE from -6 to +6 by
pressing the "UP / DOWN' button, and
then pressing the "ENTER" button to
confirm.
SATURATION
You can adjust the SATURATION from0 to
12 by pressing the "UP / DOWN' .button,
and then pressing the "ENTER"button to
confirm.
SHARPNESS
You can adjust the sharpness from 0 to B
by pressing the "UP/DOWN" button, and
then pressing the "ENTER" button to
conf irm.

DVD SETUP MENU
-
DVD SETUP MENU
OP MODE
LINE OUT, RF REMOD. You can select
your choice by pressing the direction
buttons, and then pressing the
'ENTER' button to confirm.
DIGITAL SETU P.......,,
Under the main SETUP menu:
Press "LEFT / RIGHT- button to highlight
DIGITAL SETUP item, then you can set the
DYNAMIC RANGE
You can adjust the dynamic range bY
pressing the "UP/DOWN" button, and
then pressing the "ENTER" button to
confirm.
DUAL MONO
STEREO, MONO L, MONO R, MIX MONO
You can select your choice by pressing
the direction buttons, and then pressing
the "ENTER" button to confirm.
SPEAKER SETUP.........
Under the main SETUP menu:
Press "LEFT/RIGHT' button to highlight
SPEAKER SETUP item, then you can setup
the DOWNMIX.
DOWNMIX
LT/RT, STEREO. Select Your desired
choice by pressing the direction
buttons, and then pressing the"ENTER"
button to confirm.
SUBWOOFER
Subwoofer on/off , Select your desired
choice by pressing the direction
buttons, and then pressing the"ENTER"
button to confirm.
CENTER DELAY
Center Delay uP/down, Select Your
desired choice bY Pressing the
direction buttons, and then pressing
the"ENTER" button to confirm.
REAR DELAY
Rear Delay uP/down, Select Your
desired choice bY Pressing the
direction buttons, and then pressing
the"ENTER" button to confirm.
FRONT
LARGE, SMALL. Select Your desired
choice by pressing the direction
buttons, and then pressing the"ENTER"
button to confirm.
DYNAMIC RANGE, DUAL MONO

THE PROJECTOR DOES NOT TURN ON.
Plug the power cord into ttietAC inlet 91'
the projector,,,and plug the power,cord into
the i?ower outlet. lf thd power ou:tlel h,?e"a
switch, rqake sure that it is switohed.iirt
There,is.no power from the power cable
Waituntil the eooling.down probess has
Attemptingto turn the projector on again
during the cooling process
TROUBLESHOOTING MAINTENANCE
Gare of the projector
Your projector needs little maintenance. The only thing you need to do on a regular basis
is to keep the lens clean.
Never remove any parts of the projector. Contact your dealer if parts need replacing.
Cleaning the lens
Clean the lens whenever you notice dirt or dust on tf e surface
Use a canister of compressed air to remove dust.
'lf there is dirt or smears, use lens-cleaning paper or moisten a soft cloth with lens
cleaner and gently wipe the lens surface.
Never rub the lens with abrasive materials.
Cleaning the projector case
Before you clean the case, turn the projector off and unplug the power cord.
To remove dirt or dust, wipe the case with the cleaning cloth.
To remove stubborn dirt or stains, moisten a soft cloth with water and a neutral pH
detergent. Then wipe the case.
Never use wax, alcohol, benzene, tfiinner or other chemical detergents, These can
damage the case.
Storing the projector
lf you need to store the projector for an extended time, please follow the instructions
below:
Make sure the temperature and humidity of the storage area was within the
recommended range for the projector.
Retract the adjuster feet.
Remove the batteries from the rembte control.
Pack the projector in its original packing or equivalent.
Transporting the projector
It is recommended that you ship the projector with its original packing or equivalent.
When you carry the projEctor yourself, please use the original box or provided soft carry
case.
#
The video source is not turned on or
connected correctly. Turn the video source on and check that
the sign6l cable'is connected
The projector is not correctly connected
the input source device. Select theSorrept input signal vritltithC
Source key on th€, prpjeclor or remote'
conlrol;'
The input signal has not been correctly
selected.
Remove the lens cap
The lens cap is still altached to the lens.
BLURRED IMAGE
Adjust the focus of the lens using the
us adjuster.
Adjust the projection angle and direction
as well as the height of the unit if necessary
The projector and the screen are not
aligned properly.
The lens cap is still attached to the lens.
REMOTE CONTROL DOES NOTWORK
Replace the battery with a new one.
The battery is out of power.
There is an obstacle between the remote
control and the projector.
Stand within 6 meters (19.5 feet) of the
projector.
You are too far away from the projector.

SPECIFICATIONS
Projector specifications
All specifications are subject to change without notice.
Resolution: 1024 x768
Contrast Ratio: 800:1
Light Source and Life: LED(RGB), 20000 hours
Maximum Resolution: Video: 640 x 480
Dimensions (WxHxD): 265mm x 165mm x g0mm
Aspect Ratio:4:3 / 16:9
Noise Level: <40d8
lmage Size: 20 to 120 inch (1 to 4meters)
Video Compatibility: NTSC / PAL . : ,:.'
ProjectionMethod: Front/Iop /Ceiling
Power Supply: AC to DC Adapter, AC 110-240V,50-60H2, DC12V
Power Gonsumption: 60 watts, <5 watts in standby mode .
Operating Temperature: 1O to 40C; 80% Maximurn;humidity ':t; t:
l/O Connectors: USB port, earphone port, SD / MMC card reader, compo'iite video-in
(RCA),Stereo audio-in jack, stereo audio-out jack, coaxial jaqk
S-Video in, VGAin, HDMI in, Cable TV
OSD Language: English, Chinese, Japanese, French, German, Spanish, ltalian, Dutdh
Limited Warranty -:'
DVD Combo warrants this product against any defects in material and workmanship,
Proof of purchase date will be required with any warr"nlll1"i., ln the event this product
is found to be defective within the \ /arranty period, D.Vp Combo's only obl'igation and
your exclusive remedy shall be replacement of any defective parts (labor ir;rgluded)i To
obtain warranty service, immediately notify the dealer from which you purcha
product of any defects.
lmportant: The above warranty shall be void if the customer fails to operate the product
in accordance with DVD Combo's written instructions, especially the ambient humidity
must be in-between 10% and 80%, temperature in-between 10C and 40C, altitude lower
than 10000 feet, and avoiding to operate the projector in a dusty environment. This
warranty gives you specific legal rights, and you may have other rights, which vary from
country to country.
Please refer to the warranty card and limited warranty is subject to change without notice.
il .,,1l&',: .
Table of contents
Other chinavasion Projector manuals

chinavasion
chinavasion W0000173 User manual

chinavasion
chinavasion CVQF-E158 User manual

chinavasion
chinavasion CVAK-E232 User manual

chinavasion
chinavasion CVAEL-E394-2GEN User manual

chinavasion
chinavasion PortiMax HDMI User manual

chinavasion
chinavasion UC80 User manual

chinavasion
chinavasion CVAK-E214 User manual

chinavasion
chinavasion CVAK-E440 User manual

chinavasion
chinavasion UC40 User manual

chinavasion
chinavasion CVSL-E167 User manual