ANALIZADOR DE CONSUMO
CONSUMPTION ANALYZER
ANALYSEUR DE CONSOMMATION
VERBRAUCHSANALYSER
Este manual es una guía de instalación del Wibeee Max. Para
más información, se puede descargar el manual completo en la
página web de CIRCUTOR: www.circutor.com
¡IMPORTANTE!
Antes de efectuar cualquier operación de instalación,
reparación o manipulación de cualquiera de las co-
nexiones del equipo debe desconectar el aparato de
toda fuente de alimentación. Cuando sospeche un
mal funcionamiento del equipo póngase en contacto
con el servicio postventa.
El fabricante del equipo no se hace responsable
de daños cualesquiera que sean en caso de que el
usuario o instalador no haga caso de las adverten-
cias y/o recomendaciones indicadas en este manual
ni por los daños derivados de la utilización de pro-
ductos o accesorios no originales o de otras marcas.
1. DESCRIPCIÓN
Wibeee Max es un equipo de medida de líneas trifásicas conectado
a la nube a través de la plataforma Wibeee. Así mismo, dispone de
una memoria interna que permite la recuperación de la información
en caso de pérdida temporal de conexión Wi-Fi.
Existen 2 modelos del equipo :
Wibeee Max con dos escalas para la medida de corriente: 350A
y 700A.
Wibeee Max Plus con tres escalas para la medida de corriente:
100A, 1000A y 5000A
A través de la aplicación móvil Wibeee Circutor, de la pagina
web http://wibeee.circutor.com, o del Servidor Web interno del
equipo, se accede a los datos medidos por el equipo.
2. INSTALACIÓN
¡IMPORTANTE!
Tener en cuenta que con el equipo conectado, los
bornes pueden ser peligrosos al tacto, y la apertura
de cubiertas ó eliminación de elementos puede dar
acceso a partes peligrosas al tacto. El equipo no
debe ser utilizado hasta que haya finalizado por
completo su instalación
El equipo debe ir instalado después del magneto-
térmico.
Los pasos a seguir para realizar la instalación del equipo son:
1. - Retirar el panel de protección del cuadro eléctrico.
2.- Montar el equipo en el cuadro eléctrico. El equipo dispone de 3
posibles métodos de anclaje:
Una jación magnética.
Una jación por carril DIN, Figura 1.
Una jación mediante tornillos, Figura 1.
Nota : La jación mediante tornillo es troquelada y si no se utiliza y
molesta para otro tipo de instalación, se puede romper.
3.- Realizar el conexionado del equipo.
4.- Una vez conectado el Wibeee Max a la alimentación auxiliar,
comprobar que el LED Rojo, está encendido y parpadea
5.- Durante los primeros 20 segundos posteriores al encendido, el
Wibeee Max se encuentra en periodo de selección de escala del
sensor de corriente. Pulsar la tecla RESET para seleccionar la
escala:
Wibeee Max
Sensor de corriente : FLEX Wibeee 25
Escala 350A LED azul parpadeo simple
Escala 700A LED azul parpadeo doble
Wibeee Max Plus
Sensor de corriente : FLEX Wibeee 54
Escala 100A LED azul encendido
Escala 1kA LED rojo encendido
Escala 5kA LED azul y rojo encendidos
6.- Para iniciar las comunicaciones con el Wibeee Max, escanear
el código QR para descargar la aplicación móvil Wibeee Circutor u
obtenerla a partir de la dirección http://wibeee.circutor.com.
7.- Abrir la aplicación y seguir los pasos indicados en la misma.
Nota : Para más información consular el Manual de Instrucciones
(M169B01-01-xxx).
This manual is a Wibeee Max installation guide. For further in-
formation, please download the full manual from the CIRCUTOR
web site: www.circutor.com
IMPORTANT!
The unit must be disconnected from its power supply
sources before undertaking any installation, repair or
handling operations on the unit’s connections. Con-
tact the after-sales service if you suspect that there
is an operational fault in the unit.
The manufacturer of the unit is not responsible for
any damage resulting from failure by the user or
installer to heed the warnings and/or recommenda-
tions set out in this manual, nor for damage resulting
from the use of non-original products or accessories
or those made by other manufacturers.
1. DESCRIPTION
The Wibeee Max is a device that measures three-phase lines and
is connected to the cloud via the Wibeee platform. It also has an
internal memory that allows information to be recovered in the event
of a temporary loss of the Wi-Fi connection.
There are 2 models available:
Wibeee Max with two scales for current measurement: 350A and
700A.
Wibeee Max Plus with two scales for current measurement:
100A, 1000A and 5000A
You can access the data measured by the device via the Wibeee
Circutor mobile application, the website http://wibeee.circutor.
com or the device’s internal web server.
2. INSTALLATION
IMPORTANT!
Take into account that when the device is connect-
ed, the terminals may be hazardous to the touch,
and opening the covers or removing elements may
provide access to parts that are dangerous to the
touch. Do not use the device until it is fully installed
The device must be installed after the circuit
breaker.
To install the device, carry out the following steps:
1. - Remove the protective panel.
2.- Install the device in the electric panel. The device can be mounted
in three different ways:
A magnetic attachment.
A DIN rail attachment, Figure 1.
An attachment with screws, Figure 1.
Note: The attachment with screws is die-cut and if it is not used and
it interferes with another type of installation, it can be broken.
3.- Connect the device.
4.- Once the Wibeee Max has been connected to the auxiliary power
supply, check that the red LED is on and ashing
5.- During the rst 20 seconds after switching on, the Wibeee Max is
in a period of selection of the scale for the current sensor. Press the
RESET key to select the scale:
Wibeee Max
Current sensors : FLEX Wibeee 25
Scale 350A Blue LED single blinking
Scale 700A Blue LED double blinking
Wibeee Max Plus
Current sensors : FLEX Wibeee 54
Scale 100A Blue LED on
Scale 1kA Red LED on
Scale 5kA Blue and Red LED on
6.- To begin communication with the Wibeee Max, scan the QR code
to download the Wibeee Circutor mobile application or download it
from http://wibeee.circutor.com.
7.- Open the application and follow the steps that it indicates.
Note: For more information, consult the Instruction Manual
(M169B01-03-xxx).
Ce manuel est un guide d’installation du Wibeee Max. Pour une
plus ample information, le manuel complet peut être téléchargé
sur le site web de CIRCUTOR : www.circutor.com.
IMPORTANT!
Avant d’effectuer toute opération de installation,
réparation ou manipulation de l’une quelconque des
connexions de l’équipement, vous devez déconnecter
l’appareil de toute source d’alimentation. Lorsque
vous suspectez un mauvais fonctionnement de l’équi-
pement, contactez le service après-vente.
Le fabricant de l’équipement ne se rend pas respon-
sable de tous dommages qui se produiraient dans
le cas où l’utilisateur ou l’installateur n’aurait pas
respecté les avertissements et/ou recommandations
indiqués dans ce manuel ni des dommages dérivés
de l’utilisation de produits ou d’accessoires non
originaux ou d’autres marques.
1. DESCRIPTION
Wibeee Max est un équipement de mesure de lignes triphasées
connecté au nuage à travers la plateforme Wibeee. Il dispose
également d’une mémoire interne qui permet la récupération de
l’information en cas de perte temporaire de connexion Wi-Fi
Il existe 2 modèles de l’équipement :
Wibeee Max avec deux échelles de mesure de courant: 350A et
700A.
Wibeee Max Plus avec trois échelles de mesure de courant:
100A, 1000A et 5000A
À travers l’application mobile Wibeee Circutor, du site web htt://
wibeee.circutor.com, ou du Serveur web interne de l’équipement,
on accède aux données mesurées par l’équipement.
2. INSTALLATION
IMPORTANT!
Prendre en compte que, avec l’équipement connec-
té, les bornes peuvent être dangereuses au toucher,
et l’ouverture de capots ou l’élimination d’éléments
peut donner accès aux parties partes dangereuses
au toucher. L’équipement ne doit pas être utilisé
avant que son installation ne soit complètement
terminée.
L’appareil doit être installé après le disjoncteur.
Les pas à suivre pour réaliser l’installation de l’équipement sont :
1. - Retirez le couvercle de protection.
2.- Monter l’équipement sur le tableau électrique. L’équipement
dispose de 3 possibles méthodes d’ancrage :
Une xation magnétique.
Une xation par rail DIN, Figure 1.
Une xation par vis, Figure 1.
Note : La xation par vis est estampée et si elle n’est pas utilisée
ou elle est gênante pour un autre type d’installation, elle peut être
rompue.
3.- Réaliser la connectique de l’équipement.
4.- Une fois que le Wibeee Max est connecté à l’alimentation
auxiliaire, vérier que le LED Rouge, est allumé et clignote.
5.- Durant les 20 premières secondes postérieures à l’allumage, le
Wibeee Max se trouve dans une période de sélection d’échelle du
capteur de courant. Appuyer sur la touche RESET pour sélectionner
l’échelle :
Wibeee Max
Capteurs de courant : FLEX Wibeee 25
Échelle 350A LED bleu clignotement simple
Échelle 700A LED bleu clignotement double
Wibeee Max Plus
Capteurs de courant : FLEX Wibeee 54
Échelle 100A LED bleu allumée
Échelle 1kA LED rouge allumée
Échelle 5kA LED bleu et rouge allumée
6.- Pour commencer les communications avec le Wibeee Max,
scanner le code QR an de télécharger l’application mobile Wibeee
Circutor ou l’obtenir à partir de l’adresse http://wibeee.circutor.
com.
7.- Ouvrir l’application et suivre les pas qui y sont indiqués.
Note : Pour une plus ample d’information, consulter le Manuel
d’instructions (M169B01-03-xxx).
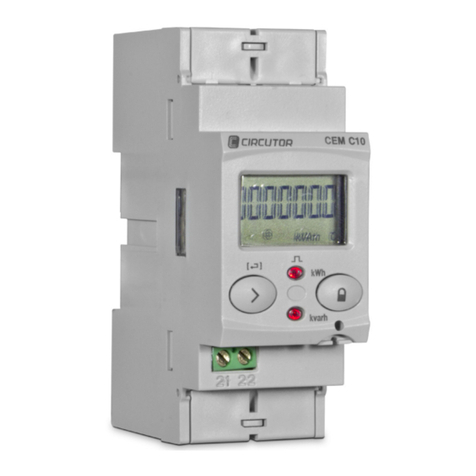
Nota : Las imágenes de los equipos son de uso ilustrativo únicamente y pueden diferir del equipo original.
Note : Device images are for illustrative purposes only and may differ from the actual device.
Diese Anleitung ist eine kurze Installationsanleitung des Wibeee
Max. Für zusätzliche Informationen können Sie die vollständige
Anleitung von der CIRCUTOR-Webseite herunterladen:
www.circutor.com
WICHTIG!
Vor Wartungsarbeiten, Reparaturen oder Arbeiten an
den Geräteanschlüssen muss das Gerät von allen
Stromquellen, sowohl Stromversorgung als auch
Messstrom, getrennt werden. Setzen Sie sich bitte
bei Verdacht auf Störungen mit dem Kundendienst
in Verbindung. Die Bauweise des Gerätes ermöglicht
im Falle von Störungen einen schnellen Austausch.
Der Hersteller des Gerätes haftet für keinerlei
Schäden, die entstehen, wenn der Benutzer oder
Installateur die Warnhinweise und/oder Empfeh-
lungen in dieser Anleitung nicht beachtet und nicht
für Schäden, die sich aus der Verwendung von
nicht originalen Produkten oder Zubehör oder von
anderen Herstellern ergeben.
1. BESCHREIBUNG
Wibeee Max ist ein Messgerät für dreiphasige Leitungen, dass über
die Plattform Wibeee mit der Cloud verbunden ist. Außerdem verfügt
es über einem internen Speicher, um bei einer vorübergehenden
Unterbrechung der WLAN-Verbindung Information wiederherstellen
zu können.
Es sind 2 Modelle erhältlich:
Wibeee Max auf zwei Skalen zur Messung vonStrom: 350A und
700A.
Wibeee Max Plus mit drei Skalen: 100A, 1000A und 5000A
Der Zugriff auf die vom Gerät erfassten Messdaten erfolgt über
die auf der Webseite http://wibeee.circutor.com verfügbaren
Smartphone-App Wibeee Circutor oder den internen Webserver
des Geräts.
2. INSTALLATION
WICHTIG!
Es ist zu beachten, dass bei angeschlossenem Ge-
rät durch die Klemmen,das Öffnen der Abdeckung
oder die Herausnahme von Teilen eine Berührung
mit gefährlichen Teilen möglich ist. Das Gerät ist
erst einzusetzen, wenn seine montage vollständig
abgeschlossen ist.
Das Gerät muss nach dem Leistungsschalter ins-
talliert werden.
Zu Installation des Geräts sind folgende Schritte durchzuführen:
1.- Entfernen Sie die Schutzvorrichtung.
2.- Gerät in die Schalttafel einbauen. Das Gerät verfügt über drei
Befestigungsoptionen:
Magnetische Befestigung.
Befestigung an DIN-Schiene, Abbildung 1.
Schraubbefestigung, Abbildung 1.
Hinweis: Die Schraubbefestigung ist gestanzt und kann bei
Nichtverwendung, oder wenn sie bei einer anderen Befestigungsart
stören solltet, entfernt werden.
3.- Gerät anschließen.
4.- Wenn das Gerät Wibeee Max an die Stromversorgung
angeschlossen ist, muss die rote LED blinken.
5.- Während der esrten 20 Sekunden nach dem Einschalten
bendet sich das Wibeee Max im Betriebsmodus zur Skalawahl des
Stromsensors. Durch Drücken der Taste RESET die Skala wählen:
Wibeee Max
Stromsensoren : FLEX Wibeee 25
Skala 350A Blaue LED-single blinkt
Skala 700A Blaue LED doppelt blinkend
Wibeee Max Plus
Stromsensoren : FLEX Wibeee 54
Skala 100A Blaue LED an
Skala 1kA Rote LED an
Skala 5kA Blaue und rote LED an
6.- Um die Kommunikation mit Wibeee Max zu starten, den QR-
Code scannen, um die App Wibeee Circutor herunterzuladen, oder
diese App über http://wibeee.circutor.com zu beziehen.
7.- App öffnen und die angegeben Schritte befolgen.
Hinweis: Für weitere Informationen siehe Betriebsanleitung
(M169B01-03-xxx).
Fijación mediante tornillos
Fijación por
carril DIN
A DIN rail
attachment
An attachment with screw
Figura 1 / Figure 1 / Figure 1 / Abbildung 1
http://wibeee.circutor.com.


