2/4
J280 Abbreviated instruction
Measuring altitude
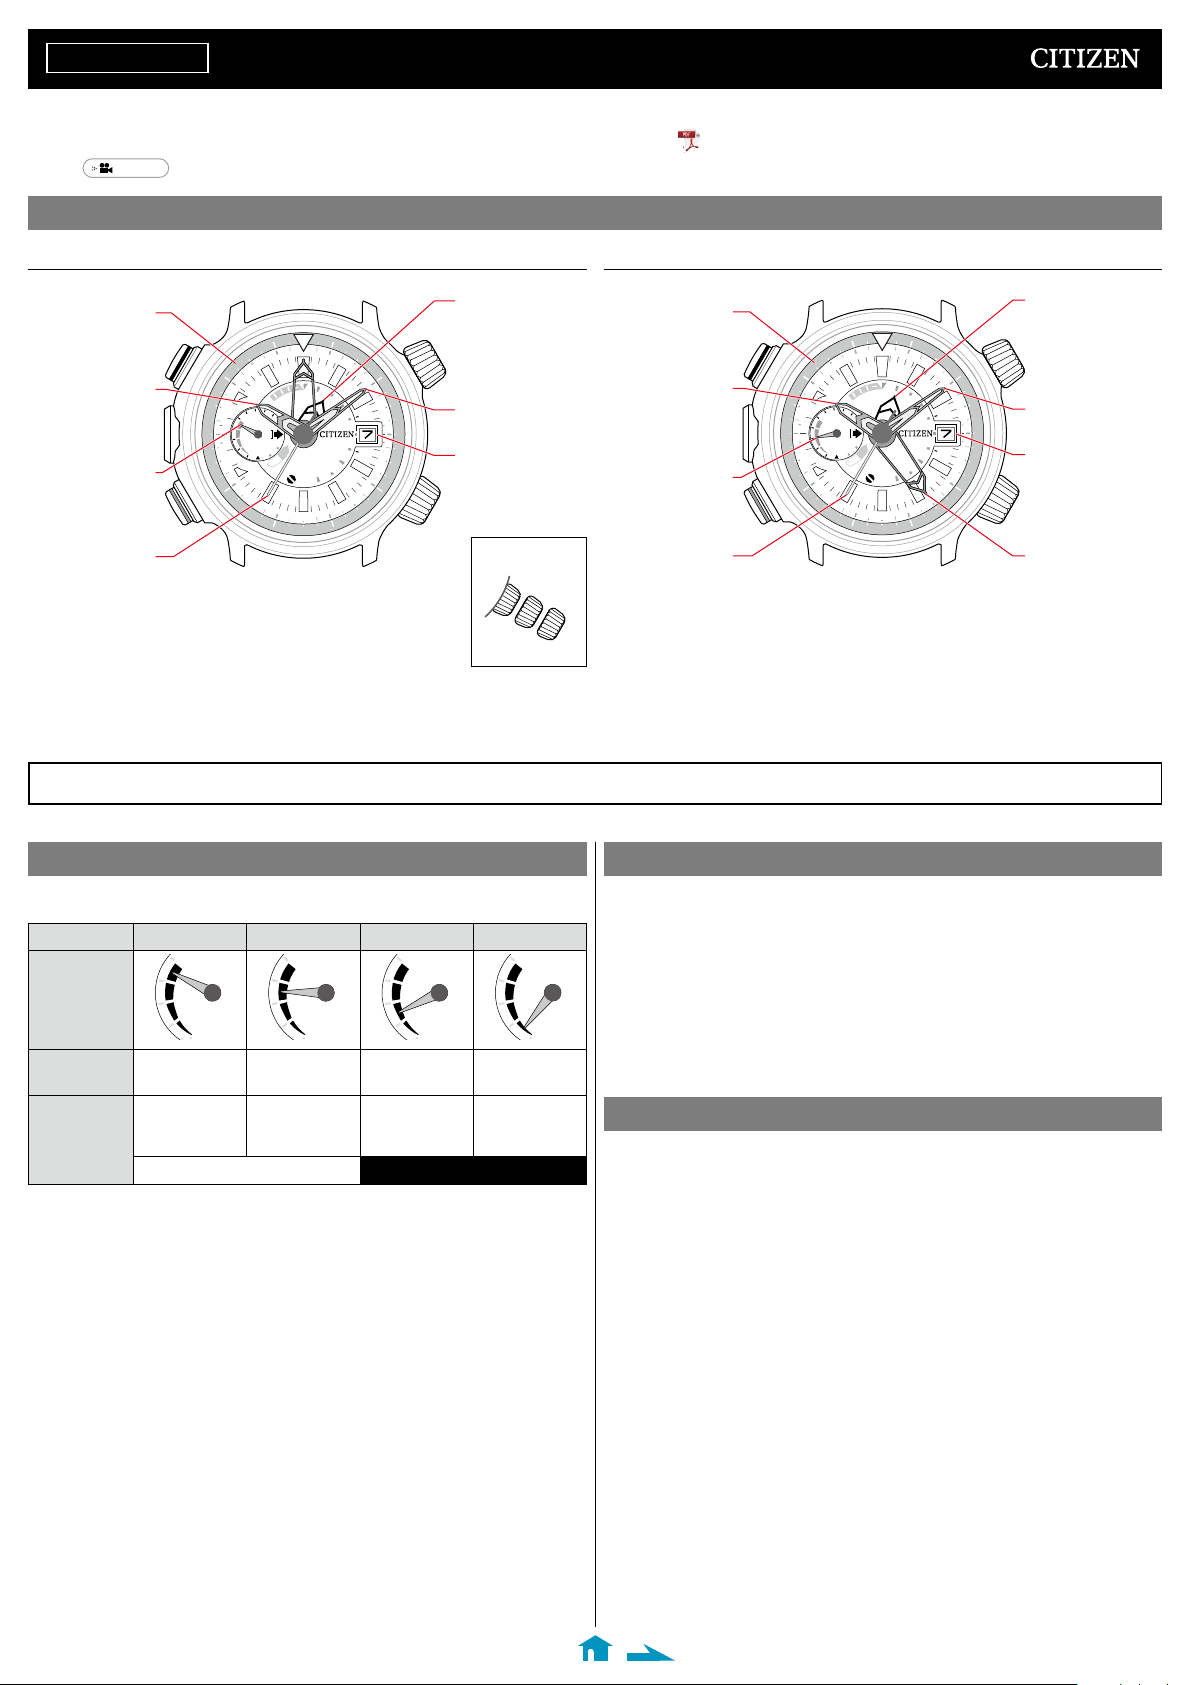
• Confirm the power reserve is in level “2” or higher before measurement.
• This watch continuously measures altitude during the first 5 minutes of
measurement.
After that, measurement occurs every 3 minutes for up to 12 hours.
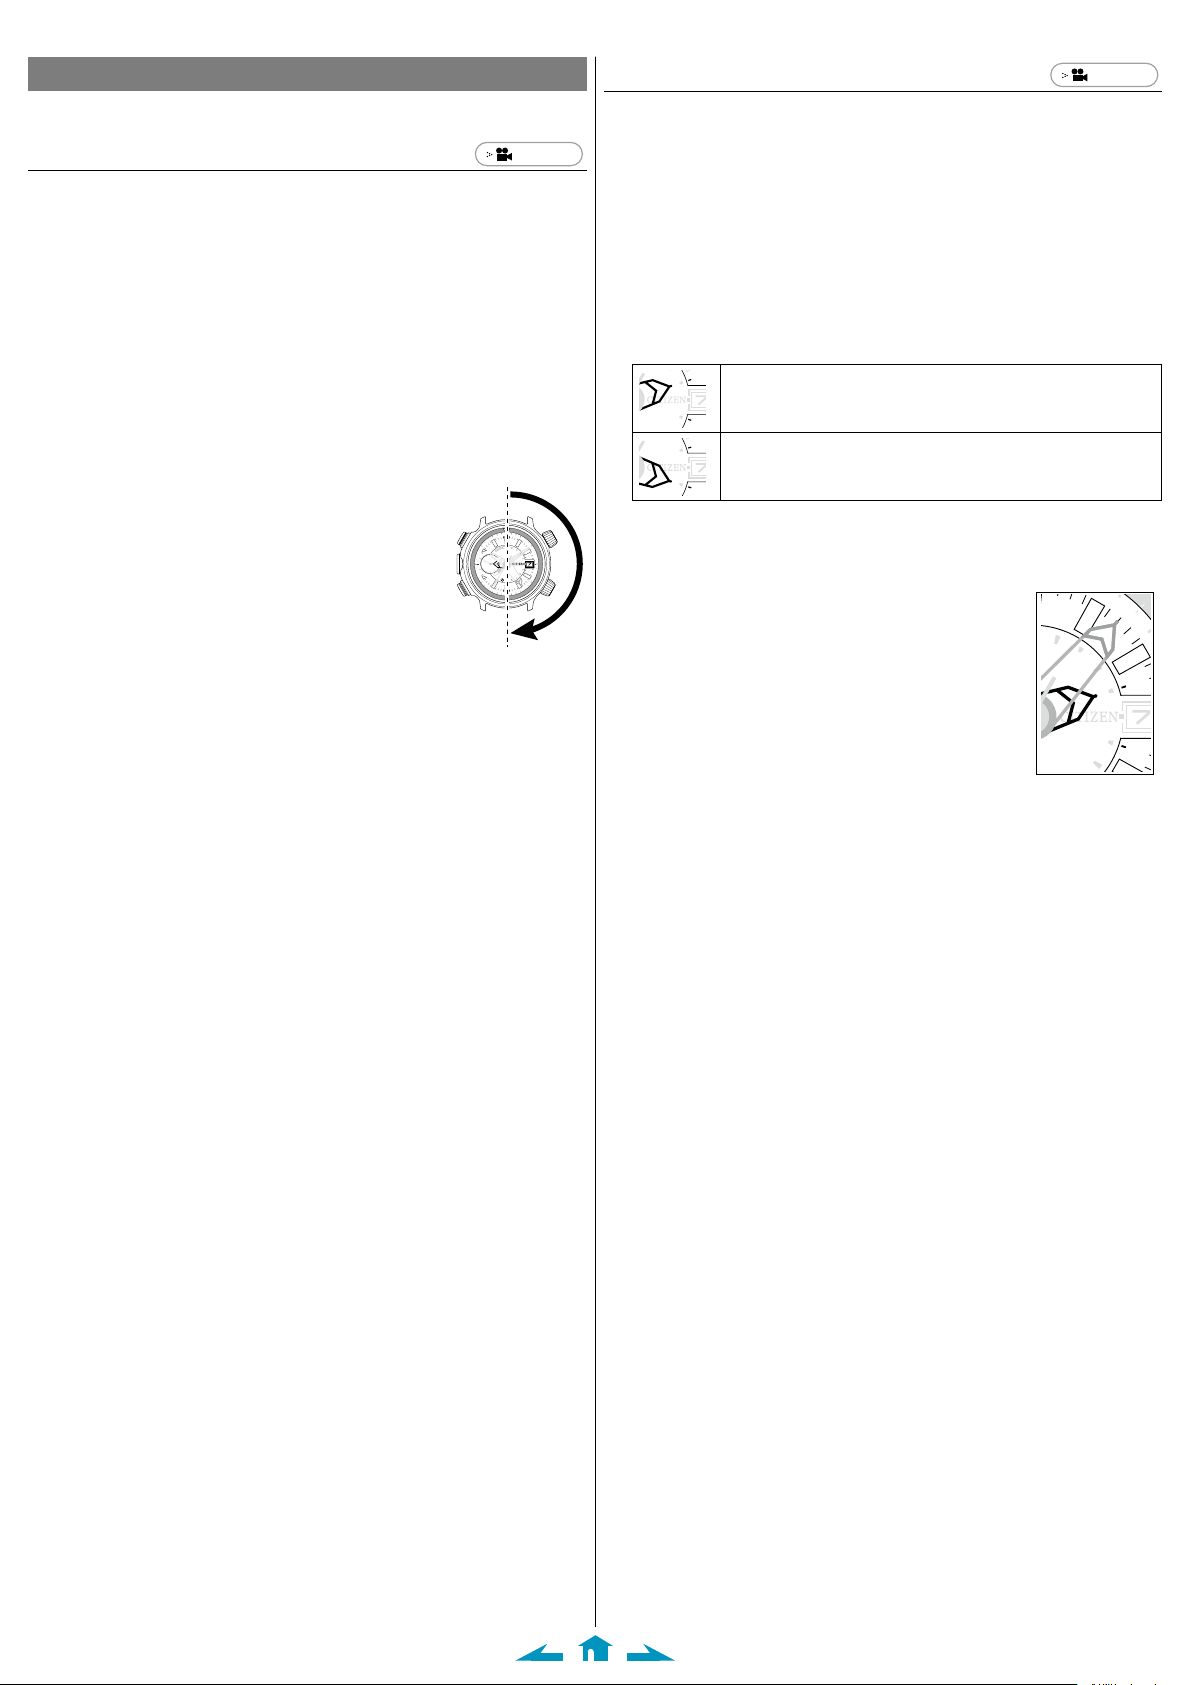
1.
Press and release the lower left button B.
Altitude is indicated.
• If you press button
A
while indicating altitude, the 100 m hand temporarily
indicates compass direction. Press button
A
to return to altitude indication.
2.
After finishing measurement, press and release the lower left
button Bto finish the procedure.
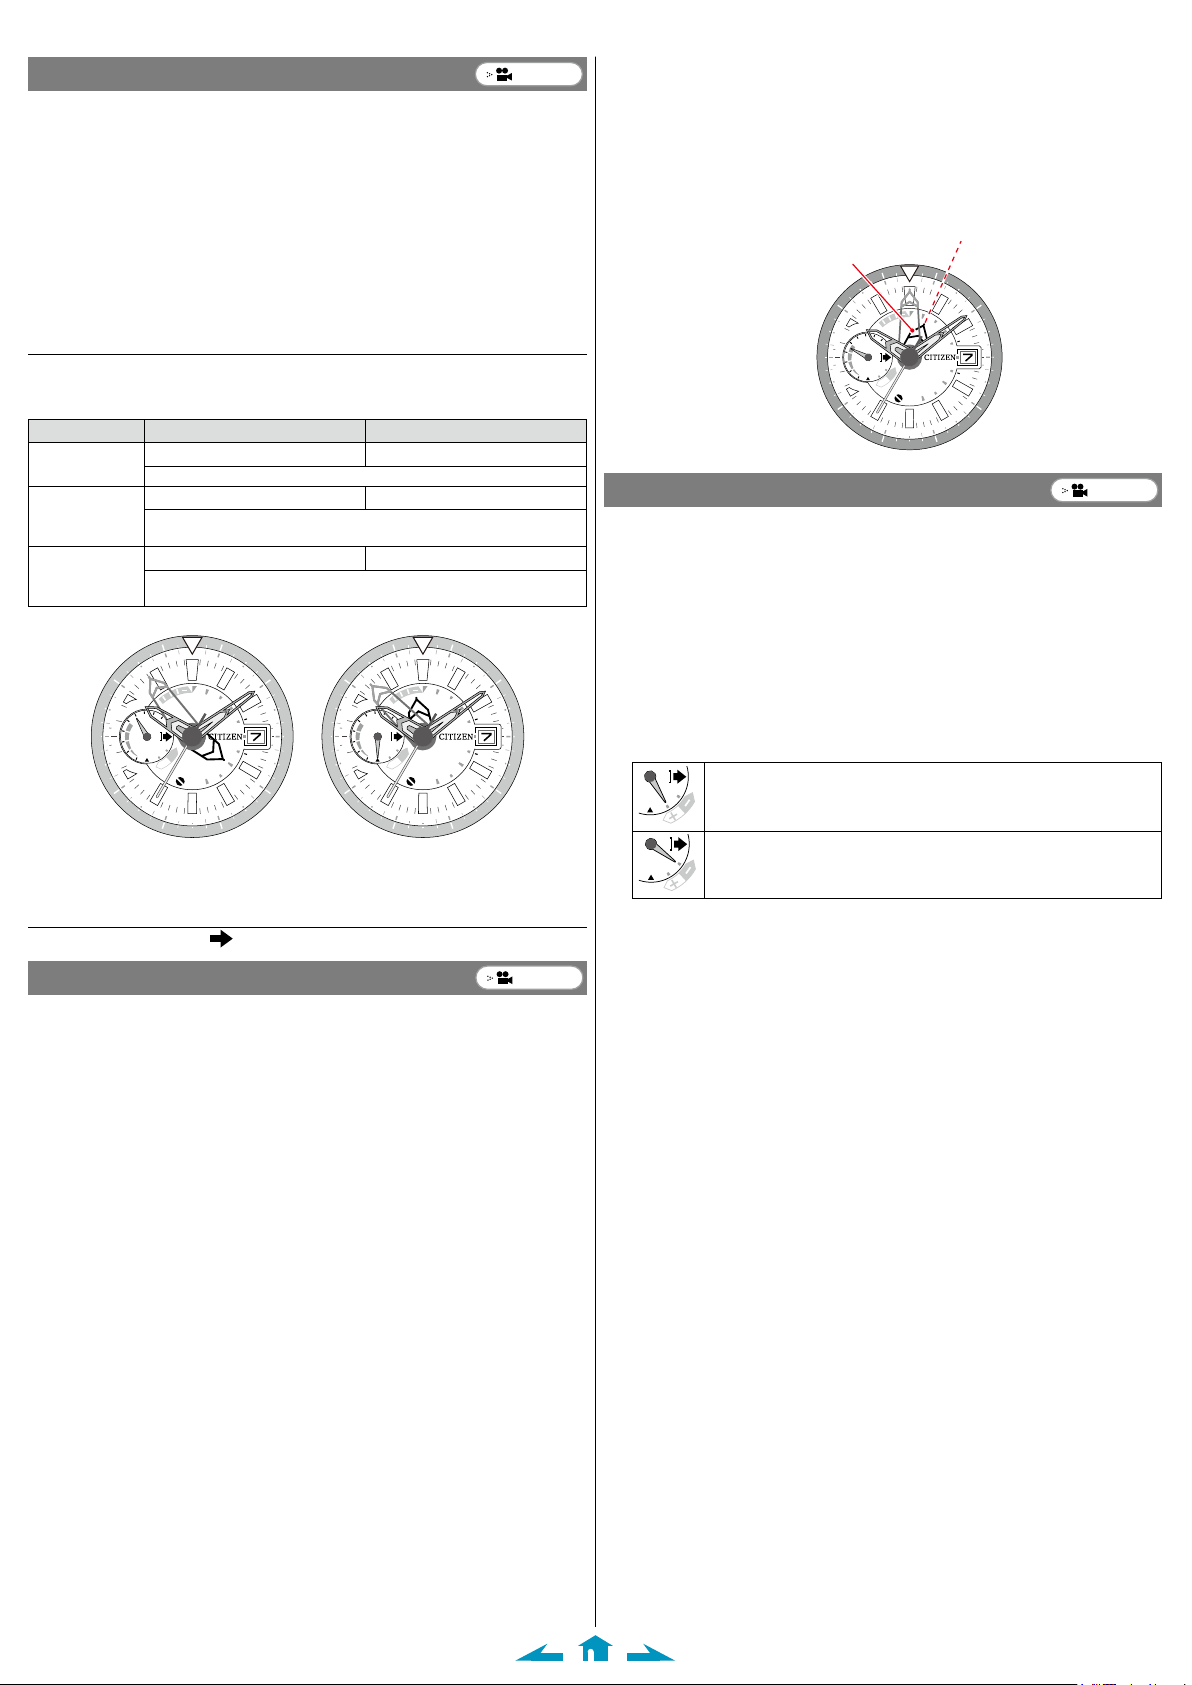
How to read altitude indication
Altitude is indicated by the 3 hands, the 1 000 m, 100 m and 2.5 m hands. Sum up
the values they indicate.
Measurable range: −300 m to 10 000 m
Hand Indication range Unit
1 000 m hand 1 000 to 10 000 m 1000 m
• It points “0” when measured altitude is lower than 1 000 m.
100 m hand
−300 to 900 m 100 m
• It points “0” when measured altitude is 0 − 100 m.
• It points “−” when measured altitude is −100 − 0 m.
2.5 m hand
−97.5 m to 97.5 m 2.5 m
• Use figures in parentheses when altitude is −97.5 to 0 m.
• Measured altitude is indicated in 5 m increments when it is higher than 6 000 m.
Altitude indication examples:
+
-
m
0200
800
400
600
0
1
2
3
4
56789
x 1000 m
+
-
m
0200
800
400
600
0
1
2
3
4
56789
x 1000 m
10 10
W
E
m
(-10)
(-20)
(-30)
(-40)
(-50)
(-60)
(-70)
(-80)
(-90)
0
50
90
40
80
30
70
20
60
10
1
0
(
-
9
0
)
(
+
5
0
)
S
(
-
5
0
)
m
W
E
6
0
(
-
4
0
)
7
0
(
-
3
0
)
8
0
(
-
2
0
)
9
0
(
-
1
0
)
2
0
(
-
8
0
)
3
0
(
-
7
0
)
4
0
(
-
6
0
)
W
E
m
(-10)
(-20)
(-30)
(-40)
(-50)
(-60)
(-70)
(-80)
(-90)
0
50
90
40
80
30
70
20
60
10
1
0
(
-
9
0
)
(
+
5
0
)
S
(
-
5
0
)
m
W
E
6
0
(
-
4
0
)
7
0
(
-
3
0
)
8
0
(
-
2
0
)
9
0
(
-
1
0
)
2
0
(
-
8
0
)
3
0
(
-
7
0
)
4
0
(
-
6
0
)
Measured altitude: 6790.0 m Measured altitude: −12.5 m
When the measured altitude cannot be indicated
The 1 000 m hand points “ ” (3 o'clock position) and stops.
Using the compass
• Confirm the power reserve is in level “2” or higher before measurement.
1.
Press and release the upper left button Awhile keeping the
watch's dial level.
The compass function starts and the compass hand points north.
• Wait until movement of the hand stops.
2.
After finishing measurement, press and release the upper left
button Ato finish the procedure.
• The indication is automatically finished in about 30 seconds without
pressing the button.
Measurement example:
+
-
m
0200
800
400
600
0
1
2
3
4
56789
x 1000 m
W
E
m
(-10)
(-20)
(-30)
(-40)
(-50)
(-60)
(-70)
(-80)
(-90)
0
50
90
40
80
30
70
20
60
10
1
0
(
-
9
0
)
(
+
5
0
)
S
(
-
5
0
)
m
W
E
6
0
(
-
4
0
)
7
0
(
-
3
0
)
8
0
(
-
2
0
)
9
0
(
-
1
0
)
2
0
(
-
8
0
)
3
0
(
-
7
0
)
4
0
(
-
6
0
)
Compass hand
North
Calibrating altitude indication
You can calibrate altitude indication measured by the watch when you know the
actual height from a map, sign or other sources.
• You can calibrate the value in the range of ±1 000 m of currently measured
altitude.
1.
Press and release the lower left button B.
The measured altitude is indicated.
• Wait until movement of the hands stop.
2.
Press and hold the lower left button Bfor 3 seconds or more.
The 1 000 m hand points “+” and calibration of altitude indication becomes
available.
3.
Press and release the lower left button Bto choose + or ‒.
Choose this when the actual altitude is higher than the measured one.
Choose this when the actual altitude is lower than the measured one.
• Each time you press the button, “+” and “‒” changes alternately.
• Repeat steps 3 and 4 to control the altitude value after calibration.
4.
Press and release the upper left button Ato correct the
indication to the actual altitude.
Move the 100 m and 2.5 m hands to indicate an approximate value of the
altitude.
• Indication keeps changing while you are pressing and holding the button.
• Press buttons
A
and
B
at the same time to reset the calibration value.
5.
Press and hold the lower left button Bfor 3 seconds or more.
The corrected altitude is set as the current one and the hands return to
measured altitude indication.
• The corrected altitude is set as the current one and the hands return to
measured altitude indication in 1 minute without any operation.
6.
Press and release the lower left button Bto finish the
procedure.
Video
Video
Video