manuals.online logo
Brands
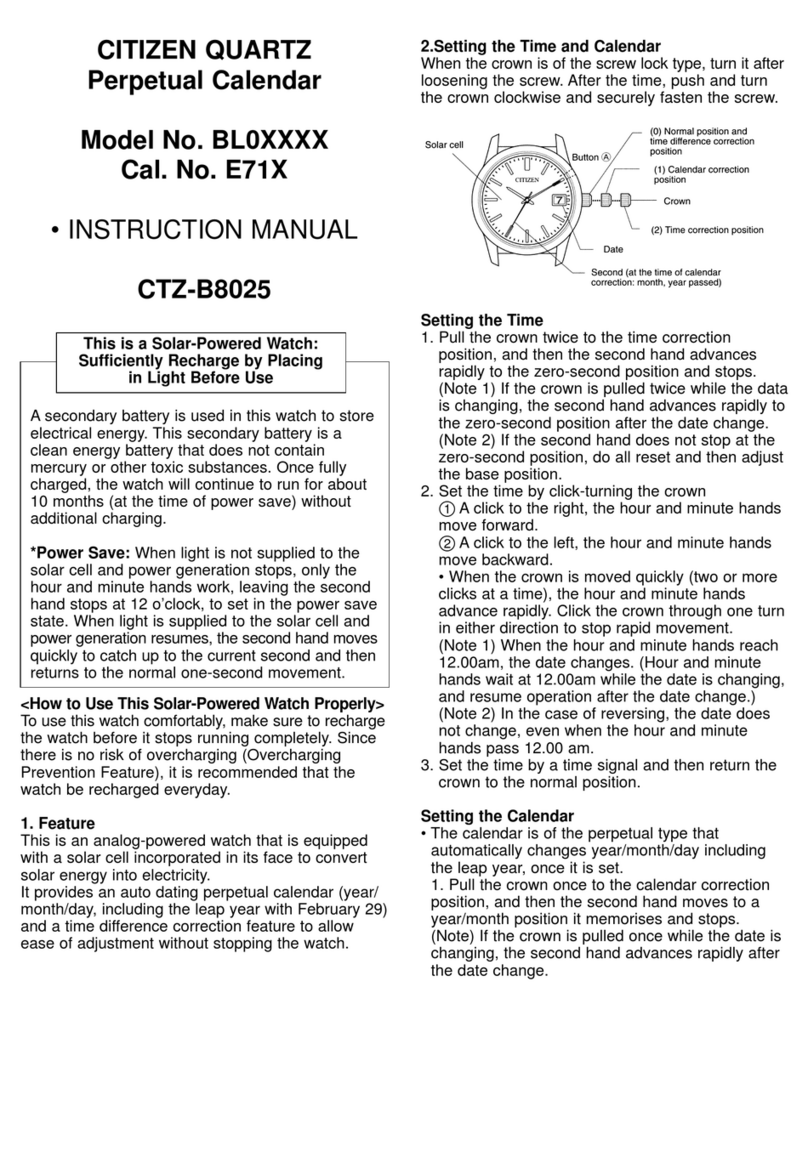
  1. Home
  2. •
  3. Brands
  4. •
  5. Citizen
  6. •
  7. Watch
  8. •
  9. Citizen H11A User manual

Citizen H11A User manual

1/2
H11A / H110/H111/ H113/ H119
Abbreviated instruction
• This watch is solar-powered. Expose the dial to light and use it sufficiently charged.
• To see details of charging time, specifications and operations, refer to the instruction manual: H11A/H110/H111/H113/H119 instruction manual
English
Reception-in-progress
indication (RX)
Reception result
indication (NO)
Hour hand
Second hand
Reception result
indication (H/M/L)
Button
B
Date indication
Crown
Button
A
Minute hand
• Actual appearance may differ from the illustration.
• The crown has two positions when pulling it out.
Checking the signal reception result
• This watch receives the time signal from the Japan station every day to adjust
time automatically.
1.
Push the crown in to position 0.
2.
Press and release the lower right button A.
The second hand moves to indicate the result of the last reception.
Indication Reception result
H
The reception was successful in a very good condition.
M
The reception was successful in a good condition.
L
The reception was successful in a not-good condition.
NO
The reception failed.
• Try signal reception following the steps in Receiving the signal manually
(on-demand reception) if the last reception failed.
3.
Press and release the lower right button Ato finish the
procedure.
The indication returns to current time.
• It returns to current time indication automatically in about 10 seconds
without pressing the button.
Receiving the signal manually (on-demand reception)
• It takes 2-15 minutes to finish reception.
1.
Push the crown in to position 0.
2.
Press and hold the lower right button Afor 2 seconds or more.
The second hand points “RX” and signal reception starts. The second hand
returns to normal movement after finishing reception.
Reception was successful The time will be updated.
Reception failed The time is not corrected and the previously set time
resumes.
• Press and hold button
A
for 2 seconds or more to cancel reception.
Component identification
Crown's position
0 1 2
Adjusting the time and calendar manually
Setting the time
1.
Pull the crown out to position 2.
The second hand points 0 second.
2.
Press and release the lower right button Arepeatedly to
change the hand to be corrected.
• Each time you press the button, the target switches between the minute
hand and the hour hand.
3.
Rotate the crown to adjust the hand.
• When you rotate the crown quickly a few times, the hand will move
continuously. To stop the rapid movement, rotate the crown in either
direction.
• The hour hand and the date indication move synchronously.
• Change of date indication shows it just became AM. Take care the time set
is AM or PM.
4.
Repeat steps 2 and 3.
5.
Push the crown in to position 0in accordance with a reliable
time source to finish the procedure.
Setting the calendar
1.
Pull the crown out to position 1.
The second hand indicates year and month currently set.
2.
Press and release the lower right button Arepeatedly to
change the indication to be corrected.
• Each time you press the button, the target switches between the date
indication and the year/month. The target moves slightly to show it is
adjustable.
3.
Rotate the crown to adjust indication.
• Year and month are indicated with the second hand.
12
1
2
3
4
5
6
7
8
9
10
11
“Month” corresponds to one of
the 12 zones shown in the figure
below.
Each number means month.
“Year” corresponds to the years
since leap year and is indicated
with markers in the zone of each
month.
Years since leap year:
0
(Leap
year)
0
Years since leap year:
1
1
Years since leap year:
2
2
3
Years since leap year:
3
4.
Repeat steps 2 and 3.
5.
Push the crown in to position 0to finish the procedure.
2/2
H11A/H110/H111/H113/H119 Abbreviated instruction
Setting the time difference
You can indicate time in a different time zone without adjusting time by setting
time difference.
• You can set time difference in 1-hour increments in the range of ±27 hours.
1.
Push the crown in to position 0.
2.
Press and release the upper right button B.
The second hand shows the time difference currently set.
3.
Rotate the crown to set the time difference.
• The hour hand moves 1 hour as the second hand moves 1 step.
±0
–5 +5
–10 +10
–27 +27
4.
Press and release the upper right button Bto finish the
procedure.
• It returns to current time indication automatically in about 10 seconds
without pressing the button.
Checking the reference position
1.
Push the crown in to position 0.
2.
Press and hold the upper right button Bfor 5 seconds or more.
The hands and indication start to move to the current reference positions
stored in memory.
3.
Check the reference position.
Correct reference positions:
• Hour, minute and second hands: 0 hour 00 minute 0 second
• Date indication: “1”
When the current reference position is different from the correct one, adjust
the position following the steps of Correcting the reference position.
4.
Press and release the upper right button Bto finish the
procedure.
Correcting the reference position
1.
Push the crown in to position 0.
2.
Press and hold the upper right button Bfor 5 seconds or more.
The hands and indication start to move to the current reference positions
stored in memory.
• Release the button as the hands/indication start to move.
3.
Pull the crown out to position 2and wait until all the hands
and indication stop.
4.
Press and release the lower right button Arepeatedly to
change the hand/indication to be corrected.
• Each time you press the button, the target changes as follows:
Date indication → hour hand → minute/second hands → (back to the top)
5.
Rotate the crown to adjust the hand/indication.
• When you rotate the crown quickly a few times, the hand/indication will
move continuously. To stop the rapid movement, rotate the crown in either
direction.
• The minute and second hands move synchronously.
6.
Repeat steps 4 and 5.
7.
Push the crown in to position 0.
8.
Press and release the upper right button Bto finish the
procedure.

After correcting the reference position
After correctiong the reference position, adjust the time and calendar manually or
by receiving time signals manually (on-demand reception).

Other manuals for H11A

1

This manual suits for next models

4

Other Citizen Watch manuals

Citizen Cuarzo User manual

Citizen

Citizen Cuarzo User manual

Citizen Watch User manual

Citizen

Citizen Watch User manual

Citizen FS00 User manual

Citizen

Citizen FS00 User manual

Citizen 0S2B User manual

Citizen

Citizen 0S2B User manual

Citizen 6350 User manual

Citizen

Citizen 6350 User manual

Citizen Eco-Drive BT0000-15A User manual

Citizen

Citizen Eco-Drive BT0000-15A User manual

Citizen 90S5 User manual

Citizen

Citizen 90S5 User manual

Citizen 8730 User manual

Citizen

Citizen 8730 User manual

Citizen 2200E-06 Manual

Citizen

Citizen 2200E-06 Manual

Citizen 3740 User manual

Citizen

Citizen 3740 User manual

Citizen Perpetual Calendar BL5250-02L User manual

Citizen

Citizen Perpetual Calendar BL5250-02L User manual

Citizen E270 User manual

Citizen

Citizen E270 User manual

Citizen 8651 User manual

Citizen

Citizen 8651 User manual

Citizen Eco-Drive Bluetooth S W410 User manual

Citizen

Citizen Eco-Drive Bluetooth S W410 User manual

Citizen 892 Manual

Citizen

Citizen 892 Manual

Citizen 66 User manual

Citizen

Citizen 66 User manual

Citizen 9015 User manual

Citizen

Citizen 9015 User manual

Citizen MCO SERIES User manual

Citizen

Citizen MCO SERIES User manual

Citizen C60 Manual

Citizen

Citizen C60 Manual

Citizen Eco-Drive BN4021-02E User manual

Citizen

Citizen Eco-Drive BN4021-02E User manual

Citizen C300 User manual

Citizen

Citizen C300 User manual

Citizen 6P21 User manual

Citizen

Citizen 6P21 User manual

Citizen 6S50 User manual

Citizen

Citizen 6S50 User manual

Citizen Eco-Drive User manual

Citizen

Citizen Eco-Drive User manual

Popular Watch manuals by other brands

eta G15.562 PRD Technical Communication

eta

eta G15.562 PRD Technical Communication

iwc Pilot's Watch Double Chronograph TOP GUN operating instructions

iwc

iwc Pilot's Watch Double Chronograph TOP GUN operating instructions

North Edge AQUA manual

North Edge

North Edge AQUA manual

BREIL 6T51 Instruction book

BREIL

BREIL 6T51 Instruction book

Samsung Galaxy Watch4 quick start guide

Samsung

Samsung Galaxy Watch4 quick start guide

Timex Ironman Sleek 150-LAP reference guide

Timex

Timex Ironman Sleek 150-LAP reference guide

Seiko S149 instructions

Seiko

Seiko S149 instructions

SMART BRACELET TW7 user manual

SMART BRACELET

SMART BRACELET TW7 user manual

Oakley Jury II manual

Oakley

Oakley Jury II manual

Casio 1549 General guide

Casio

Casio 1549 General guide

Junghans Meister J880.1 user guide

Junghans

Junghans Meister J880.1 user guide

Samsung SM-R820 Golf Edition user manual

Samsung

Samsung SM-R820 Golf Edition user manual

G-Tab W101hero Operation manual

G-Tab

G-Tab W101hero Operation manual

Seiko Essentials SSA346 instructions

Seiko

Seiko Essentials SSA346 instructions

Festina F161192 instruction manual

Festina

Festina F161192 instruction manual

Bremont JAGUAR MKI Technical notes

Bremont

Bremont JAGUAR MKI Technical notes

Polar Electro V800 Get started

Polar Electro

Polar Electro V800 Get started

RETOX 81 13 60 instruction manual

RETOX

RETOX 81 13 60 instruction manual

manuals.online logo
manuals.online logoBrands
  • About & Mission
  • Contact us
  • Privacy Policy
  • Terms and Conditions

Copyright 2025 Manuals.Online. All Rights Reserved.