HEPA FILTER CHANGE
Repair or Warranty Contact Clayton Associates, Inc. • 1650 Oak Street • Lakewood, New Jersey 08701 • P.+1-732-363-2100 F.+1-732-364-6084
Page 9
If this vacuum is used to collect hazardous material, appropriate personal protective equipment may be required.
The HEPA Filter should be replaced if damaged or when dust accumulation on the HEPA lter degrades
vacuum performance.
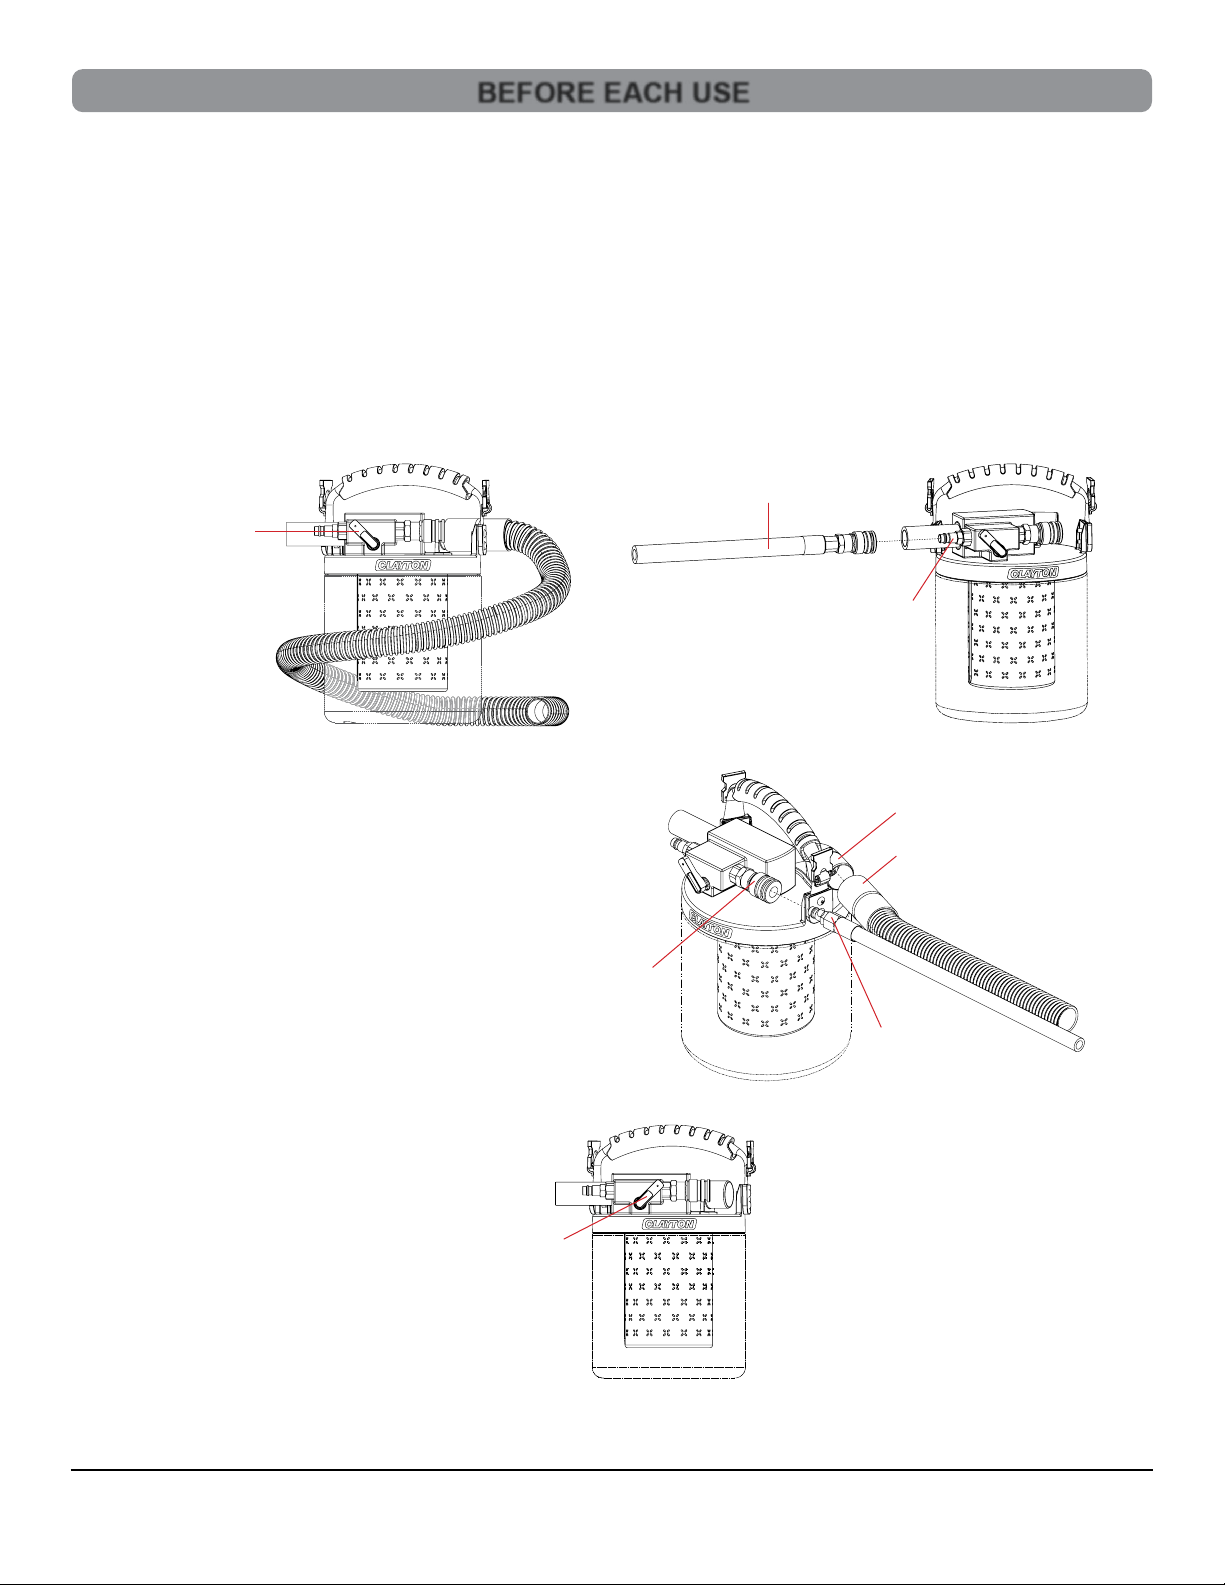
1. Safe the Vacuum
• Disconnect the compressed air source from the vacuum
• Disconnect the vacuum hose
2. Unbox a new HEPA lter
• Remove the Clayton HEPA timer card from the box and set aside
• Remove the HEPA lter from the box and unwrap
3. Remove the Inlet Cap
• Hold the vacuum canister and rotate the inlet cap counterclockwise
approximately 1 full turn
• Remove the cap from the canister
4. Remove the HEPA lter with Pre-Filter from the Inlet cap
• Hold the Inlet Cap in your left hand
• Grasp the bottom of the HEPA lter with your right hand and turn counter
clockwise approximately 3 full turns
• Remove the HEPA lter and Pre-Filter
• Dispose of the HEPA lter and Pre-Filter according to your company policy
5. Install a new HEPA lter
• Hold the Inlet Cap in your left hand
• Grasp the bottom of the HEPA lter with your right hand and turn
clockwise approximately 3 full turns
• Tighten the HEPA lter until it hard stops
Optional
• Using a 3/4 inch 6 point socket and torque wrench ensure the lter
is tightened to 46 in/lbs of torque
6. Install a new Pre-Filter on the HEPA lter
• Lay the inlet cap assembly upside down on a work surface
• Stretch a new Pre-Filter over the HEPA lter
• Pull the Pre-Filter on to the HEPA lter until the entire HEPA lter
is covered
• Ensure the Pre-Filter elastic is touching the bottom of the inlet cap
• Ensure the Pre-Filter elastic is NOT seated between the HEPA lter
gasket and the bottom of the inlet cap
7. Replace the inlet cap
• Clean / Wipe the top edge of the canister to ensure a good seal
when the inlet cap is attached
• Replace the inlet cap on the canister and rotate clockwise
approximately 1 full turn until snug
8. Activate the HEPA lter timer
• Remove the old HEPA timer card from the top handle of the vacuum
• Attach the new HEPA timer card with a zip tie (included) to the top
handle of the vacuum
• Follow the directions on timer card to activate
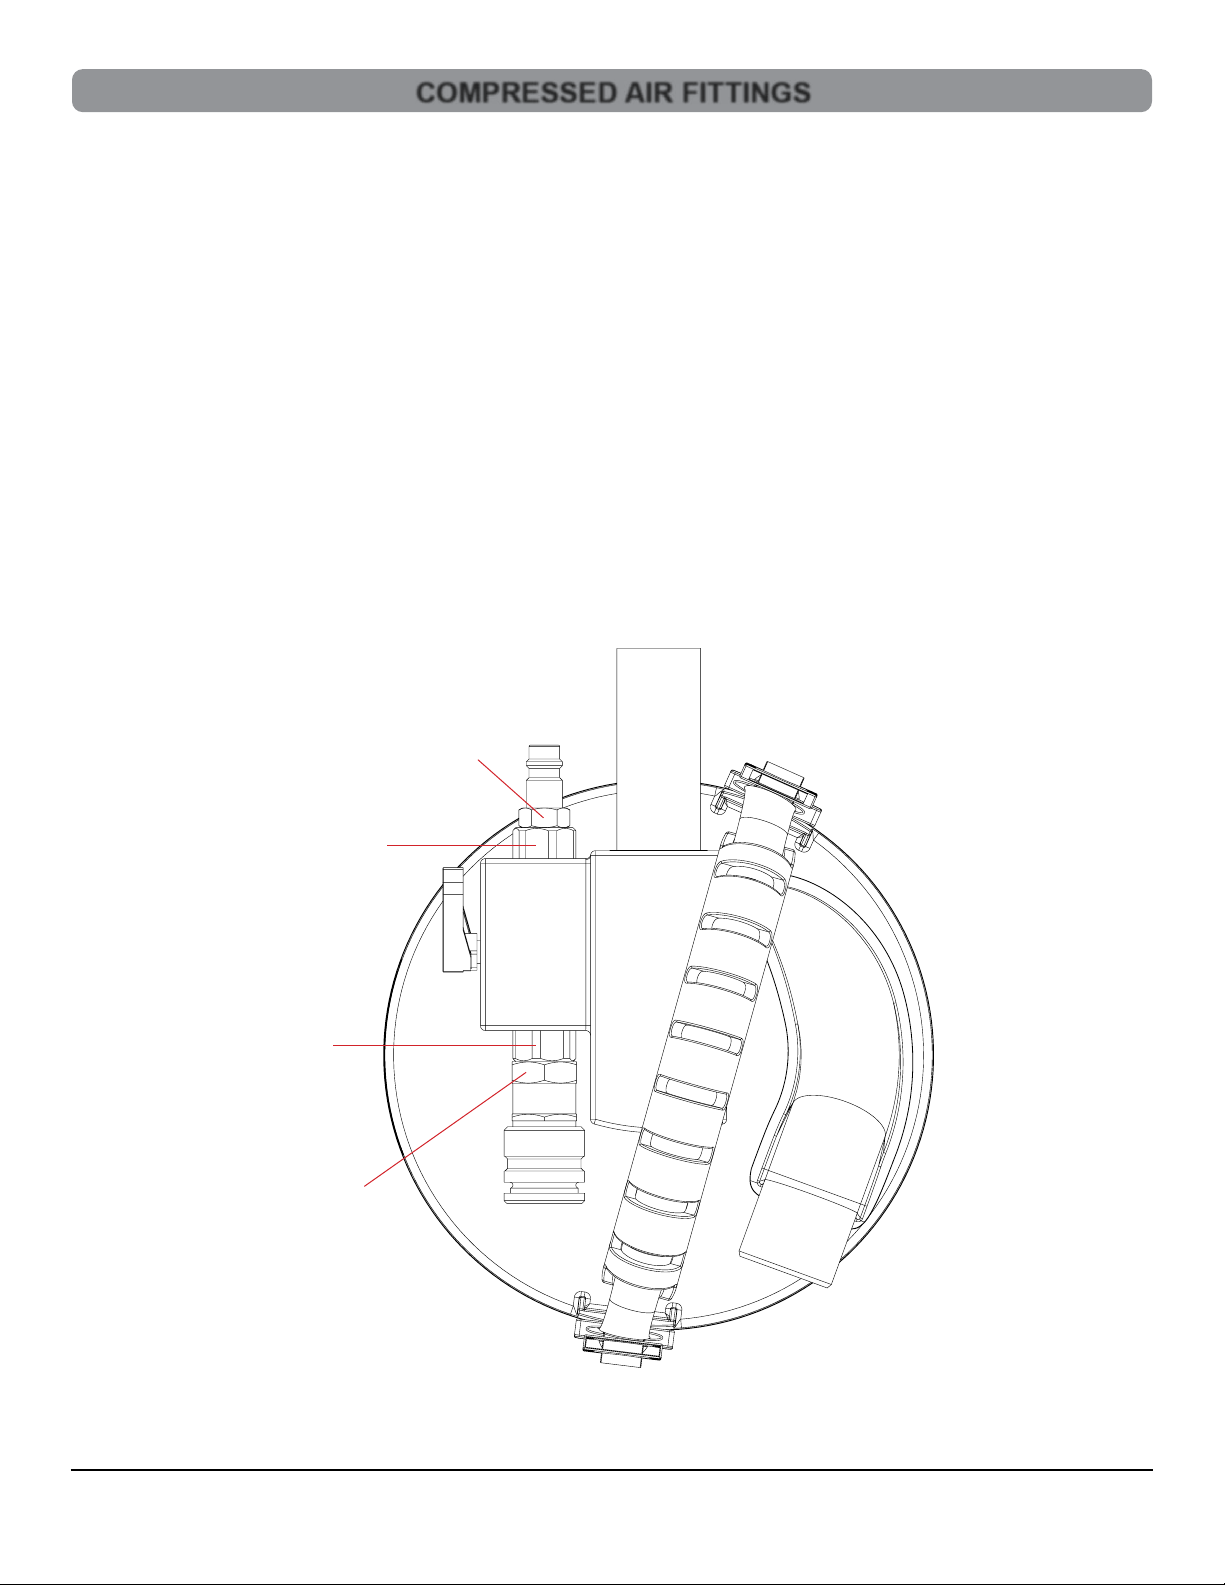
Inlet Cap
Top Edge of Canister
Canister
HEPA Filter
Pre-Filter
HEPA / Pre-Filter