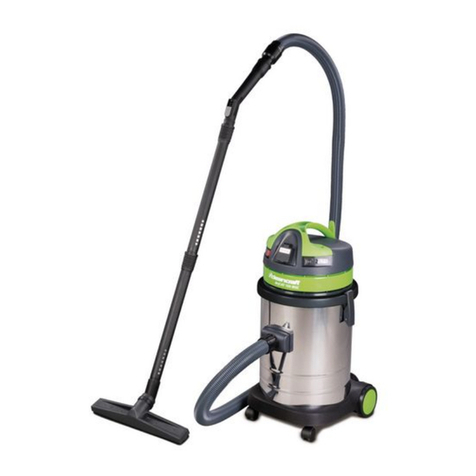
CleanCraft flexCAT 116 PD User manual

1
Spray Extractors
Original Instructions
GB
IT IS RECOMMENDED TO KEEP THIS MANUAL FOR FUTURE REFERENCES.
ATTENTION: PLEASE READ CAREFULLY THE INSTRUCTION MANUAL BEFORE USING.
FLEXCAT 116 PD
flexCAT 116 PD

2
MULTIFUNCTION MACHINE WASHING EVERY KIND OF SURFACE WITH THE INJECTION-EXTRACTION SYSTEM: FOR CARPETS AND
FITTED CARPETS, ARMCHAIRS, CURTAINS, FLOORS (MARBLE, RUBBER, AND SO ON), WALLS, CAR SEATS. THE DEVICE MAY BE USED
ALSO AS A SIMPLE VACUUM CLEANER FOR DUST AND LIQUIDS.
IDRO MODELS ARE ALSO SUITABLE TO PURIFY THE AIR THROUGH A WATER FILTRATION. THIS DEVICE IS SUITABLE FOR USING IN
PUBLIC PLACES SUCH AS HOTELS, SCHOOLS, FACTORIES, SHOPS, OFFICES AND RESIDENTIAL HOTELS.
GB
Publication details
Product identification
6SHFLDO9DFXXP&OHDQHU Article number
IOH[&$73'
Manufacturer
Stürmer Maschinen GmbH
Dr.-Robert-Pfleger-Str. 26
D-96103 Hallstadt
Germany
Fax: +49 (0) 951 96555 - 55
email: [email protected]
Internet: www.metallkraft.de
Information about the operating instructions
Genuine operating instructions
Published: 2016
Version: .0
Language: English
Author: DM
Copyright information
Copyright © 2016 Stürmer Maschinen GmbH, Hallstadt,
Germany.
Stürmer Maschinen GmbH is the sole owner of the con-
tent of these operating instructions.
Forwarding and reproduction of this document as well
as use and notification of its content is not permitted
without explicit consent. Infringements will lead to
claims for damages.
Subject to technical changes and errors.

Symbol Definition
GB - One-way flow fixed displacement hydraulic pump
GB - ATTENTION: please read carefully the instruction manual before using.
GB - These symbols will be used to remind the operator to pay attention to operations that may cause lesions, including
death, to the operator or to other people or animals nearby. Furthermore, the operations indicated by these symbols may
cause damages, even irreparable ones, to the suction device.
3
Do not dispose of power tools into household waste!
ationalational
law ly manner.ly manner.
GB
According to the European Directive 2012/19/EU on waste electrical and electronic equipment (WEEE) and its incorporation into national
law, power tools that are no longer suitable for use must be separately collected and sent for recovery in an environmental-friendly manner.

INDICATIONS TO BE SCRUPULOUSLY ADHERED TO
- This appliance is not to be used by people (Including 8-year-old
and older children) with reduced physical, sensorial or mental
capacities or without any experience and knowledge, unless
they did not receive instructions relative to the use of the
appliance and are controlled by a person responsible for their
safety.
- Children should be controlled so that they didn’t play with the
appliance.
- The packaging components could constitute potential dangers
(as for example plastic bags): they must be kept away from
children’s reach and from other people or animal not conscious
of their actions.
- For a proper disposal of the packaging follow the local laws
- Any different use from that indicated in this manual could
constitute a danger, therefore, it must be avoided
- ATTENTION: operators must be properly trained to use these
machines.
- ATTENTION: this equipment must be stored according to its
weight on a stable, safe and not inclined plane in closed and
without dampness environment.
- ATTENTION: do not use outdoors when temperatures are low.
- ATTENTION: don’t ever point the suction opening towards
delicate parts of the body – of people or animals - such as
eyes, ears, mouth, etc.
- ATTENTION: if the appliance is fitted with a supplementary plug,
do not exceed the power reported on the plug. Non-compliance
with this norm could cause fires and damages even lethal to
the user.
- ATTENTION the appliance is not suitable for areas protected
against electrostatic discharges.
- ATTENTION: use only the brushes supplied with the appliance
or those specified in the instruction manual. Using other brushes
could jeopardize safety.
- ATTENTION: do not leave the functioning appliance unattended,
always remove the plug from the socket when not using the
appliance and store it away from the reach of children or people
who are not conscious of their own actions.
- ATTENTION: in case o foam or liquid discharge switch off
immediately.
- ATTENTION: in case tipping over, lift the appliance before
switching off.
- ATTENTION: when using the carpet cleaner do not exceed the
power recorded on the aspirator supplementary accessories
plug. Ensure that the feeding voltage of the electro-utensil
corresponds to that recorded of the tag of the aspirator’s
technical data. Non-compliance with these rules could cause
fire and lethal damages to the user.
- ATTENTION: the supplementary accessories plug is to be used
only when the appliance is set for dust suction. The inobservance
of these rules may lead to causing fires and constitute mortal
danger to the user.
- ATTENTION: this appliance is not suitable for recollection of
dangerous dust.
Do not exhaust toxic, explosive, flammable or incandescent
substances. The maximum temperature allowed is 40°C / 104°F.
- Every part of the appliance must be correctly assembled before
using it.
Verify, furthermore, that the filtering elements have been
correctly and efficiently assembled.
- The appliance must be operated, installed, repaired and handled
on a steady, safe and not inclined plane.
- Ascertain that the values indicated on the engine block (on
the technical data label) correspond to those of the network to
which you intend to connect the appliance and that the socket
is compatible with the plug.
- Do not aspire water from containers, sinks, basins, etc.
- Do not aspire aggressive detergents because they could damage
the appliance.
- For the employment of detergents or cleaning fluids follow
the supplementary instructions on the products, including the
possible use of personal protection devices.
- Do not aspire materials that could damage the filtering elements
(such as glass, metal etc.).
- Do not ever pull or lift the appliance through the electrical
cable.
- Do not immerge the appliance into water and neither use water
jets to clean it.
- Do not ever aim the jet towards electric sources.
- Do not use the pump uselessly or continuously and respect the
pause periods described on the technical data tab.
- When work is completed, relieve the pressure using the faucet
with the pump turned off.
- Always remove the plug from the socket before performing
any operation.
- Regularly control the feeding cable looking for damages, cracks
or ageing. Substitute the cable before using it further.
- The substitution of the damaged cable must be done by the
tech assistance service or by competent authorized personnel
with recognized qualification.
- When using electrical extensions, make sure that these are
compatible with the power cable and that it does not touch
liquids or conductive surfaces.
- The level sensor (float) has the function to stop the vacuuming
when the tank is full of fluids or in case of overturning; carry out
routine cleaning checking that it has no damage and change it
if necessary.
- Finish the cleaning operations activating the pump with ½ liter
of clear water until the complete emptying of the tank.
- Clean every part of the appliance after using it; empty the tanks,
shake the filters and use humid cloth over its surface before
storing it.
- Cleaning operation cannot be carried out by 8-year-old and
older children when they are not supervised by adults.
- Specialized personnel must always carry out maintenance and
repairs; any damaged part must be substituted with original
spare parts.
- ATTENTION: it is forbidden to carry out changes to the appliance.
Tampering could cause fires and damages even lethal to the
user and the forfeiture of the guarantee.
- The manufacturer declines any responsibility for damages
caused to people or things due to non-compliance with these
instructions or if the appliance is unreasonably used.
GB
NOISE LEVEL: VaValues measured according to EN 60704 - 1 (1997) / EN 60704 - 2 - 1 (2001) rules. Measurement A for the sound
pressure level of the machine is < 73 dB (A) Under unfavorable feed conditions, the appliance may cause temporary drops in voltage.
4

OPTIONAL
L
LIQUID SUCTION - INJECTION-
EXTRACTION (EXTERNAL TANK)
OPTIONAL
A
A2
C
A1
A3
E
F
G
H
YZ
P
I
N
K
M
Q
R
Y
D1
O1
X
A4
5

GB
Z - Float
W - Antifoam body
W1- Cartridge filter
Z1 - Block ring
H3
H2
W1
Z1
Z
W
6

2
1 2 3 4
5 6 7 8
9 10 11 12
13 14 15 16
17 18 19 20
H3
7

H
K
N
21 22 23 24
25 26 27 28
29 30 31 32
33 34 35 36
37 38 39 40
Z
Z
A3
A4
8

GB
DRY SUCTION AND AIR CLEANING
A - Motor switch
B - Cloth Filter (*)
C - Motor
H1 - IDRO device
H2 - IDRO separator
E - Tank
F - Suction inlet
G - Flexhose
L - Potentiometer
M - Aluminum/plastic tube (0,50m)
P - Plastic handle
S - Double-use brush (*)
S1 - Wet tool
T - Round brush (*)
U - Upholstery tool (**)
V - Flat lance (*)
(*) Optional for some models
(**) Optional
LIQUID SUCTION / INJECTION-EXTRACTION
A - Motor switch
A1 - Pump switch
A2 - Additional plug (**)
A3 - Quick connector (INTAKE)
A4 - Quick connector (OUTTAKE)
C - Motor
D - Detergent’s tank with liquid valve
D1 - External tank
E - Tank
F - Suction inlet
G - Flexhose
H - Injection hose
I - Upholstery tool
L - Potentiometer (**)
K - Injection hose cock
N - Injection hose
O - Stainless steel extension tube
O1 - Aluminium-plastic bend
P - Plastic handle
Q - Carpet tool
R - Liquid front device
Y - Suction feeler
Z - Float
DUST SUCTION
- Remove the container with liquid valve D (if foreseen) (pic.1)
- Insert cloth filter B into the tank E (pic.2)
- Assemble suction head C onto the tank and clasp the hooks (pic.3)
- Insert the hose G in the suction inlet F (pic.4)
- Insert at the other hose end handle P and extension tubes M (pic.5)
- Connect the most suitable accessory (S-T-U-V) (pic.6)
- Start suction by pushing the red push button A, after correctly plugging in
the device (pic.7)
- Adjust the speed of the motor by turning the potentiometer L (if foreseen)
(pic.8)
- Examples of use as a vacuum cleaner for dust (pics. 9-10-11-12-13)
- If a paper filter is available, insert it into the tank adjusting it on the deflector
(pic.14).
AIR CLEANING/ DUST SUCTION
- Insert the IDRO H1 device by putting it on the baffle inside the inlet (pic.15)
- Pour water 3,5 into the tank (pic.16)
- Insert the IDRO separator H2 into the tank (pic.17)
- Ensure parts W1 - Z1 (H3) are fitted under the motor head C as indicated
- Hook up the motor head C on the tank and lock it up with the two hooks
(pic.18)
- Activate suction by pressing the red switch A, after having connected the
machine to the proper grid (pic. 7)
- Adjust the speed of the motor by turning the potentiometer L (pic.8)
LIQUID SUCTION
- Remove the cloth filter B from the tank E (pic.19)
- For models with internal holding tank, insert the tank provided with water
valve D (pic.20)
- For models with external holding tank, apply the float cage equipped with
the float under the motorhead (fig.40)
- Assemble suction head C onto the tank by inserting feeler Y in the suitable
opening of tank D and clasp the hooks (pic.21)
- Insert hose G in the suction inlet F (pic.4)
- Insert at the other hose end handle P and extension tubes (M - O - O1) (pic.5)
- Insert at the end of extension tube the wet tool S1 or the carpet tool Q and
apply the liquid front device R (pics.22-23) to intake liquids from floors.
- Start suction by pushing the red push button A, after correctly plugging in
the device (pic.7)
- Adjust the speed of the motor by turning the potentiometer L (if foreseen)
(pic.8)
- Example of use as a vacuum cleaner for liquids (pic.24-25)
WASHING WITH INJECTION-EXTRACTION SYSTEM
- Remove cloth filter B from the tank E (pic.19)
- Pour water into the external tank D1 (pic.26) or into the tank with liquid valve
D (pic.27) and, for the models with internal tank, place it into the tank E (Pic.20)
- Assemble suction head C on the tank by inserting feeler Y in the suitable
opening of tank D and clasp the hooks (pic.28).
For models with external holding tank join the connector X to the attachment
placed on the motorhead - INTAKE- (pic.29).
- Insert hose G in the suction inlet F (pic.4)
- Insert at the hose end handle P and extension tubes (M - O - O1) (pic.5)
- Insert at the end of extension tube the carpet tool Q if carpets or fitted carpets
are to be cleaned (pic.22), insert under carpet tool Q the front liquid device R
if floors or hard surfaces are to be cleaned. (pic.23)
- Link little hose K with the little hose H and N with the tap’s front union (pics.
30-32-33)
- Insert the end of H at the connection located on head C - OUTTAKE - (pics.
31-32-33)
- Fasten hoses H-N with suitable clips (pic.34)
- Start pump with green switch A1 – 1 minute ON / 1 minute OFF – and motor
with red switch A, after correctly plugging in the device (pic.7)
- Adjust the speed of the motor by turning the potentiometer L (if foreseen)
(pic.8)
- Push the tap’s lever in order to let the accessory on the surface to be cleaned
glide towards you (pic.35)
- After the running, release the tap’s lever and repeat the operation after lifting
and removing the accessory (pic.36)
- If you wish to clean tissues or armchairs, remove from handle P the extension
and remove hose N from the tap. Insert the upholstery tool I linking the hose
with the tap’s front union (pic.37). In order to start washing, put the opening
on the tissue, push the tap and pull it towards you.
- Example of use of opening I (pic.38)
ATTENTION: CLEAN REGULARLY THE FLOAT - Z - PLACED INSIDE THE PURIFYING
BUCKET - D - (pic.39) OR INSIDE THE FLOAT CAGE (pic.40) SO THAT IT CAN
FREELY MOVE IN ITS HOUSING. REGULARLY CHECK WHETHER THERE ARE
ANY SIGNS OF DAMAGE.
9

flexCAT 116 PD | Version 1.01
1
2
3
4
5
7
6
8
9
10
11
12
13
14
15
16
17
18
19
20
21
22
23
24
25
26
27
28
29
30
31
32
33
34
35
36
37
38
39
40
41
42
43
44
45
46 47 48
49 50
51
52
53
54 55 56 57
59
60
61
62
58 63 64 65 66 67
68
69 70 71 72 73 74 75 76
77
Spare parts drawing
10

EC DECLARATION OF CONFORMITY
2006/42/CE - 2014/30/UE - 2011/65/CE
We
Stürmer Maschinen GmbH
Dr.-Robert-Pfleger Straße
96103 Bamberg - Deutschland
declare under our responsibility that the product
to which this declaration relates is in conformity with the following standards or other normative document(s):
• IEC 60335 -1:2010+A1:2013
• IEC 60335 - 2 - 69:2012
• IEC 62233: 2008
• EN 55014 - 1:2006+A1:2009+A2:20-11
• EN 55014 - 2:1997+A1:2001+A2:2008
• EN 61000 - 3 - 2: 2014
• EN 61000 - 3 - 3: 2013
Following the provisions of the Directives: 2006/42/EC (Machinery directive)
2014/30/UE (Electromagnetic compability EMC) - 2011/65/EC (Directive RoHS II)
Person authorised to compile the technical file
Technikabteilung
Stürmer Maschinen GmbH, Dr.-Robert-Pfleger Str. 26
96103 Hallstadt
Legal Representative
Kilian Stürmer
Hallstadt 13/04/2016
flexCAT 3'
11

www.cleancraft.de
Table of contents
Other CleanCraft Vacuum Cleaner manuals

CleanCraft
CleanCraft SuperLite CSL160XL User manual
CleanCraft
CleanCraft flexCAT Series User manual

CleanCraft
CleanCraft VCA Series User manual
CleanCraft
CleanCraft flexCAT 120 VCA User manual
CleanCraft
CleanCraft dryCAT 16 L - Class User manual
CleanCraft
CleanCraft flexCAT 262 IEPD User manual
CleanCraft
CleanCraft wetCAT 362 ET User manual
CleanCraft
CleanCraft dryCAT 133 IC-HC Manual
CleanCraft
CleanCraft flexCAT 120 VCA User manual
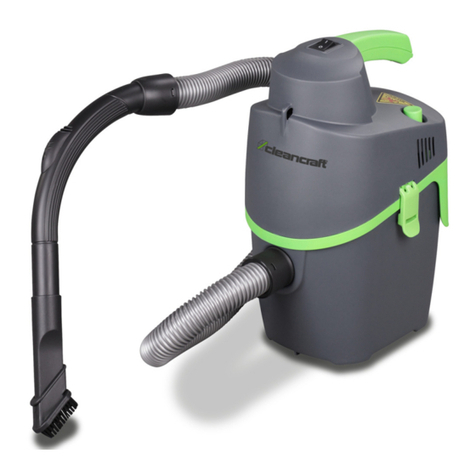
CleanCraft
CleanCraft flexCAT 16 H User manual
