CLS Manuals
CLS Atmosphere LED-panel
www.cls-led.com
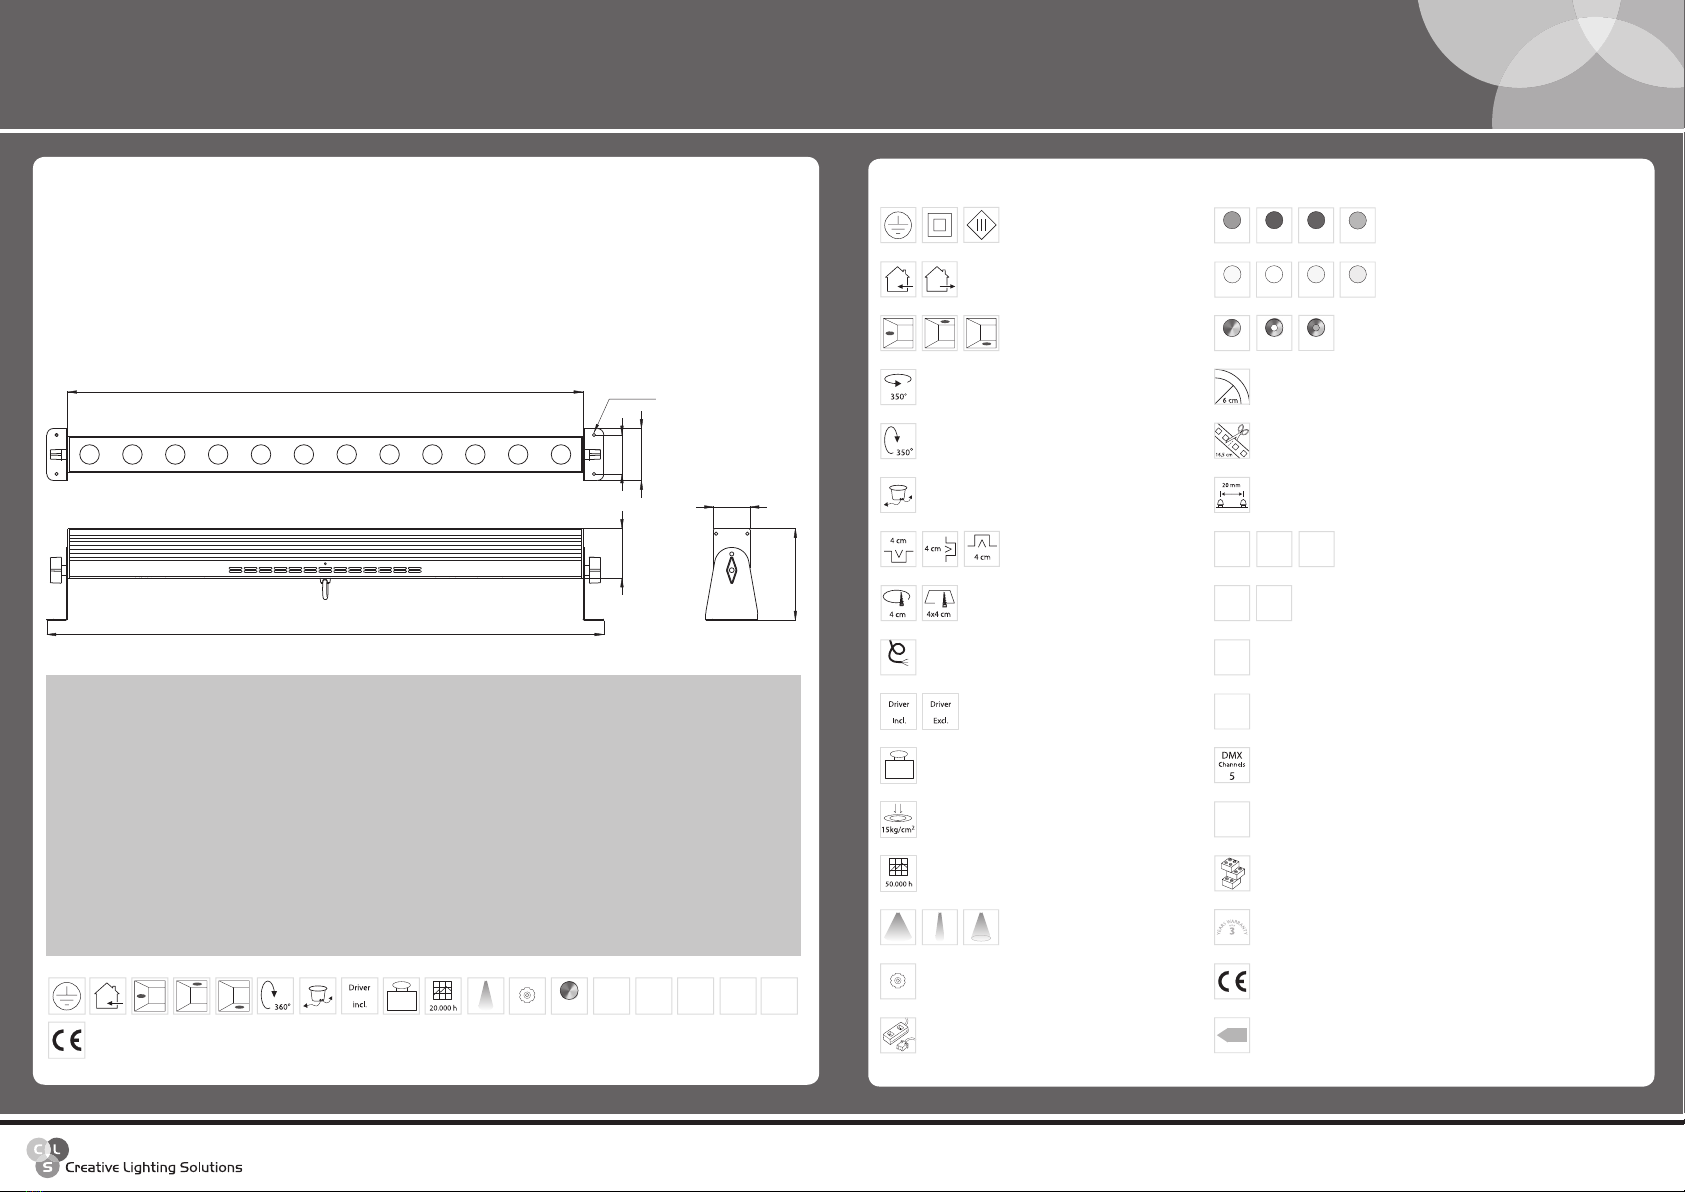
CLS Pixelbar Tri Colore
- 5 - - 6 -
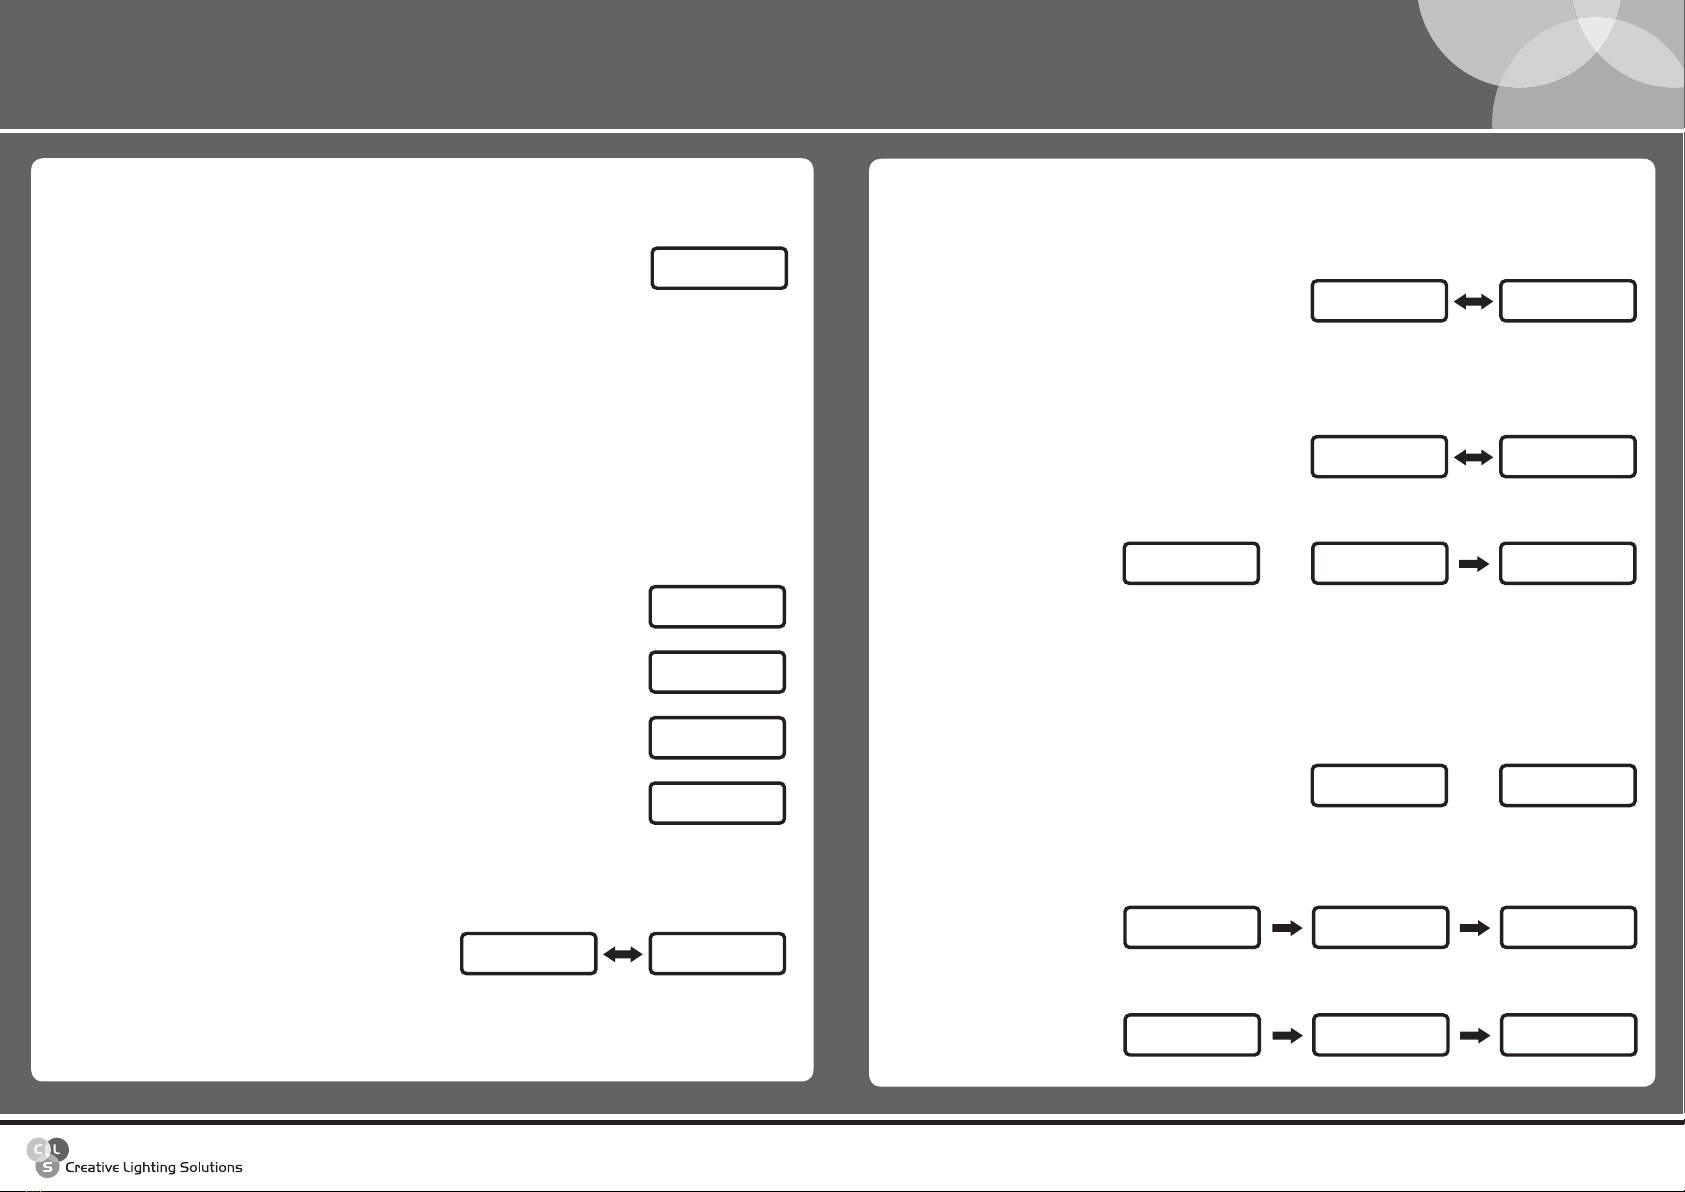
4. Demo Mode
Press [ENTER] and there are four programs in this mode:
1. Fixed Color: There are 10 built-in fixed colours. Press [UP] or [DOWN] to select the desired colour from
C01~C10.
Note: The colour illumination can be changed from 0~255 for each fixed colour. To change the colour
illumination press the [ENTER] button. The display now shows R255 G000 B000, the colour value twinkling can
be adjust from 0~255 by pressing [UP] or [DOWN]. To confirm and activate the colour setting press [ENTER]
again to the next colour setting.
2. Fade Effect:There are 6 built- in fade effects. Press [UP] or [DOWN] to select the desired effect from
F01~F06.
Note: The fade time of program can be changed from 01~20 to set the fade time press the enter button. The
display shows 'Decay ratio', the fade time can be adjust from 01~20 by pressing [UP] or [DOWN]. To confirm
and activate time setting press [ENTER] again, or press [ESC] to the next program.
Remark: To have the output saved and work with the same output when turning on the Pixelbar Tri Colore
again, please press [ENTER] under the list of each C01~C10, F01~F06 and you will see 'Status Saved'
twinkling. The memory will stay on the latest save only.
Please note the priority of directives should be DMX signal Demo Mode.
3. Self Test: Press [ENTER] to test one colour on all lighting fixtures. Press [ENTER] again to test the next colour
and so on.
4. Reset to Initial: Press [ENTER] twice. The controller will return to the original setting.
1. DMX Address
001
2. group mode
independent
2. group mode
synchronize
2. group mode
odd & even
2. group mode
duet
3. master mode
off
3. master mode
on
4. demo mode
press enter
demo layer
1. fixed color
Fixed color: C01
R255 G000 B000
Fixed color: C10
R255 G255 B255
Fixed color: C01
status saved
Fade color : f01
status saved
demo layer
2. fade color
Fade color: F01
decay ratio: 01
Fade color: F06
decay ratio: 20
demo layer
3. self test
3. self test
enter to test
3. self test
to next color
demo layer
4. reset to init
4. reset to init
enter to reset
4. reset to init
sure to reset?
OPERATION
Primitive setting:
1. DMX Address No.: 001
2. DMX Group Mode: Independent
3. Master / Slave Mode: OFF
Press [UP] or [DOWN] to select the desired step from 1 to 4 below:
1. DMX address Setting
For setting up an DMX address, press Enter and the LCM display shows 001 twinkling. Press [UP] or [DOWN] to
select the desired DMX address from number 001-512.
When selected the desired DMX address, press [ENTER] to Exit with save or [ESC] to Exit without saving.
2. DMX Group Mode
There are 4 DMX group modes, first disconnect the DMX connector. There is an total of 8 ports and can be set
for different groups. Each group works individually by using DMX console. When you see Group Mode, press
[ENTER] and the display shows 'independent' twinkling. Press [UP] or [DOWN] to select the desired group
below:
1. Independent: Control all ports individually
2. Synchronize: Control all ports works in same operation
3. Odd and Even: Port in odd numbers in one group and
even numbers in the other group.
4. Duet: Control ports by couple
When finished, press [ENTER] to exit with save or [ESC] to exit without saving.
3. Master Mode
This function is to choose the main control when you connect more then 2 controllers.When you see Master,
press [ENTER] and the display shows 'off' twinkling. Press [UP] or [DOWN] to select the master on or off. When
finished, press [ENTER] to Exit with save or [ESC] to Exit without saving.
Note: Please pay attention for the below notification when using an DMX controller as main controller to avoid
signal interrupting. When using any DMX controller as main control, please make sure the 'Master Mode' is in 'OFF'
modus on all other DMX controllers.
1. DMX Address
001
2. group mode
independent
2. group mode
synchronize
2. group mode
odd & even
2. group mode
duet
3. master mode
off
3. master mode
on
4. demo mode
press enter
demo layer
1. fixed color
Fixed color: C01
R255 G000 B000
Fixed color: C10
R255 G255 B255
Fixed color: C01
status saved
Fade color : f01
status saved
demo layer
2. fade color
Fade color: F01
decay ratio: 01
Fade color: F06
decay ratio: 20
demo layer
3. self test
3. self test
enter to test
3. self test
to next color
demo layer
4. reset to init
4. reset to init
enter to reset
4. reset to init
sure to reset?