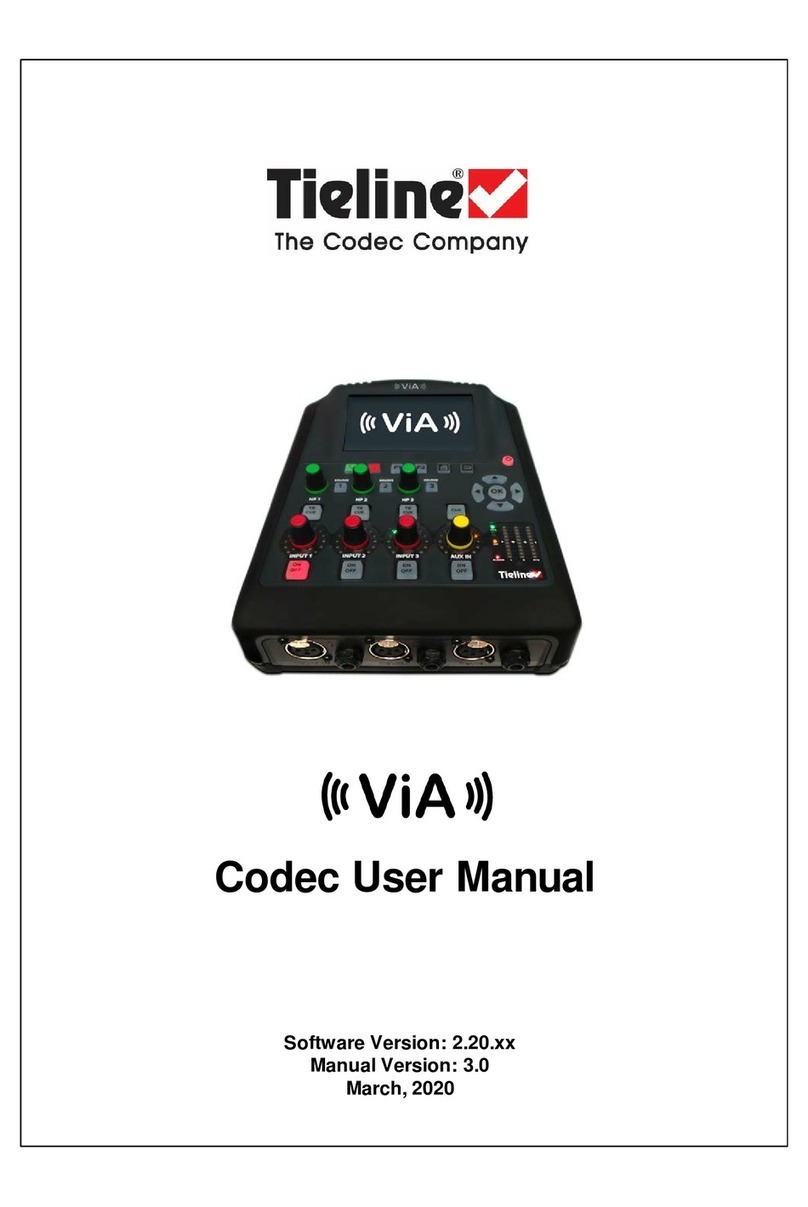
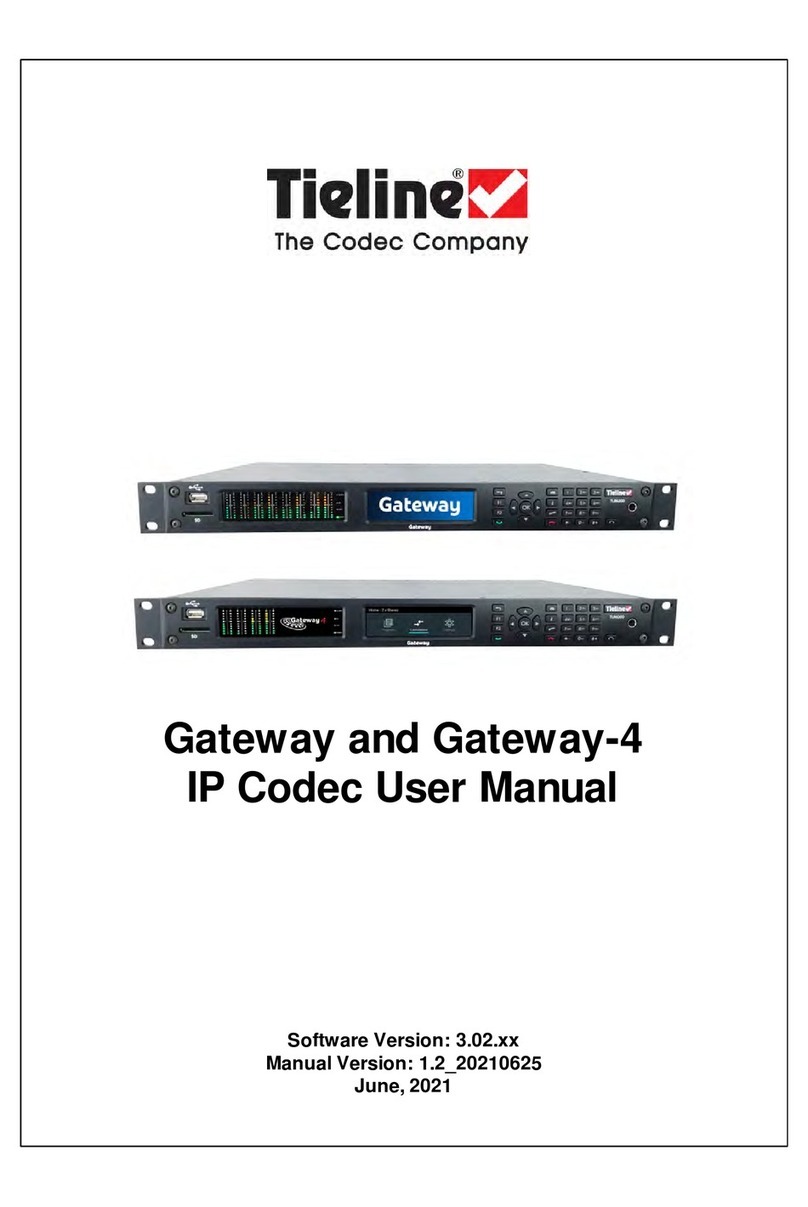
Codec Tieline TLR300 User manual

Tieline G5 Codec Compatibility
over IP and ISDN
Manual Version: 1.2
May, 2019

Tieline G5 Codec Compatibility over IP and ISDN v1.22
© Tieline Pty. Ltd. 2019
Table of Contents
Part I Connecting Tieline IP to other
Codecs Using SIP 3
................................................................................................................................... 81 Connecting to a Comrex AccessRack Codec
................................................................................................................................... 92 Connecting to a Comrex AccessPortable
................................................................................................................................... 103 Connecting to a Mayah Sporty
................................................................................................................................... 114 Connecting to a Telos Zephyr IP
................................................................................................................................... 125 Connecting to an APT Worldcast Equinox
................................................................................................................................... 126 Connecting to an ProdysProntonet LC
Part II Connecting Tieline ISDN to other
Codecs 14
................................................................................................................................... 141 Connecting to APT Wordcast Equinox ISDN
................................................................................................................................... 162 Connecting to CDQ Prima ISDN
................................................................................................................................... 193 Connecting to Mayah ISDN
................................................................................................................................... 214 Connecting to Telos Zephyr Xstream ISDN
................................................................................................................................... 245 Connecting to Comrex Matrix ISDN

3Connecting Tieline IP to other Codecs Using SIP
© Tieline Pty. Ltd. 2019
1 Connecting Tieline IP to other Codecs Using SIP
To dial between Tieline and non-Tieline codecs over IP it is necessary to configure all codecs to
connect in SIP mode. SIP provides interoperability between different brands of codecs due to its
standardized protocols for connecting different devices. Tieline IP codecs are EBU N/ACIP Tech
3326 compliant when connecting using SIP (Session Initiation Protocol) to other brands of IP
codecs.
SIP is also a useful way of dialing another device and locating it easily. This task is usually
performed by SIP servers, which communicate between SIP-compliant devices to set up a call. SIP
connections can be made in two ways; registered or unregistered.
Unregistered Peer-to-Peer SIP Connections
Codecs don’t need to be registered to a SIP server to dial peer-to-peer SIP connections. An
unregistered SIP peer-to-peer connection involves two codecs connecting to each other directly
using an IP address, as you would for a standard Tieline IP call. This is simpler and much like the
way codecs normally connect. The difference is that a Tieline IP call uses proprietary Tieline
session data to negotiate call parameters (e.g. algorithm and bit rate) when a call is established,
whereas a peer-to-peer SIP connection uses Session Description Protocol (SDP) for this purpose.
SIP provides interoperability between different brands of codecs due to its standardized protocols for
connecting dissimilar devices and is used when connecting Tieline codecs to non-Tieline devices.
There are two very distinct parts to a call when dialing over IP. The initial stage is the call setup
stage and this is what SIP and SDP is used for. The second stage is when data transfer occurs and
this is left to the other protocols such as RTP/UDP to stream audio data. SDP works with a number
of other protocols, to deliver the following functions when connecting devices over SIP:
·Establish a codec’s location.
·Determine the availability of a codec.
·Negotiate the features to be used during a call, e.g. the algorithm and bit rate.
·Provide call management of participants.
·Adjust session management features while a call is in progress (e.g. termination and
transfer of calls).
All the mandatory EBU N/ACIP 3326 algorithms are supported in the codec, including G.711,
G.722, MPEG-1 Layer 2 and 16 bit PCM, as well as optional algorithms including Opus, LC-AAC,
AAC-LD, HE-AACv2 and aptXEnhanced.
Registered SIP Server Connections
The benefit of using a SIP server to connect is that any device can be ‘discovered’ via its SIP server
registration. This is particularly useful if a codec is being used in multiple locations with IP
addresses that are DHCP assigned. These DHCP addresses are unreliable and are not
recommended for live broadcast connections. As long as your codec and the device you are dialing
are both registered to a SIP server you can connect by simply dialing the destination SIP address.

4 Tieline G5 Codec Compatibility over IP and ISDN v1.2
© Tieline Pty. Ltd. 2019
Some SIP servers route RTP audio through the SIP server as well and Tieline recommends avoiding
this type of server whenever possible. Otherwise you will be reliant on the SIP server for streaming
broadcast audio packets and most servers are not designed for mission critical packet streaming.
To dial a codec via a SIP server requires:
1. Both devices to be registered with separate SIP accounts.
2. Both codecs configured to operate in SIP mode.
3. The IP address of the SIP server.
4. An IT administrator to open UDP port 5060 to enable SIP traffic, as well as UDP audio port
5004.
A SIP server administrator should be able to provide the following details to enable SIP registration
of a device:
·Username
·Authorized User
·SIP address
·Domain
·Realm
·Registrar
·Registar port
·Outbound Proxy
·Proxy port
Advantages and Disadvantages of Using SIP
Advantages of SIP
1. SIP provides interoperability between different brands of codecs due to its standardized
protocols for connecting different devices, e.g. Session Description Protocol (SDP).
2. EBU N/ACIP Tech 3326 provides a minimum set of requirements necessary to ensure
interoperability between equipment intended for the transport of audio over IP networks. It
standardizes the use of ports, encoders, transport protocols and signaling to ensure codecs,
and other SIP-enabled devices like smartphones and VoIP phones, can connect
successfully.
Disadvantages of SIP
1. SIP requires both codecs to be configured with the same settings before connecting or the
connection will fail. When dialing Tieline to Tieline the dialing codec provides all connection
information to the answering codec. This is not possible when using SDP in SIP mode.
2. Not all professional codec manufacturers are fully compliant with all requirements for
interoperability.

5Connecting Tieline IP to other Codecs Using SIP
© Tieline Pty. Ltd. 2019
3. SIP connections are more complex to configure.
4. SIP does not support advanced software enhancements which deliver redundancy and rock
solid reliablity over IP, e.g. failover connections, SmartStream PLUS redundant streaming,
Fuse-IP bonding, plus error concealment strategies.
5. Codecs using SIP cannot use the TieLink Traversal Server for presence and connections. In
addition port forwarding is usually required.
6. Some ISPs and/or cellular networks may block SIP traffic.
SIP Security
Tools such as Shodan make it easy for anyone to easily locate devices connected to the internet
around the world. Therefore it is critical that security measures are in place for all IP and SIP
connections over the public internet.
Managing Unwanted SIP Calls
Hackers and other nefarious net-bound characters look for networks with easy access in which to
ply their trade. As a starting point they look for networks with open gateways and platforms using
default passwords.
Maintaining Codec Network Security
Adequate security is a major factor in ensuring your codecs and your broadcast network remain
secure. There are several layers of security available in Tieline codecs to maintain secure
connections. These include:
1. Immediately change the default password when you commission and install your codecs
(see instructions which follow). Create a strong password which includes both capital and
lower case letters, symbols and numbers (up to 15 characters can be entered). Password
managers can be useful when managing multiple passwords within organizations.
2. Ensure your codec is behind a firewall and only open the TCP and UDP ports required to
transmit session and audio data between your codecs. Using non-standard ports instead of
Tieline default ports can also ensure the codec is more difficult to discover. SIP usually uses
standard ports; UDP Port 5060 for session data (SDP) and UDP Port 5004 for audio data.
3. Ports 80 and 8080 are commonly used to access the Tieline codec web server. You can add
an additional layer of security by translating these ports on the WAN side of your network
into non-standard port numbers. Adjust ports using the Options panel in the Toolbox
HTML5 Web-GUI, or see "Configuring TCP/UDP Ports".
4. By default SIP interfaces are disabled to avoid unwanted traffic. The SIP Filter Lists panel
in the Toolbox HTML5 Web-GUI allows filtering of SIP URIs and User Agents to provide
greater security when using SIP. See "Configure SIP White and Blacklists" for more
information.
5. An SSL security certificate can be installed on each codec in your network to ensure it is a
trusted device within your network. See "Installing a Security Certificate" for more
information.
6. Firewall settings to enable or disable a range of firewall-related network services, or limit ping
to only work in a local subnet. Adjust settings using the Options panel in the Toolbox
HTML5 Web-GUI, or see "Firewall Configuration."
7. Implementation of CSRF protection (Cross-Site Request Forgery). Enable and disable this
setting using the Options panel in the Toolbox HTML5 Web-GU, or see "Enabling CSRF
Security" for more info.
Be sure to document any port changes because this information will be required if you need to
contact Tieline or other online support services.

6 Tieline G5 Codec Compatibility over IP and ISDN v1.2
© Tieline Pty. Ltd. 2019
Understanding SIP Terminology
What is a URI?
A Uniform Resource Identifier (URI) is a string of characters identifying a name or resource on the
internet. A Uniform Resource Locator (URL) is a URI specifying where an identified resource is
available (e.g. network location) and the mechanism for retrieving it. E.g. http://twitter.com, where
http:// is the protocol used to retrieve information from "twitter.com" which is the network location.
What is a SIP URI?
SIP URIs can be used to whitelist or blacklist devices from connecting to a codec. A SIP URI is the
address or characters used to call another person via SIP. A SIP URI is essentially a user's 'contact
address' and is used by VoIP phones and other devices to call using SIP. An example of a SIP URI
is: "sip:tieline_test1@getonsip.com". When dialing using Tieline codecs "sip:" is automatically
placed in the dial string and does not need to be entered. SIP URIs can be used to whitelist or
blacklist devices from connecting to a codec.
Important Notes:
·The default UDP audio port when using SIP for a peer-to-peer connection is 5004 in
Tieline codecs.
·Enter the IP address or SIP URI, then a full colon and the session port number to
change the session port from the default setting of UDP port 5060, e.g.
"sip:tieline_test1@getonsip.com:5070"
·Tieline codecs automatically add "sip:" to the address entered in the Address field
when dialing, so it's not necessary to add this.
·To only allow a predefined list of codecs to connect, add them to the URI Whitelist and
add a wildcard (asterisk) * to the URI Blacklist: all incoming calls will be blocked
except for codecs in the Whitelist.
What is a SIP User Agent?
A user agent is a software agent acting on behalf of a user. Hackers use SIP user agents or
'botnets' to scan for open ports on the internet. When they locate open ports they can force their
way into SIP servers and scan for valid accounts to use for fraudulent purposes, like making free
international calls. Known user agents like "sipvicious" and "friendly-scanner" can be added to a
User Agent Blacklist in Tieline codecs to stop them from accessing them.

7Connecting Tieline IP to other Codecs Using SIP
© Tieline Pty. Ltd. 2019
How do I find myCodec's User Agent
It may be necessary to discover a codec user agent as some codec manufacturers allow
whitelisting of calls by 'User Agent.' Therefore, it may be necessary to enter a Tieline codec
user agent into a non-Tieline codec to allow it to connect to a Tieline SIP codec.
·From firmware v2.16.xx and later releases the user agent in a Tieline G5 codec is configured
as "Tieline <ProductName> <Firmware Version>". E.g. Tieline Bridge-IT v2.18.68.
·In Tieline G3 codecs the user agent is configured as "Tieline <ProductName> <Serial
Number>". E.g. Tieline TLR350 8972. The model numbers for Tieline G3 codecs are as
follows:
§Commander G3 Rack TLR300 = Model Number TLR300
§Commander G3 Rack TLR300B = Model Number TLR350
§Commander G3 Field TLF300 = Model Number TLF300
§i-Mix G3 TLM600 = Model Number TLM600
Troubleshooting SIP Connections
Manufacturers of professional IP codecs in most cases do not use the standard SIP ports (UDP
5060 and UDP 5004) for making IP connections. Therefore you will need to reconfigure each codec
to use the standard SIP ports in most instances.
Most of the time EBU N/ACIP Tech 3326 SIP compliant codecs should connect when using the
same encoders and connection settings at both ends. However, if one-way audio is encountered, it
is highly likely to be a port forwarding issue. Port forwarding configuration instructions for most
popular routers are available at www.portforward.com.
Some manufacturers support a subset of the EBU N/ACIP Tech 3326 recommendations so not all
algorithms are supported by all manufacturers. G.722 is supported by most codec manufacturers,
so if you encounter connection issues, default to using this algorithm for most troubleshooting
scenarios.
Getting Started with SIP
To dial over SIP peer-to-peer without using a SIP server follow the instructions in this document. To
dial over SIP using a SIP Server you will need to:
1. Register the codec to a SIP server using SIP account credentials.
2. Configure a SIP interface in the codec. Note: The SIP1 or SIP2 interface will include the
proxy and port settings, as well as the selected IP interface used to make the connection,
e.g. LAN1.
Important Notes:
·SIP dialing is only supported over point-to-point connections, not multi-unicast
connections.
·Tieline G5 codecs support a SIP call being placed on-hold. Note: there are several
different implementations of "on-hold" by various SIP providers. Some will stop
streaming when a call is placed on-hold and others will replace live streaming with on-
hold messages or music.

8 Tieline G5 Codec Compatibility over IP and ISDN v1.2
© Tieline Pty. Ltd. 2019
·Tieline supports RFC5109 and RFC2733 compliant FEC over SIP from firmware
v2.18.xx.
·Some ISPs and/or cellular networks may block SIP traffic over UDP port 5060.
1.1 Connecting to a Comrex Access Rack Codec
Important Note:
·Firmware installed; Comrex Access codec firmware version 4.0 / Flash 4.0; Tieline
codec firmware version 2.14.88.
·To connect to the Comrex web-GUI you need to determine the IP address of the codec
on startup. View the PPM LEDs on start up to discover the last 4 digits of the IP
address; L(Send) is the 4th last digit and R(Receive) is the last digit.
·The Comrex Access does support MPEG 1 Layer 2 encoding.
·The default credentials for the Comrex Access GUI is to use any username and enter
the default password comrex
Common SIP settings Tieline recommends when connecting to non-Tieline codecs like Comrex are
as follows:
·Profile: Mono
·Bit rate: 64kbps
·Algorithm: G.722
·Session port: UDP 5060
·Audio port: UDP 5004
Configure the Comrex Access Rack Codec for a Peer-to-Peer SIP Call
1. Attach a LAN cable and any audio inputs to the Comrex Access codec.
2. Apply power to the Comrex Access.
3. Determine the IP address of the codec (DHCP by default), by noting the number of "Receive"
LEDs illuminated on the front panel of the Access codec.
4. Enter the IP address into a browser and open the Comrex Access Graphic User Interface (GUI).
5. Click the System Settings tab in the Comrex Access GUI.
6. Click to select the Show advanced options check-box below the System Setting pane.
7. Click the arrow symbol to the left of the EBU 3326/SIP Settings folder to expand and view all
SIP settings.
8. Click Accept incoming connections and ensure the Enabled check-box is selected.
9. Click IP Port and ensure that port 5060 is entered in the port number text box; click Apply to
change this setting after making changes.
10.Click RTP IP Port and ensure that port 5004 is entered in the port number box; click Apply to
change this setting after making changes.
11.Click the arrow symbol for Standard RTP Settings to expand and view all settings.
12.Click IP Port and change the Incoming network port to 5004, then click Apply.
13.Click the Profiles tab and click the Add New Profile button.
14.In the Profile Setting section select General and type a name into the Profile Name text box,
then select EBU 3326/SIP in the Channel drop-down arrow selections.
15.In the Profile Setting section and select Local, then Encoder and click VoIP in the
adjustment pane to select either G.711 or G.722. Then select Remote > Encoder > VoIP >
G.722. Note: Alternatively, select AAC, HE-AAC, AAC-LD or Opus encoding options.
16.You are now ready to connect, so click on the Connections tab in the Comrex Access GUI.
17.Click the Store New Remote button to create a new connection.
18.Enter the Remote Name and the IP address of the Tieline codec you are dialing. Then select
the profile you want to use via the drop-down Profile list box, next click OK.
19.Click the large green Connect button.
20.Click the Disconnect button to hangup the connection.

9Connecting Tieline IP to other Codecs Using SIP
© Tieline Pty. Ltd. 2019
Configure a Tieline G5 Codec for a peer-to-peer SIP Call
1. Attach a LAN cable and any audio connections to the Tieline codec.
2. To dial peer-to-peer press the HOME button to return to the Home screen, select
Connect > IP > SIP.
3. Use the numeric KEYPAD to enter the IP address of the codec you want to dial, using the
or buttons to enter the periods in the IP address and use the RETURN button
to delete numbers already entered.
4. Then press the down navigation button to select Setup and press to adjust the
algorithm to match the Access rack codec. Also adjust the jitter buffer and encode/decode
direction if required. Note: By default the Tieline codec will attempt to connect using MP2
and then G.722.
5. Press the RETURN button to navigate backwards to the Connect SIP screen.
6. Press the CONNECT button to make a connection.
Important Note: The Tieline codec should automatically select G.711 µ -law for North
America and Japan, and G.711 a-law in most other regions of the world if this algorithm is
used.
1.2 Connecting to a Comrex Access Portable
Important Note: Firmware installed - Comrex Access Portable codec firmware version
2.8-pre; Tieline codec firmware version 2.14.100
Configure the Access Portable for a Peer-to-Peer SIP Call
1. Attach a LAN cable and any audio inputs to the Comrex Access codec.
2. Apply power to the Comrex Access Portable.
3. Tap the Configure drop-down menu in the top-left of the codec touch-screen and then tap
System Settings.
4. Tap the Advanced check box at the bottom of the screen to display the full menu.
5. Scroll down the screen to N/ACIP SIP Settings and tap to select Accept Incoming
Connections if it is not enabled, then tap Edit, next tap the Enabled check box and tap the
Save button.
6. Ensure that port 5060 is entered into the port number box.
7. Tap RTP IP Port and enter port 5004 into the port number box.
8. Tap the Network drop-down menu at the top of the screen, then tap Manage Networks to
determine the IP address (DHCP by default) of the codec as you will need this to dial into the
codec from a Tieline codec.
9. Tap the Configure drop-down menu in the top-left of the codec touch-screen and then tap
Manage Profiles.
10.Tap the Add New button to create a New Profile in the Available Profiles list.
11.Tap New Profile to highlight it and tap the Edit button.
12.Tap Profile Name to highlight it on the screen and tap the Edit button, then type a name for the
profile and tap the Save button.
13.Tap Channel to highlight it on the screen and tap the Edit button, then tap to select N/ACIP
SIP in the drop-down list box and tap the Save button.
14.Tap Encoder to highlight it on the screen and tap the Edit button, then tap X3: VoIP G.722 in
the drop-down list box and tap the Save button.
15.Tap the Done button in the Profile Settings screen.
16.To create a new "Remote" connection tap Remotes, then tap Add New Remote.
17.Enter the Name of the connection and the IP address, then tap to select the profile you have
just created in the Profile drop-down list box, next tap the OK button.
18.Tap on the Remote you have just programmed with the new profile and tap the Connect button
on the screen to connect to the Tieline codec.

10 Tieline G5 Codec Compatibility over IP and ISDN v1.2
© Tieline Pty. Ltd. 2019
19.Tap the Disconnect button to hangup the connection.
Configure a Tieline G5 Codec to Connect peer-to-peer using SIP
1. Attach a LAN cable and any audio connections to the Tieline codec.
2. To dial peer-to-peer press the HOME button to return to the Home screen, select
Connect > IP > SIP.
3. Use the numeric KEYPAD to enter the IP address of the codec you want to dial, using the
or buttons to enter the periods in the IP address and use the RETURN button
to delete numbers already entered.
4. Then press the down navigation button to select Setup and press to adjust the
algorithm to match the Access portable codec. Also adjust the jitter buffer and
encode/decode direction if required. Note: By default the Tieline codec will attempt to
connect using MP2 and then G.722.
5. Press the RETURN button to navigate backwards to the Connect SIP screen.
6. Press the CONNECT button to make a connection.
Important Note: The Tieline codec should automatically select G.711 µ -law for North
America and Japan, and G.711 a-law in most other regions of the world if this algorithm is
used.
1.3 Connecting to a Mayah Sporty
Important Note: Mayah Sporty codec firmware version 4.9.1.0; Tieline codec firmware
version 2.14.88.
Configure a Mayah Sporty for a Peer-to-Peer SIP Call
1. Attach a LAN cable and any audio inputs to the Sporty codec.
2. Apply power to the Mayah Sporty.
3. Find the IP address of the codec via F2 [Codec1] > F3 [Setup] > F1 [Interface] > Ethernet >
OK. Use the navigation buttons to find the IP address as you will need this to dial into the codec
from the Tieline codec.
4. Use the up/down navigation arrow buttons and select SIP.
5. Navigate down and ensure port 5060 is entered for the UDP port, then ensure port 5004 is
entered for the TCP port. Select UDP or TCP and then OK to edit these settings.
6. Press the F4/ON button several times to return to the Home screen.
7. Press F2 [Codec] > F3 [Setup] > F2 [Quality] to display the algorithm selection screen.
8. Use the navigation arrow buttons on the top of the codec to select an algorithm from G.711µ ,
G.711a, G.722, MPEG L2 or Linear 16 bit.
9. Press the F4/ON button several times to return to the Home screen.
10.Ensure the codec is configured to automatically accept incoming calls via F4/ON System > F2
(Misc.) > Connections > Accept Mode > Auto.
11.Press the F4/ON button several times to return to the Home screen.
12.Select F2 [Codec1] > (F1) Connect > (F3) Direct > Interface (Ethernet) > Protocol (SIP) >
SIP Address (enter IP address) > OK.
13.Press the right navigation button to select dial and then press OK to dial. The screen should
display Connecting and then connect to the destination codec.
14.To hang up from the Home screen select F2 [Codec1] > F1 (End Call).
Configuring a Tieline G5 Codec for a Peer-to-Peer SIP Call
1. Attach a LAN cable and any audio connections to the Tieline codec.
2. To dial peer-to-peer press the HOME button to return to the Home screen, select
Connect > IP > SIP.

11Connecting Tieline IP to other Codecs Using SIP
© Tieline Pty. Ltd. 2019
3. Use the numeric KEYPAD to enter the IP address of the codec you want to dial, using the
or buttons to enter the periods in the IP address and use the RETURN button
to delete numbers already entered.
4. Then press the down navigation button to select Setup and press to adjust the
algorithm (usually MP2 or G.722), jitter buffer and encode/decode direction if required. Note:
By default the Tieline codec will attempt to connect using MP2 and then G.722
5. Press the RETURN button to navigate backwards to the Connect SIP screen.
6. Press the CONNECT button to make a connection.
Important Note: The Tieline codec should automatically select G.711 µ -law for North
America and Japan, and G.711 a-law in most other regions of the world if this algorithm is
used.
1.4 Connecting to a Telos Zephyr IP
Important Notes:
·Zephyr IP codec firmware version 3.1; Tieline codec firmware version 2.14.88.
·The default user name "user" and password "Telos" can be used to open the Telos
web-GUI interface.
·In testing Tieline was successful in connecting using MPEG Layer 2 and G.722.
Configure the Zephyr IP for a Peer-to-Peer SIP Call
1. Apply power to the codec and when the menu appears use the arrow buttons to navigate to
Network on the LCD screen and press OK.
2. Verify and note the IP address displayed via Ethernet Config.
3. Press the ESC button and return to the Main Menu Screen.
4. Select Codec > Advanced Setup > Encoding Mode [Layer 2] / Minimum Bitrate
[128kbps] / Maximum Bitrate [128kbps]. Note: G.722 has also been successfully tested.
5. To add a new sip address navigate to Auto > Add > Device Name [sip1@<enter IP address
here>] >Device Type [SIP] > Save. Note: the @ symbol is accessed via the "1" button.
6. Navigate back to the Contacts screen, select the contact and then select Call and press OK to
dial.
Configuring a Tieline G5 Codec for a Peer-to-Peer SIP Call
1. Attach a LAN cable and any audio connections to the Tieline codec.
2. To dial peer-to-peer press the HOME button to return to the Home screen, select Connect
> IP > SIP.
3. Use the numeric KEYPAD to enter the IP address of the codec you want to dial, using the
or buttons to enter the periods in the IP address and use the RETURN button to delete
numbers already entered.
4. Then press the down navigation button to select Setup and press to adjust the
algorithm to MP2 and the jitter buffer and encode/decode direction if required. Note: By default
the Tieline codec will attempt to connect using MP2 and then G.722.
5. Press the RETURN button to navigate backwards to the Connect SIP screen.
6. Press the CONNECT button to make a connection.
Important Notes: The address used to dial the Zephyr from the Tieline codec over SIP
was ZEPHYR@<insert IP address here>

12 Tieline G5 Codec Compatibility over IP and ISDN v1.2
© Tieline Pty. Ltd. 2019
1.5 Connecting to an APT Worldcast Equinox
Important Notes:
·Equinox codec firmware version 3.1; Tieline codec firmware version 2.14.88.
·In testing Tieline was successful in connecting using MPEG 1 Layer 2 encoding only.
Configure the Equinox for a Peer-to-Peer SIP Call
1. Plug your Ethernet LAN cable into the back of the codec and attach power.
2. Ensure the correct IP address is configured in the Equinox via Main Menu > IP > Stream
Port Settings.
3. Return to the Main Menu and select Audio.
4. Next select Audio Profile (No) and then MPEG - L2 as the algorithm. Select the
appropriate bit rate and whether you want to dial in mono, stereo or Joint Stereo, and then
the sample rate. For the profile we selected CCS IMUX.
5. Return to the Main Menu and select User and navigate to Primary Conn., then press the
Ent Dial button.
6. Navigate to Codec - SIP > Master and press Ent Dial.
7. Return to the Main Menu and select the SIP menu and press the Ent Dial button.
8. Select Setup Address Book and press the Ent Dial button.
9. Select entry entry 0or 1in the address book and press the Ent Dial button to enter the
address. Note: if you use entry 0or 1you can use the FD0 and FD1 buttons on the front of
the codec as speed dial buttons for these two entries.
10.Configure the address as SIP:TIELINE@<insert codec IP address>.
11.The codec should now be ready to dial or answer.
12.Press either the FD0 or FD1 button to dial one of these entries.
Configuring a Tieline G5 Codec for a Peer-to-Peer SIP Call
1. Attach a LAN cable and any audio connections to the Tieline codec.
2. To dial peer-to-peer press the HOME button to return to the Home screen, select Connect
> IP > SIP.
3. Use the numeric KEYPAD to enter the IP address of the codec you want to dial, using the
or buttons to enter the periods in the IP address and use the RETURN button to delete
numbers already entered.
4. Then press the down navigation button to select Setup and press to adjust the
algorithm to MP2 and the jitter buffer and encode/decode direction if required. Note: By default
the Tieline codec will attempt to connect using MP2 and then G.722.
5. Press the RETURN button to navigate backwards to the Connect SIP screen.
6. Press the CONNECT button to make a connection.
Important Notes:
·The default Local SIP address in the Equinox you need to dial is
sip:default_local_sip_user@yourdomain.com . As an example:
default_local_sip_user@203.36.205.174
·You can adjust the local SIP address setting in the Equinox via Main Menu Screen >
SIP > Local User Address
1.6 Connecting to an Prodys Prontonet LC
Important Note: Prodys Prontonet codec firmware version 06.0.1; Tieline codec firmware
version 2.14.88.
Configure a Prodys Prontonet LC for a Peer-to-Peer SIP Call
1. Attach a LAN cable and any audio inputs to the Prontonet codec.

13Connecting Tieline IP to other Codecs Using SIP
© Tieline Pty. Ltd. 2019
2. Apply power to the codec.
3. To find the IP address in the codec press the INF button on the codec until you can see the IP
address listed adjacent to ADDR:
4. Press the OK button to exit the INF menu screen.
5. Press OK again to view the MAIN MENU.
6. Use the navigation buttons to select NET and press OK.
7. In the NET SELECTION screen select IP and press OK.
8. In the SET CODEC screen select SIMPLE for a single connection, then press OK.
9. In the SET IP NET screen select OK when Unicast/Multicast is displayed.
10. In the STREAMING PROTOCOL screen navigate to SIP and press OK.
11.Press arrow button above the OK button to return to the MAIN MENU.
12.Navigate to ENC and press OK.
13.Press OK in the SET ENCODING MODE (ENCODER1) screen.
14.In the SET ENCODER 1 screen navigate to your preferred encoding algorithm and press OK.
15.Configure your preferred bit rate in the MPEG SET BITRATE screen, then press OK.
16.Select Mono, J-Stereo or Stereo in the MPEG SET MODE screen, then press OK.
17.Select your preferred sample rate in the MPEG SET Fs screen, then press OK.
18.In the MPEG SET CRC menu select OFF and press OK.
19.In the MPEG SET AUX DATA menu select OFF and press OK.
20.Press the CALL 1 button and select Unicast, then press OK.
21.Select BIDIR for a bidirectional audio path over the connection, then press OK.
22. In the LAN L1 DIAL screen use the keypad buttons to enter the IP address of the destination
codec in the LAN L1 DIAL screen, then press OK to dial.
23.On the LCD screen of the Prontonet it should display L1->CONNECTED and FRAMED is
displayed in the bottom left corner of the screen. The GREEN LED adjacent to the CALL1
button is also illuminated when connected.
24.Press the CALL 1 button for approximately 2-3 seconds to hangup the call.
Important Note:
·In Tieline testing the codecs were successful in connecting over MPEG Layer 2 in both
directions.
·Please configure the Prontonet LC with a 20ms frame rate when attempting to connect
over G.711 or G.722 with Tieline codecs. This setting can be configured using Prodys
web-browser configuration software.
Configuring a Tieline G5 Codec for a Peer-to-Peer SIP Call
1. Attach a LAN cable and any audio connections to the Tieline codec.
2. To dial peer-to-peer press the HOME button to return to the Home screen, select Connect
> IP > SIP.
3. Use the numeric KEYPAD to enter the IP address of the codec you want to dial, using the
or buttons to enter the periods in the IP address and use the RETURN button to delete
numbers already entered.
4. Then press the down navigation button to select Setup and press to adjust the
algorithm (usually MP2 or G.722), jitter buffer and encode/decode direction if required. Note: By
default the Tieline codec will attempt to connect using MP2 and then G.722.
5. Press the RETURN button to navigate backwards to the Connect SIP screen.
6. Press the CONNECT button to make a connection.
Important Note: The Tieline codec should automatically select G.711 µ -law for North
America and Japan, and G.711 a-law in most other regions of the world if this algorithm is
used.

14 Tieline G5 Codec Compatibility over IP and ISDN v1.2
© Tieline Pty. Ltd. 2019
2 Connecting Tieline ISDN to other Codecs
To dial from a Tieline codec to a non-Tieline codec it is necessary to disable ‘Session Data’ and
use an algorithm like G.722 or MPEG Layer 2 for compatibility. The same settings must be
configured at both ends for:
·Mono or stereo
·Encoding (Algorithm)
·Sample Rate
·Other relevant settings on the non-Tieline codec
Following are configuration instructions for dialing to several non-Tieline codec brands over ISDN.
2.1 Connecting to APT Wordcast Equinox ISDN
Configuring the WorldCast Equinox to Make an ISDN Call
1. Plug your ISDN line into the back of the codec and attach power.
2. Press the "Menu" button on the codec to access the codec menus.
3. Press the "Menu" button to select the "USER" menu.
4. Select "Primary Connection" and press the "Ent/Dial" button.
5. Next select "Codec - ISDN" > "Use Audio Profile" [No] > "Eapt-X16", or "Eapt-X24",
"MPEG1-L2" or G.722.
6. Select the appropriate bit rate and whether you are dialing in mono, stereo or Joint Stereo,
and then the sample rate.
7. For bonded "MPEG1-L2" connections select "CCS IMUX".
8. Complete the profile setup. The codec is now ready to dial or answer.
Configuring the Tieline Codec to Dial the Equinox over ISDN
1. Press the HOME button to return to the Home screen and select Connect > ISDN.
2. Navigate to Setup and press the button.
3. Select Session Type [Sessionless] > Select Dial Route [None] > Number of B Channels
[Choose the number of B-channels (between 1 and 4) required for your connection] > Algorithm
[Choose G.722 , E apt-X Mono or Stereo, MP2 Mono or Stereo or MP2 J-Stereo (Note:
select 32kHz or 48kHz sample rate for MP2 and E apt-X depending on available B-channels)].
4. Navigate to a Destination (e.g. Dest 1 or Dest 2) and press the button to select each one in
turn. Enter the number for each B channel you want to dial and press the button, then select
which B channel will dial using that number and press the button.
5. Navigate down to Auto Reconnect and press the button to toggle between Enabled and
Disabled. Note: This is normally enabled on the dialing codec only.

15Connecting Tieline ISDN to other Codecs
© Tieline Pty. Ltd. 2019
6. Navigate down to Save as Program and press the button to save these settings as a
program.
7. Navigate down to Module Configuration and press the button.
8. Select the ISDN module you want to configure and press the button.
9. Configure the following settings:
·Accept > Voice and Data
·Network > Check with your Telco (EU-ETSI in Australia; Europe & most countries outside
North America; [US Nat] is the most common in the US, but check with your Telco).
·Line Type > Check with your Telco and select either Point-to-Multi (point-to-multipoint) or
Point-to--Point (point-to-point).
·DN/MSN > Enter the "SPID" and "DN" numbers if required in your region, e.g. a SPID is
normally required in the US.
10. Navigate up to Apply Settings and press the button.
Dialing from the Tieline Codec
ProgramDialing
1. If you have saved the ISDN program as previously instructed, press the HOME button to
return to the Home screen and select Connect > Programs.
2. Select the saved program you want to load and press the button.
3. Select Load and press the button to load the program.
4. Press the CONNECT button to dial the ISDN program connections.
Ad Hoc Dialing
1. If you haven't save the program but have entered the dialing numbers and other settings, press
the HOME button to return to the Home screen and select Connect > ISDN > Connect.
2. Press the button to dial using the settings previously entered.
Important Note: If you select different algorithm settings on each codec and dial from the
Tieline codec, the connection will be unsuccessful and the CONNECTED LED on the front
panel of the Tieline codec will continuously flash. Adjust the algorithm settings and
attempt to reconnect.
Dialing from the WorldCast Equinox
Important Note: Configure ISDN Answer Config settings in the codec before attempting
to dial from the Equinox to the Tieline codec. Select the following settings in the Tieline
codec in one of the Configs (see ISDN Answering Configuration for more detail):

16 Tieline G5 Codec Compatibility over IP and ISDN v1.2
© Tieline Pty. Ltd. 2019
·May bond.
·Sessionless.
·Algorithm: G.722, MP2 Mono, MP2 Stereo, MP2 J-Stereo or E apt-X Mono or
Stereo.
·Sample Rate: 32kHz or 48kHz
1. Navigate to the B-channel you want to dial over and press the "Ent/Dial" button.
2. Use the keypad to enter the number of the line you are dialing.
3. Press the "Ent/Dial" button again to make the outgoing call from the codec.
4. If dialing two B-channels, navigate to the second B-channel and use the keypad to enter the
number, then press the "Ent/Dial" button. Note: the codec screen will display IMUX UNLOCKED
until you dial additional connections when bonding multiple channels.
Important Note: When dialing a mono or stereo connection over two B-channels audio is
not available until the second connection is successful.
2.2 Connecting to CDQ Prima ISDN
Use the following information to connect a Tieline codec to a Musicam CDQ Prima codec.
Configuring the CDQ Prima for a Mono Connection
Select a mono profile in the Prima codec for the connection:
1. Press the “SDIAL” button on the front panel of the codec.
2. When “ID NUM” is displayed press “8” and then press "Enter" using the down arrow.
3. “MPEG2/64K:QS” will be displayed briefly followed by “WORKING”.
4. “OK” will be displayed momentarily and then the LCD screen will return to the default screen
and be programmed for:
·A Mono connection.
·64Kbps Bit-Rate.
·48K Sample Rate.
·MPEG Layer 2 algorithm.
·1 ISDN B channel.
·Decoder Independent – No.
5. Press the right arrow on the "Enter" button and navigate to "Interface". Push the down arrow
on the "Enter" button to select this menu.
6. Use the "Enter" button and navigate to the type of interface you are using. Note: During
Tieline tests we used an "Internal TA".
7. Select the actual terminal adapter connected to your codec. Note: During Tieline tests we
used the internal "TA301".
8. Use the "Enter" button and select the switch type for the country you are in. Check with
your Telco for the correct setting if you are unsure. Note: During Tieline tests we used the
internal "NI1" setting for the USA.
9. Use the "Enter" button and keypad to enter the "SPID 1" and "SPID 2" numbers if required.
10.Use the "Enter" button and keypad to enter the "ID 1" and "ID 2" (Directory/MSN) numbers if
required.
11.The codec should now be configured.
Configuring the CDQ Prima for a Stereo Connection
1. Press the “SDIAL” button on the front panel of the codec.
2. When “ID NUM” is displayed press “27” or "35" (in testing this varies depending on the firmware
version in the CDQ Prima) and then press "Enter" using the down arrow. Note: if "27" or "35"
don't work, look for "Zephyr/128K:QS" in the dial list.

17Connecting Tieline ISDN to other Codecs
© Tieline Pty. Ltd. 2019
3. “Zephyr/128K:QS” will be displayed briefly followed by “WORKING”.
4. “OK” will be displayed momentarily and then the LCD screen will return to the screen displayed
prior to programming. The codec is now programmed for:
·A Joint Stereo connection.
·128Kbps Bit-Rate.
·48K Sample Rate.
·MPEG Layer 2 algorithm.
·2 ISDN B Channels
·Decoder Independent – Yes
5. Press the right arrow on the "Enter" button and navigate to "Interface". Push the down arrow on
the "Enter" button to select this menu.
6. Use the "Enter" button and navigate to the type of interface you are using. Note: During Tieline
tests we used an "Internal TA".
7. Select the actual terminal adapter connected to your codec. Note: During Tieline tests we used
the internal "TA301".
8. Use the "Enter" button and select the switch type for the country you are in. Check with your
Telco for the correct setting if you are unsure. Note: During Tieline tests we used the internal
"NI1" setting for the USA.
9. Use the "Enter" button and keypad to enter the "SPID 1" and "SPID 2" numbers if required.
10.Use the "Enter" button and keypad to enter the "ID 1" and "ID 2" (Directory/MSN) numbers if
required.
11.The codec should now be configured.
Configuring the Tieline Codec to Connect to the CDQ Prima
1. Press the HOME button to return to the Home screen and select Connect > ISDN.
2. Navigate to Setup and press the button.
3. Select Session Type [Sessionless] > Select Dial Route [None] > Number of B Channels
[Choose 1B (mono) or 2B (stereo)] > Algorithm [Choose MP2 Mono or MP2 J-Stereo (Note:
select 48kHz sample rate for MP2 algorithms)].
4. Navigate to a Destination (e.g. Dest 1 or Dest 2) and press the button to select each one in
turn. Enter the number for each B channel you want to dial and press the button, then select
which B channel will dial using that number and press the button. Note: In testing it was
necessary to enter the ISDN number, followed by the SPID, to dial successfully.
5. Navigate down to Auto Reconnect and press the button to toggle between Enabled and
Disabled. Note: This is normally enabled on the dialing codec only.
6. Navigate down to Save as Program and press the button to save these settings as a
program.
7. Navigate down to Module Configuration and press the button.

18 Tieline G5 Codec Compatibility over IP and ISDN v1.2
© Tieline Pty. Ltd. 2019
8. Select the ISDN module you want to configure and press the button.
Important Note: ISDN Sync should be displayed when an ISDN line is connected to the
codec. This appears regardless of whether you have configured the ‘ISDN Line Type’
correctly.
9. Configure the following settings:
·Accept > Voice and Data
·Network > Check with your Telco (EU-ETSI in Australia; Europe & most countries outside
North America; [US Nat] is the most common in the US, but check with your Telco).
·Line Type > Check with your Telco and select either Point-to-Multi (point-to-multipoint) or
Point-to--Point (point-to-point).
·DN/MSN > Enter the "SPID" and "DN" numbers if required in your region, e.g. a SPID is
normally required in the US.
10. Navigate up to Apply Settings and press the button.
Dialing from the Tieline Codec
ProgramDialing
1. If you have saved the ISDN program as previously instructed, press the HOME button to
return to the Home screen and select Connect > Programs.
2. Select the saved program you want to load and press the button.
3. Select Load and press the button to load the program.
4. Press the CONNECT button to dial the ISDN program connections.
Ad Hoc Dialing
1. If you haven't save the program but have entered the dialing numbers and other settings, press
the HOME button to return to the Home screen and select Connect > ISDN > Connect.
2. Press the button to dial using the settings previously entered.
After dialing successfully “FRAMED” should illuminate on the CDQ Prima screen. Tieline codecs
also support 32kHz sampling.
Important Note: Configure ISDN Answer Config settings in the codec before attempting
to dial from the Equinox to the Tieline codec. Select the following settings in the Tieline
codec in one of the Configs:
·May bond.
·Sessionless.
·Algorithm: MP2 Mono, MP2 J-Stereo.
·Sample Rate: 48kHz

19Connecting Tieline ISDN to other Codecs
© Tieline Pty. Ltd. 2019
Making a Mono Call from the CDQ Prima Codec
1. Press the "Dial" button on the front panel of the codec.
2. Navigate right using the "Enter" button and select "1".
3. Enter the number to dial using the numeric keypad.
4. Press the "Enter" button (bottom arrow) and the screen will briefly display "Working", then
"Connect" and then the green "Framed" light should illuminate on the front panel.
Making a Stereo Call from the CDQ Prima Codec
1. Press the "Dial" button on the front panel of the codec.
2. Use the "Enter" button and select "Both".
3. Enter the first number to dial using the numeric keypad.
4. Press the "Enter" button (bottom arrow) and the screen will briefly display "Dialling line 1" and
then "Connect".
5. Enter the second number to dial using the numeric keypad and press the "Enter" button (bottom
arrow).
6. The screen will briefly display "Dialling line 2", then "Connect" and then the green "Framed" light
should illuminate on the front panel.
Important Note: When connecting in stereo, the Prima expects both B channel dials to
occur within 5 seconds. This can be performed by the Tieline codec.
It has also been noted that the CDQ Prima codec will not connect if no audio is present
when dialing. It may connect Prima > Tieline, but not Tieline > Prima. If audio is present,
the codec should connect and stay connected even if audio is removed subsequently. The
J-Stereo light on the Prima may also flash when in this mode.
Ideally, have audio connected when dialing and the codec will frame immediately after the
first dial and then dial the second B channel quickly afterwards.
2.3 Connecting to Mayah ISDN
Configuring the Mayah Sporty to Make an ISDN Call
1. Plug your ISDN line into the codec and attach power.
2. Press "F2 Codec".
3. Press "F3 Setup"
4. Press "F2 Quality"
5. Use the navigation buttons to select an algorithm setting from "G.722", "L2 Mono, Stereo or
J-Stereo" or "E apt-XMono or Stereo", then press the "OK" button to save the setting.
6. Press "F4 ESC" to return to the home screen.
7. Press "F2 Codec", then "F1 Connect", then "F3 Direct".
8. Navigate to "interface" and press "OK" to select ISDN.
9. Navigate to "number1" and press "OK" to enter the ISDN number using the keypad, then
press "OK".
10.If you are bonding multiple channels navigate to "number2" and press "OK" to enter the
ISDN number using the keypad, then press "OK".
Configuring the Tieline Codec to Dial the Mayah Sporty over ISDN
1. Press the HOME button to return to the Home screen and select Connect > ISDN.
2. Navigate to Setup and press the button.

20 Tieline G5 Codec Compatibility over IP and ISDN v1.2
© Tieline Pty. Ltd. 2019
3. Select Session Type [Sessionless] > Select Dial Route [None] > Number of B Channels
[Choose the number of B-channels (between 1 and 4) required for your connection] > Algorithm
[Choose G.722 , E apt-X Mono or Stereo, MP2 Mono or Stereo or MP2 J-Stereo (Note:
select 32kHz or 48kHz sample rate for MP2 depending on available B-channels)].
4. Navigate to a Destination (e.g. Dest 1 or Dest 2) and press the button to select each one in
turn. Enter the number for each B channel you want to dial and press the button, then select
which B channel will dial using that number and press the button.
5. Navigate down to Auto Reconnect and press the button to toggle between Enabled and
Disabled. Note: This is normally enabled on the dialing codec only.
6. Navigate down to Save as Program and press the button to save these settings as a
program.
7. Navigate down to Module Configuration and press the button.
8. Select the ISDN module you want to configure and press the button.
9. Configure the following settings:
·Accept > Voice and Data
·Network > Check with your Telco (EU-ETSI in Australia; Europe & most countries outside
North America; [US Nat] is the most common in the US, but check with your Telco).
·Line Type > Check with your Telco and select either Point-to-Multi (point-to-multipoint) or
Point-to--Point (point-to-point).
·DN/MSN > Enter the "SPID" and "DN" numbers if required in your region, e.g. a SPID is
normally required in the US.
10. Navigate up to Apply Settings and press the button.
Dialing from the Tieline Codec
ProgramDialing
1. If you have saved the ISDN program as previously instructed, press the HOME button to
return to the Home screen and select Connect > Programs.
This manual suits for next models
3
Table of contents
Other Codec Conference System manuals