Compex SAS2224 User manual

CONTENTS
1. Introduction .....................................................................................................................................1
2. Package Contents.............................................................................................................................2
3. Features on Compex SAS2224 ........................................................................................................2
4. Panel Views .....................................................................................................................................3
5. Panel Features.................................................................................................................................4
6. Specifications...................................................................................................................................5
7. Hardware Installation.......................................................................................................................6
7.1. Installation and Removal of Expansion Module.....................................................................7
8. Buttons and LEDs Feature Description............................................................................................8
8.1. Buttons Operations.................................................................................................................8
8.1.1. Mode Button ............................................................................................................. 8
8.1.2. Set Button ............................................................................................................... 10
9. LEDs Indicators.............................................................................................................................11
9.1. How to view all current active ports Link/Act status............................................................11
9.2. How to view the connection speed of those active ports ......................................................11
9.3. How to view which active ports are connected at Full or Half Duplex mode.......................11
9.4. How to set up priority port ...................................................................................................12
9.5. How to set up VLAN............................................................................................................12
9.6. How to force a certain port to 100Mbps speed and Half or Full-duplex mode.....................13
9.7. How to force a certain port to 10Mbps speed and Half-duplex mode ..................................14
9.8. How to set Default Mode .....................................................................................................16
9.9. How to check which ports have been pre-configured for what modes .................................16
10. Troubleshooting.............................................................................................................................17
Technical Support ............................................................................................................................TS-1
Warranty Card........................................................................................................................................ I
Chinese Version...................................................................................................................................81
Technical Support for English Version............................................................................................TS-1
Technical Support for German Version ...........................................................................................TS-2
Technical Support for Russian Version ...........................................................................................TS-3
Technical Support for French Version .............................................................................................TS-4
Technical Support for Chinese Version ...........................................................................................TS-5
Warranty Card for English Version ....................................................................................................... I
Warranty Card for German Version......................................................................................................II
Warranty Card for Russian Version .....................................................................................................III
Warranty Card for French Version ..................................................................................................... IV
Warranty Card for Chinese Version......................................................................................................V

English 24-port 10/100Mbps Fast Ethernet Switch
with Power Buttons
SAS2224
1
“Quick Install Guide”
24-port 10/100Mbps Fast Ethernet Switch
with Power Buttons
SAS2224
1. Introduction
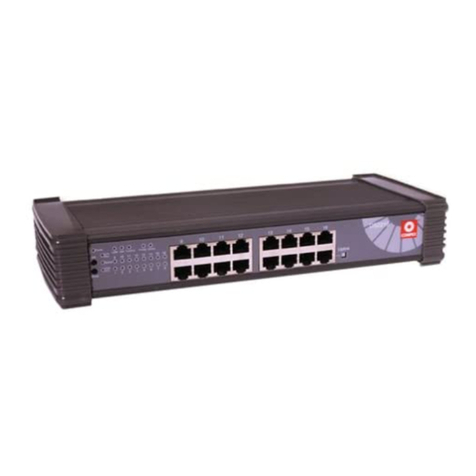
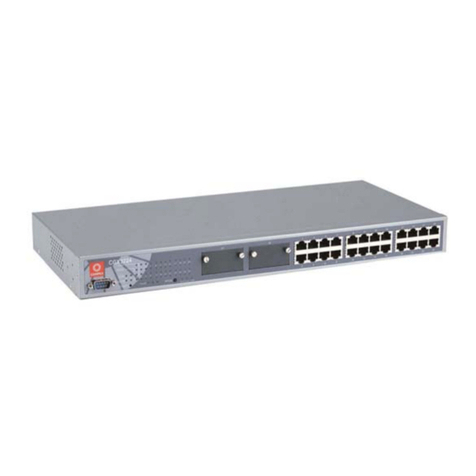
Figure 1.1 Compex SAS2224
Compex SAS2224 is a fast Ethernet switch that provides 24 10/100Mbps ports capable of
delivering full or half duplex transmission with flow control. This fast Ethernet switch supports
advanced features such as Virtual LAN and Forced Mode and these features can be easily
configured with a touch of the Powerbuttons located on the front panel of the switch. SAS2224 is
designed for full auto negotiation functionality that self configures for the highest possible
operation mode between nodes, coupled with collision-free packet switching capability makes
this a great choice for your expanding network.

2 24-port 10/100Mbps Fast Ethernet Switch
with Power Buttons
SAS2224
English
2. Package Contents
♦ 1 x Compex SAS2224 Switch Unit
♦ 1 x Power Cord
♦ 1 x Accessory Set
♦ 1 x Quick Install Guide with warranty card
3. Features on Compex SAS2224
♦ 10/100 N-Way Auto-Negotiation or Forced Mode
By default, Compex SAS2224 is configured for auto-negotiation to the highest possible
operation mode between two nodes. Alternatively, the users are able to manually configure
the speed (10/100Mbps) and the transmission mode (full/half duplex) of the ports.
♦ 10/100 Mbps Switching Function
A cost-effective 100Mbps and 10Mbps switching function in a single unit. Compex SAS2224
divides the network into smaller shared groups, eliminating unnecessary traffic and relieving
congestion on server paths.
♦ 10/100 Mbps Integration
24 high-speed ports permit Ethernet workgroups to communicate with Fast Ethernet users in a
single integrated network, and share servers connected to the dedicated 100Mbps ports.
♦ Efficient and Reliable Packet Forwarding
The self-learning mechanism allows Compex SAS2224 to learn the MAC addresses related to
the individual port and map them onto a MAC Address table. The incoming packets are
forwarded only to the related port. Hence, this would reduce unnecessary broadcasts to the
network. With Half Duplex Back Pressure flow control and Full Duplex IEEE802.3x Flow
Control, Compex SAS2224 is able to ensure zero packets loss even when the switching buffer
is full.

English 24-port 10/100Mbps Fast Ethernet Switch
with Power Buttons
SAS2224
3
10 11
6 7
1 2 3 4 5
8 9
4. Panel Views
Figure 4.1 Front Panel View of Compex SAS2224
Figure 4.2 Front Panel View of Compex SAS2224 (Section #1)
Figure 4.3 Front Panel View of Compex SAS2224 (Section #2)
Figure 4.4 Back Panel View of Compex SAS2224

4 24-port 10/100Mbps Fast Ethernet Switch
with Power Buttons
SAS2224
English
5. Panel Features
Features Status and Indication
1 MODULE LED ON indicates an optional module had been installed.
2 POWER LED ON indicates power is supplied to Compex SAS2224.
3 Set Button To configure port mode.
4 Mode Button To view port status and select option mode.
5 24 LEDs To indicate the status of port configuration on individual port.
6 Display LED To view active ports Link/Act, 10/100M, Full/Col status.
7 Configuration LED To configure port Priority, Speed, VLAN, Full/Half mode.
8 24 RJ-45 Ports RJ-45, 100Base-TX/10Base-T ports; Auto-negotiation.
9 Reset Button To reboot Compex SAS2224.
10 Module Slot For optional 100Base-FX Fiber Module and AUI Module
11 Power Socket Flexible power input (range 100VAC to 240VAC)

English 24-port 10/100Mbps Fast Ethernet Switch
with Power Buttons
SAS2224
5
6. Specifications
• Industry Standards Complies with
• IEEE802.3 10Base-T standard
• IEEE802.3u 100Base-TX standard
• IEEE802.3u 100Base-FX standard
• IEEE802.3 AUI standard
• FCC Class A, CE Mark
• LED Indicators • Power status
• Presence of optional module
• Display LEDs for Link/Act, 10/100M, Full/Col.
• Configuration LEDs for VLAN, Speed, Full/Half duplex,
Priority
• Interface • Supports 24 10/100Mbps ports (RJ-45, UTP): Half/Full
Duplex modes at 10 Mbps and 100 Mbps.
• Supports 1 modular slot for optional module (100Base-
FX or AUI module).
• Link Distance • 100Base-TX: Requires data grade Category 5 UTP cable.
Segment length can be up to a maximum of 100 meters.
• 10Base-T: Requires Category 3, 4 and 5 UTP cable.
Segment length can be up to a maximum of 100 meters.
• Switching Type Store-and-Forward
• Operating Mode N-way Auto-negotiation or Forced Mode
• Switching Buffer 4M bytes
• MAC Address Table 2K
• Flow Control • Back Pressure Flow Control (Half Duplex)
• IEEE802.3x Flow Control (Full Duplex)
• Back Plane Capacity 4.8Gbps

6 24-port 10/100Mbps Fast Ethernet Switch
with Power Buttons
SAS2224
English
• Dynamic Address
Learning/Filtering
Yes
• Power Supply • Internal power supply is provided with voltage ratings of
100VAC to 240VAC, 50~60 Hz.
• Power consumption is 25W maximum.
Operating Temperature:
Storage Temperature:
Operating Humidity:
Storage Humidity:
0°C to 50°C
-20°C to 70°C
10% to 80% RH;
5% to 91% RH.
• Environment
Requirements
[RH = Relative Humidity]
• Physical Dimension 432mm x 202mm x 44mm (Lx D x H)
7. Hardware Installation
Compex SAS2224 can be installed as a desktop unit or mounted on a 19-inch rack. Below list the
installation steps.
1. Unpack the unit.
2. For desktop installation
Choose a location that is near to the devices to be connected and close to an electrical outlet.
Put the unit at a clean, smooth, level and sturdy place. Make sure there is enough clearance
around the switch to allow attachment of cables, power cord and adequate air circulation.
For rack installation
Fasten the screw on the rack-mounting bracket to the side of the unit and mount the unit onto
the 19-inch rack firmly.
3. Plug the power cord into the back of the unit and power on the unit. Check that the power
LED indicator on the unit is lighted up.
4. The unit is now ready to operate.

English 24-port 10/100Mbps Fast Ethernet Switch
with Power Buttons
SAS2224
7
7.1. Installation and Removal of Expansion Module
Figure 7.1 Installing the Expansion Modules
1. Power OFF Compex SAS2224.
2. Unscrew and remove the back cover plate.
If you are replacing an existing module, just unscrew and pull out the existing module
carefully.
3. Insert the expansion module carefully and ensure that the module is fully engaged
with the back plane socket in the switch.
4. Tighten back the screws.
5. Power ON the switch and the unit is now ready for operation.
NOTE
The expansion module is sold separately. Please refer to www.compex.com.sg or
www.cpx.com for more details.

8 24-port 10/100Mbps Fast Ethernet Switch
with Power Buttons
SAS2224
English
8. Buttons and LEDs Feature Description
8.1. Buttons Operations
There are two buttons on Compex SAS2224 panel - Set and Mode buttons. They are for
setting and resetting enhanced functions.
8.1.1. Mode Button
This button allows you to:
♦ Select an option mode to configure for a port.
♦ View all ports pre-set status for a particular mode.
♦ Display Link/Act, 10/100M and Full/Col status of all active ports.
To activate this function,
1. Press once and the LED will light up at the first Configuration LED.
2. Press again and it will jump to the next mode option.
3. Press several times to cycle through all the modes.

English 24-port 10/100Mbps Fast Ethernet Switch
with Power Buttons
SAS2224
9
LEDs Description
Two function groups, namely Display LED group and Configuration LED
group, can be selected from the Mode button:
Display LED: To select general port operation status
Function Description
Link/Act Display all active ports link and activity status.
10/100M Display all active ports speed. ON for 100Mbps, OFF for
10Mbps.
Display all active ports Duplex mode and collision status.
ON For Full-Duplex mode
OFF For Half-Duplex mode.
Full/Col
Blinks Indicate collision is active. This occurs only when
port is operating in Half-Duplex mode.
Configuration LED: To configure the ports and set Priority/VLAN operation
Function Description
Priority Set priority of the ports
VLAN1/3 Set/reset/view pre-set VLAN1/3
VLAN2/4 Set/reset/view pre-set VLAN2/4
100M Set/reset/view pre-set speed for all ports.
Half Set/reset/view pre-set duplex mode for all ports.

10 24-port 10/100Mbps Fast Ethernet Switch
with Power Buttons
SAS2224
English
8.1.2. Set Button
This button enables you to:
♦ Select a port to set/reset a option mode.
♦ Save and update changes.
To activate this function,
1. After Mode button is set to the desired option, the port LED will start to flash
follow the sequence port #1 to port #24.
2. To select a port, press Set button once to select it when the desired port LED
is flashing.
3. To set and save the mode, press the Set button and hold it down for about 3
seconds until all port LEDs flashed thrice.

English 24-port 10/100Mbps Fast Ethernet Switch
with Power Buttons
SAS2224
11
9. LEDs Indicators
9.1. How to view all current active ports Link/Act status
1. Press the Mode button several times until the Link/Act LED lights up.
2. All ports LEDs that light up and/or blinking are the link and activity status of these
active ports.
9.2. How to view the connection speed of those active ports
1. Press Mode button several times until 10/100M LED lights up.
2. Those ports LEDs that light up indicate they are connected at 100Mbps speed.
Those that did not light up are either inactive or not connected. If there are active
ports but their LEDs did not light up indicate they are connected at 10Mbps speed.
9.3. How to view which active ports are connected at Full or Half Duplex mode
1. Press the Mode button several times until the Full/Col LED lights up.
2. Those port LEDs that lighted up indicate they are connected at Full-Duplex mode.
Those port LEDs not lighted up are either inactive or not connected. If there are active
ports but their LEDs did not light up then they are connected at Half-Duplex mode.

12 24-port 10/100Mbps Fast Ethernet Switch
with Power Buttons
SAS2224
English
9.4. How to set up priority port
You can easily set up the priority of the ports in Compex SAS2224 using the power
buttons.
3. Press the Mode button several times until the Priority LED lights up. You will notice
that individual LED will flash in sequence for a few seconds, starting from Port #1 to
Port #24. If the port LED is lighted up, it indicates that the port has already set its
priority, and nothing needs to be done. Otherwise, please proceed with the following
procedures.
4. Press Set button once when the desired port is flashing. The selected port LED will
light up and this shows that the port has been selected for priority setting.
5. To save your configuration, press Set button and hold it down for about 3 seconds
until the remaining LEDs flash thrice.
9.5. How to set up VLAN
You can set up to four VLANs on Compex SAS2224.
VLAN 1
1. Press the Mode button several times until the VLAN1 LED lights up. You will notice
that all LEDs will light up all at the same time. Subsequently, each individual LED
will flash in sequence for a few seconds, starting from Port #1 to Port #24. If the port
LED is lighted up, it indicates that the port has already set in VLAN 1. Otherwise,
please proceed with the following procedures.
2. Press Set button once when the desired port is flashing. The selected port LED will
not light up for VLAN 1. This shows that the port has been de-selected from VLAN 1.
3. To save your configuration, press Set button and hold it down for about 3 seconds
until the remaining LEDs flash thrice.

English 24-port 10/100Mbps Fast Ethernet Switch
with Power Buttons
SAS2224
13
VLAN 2
1. Press the Mode button several times until the VLAN2 LED lights up. You will notice
that ONLY individual LED will flash in sequence for a few seconds, starting from
Port #1 to Port #24.
2. Press Set button once when the desired port is flashing. ONLY the selected port LED
will light up for VLAN 2. This shows that the port has been selected for VLAN 2.
3. To save your configuration, press Set button and hold it down for about 3 seconds
until the selected LEDs keep flashing.
4. To set up ports in VLAN 3, please press the Mode button to VLAN 1/3 LED and
repeat the procedures for setting VLAN 2.
To set up port in VLAN 4, please repeat the procedures in VLAN2.
9.6. How to force a certain port to 100Mbps speed and Half or Full-duplex mode
1. Press the Mode button several times until the 100M LED lights up. Check the LED
for that port number you want to set.
2. If the port that you want to set as 100M has already lighted up, you may proceed to
Step 7 – Setting Port as Full/Half duplex, or else please proceed to next step.
3. The port LEDs will flash in sequence from port #1 to Port #24. Press the Set button to
confirm the desired port to configure in 100M.
4. When selected, the port will remain lighted up for 100M mode. For 10M, the LED
will turn off.
5. To save your configuration, press the Set button and hold it down for about 3 seconds
until the all LEDs flashing thrice.
6. Next press the Mode button until the Half LEDs lights up. Check the LED for the port
number you want to set.

14 24-port 10/100Mbps Fast Ethernet Switch
with Power Buttons
SAS2224
English
7. After the Half LED lighted up, the port LEDs will flash in sequence from port #1 to
port #24.
8. Press Set button once when the desired port is flashing. When selected, this port LED
will remain lighted for Half mode. For Full mode, the LED will turn OFF.
9. To save your configuration, press the Set button and hold it down for about 3 seconds
until all selected LEDs are flashing.
NOTE
To configure a port to auto-negotiation mode, turn OFF that port LED in both 100M
and Half mode setup.
9.7. How to force a certain port to 10Mbps speed and Half-duplex mode
1. Press the Mode button several times until the Half LED lights up. Check the LED for
that port number you want to set.
2. If the port has already forced to Half-Duplex mode, this means that the Port LED has
lighted up, please proceed to Step 6. Otherwise, please continue with the procedure
listed below.
3. After the Half LED light up, the port LEDs will flash in sequence from port #1 to port
#24.
4. To select the desired port, press the Set button once when the desired port is flashing.
When selected, this port LED will remain lighted up for Half mode. For Full mode,
the LED will turn OFF.
5. After selecting the desired port, press the Set button and hold it down for about 3
seconds until all LEDs flashes. The port LED you have set will remain lighted up
indicating a successful configuration.
6. Next press the Mode button until the 100M LEDs lights up. Check the LED for that
port number you want to set.

English 24-port 10/100Mbps Fast Ethernet Switch
with Power Buttons
SAS2224
15
If it is not lighted up, it indicates that the port is already in 10Mbps mode and the
setup has completed. Or else please proceed to the next step.
7. The port LEDs will flash in sequence from port #1 to port #24. Press the Set button
once when the desired port is flashing.
This port LED will remain lighted for 100M mode if selected. For 10M mode, the
LED will turn OFF.
8. After selecting the desired ports, press the Set button and hold it down for about 3
seconds until all LEDs flashing. When succeeded, the port LED you have set will
remain lighted up. Setup complete.
NOTE
10Mbps and Full-Duplex combination is not supported.
100M LED Half LED Port Status
ON ON Forced to 100Mbps speed and Half-Duplex mode
OFF ON Forced to 10Mbps speed and Half-Duplex mode
ON OFF Forced to 100Mbps speed and Full-Duplex mode
OFF OFF Reset to normal auto-negotiation mode

16 24-port 10/100Mbps Fast Ethernet Switch
with Power Buttons
SAS2224
English
9.8. How to set Default Mode
1. Press the Set button first, then hold it and at the same time press the Mode button for
about 3 seconds until all the port LEDs flash once.
Now Compex SAS2224 has restored to Factory Default Setting.
The factory default setting of Compex SAS2224 is
♦ All ports in VLAN1/3.
♦ Each port runs in Auto-Negotiation mode.
9.9. How to check which ports have been pre-configured for what modes
1. Press Mode button several times till the LED of the required mode has lighted up.
2. The LEDs that are lighted indicate that they are in the selected mode.

English 24-port 10/100Mbps Fast Ethernet Switch
with Power Buttons
SAS2224
17
10. Troubleshooting
Compex SAS2224 is designed with LED indicators to indicate the operating status such as; Power
Status, Presence of Module Status, Port Activity Status (Transmit/and Receive), Duplex status,
and 10/100Mbps connection Status that can be found on the Front panel. The LEDs function is
also a useful troubleshooting aid for the Compex SAS2224.
LED indicators Description of Function
Power LED Power Green LED If Power LED does not light up when power
supply is inserted, check that:
• Plug/cord is properly inserted into the socket.
• Main switch on the power point is ON.
Module LED Module Green
LED
If Module LED does not light up when an
optional module is inserted, check that:
• The optional module is inserted properly.
Full/Col LED Full Duplex/
Collision Green
LED
If the LED does not light up steadily when the
particular port is running at Full Duplex mode,
check that:
• The device is configured as Full Duplex
mode.
• If the LED is not blinking when two or more
stations are accessing the network
simultaneously with a condition that they are
not set in Full Duplex mode, replace the
switch.

18 24-port 10/100Mbps Fast Ethernet Switch
with Power Buttons
SAS2224
English
LED indicators Description of Function
Link/Activity
Green LED
If the LED does not light up steadily when the
particular port is connected to 10Base-T /
100Base-TX LINK and there is no network
activities on the network segment, check that
• Wire pairs connection at RJ-45 plug are
correct.
• RJ-45 plug is fully inserted until you hear a
click sound.
• The PC is powered-up.
If the LED is not blinking when there are
network activities on the network segment,
replace the switch.
Link/Act LED
10/100M Green
LED
If the LED does not light up steadily when the
particular port is connected to 100Base-TX
LINK, check that
• The particular port has configured to Full
Duplex mode.
• Wire pairs connection at RJ-45 plug are
correct.
• RJ-45 plug is fully inserted until you hear a
click sound.
• The PC is powered-up.
Table of contents
Other Compex Switch manuals

Compex
Compex SGX3226 User manual

Compex
Compex PS2208A User manual

Compex
Compex SGX3224 User manual

Compex
Compex SXP2224WM User manual

Compex
Compex SAS2224B 1A User manual

Compex
Compex PS2216 User manual

Compex
Compex SGX3226 User manual

Compex
Compex MicroHub TP1006C User manual

Compex
Compex Runner User manual

Compex
Compex ReadyLink PS2208B User manual
Popular Switch manuals by other brands

Think Simple
Think Simple Vitrum On-Off Classic Installation and operation

Juniper
Juniper EX8200 Series Installing

Extron electronics
Extron electronics DXP DVI Pro user guide

CommFront
CommFront USW-2206 SFP quick start guide

Eisenbau
Eisenbau GuaRdboX GD Series Installation, operation & maintenance manual

Atrust
Atrust m320 user manual