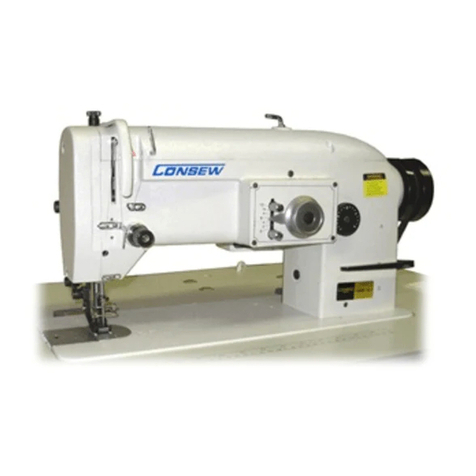
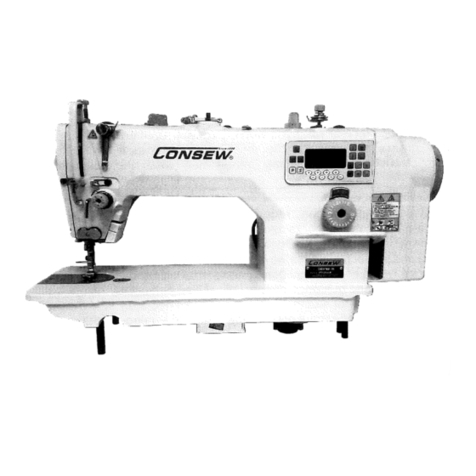
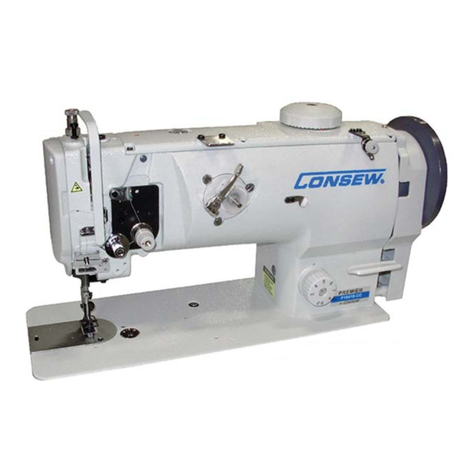
Consew 7360RA TCWL (E) User manual

MODEL
7360RA
TCWL
(E)
PARTS
&
INSTRUCTION
MANUAL

CONTENTS
Instruction manual
.........................................................
1-13
Parts catalogue
.............................................................
19-34
Arm and bed mechanism
...................................................................
19-20
Arm
shaft, vertical
shaft
and
thread
take-up
mechanism
........................
21-22
Feeding, feed lifting
and
rotating hook mechanism
................................
23-24
Stitch length regulating mechanism
...................................................
25-26
Presser foot mechanism
.....................................................................
27-28
Knife
actuating
mechanism
.............................................................
29-30
Reverse sewing
and
detector mechanism
.............................................
31
Wiper mechanism
...............................................................................
32
Oil pump mechanism
.......
0.0
........................................................................................................................
33
Oil reservoir and accessories
.....................................................
11
...........
34

Before
putting
a new machine into operation, remove
the
plugs (A) on
the
top
of
the
arm
and
replenish
the
oil
supply. Lift
the
presser foot
and
run
the
machine
at
a low speed
of
2000
spm
to check
that
the
oil is being
distributed
correctly
by
inspecting
the
window on
the
oil reservoir.
When
lubrication is normal, keep
the
machine
running
at
this speed
for
30 minutes,
and
then
increase
the
running
speed gradually. After a
month
of
running,
the
machine
can
be
run
at
maximum speed assuming
normal
working
conditions.
Fig.!
FILLING THE
OIL
RESERVOIR
The
amount
of
oil in the
reservoir
is controlled
through
the
reference
marks
A
and
B shown in Fig 2. A
indicates
the
maximum oil level,
the
mark
B is the minimum oil level.
If
the
oil level is below
the
mark
B refill
the
oil reservoir.
When
filling
the
reservoir, loosen
the
oil draining screw (c),
drain
offthe
remaining
oil reservoir completely,
clean
the
reservoir
and
re-tighten
the
oil draining screw (c)
and
fill
the
oil reservoir
with
fresh sewing machine
oil.
Fig. 2
REGULATING
OIL
DISTRIBUTION ON THE ROTATING
HOOK
Adjust
the
amount
ofoil used to
lubricate
the
rotating
hook
by
turning
the
oil flow adjusting screw (A).
Tnrn
the
screw (A) clockwise (in
the
direction of
the
+ sign) to increase
the
oil flow;
turn
it counter-clockwise
(in
the
direction
ofthe
-sign) to decrease
the
oil flow.
Fig. 3
1

OIL
PUMP ADJUSTMENT
During
everyday operation, adjusting the oil
pump
is not usually necessary.
If
the oil level
doesn't
fluctuate
in
the oil reservoirwindow when the machine
runs
at
a low speed, close the clearance on the oil bypass hole.
Adjusting. plate
fif.
'it
iii]
flJll
O.5-1.0mm
standard
clearance
95'n:iillIl
Bypass Oil hole
Fig. 4
NEEDLE INSTALLATION
Turn
the
balance wheel to lift the needle
bar
to the
upper
end
of
its stroke. Loosen the needle clamp screw
while keeping
the
long groove
of
the needle facing left; insert the needle
shank
up
to the bottom
of
the needle
socket, then tighten the needle clamp screw.
Fig. 5
CONNECTING
THE
CLUTCH
LEVER
TO
THE
PEDAL
The
optimum tilt angle
of
the pedal
is
approximately 15 degrees.
Adjust
the
clutch
so
that
the clutch lever (c) aligns
with
the
draw
bar
(8)
as shown
in
Fig. 6. The machine pulley should rotate
counter
clockwise when viewed from the outside
of
it.
The
rotating
direction
of
motor
pulley can be reversed by
turning
the
plug
of
the
motor
180 degrees.
Adjust the tension ofO-Belt (F) by moving
the
motor
up
and
down; the
proper
tension
on
the
O-beIt
is
a slack
oflO-20
mm
when
the belt
is
depressed
at
the center
ofthe
belt.
Fig. 6
2

BELT
COVER
INSTALLATION
Install
the
belt cover
for
the
sake
of
safety. Install
belt
cover (C)
to
arm
with
screw (A)
and
screw (B) ,
and
install
belt cover (E) onto
table
with
screw (D).
Fig. 7
ADJUSTING
THE
TIMING
OF
THE TENSION DISCS
Within
the
presser
foot lift
range,
the
timing
of
the tension discs
can
be
adjusted as follows:
Remove
the
rubber
plug
from
the
back
of
the
arm
and
loosen
the
screw (A)
ofthe
knee lift lever (left).
Move
the
tension releasing
cam
(D) to the left for
earlier
opening
or
to
the
right
for
later
opening.
It
will facilitate
the
adjustment
if
a blockis
put
under
the
presser
foot lift.
~-e
..-
Fig. 8
THREADING
To
thread
the
needle,
raise
the
needle
bar
to the
upper
end
of
its stroke.
Lead
the
thread
from
the
spool
and
follow
the
progression as
shown
in
Fig.
9.
To
draw
the
bobbin
thread,
hold
the
end
of
the
needle
thread
and
turn
the
balance wheel to lower
the
needle
bar
and
then
lift
it
to its highest position.
Pull
the
ends
of
needle
thread
and
bobbin
thread
toward
the
front
and
under
the
presser
foot.
3

Fig. 9
BOBBIN WINDER INSTALLATION AND ADJUSTMENT
The
bobbin
winder
pulley
should
aligu
with
the
V belt
and
there
should
be
some clearance between
them.
When
the
bobbin
winder
stop
latch
lever is depressed,
the
V belt
should
be
in
contact
with
the
bobbin
winder
pulley
so
that
the
bobbin
winder
pulley
can
be driven by
the
V belt.
The
thread
on
the
bobbin
should
be
uniform
and
tight.
If
not,
turn
the
tension
stud
nut
(A)
on
the
bobbin
winder
tension
bracket
to
adjust
the
tension.
First,
loosen
the
set
screw (B) on
the
bobbin
winder
tension
bracket
and
move
the
bracket
(C)
either
left
or
right
as needed.
For
instance,
if
the
thread
is
wound
as
illustrated
by
figure (b), move
the
bracket
left.
If
it
is
wound
as
in
figure (c) move
it
right. After
adjusting
the
tension
make
sure
to tighten
set
screw (B).
Don
not
overfill
the
bobbin,
figure
(d).
For
best results, fill to
about
80%
capacity.
This
can
be
adjusted
by
using
screw (E).
~
I
a b d
Fig. 10

ADJUSTING
THE
PRESSURE ON
THE
PRESSER
FOOT
Adjusting
the
pressure
on
the
presser
foot is dependent
upon
the
thickness
of
the
material
being sewn.
First,
loosen lock
nut
(A).
For
heavy materials
turn
the
pressure
regulating
thumb
screw
in
the
direction
indicated
in
Fig.
11
(a) to increase
the
pressure.
For
light materials
turn
the
thumb
screw
in
the
opposite
direction as shown in Fig.
11
(b) to decrease
the
pressure. Once
the
appropriate
pressure
has
been
set
tighten lock
nut
(A).
a
Fig.ll
b
•
•
THREAD TENSION ADJUSTMENT
Thread
tension shonld
be
determined in
tandem
with
the
stitch obtained
by
adjusting
the
tension
on
the
bobbin
thread
and
the
needle tension Fig. 12. The tension
of
the
bobbin
thread
should
be
adjusted
by
turning
the
tension
spring
regulating screw on the bobbin case.
Once
it
is adjusted,
insert
the
bobbin
into
the
bobbin
case
and
hold
the
end
of
the
thread
from
the
case
and
let it hang.
If
the
bobbin rotates slowly
downward
the
tension is correct.
The
tension on
the
needle
thread
is
adjusted
by
turning
the
thumb
nut.
l-gIlI-Fig. 12
13
Fig. 13
Normal
stitch form
_
..
Needle thread
~I§@ll§@l,@'l~
..
Bobbin thread
Fig. 14
5

The
stroke
of
the
thread
take-up
spriug
runs
from
8mm
to
10mm.
When
sewing very thin fabrics,
reduce
the
thread
take-up
spring
tension
and
increase tbe
thread
take-up
spring
stroke. Conversely increase
the
thread
take-up
spring tension
and
reduce
the
thread
take-up
stroke
when
sewing
very
thick
fabrics.
To
adjust
the
thread
take-up
spring
tension: (Fig. 13),
first
loosen
the
set
screw (A)
then
turn
the
tension
stud
(B)
counter
clockwise to
decrease
the
tension
of
the
thread
take-up
spring
( C ) to zero.
then
turn
the
tension
stud
(B) clockwise till
the
spring
(C) comes to the notch
of
the
tension
regulating
bushing,
and
again
turn
the
tension
stud
(B) halfway
back
(counter
clockwise ),
After
tbe
adjustment,
tighten
the
set screw (A).
Adjusting
the
thread
take-up
spring
stroke: (Fig. 14) loosen
the
set
screw (B)
turn
the
stud
(C) clockwise to
increase
the
stroke
or
turn
stud
(C)
counter
clockwise to decrease
the
stroke.
After
making
the
adjustment,
tighten
set screw (B).
SYNCHRONIZATION
OF
THE
NEEDLE
WITH
THE
ROTATING
HOOK
When
the needle
bar
is
raised
from
its lowest position
the
gap
should
equal
that
illustrated
by
(A)
in
Fig. 15.
The
hook
point
(D, Fig. 16)
ofthe
bobbin
should align
with
the
center
line
ofthe
needle
and
be
1- 1.5
mm
above
upper
end
of
the
needle eye (Fig 15).
1.0-1.5.
Fig. IS
Fig. 16
The
clearance between
the
bottom
of
the needle notch
and
the
hook
point
should be approximately
0.05
mm
(Fig. 16).
6

ADJUSTING STITCH
LENGTH
AND REVERSE FEEDING
The
stitch length
can
be
adjusted
by
turning
dial (A).
The
figures
on
the
face (B)
ofthe
dial show
the
stitch
length
in
mm.
The
reverse feed
lever
must
be
depressed while
adjusting
the
stitch length. Reverse feeding
starts
when
the
reverse feed lever (c) is depressed, the machine will feed
forward
again
when
the
reverse feed
lever is released.
Fig. 17
ADJUSTING
THE
POSITION
OF
THE
FEED
DOG
AND NEEDLE
Turn
the
balance
wheel to lower
the
Feed
Dog (A).
When
the
top
of
the
feed
dog
is flush
with
the
Throat
Plate
Surface
(B),
the
Needle
Point
(C)
should
be
3mm
below
the
surface
ofthe
throat
plate.
The
adjustment
should
be
made
by
adjusting
the
position
ofthe
feed cam
and
feed lift
cam
(Fig. 19).
Fig.
18
Standard
position is shown
in
Fig. 19.
For
the
third
screw (A)
of
feed
cam
and
the
second screw ( B )
of
feed lift
cam
to
Arm
Shaft
Oil Hole (C) is
set
to
the
direction
of
the
balance
wheel
turning.
Fig. 19
10

STITCH
LENGTH ADJUSTMENT
Loosen
Screw (A) to
adjust
Stitch
Length
Adjusting
Cam
(B).
Turn
it
to
the
right
to
narrow
the
stitch length
for
forward
stitches,
and
widen
it
for
reverse;
turn
it
left to widen
the
stitch
length
for
forward
stitches,
and
narrow
it
for
reverse.
Fig. 20
FEED
DOG HORIZONTAL ADJUSTMENT
Lift
the
front
of
the feed
dog
to
prevent
the
fabric
from
puckering.
Lower
the
front
of
the
feed dog to
prevent
the
fabric
from
tearing
or
the
bobbin
thread
breaking.
Mark positipn
on
Feed dog
eccentric shaft
+
-""''''''''''
..
'Standard
@ Level
d'\
......
~
The front
up
W
.....
Above the
max.
ffi..JIL.U
d
~
The front down
~
.......
n
er
the
max.
Fig.
21
THREAD CUTTING MECHANISM
The
thread
cutting
mechanism
adapts
the
hook
shaft
cam
driving
for
thread
cutting.
If
thread
cutting
electromagnet
works,
and
after
it
f'mishes
trimming
the
thread,
reset
thread
cutting
cam
crank
at
once,
otherwise this
may
cause
the
movable
knife
and
needle to collide
and
damage
them.
KEY
FOR
Fig. 22
A
-fixed
knife support 8sm.
C
-thread
cutting cam.
E -
soh
thread.
G
-stopper.
J
-cutter
driving shaft.
L - knife{leftL
N - thread retainer.
Fig, 22
B - knife support
a5m.
(left)
o-thread cutting electromagnet.
F - electromagnet a5m
H.
I - thread cutting cam crank.
K - cutter driving
crank.
M
-fixed
knife.
11

KNIFE SUPPORT ASM (left)
Insert
the left knife
support
assembly (B) into
Hook
Shaft
Bushing (C) as
the
figure shows
and
then
tighten
screw (A).
Fig. 23
FIXED
KNIFE
SUPPORT ASSEMBLY
Remove the
hook
positioner
and
then
set
it
with
screw (A) shown in Fig 24 (B)-fixed knife
support
assembly.
Fig. 24
POSITION
OF
THE
FIXED
KNIFE
AND
LEFT
KNIFE
POINT
(1)
The
standard
position is shown
in
figure 24.
If
the
size is
larger
than
the
standard,
the
knife will
either
cut
the
3
threads
or
draw
the
thread
out
of
the
needle eye;
if
smaller,
it
will
cause damage, so be
sure
to avoid
that.
If
any
of
the
above mentioned situations occur,
adjust
by
setting
the
{'lXed
knife
support
or
the
{'lXed
knife (B).
.!+o.3mm
A)--hG!
; ,
"
"
l:
oj
-
(e
_I
Fig. 25
o
A-the blade C-the knife (left)
12

CONNECTING
THE
KNIFE SUPPORTAND CUTTERDRIVING CRANK
Connect
them
as
figure
26 shows
and
notice
the
position
of
Cutter
Link
Lever
(A).
11l11=---IA
Fig. 26
POSITIONING
THE
CUTTERDRIVING SHAFT
The
Standard
position is
shown
in
figure 27.
When
assembled,
the
Cutter
Driving
Shaft
(G) should first
be
put
in
Cutter
Driving
Crank
(A).
Set
Thread
Cutting
Cam
Crank
1 (D)
on
the
cutter
driving
shaft
by
referring
to
the
standard
position.
Set
Stopper
(F),
make
sure
that
there
is no clearance
between
parts
around
the
cutter
driving
shaft,
and
rotate
evenly. -,
a
Fig. 27 B-spring end cover C-spring
E-thread
cutting cam
crank
2
THE
ELECTROMAGNET CORE STROKE
The
standard
stroke
of
the
electromagnet core is
6mm.
The
stroke
can
be
adjusted
with
Positioning
screw (A).
6mm+
d.L-JIf"-----\c
O.Smm
1mm
Fig. 28
B-thread cutting electromagnet holder
C-thread cutting cam
crank
2
D-driving
bar
E-thread cutting electromagnet
The
installation
parameters
are
shown
in
Fig. 28. 13

INSTALLING
THE
THREAD CUTTING CAM
Align balance wheel
machine
arm
No.2
Positioning
Mark
(A)
with
Positioning
Mark
(B)
on
the
machine
arm
as
shown
in
Fig. 29.
Fig. 29
As
the
thread
cutting
electromagnet
runs,
the
Thread
Cutting
Cam
(A)
rotates
in
the
normal
direction.
Fix
the
cam
when
Cam
(A) is engaged
with
Roller (B).
Fig. 30
To
stop
operating
the
electromagnet, reset
Cam
Driving
Crank
(A),
Cam
(B) is
separated
from
engaging
with
the
roller,
the
standard
clearance
is
O.
5- 1 mm.
--------'@
I~=::;:H
-'------{A
•
Fig.
31
Note: figure 32 shows
the
standard
position
of
Cam
Driving
Crank
(D) before operation.
2mm~,*
6-®
@-_._./Ol
©-
/ I
C .
\ )
foL-----"'---
r"
~'-_I
Fig. 32
Key: A-book sbaft B-roller C-cutter driving sbaft
14

It
may
change
the positions mentioned
above
to remove
the
stopper,
then
adjust
with
Screw (A).
and
readjust
following
the
progression
from
Fig. 29-31.
Fig. 33
ADJUSTING KNIFE CUTTING DEPTH
Fig. 34
Key: A-knife (right)
B-cutter
driving sbaft
Adjusting
the
knife
cutting
depth:
When
the
electromagnet is
working,
run
the
machine, the left knife (A) will
follow
the
motion
of
the
thread
cutting
cam.
The
maximum
degree
of
cutting
depth
is 1. 5-2. Omm (B)
for
the fixed knife.
Adjust
the
cutter
driving
crank
if
necessary.
1.S-2.0mm
..
Fig. 35
ADJUSTING THE CUTTING PRESSURE
Figure
36
shows
the
standard
position
that
the
Left Knife (A) begins to
touch
the
Fixed Knife (B).
Fig. 36
15

(2)
When
cuttingheavier
thread,
increase the cutting pressure. To
adjust
the cutting pressure, loosen Set
Nut
(A),
and
adjust
Screw (B).
Fig. 37
ADJUSTING
THE
NEEDLE THREAD TENSION
There
should
be a clearance
of
1
mm
between the two discs while the
thread
cutting electromagnet
(A)
is
working.
To
make an adjustment, loosen
Nut
(B)
and
move soft
thread
(C).
A
(€l
€l
Fig. 38
Note:
If
the
clearance
is
too
narrow,
the
thread
end left
after
cutting is too
short
and
may
be pulled away
from
the
needle eye; otherwise
the
tension will be slack and will effect
the
needle
thread
tension.
1mm
Fig. 39
16

THREAD ENDS ADJUSTMENT
To
get the needle
thread
ends to the
proper
length,
adjust
Nut
(A).
Turn
right to shorten.
Turn
left
to
lengthen.
---
Fig. 40
INSTALLING REVERSE STITCHELECTROMAGNET
Adjust
the position
of
Electromagnet (A) properly to
guarantee
the flexible connection
of
the
magnet to the
link
lever
and
the convenient operation
of
Reverse Stitch
Bar
(B), then set with a screw.
Fig.
41
REVERSE SWITCH
The
figure shows the
normal
position. To reverse stitch, simply slide the switch as indicated
in
Fig. 42. To
resume
normal
sewing, slide the switch
back
to the original position.
Fig.
42
17

THREAD RETAINING DEVICE
Thread
Retainer
Height
The
standard
height is 2
mm
from
the
needle
point
when
the
needle is
at
its highest position.
To
adjust
Thread
Retainer
(B), loosen screw (A).
Fig. 43
When
the
magnet
is electromagnetically engaged,
the
standard
distance between the
thread
retainer
and
the
center
of
the
needle
should
be
0-2
mm.
0-2mm
Fig. 44
To
adjust
its position, loosen Screw (C)
and
Screw (B)
and
then
adjust
the
position
of
Electromagnet
Assembly
(A).
~:I
@--
Fig.4S
HOOK BOBBIN CASE AND BOBBIN
There
is a
thread
groove (A)
in
the
special
hook
for
thread
cutting
sewing machine.
2.
The
bobbin
case used
in
the
machine
should be
equipped
with
a
spring
(B)
in
the bottom, which prevents
the
bobbin
from
running
when
it
is empty.
18

PARTS CATALOGUE

I
,
,
,
-,
19

ARM
AND BED MECHANISM
No. Part No. Descril!tion
22T1
-021G3
liH&1Hm
Screw
2 22Tl
-021Gl
tl1&
Slide
plate
3 48Tl
-005
(i:1&!$jf
Leg
4
GB93
-76
~1l!I6
Spring washer 6
5 124Tl -00281
001&
Face
plate
6 124Tl -002B2
OO1&~Jt
Face
plate gasket
7 22Tl -003C3 1M!."
Rubber
plug
8 22Tl -003C4
1M,"
Rubber
plug
9 22Tl -003C5
OO1&~1;]
Thread
guide
on
face
plate
78Tl
-004Cl
00
1&g:,<
1;]
Thread
guide
on
face
plate
10 22Tl -003C6
il1.1;]~n
Screw
11
22Tl
-004
OO!!ii~rr
Screw
12
22Tl -008H
iill~tllj4:
Oil
check
window
13
36T2
-004
:::'JU:'<1;]
Three -hole thread guide
14
36T2
-005
:::'lL%:'<~~m
Screw
15
36T2
-006D1
IH\"~i:1~1&
Pretension
thread
guide
16
36T2
-006D2
IHj,,~~n
Thread tension stud
17
22Tl -009E3
IJ\*~1&
Thread
tension
disc
18
36T2
-006D3
IJ\9i:~lI/..
Tension
spring
for
pretensi®
19
36T2
-006D4
IJ\9i:~~fr):
Thread
tension
nut
20
22T1
-011
IJ\9i:~I§I;E~n
Set
screw
21
22Tl -012F1
*~~n
Thread
tension stud
22
22T1
-012F2
9i:~~fr):
Thread
tension
nut
23
22T1
-012F3
*~lI/..
Thread
tension
spring
48T1
-OO3Al
9i:~lI/..
Thread
tension
spring
24
22T1
-012F4
f~~1&
Thread
tension
releasing
disc
25
22T1
-012F5
*i:'<1&
Thread
tension
disc
26
22T1
-012F6
lMl1..
Thread take -
up
spring
48T1
-OO3A2
tltl:'<.
Thread
take -
up
spring
27
22T1
-012F7
9i:l:'<iIil'P
Hf
Thread
tension
regu!ator
bushing
28 22Tl -012FS
*~iIil'PHf~n
Screw
29 22Tl -012F9
film
Thread
tension
releasing
pin
30 22Tl -012F10
9i:~~fr):J.tM1&
Stop
disc
31
2211
-012Fll
o~[I
o
-type
ring
32 22Tl
-013
~
*~i)lj'PHfI§l;E~n
Set screw
33
22T1
-014
~~
Thread
guide
78Tl
-005
il1.ZJ
Thread
guide
34
22T1
-015
!,\(&"
Rubber
plug
35 22Tl
-016
!,\1;!i"
Rubber
plug
37
36T2
-007
jjt~fHpl\'L
Thread
take
-
up
lever
guard
78T2
-002
jjt~
HlP
l\'L
Thread
take
-up
lever guard
38
22T2
-004
jjt~HlPl\'L~rr
Screw
39
36T2
-008
tt!!ii
(B1.
81
Needle
plate
48Tl
-004
tt1&
Needle
plate
40 22Tl
-020
tt1&~il~T
Screw
41
22Tl -012G2 tl1&.
Slide
plate
spring
20
This manual suits for next models
1
Table of contents
Other Consew Sewing Machine manuals

Consew
Consew 7360R-1 User manual

Consew
Consew P1206RB-7 Technical manual

Consew
Consew 3421UX5-2 User manual

Consew
Consew 244B Manual

Consew
Consew 744R10-1 User manual

Consew
Consew 333RB-3 User manual

Consew
Consew CN 2230 R Datasheet

Consew
Consew 7360R Parts list manual

Consew
Consew 223R-2 User manual

Consew
Consew Sewing Machine User manual

Consew
Consew CN2053R-1A User manual
Consew
Consew 99 User manual

Consew
Consew CP206R User manual

Consew
Consew 175 Manual

Consew
Consew DLS600 User manual

Consew
Consew 30 Use and care manual

Consew
Consew 205RB-1 User manual

Consew
Consew 146RBL-1A User manual
Consew
Consew 210 Instruction Manual

Consew
Consew 28 User manual