manuals.online logo
Brands
  1. Home
  2. •
  3. Brands
  4. •
  5. Consew
  6. •
  7. Sewing Machine
  8. •
  9. Consew 146RBL-1A User manual

Consew 146RBL-1A User manual

Other manuals for 146RBL-1A

1

This manual suits for next models

1

Other Consew Sewing Machine manuals

Consew 332 User manual

Consew

Consew 332 User manual

Consew CN3115RB-1 User manual

Consew

Consew CN3115RB-1 User manual

Consew 223R-2 User manual

Consew

Consew 223R-2 User manual

Consew 277RFS-3 Datasheet

Consew

Consew 277RFS-3 Datasheet

Consew 7360R-7DD Guide

Consew

Consew 7360R-7DD Guide

Consew 227r-2 Guide

Consew

Consew 227r-2 Guide

Consew 522 Operation manual

Consew

Consew 522 Operation manual

Consew 206RBL-18 Parts list manual

Consew

Consew 206RBL-18 Parts list manual

Consew 261B Manual

Consew

Consew 261B Manual

Consew 328RB-1 User manual

Consew

Consew 328RB-1 User manual

Consew 244B Manual

Consew

Consew 244B Manual

Consew P1206RB-7 Technical manual

Consew

Consew P1206RB-7 Technical manual

Consew 133A-1 User manual

Consew

Consew 133A-1 User manual

Consew 744R10-1 User manual

Consew

Consew 744R10-1 User manual

Consew 30 Use and care manual

Consew

Consew 30 Use and care manual

Consew P1541S-CC Technical manual

Consew

Consew P1541S-CC Technical manual

Consew 347R-1A-WS User manual

Consew

Consew 347R-1A-WS User manual

Consew 389RB-1 Manual

Consew

Consew 389RB-1 Manual

Consew 30 Use and care manual

Consew

Consew 30 Use and care manual

Consew 222 User manual

Consew

Consew 222 User manual
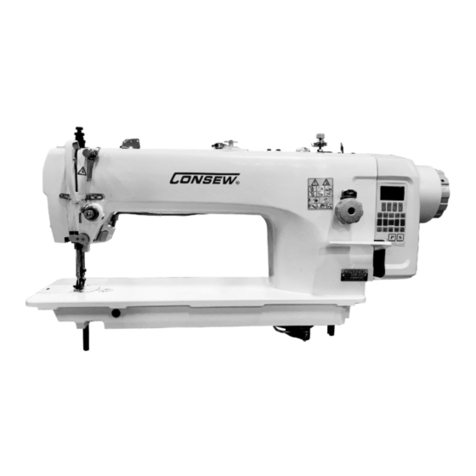
Consew 7360R Parts list manual

Consew

Consew 7360R Parts list manual

Consew SK 2R Manual

Consew

Consew SK 2R Manual

Consew 223 User manual

Consew

Consew 223 User manual

Consew 230 Manual

Consew

Consew 230 Manual

Popular Sewing Machine manuals by other brands

Brother PE-180D Service manual

Brother

Brother PE-180D Service manual

Singer 569U1100 Operator's guide

Singer

Singer 569U1100 Operator's guide

ELNA 2002 instruction manual

ELNA

ELNA 2002 instruction manual

Siruba DL7200D-NM1 Instruction book

Siruba

Siruba DL7200D-NM1 Instruction book

Silver Viscount 9500e instruction manual

Silver

Silver Viscount 9500e instruction manual

Pfaff 3588-05/020 instruction manual

Pfaff

Pfaff 3588-05/020 instruction manual

JUKI DDL-9000A instruction manual

JUKI

JUKI DDL-9000A instruction manual

Pfaff 284 Instruction book

Pfaff

Pfaff 284 Instruction book

Reliable MSK-335B Specification sheet

Reliable

Reliable MSK-335B Specification sheet

Kenmore 385. 19000 owner's manual

Kenmore

Kenmore 385. 19000 owner's manual

Brother FD4-B271 instruction manual

Brother

Brother FD4-B271 instruction manual

Brother Computerized Embroidery Machine Operation manual

Brother

Brother Computerized Embroidery Machine Operation manual

Husqvarna Viking Designer SE user guide

Husqvarna Viking

Husqvarna Viking Designer SE user guide

Singer 645 owner's manual

Singer

Singer 645 owner's manual

Riccar RL634DE user manual

Riccar

Riccar RL634DE user manual

ZOJE ZJ9800 Operation manual

ZOJE

ZOJE ZJ9800 Operation manual

Siruba C007JP Instruction book

Siruba

Siruba C007JP Instruction book

IKEA SY user guide

IKEA

IKEA SY user guide

manuals.online logo
manuals.online logoBrands
  • About & Mission
  • Contact us
  • Privacy Policy
  • Terms and Conditions

Copyright 2025 Manuals.Online. All Rights Reserved.

-------------
-------~-----
------
-------
-----·-··
-,------··----···-----~-----
----
-------···
---·----------------
OPERATING
INSTRUCTION
.
;
l
I
._l •
MODEL 146RBL-1A
146RB
-1A
CONSEW
INTERNATIONAL
I.
TO.
Yomaiin 81dg.,
II.
1-<'-"•·
Hon-mochi, Higoshi-ltv,
Osak-.
541
Japon.
P.
0.
lox:
Osaka
HiQashi
No.
j()9
-
Teleohones :
Osoko
(06) 261 -3191 -
3297
Coble
Add,.eu:
..CONSEWMACH"
Osaka
Telu:
J64459 CONSEW
fox:
(06)
261-3298
From the library of: Superior Sewing Machine & Supply LLC
Page
1
I.
H 0 W T 0 U S E M A C H I N E
==========================================
1.
NAMES
OF
MAIN
PARTS
1.
Hand Wheel
2.
Sp:x>l
pin
3.
Feed
Regulating
dial
4.
Feed
reverse
lever
5.
Zig-zag
width
indicator
::
Stoppers
for
.zig-zag
width
indicator
7.
Thread
guide
with
three
b:>les
8.
Presser
bar
regulator
screw
9.
'lhread
take-up
lever
lOa.
Upper
Ann
Thread
guide
lOb.
Iotter
Arm
Threa.d
guide
11.
Upper
thread
tension
regulator
12.
Tension
post
thread
guide
13.
Needle
bar
arrl
needle
bar
thread
guide
14.
Presser
foot
15.
Throat
plate
16.
Slide
plate
17.
Feed
dog
(Fig.
1)
From the library of: Superior Sewing Machine & Supply LLC
2.
SFQ)L
PIN
For
tre
convenient
sake
of
packing,
the
sp::xJl
pin
is
rerroved
from
tha
machine
arrl
packed
seperate
in
the
accessory
rox.
Put
the
pin
as
slx:Mn
in
Fig.
1 -
#12.
3.
SPEED
The
machine
is
set
to
run
at
the
speed
of
3,000
r.p.m.
at
tre
maximtin
zig-~g
width
of
10
nm.
lbever,
this
speed
deperrls
on
the
electric
current
an:i
also
the
diameter
of
the
notor
pulley
being
used.
Page
2
-
~~-
.
In
order
to
assure
the
durability
of
the
machi.rie,
.it
is
redorttrended
that
the
machine
will
be
used
at
the
rnaximun
speed
of
2,500
r.p.m.
at
the
begi.nning
·
of
use.
_,·;~'li>
-~~·-
?~~-
. I
4.
OII..IN:;
TO
THE OC1l'ATnt; I:DJK
¥ .
Please
supply
a few
drops
of
oil
to
the
·groove
of
tre
rotating
h:ok
every
d<;tY.
(As
arrow-marked
in
Fig.
2)
.·
.
·.
I
5.
NEEDLE
AND
'l'HREID
(Fig.
2)
I
The
size
of
the
needle
to
be
used
smuld
J::e
detennined
by
the
size
of
the
thread
as
well
as
tre
rnaterials
to
be
sewn.
The
needle
srould
be
set
with
its
groove
facing
toward
you,
as
sh:Jwn
in
the
Fig.
3.
!I
Ditch
of
Needle
Needle
arrl
Thread
Ol.art
Thread
size
Needle
Size
#}120
-
11100
100
-
80
80-
60
60-
40
40
-
20
20-
16
II
9
11
14
16
19
21
I
I
I
I
From the library of: Superior Sewing Machine & Supply LLC
.
••
Pagel
6.
OILINi
It
is
nost
l..Ittx>rtant
that
the
machine
is
properly
oiled
every
day.
(Fig.
4)
One
or
t\«:l
drops
of
oil
would
be
suppliEd
to
all
·tb!
sp::>ts
irrlicated
in
the
Fig.
4.
7.
~"1'
OF
ZIGUG
Wli1I'H
AND
FEEDDC
vo.tn£.
1)
Mjlistnent
of
Ziqzaq
width
can
be
made
by
Zigzaq
regulator
dial.
When
straight
sewinq
is
required,
please
place
the
dial
to
"0"
ani
gradually
raisi.nq
nuabers,
ziqzaq
width
will
be
w1dene:.i
up
to
.
the
maxi.ttut\
width
of
10
rrm.
2
.,
Feeding
volune
can
be
adjusted
by
feed
regulation
dial
a.rrl when
it
is
placed
to··
·"o",
feedinq
is
stopped.
By
raisi.nq
the
nunbers
\l{:WCU:d,
the
requil:ed
volme
is
obta.ine:l
ani
the
max:i.nun
feeding
volune
is
5
nn
•
From the library of: Superior Sewing Machine & Supply LLC
8.
1-0'1
10
THREAD
THE
MACHINE
Starting
from
the
sp:x:>l
pin
(l),
please
lead.
tre
thread
as
per
the
following
manner.
(2)
Three
role
thread
eyelet-
(3)
(4)
Tension
disc.
Tension
spring
(5)
Tension
p::>st
thread
guide
t.pper
ann
thread
guide
(6)
(7)
Take
up
lever
(8)
Tension
p::>st
thread
guide
(9)
IDwer
arm
thread
guide
(10)
Needle
bar
thread
guide
(ll)
~
Needle
..,.
9.
H:::W
'lU
WIND
roBBIN
{Fig
..
5)
Page
4
If
tm
robbin
thread.
does
rot
wind
evenly
on
the
J:otbin,
this
•ill
affect
tre
stitch
arrl
please
be
careful
to
wind
th!
.irread.
to
robbin
as
per
the
follCM.i.ng.
1.
Push
the
robbin
on
the
robbin
win::ler
spirx:lle
as
far
as
it
will
go.
2.
Bring
the
thread.
forward
tc:Mard
the
i:;x,bbin
arrl
wind
from
below
in
clockwise
direction
several
times
arourrl
the
robbin.
3.
Push
the
robbin
wind.er
lever
downward
until
the
wheel
contacts
the
drive
belt,
and
then
start
tre
machine
•
.
4.
klj
ustm;mt
screw
(
4)
can
be
turned
in
or
out
to
increase
or
decrease
the
am::::mnt
of
thread
to
be
wound
on
the
bobbin.
If
tre
t.t'lread
does
rot
wind
evenly
qn
the
bobbin,
adjust
the
tension
thread
guard
by
noving
to
right
or
left
as
may
be
·
re:;zuired.
robbin
w~er
(Fig.
6}
From the library of: Superior Sewing Machine & Supply LLC
..
I
Pa<Je
~
10.
INSERI'INJ
THE
OOBBIN
IN
THE
OOBBIN
CASE
To
insert
the
fully
~
l::obbin
in
the
robbin
case,
oold
it
between
thumb
and irrl.ex
fingers
of
your
left
hand
and
place
into
the
OObbin case
with
the
thread
tail
remained
outside.
Pass
the
remai~
thread
tail
through
the
slot
of
bobbin
case,
urrler
tension
spring,
then
through
the
pig
tail
thread
guide.
Fig.
7 - Namas
of
B::>bbin
Case
Tension
Ibbbin
case.
11.
REGUI.ATIN:; THE
THREAD
TENSICN
For
ordinary
stitching,
the
tension
of
the
upper
and
lower
thread
should
be
equal
so
as
to
lock
ooth
·
threads
in
the
center
of
the
fabric.
The
tension
of
the
l::obbin
thread
is
regulated
by~
of
the
tension
screw,
but
it
is
preferable
to
keep
it
rather
weak.
Once
it
is
regulated,
the
perfect
stitch
can
be
obtained
by
adjusting
the
tension
of
upper
thread
by
increasing
or
decreasing
the
tension.
12.
REVERSE STITCH
For
reversing
the
feed
of
the
machine,
keep
the
feed
reverse
lever
#4
(In
Fig.
1)
depressed
as
long
as
required
and
if
release
the
lever,
ordinary
forward
stitch
will
be
done.
(For
all
other
fo:r:.ward
stitching,
the
lever
remains
in
up
position)
.
r
From the library of: Superior Sewing Machine & Supply LLC
Always
use
·the
lightest
pressure
possible
to
allCM
the
sm::x:>th
feed
of
material.
It
can
be
adjusted
by
turning
the
regulating
screw. To
increase
the
pressure,
turn
the
screw
to
the
right
am
to
decrease
it
to
the
left.
(Fig.
8)
..
14.
PREPARATIOO
FUR
$I.'WllG
1.
Turn.
the
balance
"Wheel
toward
you
with
the
riqht
·haM
-'
until
the
needle
llllVe$
down
ard
up
again
to
its
highest
p;>i.nt,
thus
catching
the
lower
O::x>bbin)
thread.
2.
N:Jw
pull
the
end
of
the
upper
thread
you
are
b:>lding
and
the
t:obbin
thread
will
be
grought
up
wit;h
it
through
the
needle
hole
in
the
throat
plate'
and
place
both
ends
of
the
thread
back
under
the
presser
foot.
3.
Place
the
fabric
to
be
Sewn
beneath
the
presser
foot,.
lCMer
the
foot
llp:)n
it
and
then
start
sewing
tl}e
machine.
'ro
REMJVE
FABRIC
AFTER
sr:wm:;
Raise
the
needle
bar
to
its
highest
point,
lift
the
presser
foot
am
draw
the
fabric
back
and
to
the
left.
Cut
the
errls
of
the
thread
a few
inches
long
from
the
needle.
From the library of: Superior Sewing Machine & Supply LLC
Page
7
II
A 0 J U S T M E N T
====·=================~===
1.
ADJt.lS'J.MtNl'
FOR
STRAIGHl'
SEHIN:i
(Ref.
Fig.
9)
At
the
tine
of
despatch
f:tan
the
factory,
the
machine
is
so
adjusted
that
the
zig-zag
regulator
is
fixed
at
"0".
If
rot,
please
reset
the
Wicator
dial
at
"0"
and
run
machine
to
assure
that
accurate
straight
stitches
be
obtained.
Sh::ruld you
fail
to
obtain
accurate
at.raiqht
Stitches
by
the
above,
please
loosen
regulator
screw
W,
then
adjust
zig-zag
Width
re<;W.ator
(BJ
by
ll'DV'i.ng
it
sideway,
until
you
obtain
accu
straight
stitches.
After
adjustment:
is
made
correctly,
set
the
screws
(A}
ani
(B)
tight
with
Udicator
points
"0".
2.
~
FQR
~
1'HB
tciilta (1\af.
t1
9• 10)
•
Set
the
zig-2:$9
regulating
dial
·for
straight
stitch
sewirq
ani
turn
hard
wheel
~
you
until
the
~e
reacheS
its
lowest
point
of
its
·downwar:d
st.rake.
See
that
the
needle
enters
the
needle
slot
in
the
threat
(needle)
plate
at
the
very
center.
. And
also
see
that
the
bx:Jk
point
meets
the
vertical
center
of
needle,
at
this
position.
If
it
c!ces
rot,
adjust
the
needle
bar
ft"ame
.
pit:man
eccentric
stW.
"D"
eng. 11)
by
loosenirq
the
set
screw
"C"
.(
3.
~
OF
ZIGZI!G
~
(Ref.
Fig.
11)
In
case
the
ziq
zag
drive
cam
is
foun:l
wxongly
situated,
make
the
needle
to
reach
its
l<:Mest iX)int
an::i
tiqhten
the
set
screw
"E"
of
the
cam
to
o:xre
to
the
top,
as
sl"own
in
the
Fig
.
.:.1.
Zigzaq
Regulator
B
Zuqzag
drive
cam.
(Fiq.
ll)
M.just:.ing
Screw
J
(Fig.
9)
~e
bar
fraxre
pitman
(Fig.
10)
Set
sc~
Eccentric
Stu:i
-Pin
~
zigzag
regulat.i.
I<n:>l:
(DJ-" l
/
'
From the library of: Superior Sewing Machine & Supply LLC
4.
MJUS'I'MENI'
OF
UPPER
FEED
MOCRANISM.
(Ref.
Fig.
12)
(For
the
type
with
upper
feed
rrechanism,
146RB-1A
and
146RBL-1A)
A.
To
increase
the
lifting
vol\.llre
of
outer
fcx:>t.
1.
I.Dosen
the
adjusting
belt
A
{#752).
2.
Raise
the
position
of
Rock
Shaft
Crank
(#751)
as
you
desire.
-
'-
3.
Set
too
b::>lt
tightly,
~fter
adjustrrent.
B.
To
obtain
nore
lifting
vol\.llre
of
outer
foot.
1.
U::>osen
the
adjusting
b::>lt B (#752)
2.
Raise
the
}?OSition
of
lifting
crank
connecting
line
#748)
as
you
desire.
3.
Reset
the
b::>lt
tightly,
after
adjustzrent.
C.
'Ib
increase
the
feeding
volurre
of
order
fcx:>t.
1.
I.Dosen
the
adjusting
b::>lt
C.
(#733}.
2.
Raise
the
position
of
feed
correcting
link
(#732)
as
you
desire.
3.
Reset
the
b::>lt,
after
adjustrrent.
I
Page 8
From the library of: Superior Sewing Machine & Supply LLC
Page 9
An.J1.E'IMENI'
OF
UPPER
FEll
MECHANISM
I
A I
(
(Fig.
12)
I
From the library of: Superior Sewing Machine & Supply LLC
Page
10
5.
AOJtSrMENl'
OF
NEIDLE
T1MIN.'i
AT
ITS
1.DtlEST POSITION
(Ref.
Fig.
13)
Rercnve
face
plate
and
lcx:>sen
the
screw
(#209)
of
needle
bar
bracke·
{#206).
Turn
the
ham
wheel
(#240)
slowly
towards
you
until
the
needle
bar
F (#707)
is
aligned
with
the
screw
(/J2ll)
of
needle
bar
crank
rod
(#2<10)
•
'Ibis
is
considered
the
lriwest
position
of
needle.
6.
~
OF
Tl:Mll'G
I:El'WJ::'m
NEEDLE
AID
RX>K
(Needle
being
used
is
typ!
DP
x
17)
1.
Turn
the
zig-zag
dial
riqht
to
the
lat:gest
width
of
10
mu
and
have
the
needle
reach
at
its
rightest
ard
~st
point.
2.
'!ben
set
the
b::lok so
that
the
end
of
OOok
gib
o:xnes
0.
5
nm
right
of
needle
"L".
(Ref.
Jfig.
14)
3.
·
Turn
the
hand
wheel
to
the
leftest
ard
lowest
p::>sition.
See
that
the
b:Jok
point
trafels
1
nm
above
the
thread
hole
of
the
needle.
(Ref.
·Fig.
15)
4.
When
sewing
the
different
materials,
1t
is~
that
the
timing
explained
above
is
a
little
delayed.
Ill
..
~tl
Needle
Bar
(F)
l
l'
;
i !
I
'I
!
II
Needle
bar
I .
oonnecting
I I
link
.I
.
(Fig.
13)
Needle
bar
(Fig'!l;(J
,....&---'-....,. Needle
bar
Needle
t.
screw
"""'
I
I~
(Fig.
15)
From the library of: Superior Sewing Machine & Supply LLC
page
11
==============
If
follONing
problems
be
occurred,
please
check
the
p::>ints
as
Su;Jgested
belON. ·
* -
marked
be
checked
carefully.
Thread
breakage
** -
marked
be
nost
carefully
checked.
** -Any damage
on
the
h:x:>k?
(Please
carefully
check
on
the
hook
{X)int) •
-
Is
t~
between
needle
and b::ok
mrrect?
*
-·
Isn't
hook
point
worn
out?
* -
Is
quality
of
thread
good?
-Any
scratch
on
thread
guides?
** -
'Any
datnaqe
or
scratch
on
h::lOk
retainer?
~,
.
,_.
_..
*
*
*
*
*
-
Is
needle
all
ri9ht?
·
,_:,.
.
-Any damaqe,·on
needle
plate,
partiCUlarly
around
needle
oole?
-
Is
check
spring'
c:crrect,
oot
too
hard?
-
N:>
lints
in
bobbin
case?
-
Isn't
the
ma.chine
too
old
to
cause
excessive
play
on
all
noving
parts?
-Does
needle
penetrate
center
of
needle
hole
on
needle
plate?
-
N:)
bent
needle
used?
-No
too
much
play
on-
zig
zag
drive
fork?
-
Is
thread
tension
correct?
"
Skipt>ing
of
stitch
*
*
*
*
-
Is
the
timing
of
needle
to
h:x:>k
correct?
N:>t
too
early,
rot
too
late?
-
N:>
bent
needle
used?
-No
worn
out
on
h:x:>k
point?
-
No
excessive
play
on
needle
bar?
-No
excessive
clearance
between
needle
ani
hook
point?
-
Isn't
needle
oole
of
neecile
plate
too
large
to
the
size
of
needle
used?
Thread
Breakage
(On
straight
sewing') •
*
*
*
*
-No
exoessi
ve
clearanCe
between
needle
ani
hook
point?
-
Is
hook
timi.rl:l
correct?
Not
too
early?
-
Isn't
check
spring'
too
hard?
-Does
check
sprin:J
noves
freely?
Needle
Breakage
* -
Ooesn
't
needle
hit
needle
plate?
* -
Is
the
clearance
between
needle
arrl
hook
p::>int
correct?
** -
N:>
excessive
play
on
needle-
bar
fraxre?
** -
N:>
excessive
play
on
OOok
shaft
thrust
collar?
From the library of: Superior Sewing Machine & Supply LLC