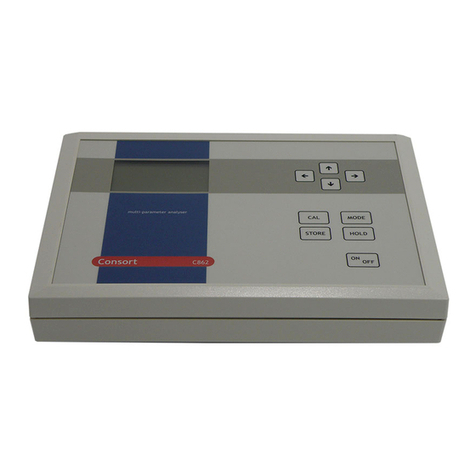
Consort K611 User manual

CONSORT
MANUAL
HANDLEIDING
MODE D’EMPLOI
ANLEITUNG
K611
January 1997

Table of contents
Introduction ...................................... 1
Manufacturer .................................... 1
Warranty ......................................... 1
Servicing ......................................... 1
Specifications ................................... 2
Keybord .......................................... 2
Error Codes ..................................... 3
AC Adapter ...................................... 3
SET-UP . . . . . . . . . . . . . . . . . . . . . . . . . . . . . . . . . . . . . . . . . . . . . . 3
Alarm ............................................. 3
Beeper ........................................... 4
Printer . . . . . . . . . . . . . . . . . . . . . . . . . . . . . . . . . . . . . . . . . . . . 4
Identification ..................................... 4
Code ............................................. 4
Temperature compensation ................... 4
DATA ACQUISITION ............................... 5
Logging data .................................... 5
Adding data ..................................... 5
Recalling data .................................. 6
Printing data .................................... 6
Inputs ............................................. 6
CONDUCTIVITY MEASUREMENT ............. 6
Maintenance .................................... 6
Calibration ....................................... 6
Conductivity measurement ................... 7
TEMPERATURE MEASUREMENT ............. 7
Calibration ....................................... 7
Measurement ................................... 7
DATA COMMUNICATION ......................... 8
Recorder output ................................ 8
GLP-protocol .................................... 8
Digital output . . . . . . . . . . . . . . . . . . . . . . . . . . . . . . . . . . . . 9
Printer connection .............................. 9
Computer connection .......................... 9
TROUBLE SHOOTING ........................... 10
Simple test ...................................... 10
Calibrate ......................................... 10
Reset ............................................. 10
Inhoudsopgave
Inleiding .......................................... 11
Fabrikant ......................................... 11
Waarborg ........................................ 11
Onderhoud ...................................... 11
Specificaties ..................................... 12
Toetsenbord ..................................... 12
Foutmeldingen .................................. 13
Netadapter ...................................... 13
INSTELLEN ......................................... 13
Alarm ............................................. 13
Zoemer ........................................... 14
Drukken . . . . . . . . . . . . . . . . . . . . . . . . . . . . . . . . . . . . . . . . . . 14
Identificatie ...................................... 14
Kode . . . . . . . . . . . . . . . . . . . . . . . . . . . . . . . . . . . . . . . . . . . . . . 14
Temperatuurcompensatie ..................... 14
METINGEN OPSLAAN ........................... 15
Gegevens opslaan ............................. 15
Gegevens toevoegen .......................... 15
Gegevens oproepen ........................... 16
Gegevens afdrukken ........................... 16
Ingangen ......................................... 16
GELEIDBAARHEIDSMETING ................... 16
Onderhoud ...................................... 16
IJken . . . . . . . . . . . . . . . . . . . . . . . . . . . . . . . . . . . . . . . . . . . . . . 16
Geleidbaarheidsmeting ........................ 17
TEMPERATUURMETING ......................... 17
IJken . . . . . . . . . . . . . . . . . . . . . . . . . . . . . . . . . . . . . . . . . . . . . . 17
Meting ............................................ 17
GEGEVENS-UITWISSELING .................... 18
Analoge uitgang ................................ 18
GLP-protocol .................................... 18
Digitale uitgang ................................. 19
Verbinden met printer .......................... 19
Verbinden met computer ...................... 19
FOUTEN ONDERZOEK .......................... 20
Eenvoudige test ................................ 20
Afregelen ........................................ 20
Herzetten ........................................ 20
ii

Table de matières
Préface ........................................... 21
Fabricant ......................................... 21
Garantie .......................................... 21
Service ........................................... 21
Spécifications ................................... 22
Le clavier ........................................ 22
Code d'erreur ................................... 23
Adapteur secteur ............................... 23
INSTALLATION ..................................... 23
Alarme ........................................... 23
Signal acoustique .............................. 24
L'imprimant ...................................... 24
Identification ..................................... 24
Code ............................................. 24
Compensation de température ............... 24
COLLECTEUR DE DONNEES .................. 25
Mémoriser des données ...................... 25
Ajouter des données ........................... 26
Afficher des données .......................... 26
Imprimer des données ........................ 26
Branchement .................................... 26
MESURE DE CONDUCTIVITE .................. 26
Entretien ......................................... 26
Etalonnage ...................................... 26
Mesure de conductivité ....................... 27
MESURE DE TEMPERATURE .................. 27
Etalonnage ...................................... 27
Mesure ........................................... 27
TRANSFERT DE DONNEES .................... 28
Sortie analogique .............................. 28
Protocole GLP .................................. 28
Sortie numérique ............................... 29
Imprimante ...................................... 29
Ordinateur ....................................... 29
DIAGNOSTIC ....................................... 30
Test simple ...................................... 30
Calibrage ........................................ 30
Remise en état ................................. 30
Inhaltsverzeichnis
Einführung . . . . . . . . . . . . . . . . . . . . . . . . . . . . . . . . . . . . . . . 31
Hersteller ........................................ 31
Garantie .......................................... 31
Service ........................................... 31
Technische Daten .............................. 32
Bedienungsfeld ................................. 32
Fehlermeldungen ............................... 33
Netzadapter ..................................... 33
EINSTELLUNG ..................................... 33
Alarm ............................................. 33
Summer .......................................... 34
Drucker . . . . . . . . . . . . . . . . . . . . . . . . . . . . . . . . . . . . . . . . . . 34
Identification ..................................... 34
Code ............................................. 34
Referentztemperatur ........................... 34
DATENVERARBEITUNG ......................... 35
Daten speichern ................................ 35
Daten zufügen .................................. 35
Daten auflisten .................................. 36
Daten ausdrucken .............................. 36
Eingänge ........................................ 36
LEITFÄHIGKEITSMESSUNG .................... 36
Wartung .......................................... 36
Eichung .......................................... 36
Leitfähigkeitsmessung ......................... 37
TEMPERATURMESSUNG ....................... 37
Eichung .......................................... 37
Messung ......................................... 37
DATEN-AUSTAUSCH .............................. 38
Analogausgang ................................. 38
GLP-protokoll ................................... 38
Digitalausgang .................................. 39
Druckeranschluβ. . . . . . . . . . . . . . . . . . . . . . . . . . . . . . . 39
Datenübertrabung .............................. 39
FEHLERFUNKTIONEN ........................... 40
Einfacher Test ................................... 40
Eichung .......................................... 40
Wiedereinstellen ................................ 40
iii

1
Introduction
This instrument is manufactured with the latest technology and needs no
particular maintenance. CONSORT certifies that this instrument was
thoroughly inspected and tested at the factory prior to shipment and found
to meet all requirements defined by contract under which it is furnished.
However, dimensions and other physical characteristics may differ.
The normal operating temperature should be between 4° and 40°C. Never
store the instrument in a room with high humidity or at very low
temperatures (condensation water!).
If it is equipped with rechargeable batteries, the instrument should be
connected permanently to the mains in order to keep the batteries in good
condition. Do not store the instrument for longer than 1 month without
recharging the batteries. The batteries can be replaced by opening the
bottom compartment of the cabinet.
Manufacturer
CONSORT nv
Parklaan 36 Tel (++32)(14)41 12 79
B2300 Turnhout Fax (++32)(14)42 91 79
Belgium
Warranty
This instrument (excluding all accessories) is warranted against defective
material and workmanship for a period of thirty-six (36) months from the
date of shipment ex factory. CONSORT will repair all defective equipment
returned to it during the warranty period without charge, provided the
equipment has been used under normal laboratory conditions and in
accordance with the operating limitations and maintenance procedures in
this instruction manual and when not having been subject to accident,
alteration, misuse or abuse. A return authorisation must be obtained from
CONSORT before returning any product for warranty repair on a freight
prepaid basis!
CONSORT is not liable for consequential damages arising out of the use
or handling of its products.
Servicing
In the event of this instrument being returned for servicing, the owner is
requested to remove the power supply and NOT to send the following
items unless they are suspect:
Manual
Cables
Accessories
If serious malfunctioning occurs, stop using the unit immediately and
consult your local CONSORT dealer.

2
Specifications
Conductivity 0...200 mS/cm
Resistivity 0...20 MΩ.cm
Temperature 0...100°C
Resolution 0.1°C, 0.01 µS/cm, 10 Ω.cm
Inputs BNC input for conductivity cell
BANANA input for a Pt1000 temperature probe
Temp. Comp. automatic with Pt1000 or manual
Digital output programmable RS232, 2400 b/s, for bi-directional
communication with a computer or printer
Analogue output 0...2 V, ca 8 kΩ, 8 bit D/A
Display 8 digit/character, 12 mm LCD display, shows
readings, °C & messages
Keys 10 tactile membrane keys
Ambient temp. 4...40°C
Rel. Humidity 0...90 % (non-condensing!)
Power supply 210-250 V~ (* 105-125 V~), 50/60 Hz, max. 2 VA, & 4
NiCd batteries, size AA
Cabinet IP65 cabinet
Dimensions 252 x 121 x 50 mm
Weight 600 g
Keyboard
MODE = Selects all modes or escapes from error traps, calibration
procedures, etc..by returning to the original mode.
CAL = Starts or proceeds a calibration or a function.
¿/À= Button for entering a value or for selecting a function.
°C = Reads temperature, when a Pt1000 is present, or manual
temperature compensation.
HOLD = Holds display when measuring.
RES = Changes resolution/units of the display.
PRINT = Displayed value is printed through the RS232 output.
ON/OFF = Switches the instrument on or off.
Each time the instrument is switched on, it will check briefly its internal
calibrations while showing all functions of the display and the software-
version. An error message appears when sonething is wrong.

3
Error codes
[Or. EC] = Overrange Conductivity (e.g. short circuited electrode
cable).
[Or. OhM] = Overrange Resistivity (e.g. interrupted electrode cable).
[Or. °C] = Overrange °C (measured degrees out of range).
[no dAtA] = Data-logging memory empty.
[not.CAL] = Calibration procedure interrupted (the previous calibration
remains valid!).
[Err.cc] = Cell constant not within 70...130% of the nominal value.
[Err.CAL] = Calibration error (check electrodes and standard solutions).
[Err.Stb] = Electrode not stable.
[Err.Prt] = Communication error with the attached printer.
[Err.bAt] = Battery charger defective (disconnect the AC-adapter
immediately from the mains, remove the batteries and have
your instrument serviced!.
[Err.COM] = General communication error.
[Err.MEM] = Fatal memory error (all factory settings are cleared. Have
your instrument serviced!).
[ILLEGAL] = An unauthorised person has failed to repair the unit.
Warranty is elapsed from now on!
SET-UP
An audible alert can be given when the displayed values stray outside a
programmable high- and low-level.
Alarm
1. Select the set-up procedure by pressing MODE.
2. Press CAL until you can choose with ¿or Àbetween [ALrM OFF],
[ALrM EC], or [ALrM tdS]. Press CAL. Select [ALrM OFF] if no alarm
is required.
3. The display shows e.g. [L=23.0MS] while the units are blinking. Select
the desired range with ¿or Àand press CAL.
4. The display shows e.g. [L=23.0MS] while [=] is blinking. Select the
desired minimum level with ¿or Àand press CAL. Each time the
measurements are below this level, the beeper will sound an alarm.
5. The display shows e.g. [H=57MS] while the units are blinking. Select
the desired range with ¿or Àand press CAL.
6. The display shows e.g. [H=57MS] while [=] is blinking. Select the
desired maximum level with ¿or Àand press CAL. Each time the
measurements are above this level, the beeper will sound an alarm.
7. Press CAL to continue or press MODE to cancel.
AC Adapter
Remove the protective silicone stopper from the REF socket and connect
the jack of a suitable AC adapter (model A4070 for 230 V~ or model
A4071 for 115 V~) to the socket for recharging the NiCd batteries. Avoid
to use an AC adapter without NiCd batteries being inserted in the
instrument! For field work, remove the adapter and reinsert the protective
silicone stopper into the socket.

4
The measured values can be printed automatically at timed intervals or
manually on operator command.
Printer
1. Select the set-up procedure by pressing MODE.
2. Press CAL until the display shows e.g. [Pt=120]. Select the desired
time interval (0...9999 s) between the transmitted data to a printer,
with ¿or À. Pre-set to zero if no automatic printing is required.
3. Press CAL to continue or press MODE to cancel.
The instrument can be identified by e.g. a computer when a specific
number is allocated to it.
Identification
number
1. Select the set-up procedure by pressing MODE.
2. Press CAL until the display shows e.g. [Id.no=5]. Select the desired
identification number (0...999) for your meter with ¿or À. Pre-set to
zero if this number should not be mentioned while printing.
3. Press CAL to continue or press MODE to cancel.
Secret code
A private code can be programmed to avoid undesired access to the
instrument.
1. Select the set-up procedure by pressing MODE.
2. Press CAL until the display shows [Code on], [Code OFF], or [Code
CAL]. Decide, with ¿or À, whether the access to all future
calibrations should be by entering a code (on) or not (off). Press CAL
to continue or press MODE to cancel. Select [Code CAL] to enter
your personal code.
3. The display shows [E=-----] while [=] is blinking. Enter your secret
sequence of 5 keys to proceed. Press CAL to continue or press
MODE to cancel.
Permits to install the reference temperature. Temperature
compensation
1. Select the set-up procedure by pressing MODE.
2. The display shows [rEF=25°C] or [rEF=20°C]. Select the temperature
to which all future conductivity measurements will be referred with ¿
or Àand press CAL to continue or MODE to return.
The built-in beeper can be programmed to sound each time a key-path
is pressed.
Beeper
1. Select the set-up procedure by pressing MODE.
2. Press CAL until you can choose with ¿or Àbetween [bEEP on] or
[bEEP OFF]. Decide whether or not the beeper should sound each
time the keyboard is touched.
3. Press CAL to continue or press MODE to cancel.

5
DATA-ACQUISITION
[no LOG] : No data-logging.
[SEt LOG] : Permits to pre-set the data-logging parameters.
[LSt LOG] : Permits to view the stored values on the display.
[Prt LOG] : Permits to send the stored values to a printer or computer.
[Cnt LOG] : Permits to continue with a next series of measurements,
without erasing the previous data-logging.
Up to 100 values can be stored in the non-volatile memory of the
instrument.
Set log: Procedure to pre-set the data-logging parameters.
1. Select the set-up procedure by pressing MODE and press CAL.
2. Choose [SEt LOG] with ¿or À. Select [no LOG] if no data-logging is
required and press MODE to return to the original mode.
3. Press CAL untill you can choose with ¿or Àbetween [LOG EC],
[LOG OhM] or [LOG tdS]. Select the desired mode and press CAL.
4. The display shows e.g. [dt=100]. Select the desired time interval
(0...9999 s) between the data-logging, with ¿or Àand press CAL.
Pre-set to zero for manual data-logging, each time PRINT is pressed
(the next points 5 to 7 are skipped and press CAL).
5. The display shows e.g. [n=40]. Select the desired number of values
(1...100) to be data-logged with ¿or Àand press CAL.
6. The display shows e.g. [d=31.12.91] while the year is blinking.
Program the desired starting date with ¿or Àand press CAL.
Program similarly the month and the day.
7. The display shows e.g. [t=23.59] while the minutes are blinking.
Program the desired starting time with ¿or Àand press CAL.
Program similarly the hours.
8. The display shows [StArt ?]. Press CAL to start the data-logging
according the previous settings (a blinking [L] appears) or press
MODE to cancel. After the last value has been catalogued the display
will show [End LOG]. When manual data-logging has been selected,
press PRINT to put a next measurement into memory. In the
meantime the display shows the logging-number e.g. [LOG 7]. Press
MODE to cancel.
Logging data
[Cnt LOG]: Permits to continue with a next series of measurements,
without erasing the previous data-logging
1. Select the set-up procedure by pressing MODE and press CAL.
2. Select [Cnt LOG] with ¿or Àto continue with a next series of
measurements, without erasing the previous data-logging, provided
the memory has enough capacity left and press CAL.
Adding data

6
[Lst LOG]: permits to view the stored values on the display.
1. Select the set-up procedure by pressing MODE and press CAL.
2. Select [Lst LOG] with ¿or Àand press CAL
3. The display shows the first data-logged value in memory (a blinking
[n] appears). Press ¿or Àto view all other values.
4. While pressing HOLD the corresponding date is shown (not relevant
when a manual or continued data-logging has been performed).
5. While pressing RES the corresponding time shown (or: series + log-
number, e.g. [2-017], when a continued data-logging has been
performed).
6. While pressing °C the corresponding temperature is shown.
7. Press PRINT to send the recalled data to a printer.
8. Press MODE to return to cancel.
Recalling data
[Prt LOG]: Permits to send the stored values to a printer or computer.
1. Select the set-up procedure by pressing MODE and press CAL.
2. Choose [Prt LOG] with ¿or Àand press CAL
3. The display shows [PrintinG] while all data-logged values, including
corresponding dates and times, are sent to the RS232 output in the
following format, compatible with EXCEL™, LOTUS 123™,... The
columns are separated by a TAB character.
Printing data
Log# VALUE UNIT C H D
001 16.49E-03 S/cm 23.7 13:19:57 29/01/95
002 15.05E-03 S/cm 23.7 13:20:57 29/01/95
003 13.39E-03 S/cm 23.8 13:21:57 29/01/95
Inputs
The measuring cell should be connected to the coaxial INPUT connector.
Automatic temperature compensation and temperature measurements
are possible by plugging a Pt1000 thermocompensator into the °C
terminals.You can also use a combination conductivity electrode with built
in Pt1000. Its banana plug should be inserted in the upper °C terminal.
Without compensator, the manual temperature compensation is
automatically switched on.
CONDUCTIVITY MEASUREMENT
A conductivity cell is active and stable only after wetting! For this
purpose it must be immersed for at least one hour in distilled water.
Rinse the cell always after use and store it in distilled water (add some
detergent to keep the spongy platinum surface in perfect condition).
A polluted cell may be cleaned with a soft detergent or diluted nitric acid.
Greasy substances may be removed with acetone or alcohol (never do
this with plastic electrodes!).
Maintenance
The cell constant depends on the physical dimensions of the platinum
plates. They are coated with a spongy black platinum deposit. This
increases greatly the effective surface and reduces polarising effects.
Since the coating of platinum black is quite resistant to chemical action,
the cell constant remains fairly constant during the electrode life time.
Calibration

1. Select the conductivity range by pressing MODE (the display shows
[µS] or [MS]) and press CAL.
2. The display will show the cell constant (e.g. [cc=1.073]). Press CAL
to start the automatic determination procedure.
3. The display shows one of the KCl standard solutions in memory
[St=0.01M] (1413 µS/cm), [St=0.1M] (12.88 mS/cm) of [St=1M]
(111.8 mS/cm). Select the proper standard with ¿or Àand press
CAL.
4. After rinsing the cell several times with the standard solution,
immerse it the standard solution. The solution temperature is not so
critical but it should lie between 0°C and 30°C. If the standard has a
different temperature press °C here (not necessary when using a
Pt1000). Press CAL to continue.
5. The display will show the computed cell constant e.g. [cc1=1.045]
and will calibrate automatically when readings are stable ([=] stops
blinking).
Conductivity
measurement
1. Select the conductivity range by pressing MODE (the display shows
[µS] or [MS]).
2. Rinse the electrodes with the sample and immerse them in it.
3. Read the display (remember: compensated to the reference
temperature!). The autoranging feature gives you the largest possible
number of digits + their unit.
4. Rinse the cell always after use and store it in distilled water (add
some detergent to keep the spongy platinum surface in perfect
condition).
∗Disconnect the AC-adapter to increase accuracy in the lower
conductivity range!
∗See page 41 for the standards in memory.
∗A blinking decimal point warns you for unstable measurements. Wait
to read the display!
∗Press RES to switch between ppm (salinity), S/cm (conductivity) or
Ω.cm (resistivity).
∗When starting a titration, press Àto lock the actual range and avoid
cross-over errors due to differences in the measuring frequency.
Press MODE to return to the normal measuring mode.
∗Stirring the solution during the measurements promotes the
homogeneity and is therefore always recommended.
7
TEMPERATURE MEASUREMENT
1. Press CAL to calibrate the °C scale with any reference. Immerse the
Pt1000 in a solution of known temperature.
2. The display shows e.g. [°C=22.3]. Calibrate to the proper value with
¿or Àand press CAL again or press RES to reset the absolute
readings.
Calibration
Measurement
1. Read temperature by pressing °C.
2. Without Pt1000, adjust the manual temperature compensation with ¿
or Àand proceed by pressing MODE.

8
DATA COMMUNICATION
A recorder can be connected to the red (+) and the black (-) terminals.The
0 to 2 V output range corresponds with 0 to 2000 digits. Use only
laboratory recorders with a high input impedance!
Recorder output
GLP-protocol
1. Select the conductivity range by pressing MODE.
2. Press CAL to display the cell constant, e.g. [cc=1.073].
3. Press PRINT to print a complete calibration report, e.g.:
4. Press MODE to return to the normal measuring mode.
CONSORT Conductometer K611
--------------------------
SETTINGS
--------
Identification No : 004
Software Version : 3.0
User Code : on
Titration Lock : off
ATC (Pt1000) : yes
ATC Cal. Temp. (C) : 30.0
Alarm EC : on
Alarm High (S/cm) : 85.7E-03
Alarm Low (S/cm) : 30.5E-03
Ref. Temp. : 20
Batt.Capacity (%) : 87
CALIBRATION
-----------
Ref. Temp. (C) : 25
Standard (S/cm) : 1413E-06
Cell Const (cm-1) : 1.073
Response Time (s) : 13
STATISTICS
----------
Cell Const (cm-1) : -0.026
Average Resp. (s) : +1

9
A standard RS232 output terminal (DP9) is provided for interfacing the
instrument with a printer or computer. Data is sent in the ASCII code at a
BAUD rate of 2400 b/s (8 bit, no parity, 1 start and 2 stopbits, automatic
line feed ON, data transfer protocol Xon/Xoff).
Digital output
Serial port pinout specifications:
pin 1 : RLSD, received line signal detector
pin 2 : TxD, transmit data
pin 3 : RxD, receive data
pin 4 : not connected
pin 5 : Gnd, signal ground
pin 6 : DSR, data set ready
pin 7 : not connected
pin 8 : CTS, clear to send
pin 9 : not connected
Printer
connection
Interfacing with a printer:
Press PRINT each time you want to print the measured values. The
columns are separated by a TAB character. Run the set-up procedure
(page for automatic printing at timed intervals, 'Printer' page 4, while you
are measuring. The PRINT keypath does not function in this case. It is also
disabled during an automatic data-logging., e.g.:
Log# VALUE UNIT C H D
001 16.49E-03 S/cm 23.7 13:19:57 29/01/95
002 15.05E-03 S/cm 23.7 13:20:57 29/01/95
003 13.39E-03 S/cm 23.8 13:21:57 29/01/95
Using WINDOWS™ to collect data:
1. Connect the computer with the RS232 terminal, using the optional
AK2310 cable (eventually with adapter AB3190 for connection with a
25 pole RS232 terminal).
2. Start WINDOWS™ and select
Terminal
in the
Accessories Group
.
3. Choose
Receive Text File
in the
Transfer Menu
and create a file name
(TXT format) for the data to receive.
4. Select the
Settings Menu
and make sure the following parameters
are programmed:
Baud Rate : 2400
Data bits : 8
Stop bits : 2
Parity : None
Flow control : Xon/Xoff
5. Start the conductometer in the desired measuring mode for manual
or automatic data collection (see 'Printer’page 4 for more details).
6. When finished, open the created file with a standard spreadsheet
(e.g. EXCEL™) or wordprocessor (e.g. WORD™) for further
processing.
Computer
connection

10
Interfacing with a computer:
Send a single character to the instrument and it will execute the
corresponding command as follows:
1 = press MODE.
2 = press CAL.
3 = press ¿.
4 = press À.
5 = press SET.
6 = press HOLD.
7 = press RES.
8 = press PRINT.
? = send display to computer.
+ = keyboard on (manual operation remains possible).
- = keyboard off (manual operation disabled).
Follow exactly the same measuring or calibration procedures, as
described in this manual, to include any desired command in your
computer data-acquisition program.
This example continuously prints the measured values (pH and
temperature) on the computer screen:
10 ON ERROR GOTO 70 'makes sure no error occurs
20 OPEN "COM1:2400,N,8,2" AS #1 'prepares computer input
30 PRINT #1,"8" 'PRINT button pressed
40 INPUT #1,V$ 'measured values transmitted
50 PRINT V$ 'received values printed
60 GOTO 30 'repeat procedure
70 RUN
TROUBLE SHOOTING
Try this procedure if you suspect the electronic performance of the
instrument.
Simple test
1. Leave the conductivity input open.
2. Switch the instrument ON.
3. Select the conductivity range by pressing MODE. The display should
show [0.00µS] ± 0.01 µS/cm. Run the Calibrate procedure if errone-
ous values are read.
Calibrate
This procedure permits to calibrate automatically all amplifiers of the
instrument.
1. Leave the conductivity input open.
2. Switch the instrument ON while holding CAL pressed.
3. The display shows [SELFCAL] for a while and returns to the
measurements.
Reset
This procedure resets the instrument to the original factory settings. All
personal memorised data (including access code) will be erased!
1. Switch the instrument ON while holding MODE pressed.
2. The display shows [rESEt] for a while and returns to the measure-
ments.

11
Dit toestel is gebouwd volgens de modernste technologie en hoeft niet
speciaal te worden onderhouden. CONSORT bevestigt dat dit toestel
grondig werd nagekeken en getest alvorens te worden verstuurd, en
beantwoordt aan alle vereisten van het aankoopkontrakt. Er kunnen
echter wel afwijkingen optreden in de afmetingen en andere fysische
eigenschappen.
De normale werktemperatuur moet tussen 4°en 40°C liggen. Bewaar het
toestel nooit in een ruimte met hoge vochtigheidsgraad of bij lage
temperaturen (condenswater!).
Indien dit toestel uitgerust is met oplaadbare batterijen, moet het
permanent op het net worden aangesloten om de batterijen steeds
optimaal te houden. Leg het toestel nooit voor langer dan een maand weg
zonder eerst de batterijen te hebben opgeladen. De batterijen kunnen
worden vervangen na het deksel in de bodem van de kast te hebben
geopend.
Inleiding
CONSORT nv
Parklaan 36 Tel (++32)(14)41 12 79
B2300 Turnhout Fax (++32)(14)42 91 79
België
Fabrikant
Dit toestel (uitgezonderd alle toebehoren) is gewaarborgd tegen defect
materiaal of constructiefouten voor een periode van zesendertig (36)
maanden vanaf de verzenddatum af fabriek. CONSORT zal elk toestel
gratis herstellen, binnen de waarborgperiode, voor zover het werd
gebruikt onder normale laboratorium omstandigheden volgens de
werkvoorschriften en onderhoudsprocedures uit deze gebruiksaanwijzing
en wanneer de oorzaak van het defect niet een ongeluk, een aanpassing,
verkeerd gebruik of misbruik is. Er moet eerst een toelating van
CONSORT verkregen worden vooraleer eender welk toestel franco terug
te sturen voor herstelling onder waarborg!
CONSORT kan niet aansprakelijk worden gesteld voor eventuele
schadelijke gevolgen van het gebruik of behandeling van zijn produkten.
Waarborg
Mocht dit toestel worden teruggestuurd voor onderhoud, gelieve het
netsnoer af te koppelen en volgende toebehoren NIET mee te sturen,
tenzij ze verdacht zijn:
Handleiding
Kabels
Toebehoren
In geval van ernstige storing, stop onmiddellijk het gebruik van het toestel
en raadpleeg uw plaatselijke CONSORT verdeler.
Onderhoud

12
Geleidbaarheid 0...200 mS/cm
Resistiviteit 0...20 MΩ.cm
Temp. bereik 0...100°C
Resolutie 0.1°C, 0.01 µS/cm, 10 Ω.cm
Ingangen BNC-ingang voor een geleidbaarheidscel
BANAAN-ingang voor een Pt1000 temperatuursonde
Temp. Comp. automatisch met Pt1000 of manueel
Digitaaluitgang programmeerbare RS232, 2400 b/s, voor bidirec-
tionele communicatie met een computer of printer
Analooguitgang 0...2 V, ca 8 kΩ, 8 bit D/A
Aflezing 8 cijfers/karakters, 12 mm LCD aflezing, toont
metingen, °C & boodschappen
Toetsen 10 membraantoetsen
Omg. Temp. 4...40°C
Rel.Vochtigheid 0...90 % (niet condenserend!)
Voeding 210-250 V~ (* 105-125 V~), 50/60 Hz, max. 2 VA, &
NiCd batterijen, type AA
Kast waterdichte (IP65) kast
Afmetingen 252 x 121 x 50 mm
Gewicht 600 g
Specificaties
MODE = Kiest alle mogelijke functies of ontsnapt uit foutmeldingen,
ijkprocedures, enz. door terug te keren naar de
oorspronkelijk gekozen functie.
CAL = Begint of vervolgt een ijking of een functie.
¿/À= Toetsen voor het instellen van een waarde of voor het
kiezen van een functie.
SET = Leest de temperatuur af bij aangesloten Pt1000 of manuele
temperatuurcompensatie.
HOLD = Houdt de aflezing vast tijdens het meten.
RES = Wijzigt de resolutie of eenheden van de aflezing.
PRINT = De getoonde waarde wordt via de RS232 uitgang
afgedrukt.
ON/OFF = Aan- en uitschakelen van het toestel.
Toetsenbord
Bij het inschakelen van het toestel worden de inwendige ijkingen even
nagegaan, terwijl alle uitleesmogelijkheden en de programmaversie in
het afleesvenster worden getoond. Er verschijnt een foutmelding
wanneer iets niet in orde is.

13
[Or.EC] = Geleidbaarheidsoverschrijding (b.v. onderbroken elektrode-
kabel)
[Or.OhM] =Ω-overschrijding (b.v. onderbroken elektrodekabel)
[Or.°C] =°C-overschrijding (gemeten temperatuur valt buiten het
normale bereik)
[no dAtA] = Gegevensgeheugen is leeg
[not.CAL] = IJkprocedure onderbroken (de vorige ijking blijft geldig!)
[Err.cc] = Celconstante ligt niet tussen 70...130% van de nominale
waarde
[Err.CAL] = IJkfout (kijk cel en standaardoplossing na)
[Err.Stb] = Onstabiele elektrode
[Err.COM] = Algemene verbindingsfout
[Err.Prt] = Verbinding met de printer gestoord.
[Err.bAt] = Defecte batterijlader (trek de netadapter onmiddellijk uit het
stopcontact, verwijder de batterijen en laat uw toestel
nakijken!).
[Err.MEM] = Fatale geheugenfout (alle fabrieksinstellingen zijn
verdwenen. Laat uw toestel nakijken!)
[ILLEGAL] = Een onbevoegd persoon heeft tevergeefs getracht het
toestel te herstellen. Vanaf nu is uw recht op waarborg
vervallen!
Foutmeldingen
Netadapter
Verwijder de siliconen beschermstop uit de REF-bus en verbind de jack-
stekker van een geschikte netadapter (model A4070 voor 230 V~ of model
A4071 voor 115 V~) met de DC-bus om de NiCd-batterijen op te laden.
Gebruik nooit een netadapter zonder eerst NiCd-batterijen te hebben
geplaatst in het toestel! Verwijder de netadapter en steek de siliconen
beschermstop weer in de REF-bus om het toestel in het veld te gebruiken.
INSTELLEN
Het is mogelijk om telkens een geluidssignaal te geven wanneer de
metingen buiten vooraf geprogrammeerde waarden vallen.
1. Druk op de MODE-toets tot [SEtuP] op het scherm verschijnt.
2. Druk op CAL tot er met ¿of Àkan worden gekozen tussen [ALrM
OFF], [ALrM EC] of [ALrM tdS]. Kies voor [ALrM OFF] indien geen
alarm gewenst is. Druk op CAL.
3. Op de aflezing verschijnt b.v. [L=23.0MS] terwijl de eenheden
knipperen. Kies het gewenste bereik met ¿of Àen druk op CAL.
4. Op de aflezing verschijnt b.v. [L=23.0MS] terwijl [=] knippert. Kies het
gewenste minimum met ¿of À. Telkens wanneer de metingen dit
minimum overschrijden, zal de zoemer een alarmsignaal laten horen.
5. Op de aflezing verschijnt b.v. [H=57MS] terwijl de eenheden
knipperen. Kies het gewenste bereik met ¿of Àen druk op CAL.
6. Op de aflezing verschijnt b.v. [H=57MS] terwijl [=] knippert. Kies het
gewenste maximum met ¿of À. Telkens wanneer de metingen dit
maximum overschrijden, laat de zoemer een alarmsignaal horen.
7. Druk op CAL om verder te gaan of op MODE om te eindigen.
Alarm

14
De ingebouwde zoemer kan ingesteld worden om een toon te geven
telkens als er op een toets wordt gedrukt.
Zoemer
1. Druk op de MODE-toets tot [SEtuP] op het scherm verschijnt.
2. Druk vervolgens op CAL tot er met ¿of Àkan gekozen worden
tussen [bEEP ON] of [bEEP OFF]. Hierdoor wordt beslist of de
zoemer respectievelijk wel of niet moet werken bij indrukken van het
toetsenbord.
3. Druk op CAL om verder te gaan of op MODE om te eindigen.
De metingen kunnen zowel manueel als automatisch, met elk gewenst
tijdinterval, worden gedrukt.
Afdrukken
1. Druk op de MODE-toets tot [SEtuP] op het scherm verschijnt.
2. Druk vervolgens op CAL tot op de aflezing b.v. [Pt=120] verschijnt.
Kies met ¿of Àhet gewenste tijdinterval (0...9999 s) tussen de naar
de printer gestuurde gegevens. Stel in op nul indien er geen
automatisch drukken gewenst is.
3. Druk op CAL om verder te gaan of op MODE om te eindigen.
Het toestel kan een specifiek nummer worden toegekend om
identificatie door b.v. een computer mogelijk te maken.
Identificatie
1. Druk op de MODE-toets tot [SEtuP] op het scherm verschijnt.
2. Druk op CAL tot op de aflezing b.v. [Id.no=5] verschijnt. Kies met ¿
of Àhet gewenste identificatie (0...999) nummer voor uw toestel.
Stel in op nul indien dit nummer niet vermeld dient te worden bij het
drukken.
3. Druk op CAL om verder te gaan of op MODE om te eindigen.
Om ongewenste toegang tot het toestel te vrijwaren, kan een
persoonlijke kode worden geprogrammeerd.
Kode
1. Druk op de MODE-toets tot [SEtuP] op het scherm verschijnt.
2. Druk op CAL tot de aflezing [Code on], [Code OFF], of [Code CAL]
aangeeft. Beslis met ¿of Àof de toegang tot alle verdere ijkingen
moet gebeuren door een kode in te voeren ja [Code on] dan nee
[Code OFF] en druk vervolgens op CAL om verder te gaan of op
MODE om te eindigen.
3. Kies [Code CAL] om uw persoonlijke kode in te geven.
4. Op de aflezing verschijnt [E=-----] terwijl [=] knippert. Geef uw
geheime volgorde van 5 toetsen in om verder te gaan. Druk op CAL
om verder te gaan of op MODE om te eindigen.
Temperatuur-
compensatie
Instellen van de referentietemperatuur.
1. Druk op de MODE-toets tot [SEtuP] op het scherm verschijnt.
2. Het toestel toont [rEF=25°C] of [rEF=20°C]. Kies de temperatuur
waarnaar alle volgende geleidbaarheidsmetingen zullen verwijzen
met ¿of Àen druk op CAL om verder te gaan of op MODE om te
eindigen.

15
Er kunnen tot 100 waarden in het geheugen van het toestel worden
verwerkt.
[no LOG] : Geen gegevensverwerking.
[SEt LOG] : Instellen van de gegevensverwerking.
[LSt LOG] : Toont de verwerkte gegevens in het uitleesvenster.
[Prt LOG] : Zendt de verwerkte gegevens naar een printer of computer.
[Cnt LOG] : Verwerkt een volgende reeks gegevens zonder de voor-
gaande te wissen.
METINGEN OPSLAAN
[Set log]: Procedure om de gegevensverwerking in te stellen.
1. Kies de instellingsprocedure [SEtuP] met MODE en druk op CAL.
2. Kies met ¿of Àtot [SEt LoG] op het scherm verschijnt. Kies [no
LOG] indien er geen gegevensverwerking nodig is en druk op MODE
om te eindigen en terug te keren naar de oorspronkelijke functie.
3. Druk vervolgens op CAL.en kies met ¿of Àtussen [LOG EC],
[LOG OhM] of [LOG tdS] en druk op CAL.
4. Op de aflezing verschijnt b.v. [dt=100]. Kies het gewenste tijd- interval
(0...9999 s) tussen elke opslag van gegevens mett ¿of À. Stel deze
waarde op nul in, om manueel gegevens op te slaan. De gegevens
kunnen nu opgeslagen worden door telkens op PRINT te drukken
tijdens de meting. (De volgende punten 5-7 worden hierdoor
overgeslagen en druk op CAL).
5. Druk vervolgens op CAL. Op de aflezing verschijnt b.v. [n=40]. Kies
het aantal op te slagen metingen (1..100) met ¿of À. Druk op CAL.
6. Op de aflezing verschijnt b.v. [d=31.12.91] terwijl het jaar knippert.
Programmeer de gewenste begindatum met ¿of Àen druk op CAL.
Programmeer op gelijkaardige wijze maand en dag.
7. Op de aflezing verschijnt b.v. [t=23.59] terwijl de minuten knipperen.
Programmeer de gewenste begintijd met ¿of Àen druk op CAL.
Programmeer op gelijkaardige wijze de uren.
8. Op de aflezing verschijnt [StArt ?]. Druk op CAL om het opslaan te
beginnen volgens de voorafgaande instellingen (er verschijnt, samen
met de af te lezen waarde, een knipperende [L]) of druk op MODE om
te eindigen. Op het scherm verschijnt [StoP?], drukken op CAL zet
het toestel terug in de oorspronkelijk gekozen functies. Wanneer de
laatste waarde is opgeslagen, verschijnt op de aflezing [End LOG].
Bij manuele gegevensverwerking drukt men telkens op PRINT om
een volgende meting in het geheugen op te slaan. Ondertussen
verschijnt op de aflezing het opslagnummer b.v. [LOG 7]. Druk op
MODE om te eindigen.
Gegevens
opslaan
[Cnt LOG]: Verwerkt een volgende reeks metingen zonder de
voorgaande te wissen.
1. Kies de instellingsprocedure [SEtuP] met MODE en druk op CAL.
2. Kies met ¿of Àtot [Cnt LOG] op het scherm verschijnt, op
voorwaarde dat er voldoende geheugencapaciteit overgebleven is,
en druk vervolgens op CAL.
Gegevens
toevoegen

16
[Lst loG]: Toont de verwerkte gegevens in het uitleesvenster.
1. Kies de instellingsprocedure [SEtuP] met MODE en druk op CAL.
2. Kies met ¿of Àtot [LstLoG] op het scherm verschijnt en druk
vervolgens op CAL.
3. De eerst opgeslagen waarde wordt getoond (er verschijnt een
knipperende [n]). Druk ¿of Àom alle andere waarden te zien.
4. Houd de HOLD toets ingedrukt om de datum af te lezen. (niet
relevant bij manuele verwerking of verwerking in reeksen).
5. Houd de RES toets ingedrukt om de tijd af te lezen (of: reeks +
volgnummer, b.v. [2-017], bij een verwerking in reeksen).
6. Houd de °C toets ingedrukt om de temperatuur af te lezen.
7. Druk op PRINT om de opgeroepen gegevens naar een printer te
sturen.
8. Druk op MODE om te eindigen.
Gegevens
oproepen
[Prtlog]: Zendt de verwerkte gegevens naar een printer of computer.
1. Kies de instellingsprocedure [SEtuP] met MODE en druk op CAL.
2. Kies met ¿of Àtot [PrtLoG] op het scherm verschijnt en druk.
vervolgens op CAL.
3. Op de aflezing verschijnt [PrintinG] terwijl alle opgeslagen waarden,
inclusief overeenkomstige datum en tijd, naar de RS232 uitgang
worden gestuurd in een formaat compatibel met EXCEL™, LOTUS
123™. De kolommen zijn gescheiden door een TAB-teken,bv:
Gegevens
afdrukken
Log# VALUE UNIT C H D
001 16.49E-03 S/cm 23.7 13:19:57 29/01/95
002 15.05E-03 S/cm 23.7 13:20:57 29/01/95
003 13.39E-03 S/cm 23.8 13:21:57 29/01/95
De meetcel moet met de coaxiale ingang worden verbonden.
Automatische temperatuurcompensatie en -meting zijn mogelijk wanneer
een Pt1000 thermocompensator aan de °C klemmen wordt aangesloten.
Gecombineerde geleidbaarheidselektroden met ingebouwde Pt1000
kunnen eveneens worden gebruikt. Verbind dan de bananenstekker met
de bovenste °C klem. Zonder Pt1000 is de manuele temperatuur
compensatie automatisch ingeschakeld.
Ingangen
GELEIDBAARHEIDSMETING
Een geleidbaarheidscel wordt slechts werkzaam en stabiel na
bevochtiging! Hiertoe moet ze minstens één uur worden gedompeld in
gedistilleerd water. Spoel de cel steeds schoon na gebruik en bewaar ze
dan in gedistilleerd water (voeg een kleine hoeveelheid detergent toe om
het sponsachtige platina-oppervlak in optimale conditie te houden).
Een bevuilde cel kan worden gereinigd met een licht detergent of verdund
salpeterzuur. Vettige substanties kunnen best met aceton of alcohol
worden verwijderd (doe dit echter nooit met kunststof elektroden!).
Onderhoud
IJken
De celconstante hangt af van de fysische afmetingen van de platina
plaatjes. Zij zijn met sponsachtig platinazwart bedekt. Hierdoor wordt
hun effectief oppervlak sterk vergroot en worden polarisatie-
verschijnselen verminderd. Omdat platinazwart praktisch volledig
chemisch resistent is, blijft de constante vrijwel gelijk tijdens de
levensduur van de elektrode.

17
1. Kies het geleidbaarheidsbereik door op MODE te drukken tot [µS] of
[MS] op de aflezing verschijnt en druk op CAL.
2. Op de aflezing verschijnt de gemiddelde celconstante van de vorige
ijking (b.v. [cc=1.073]). Druk op CAL om de automatische
ijkprocedure te starten.
3. Op de aflezing verschijnt één van de 3 opgeslagen standaard-
oplossingen [St=0.01M] (1413 µS/cm), [St=0.1M] (12.88 mS/cm) of
[St=1M] (111.8 mS/cm). Kies de gewenste standaard met ¿of À.
4. Spoel de cel enkele malen met de standaardoplossing en dompel ze
in deze standaardoplossing. De temperatuur van de oplossing is niet
zo belangrijk maar ze moet wel tussen 0°C en 30°C liggen. Indien de
standaard een andere temperatuur heeft, druk dan op °C (niet nodig
wanneer een Pt1000 wordt gebruikt) om manueel te compenseren.
Druk vervolgens op CAL.
5. De aflezing toont de berekende celconstante b.v. [cc1=1.045] en ijkt
automatisch wanneer de aflezingen stabiel zijn ([=] stopt met
knipperen).
∗Koppel de netadapter los om zeer lage geleidbaarheden nauwkeurig
te meten!
∗Zie pag. 41 voor de ijktabellen in het geheugen.
∗Een knipperende komma waarschuwt voor onstabiele metingen.
Wacht nog even met aflezen!
∗Druk op RES om om te schakelen tussen [ppm] (saliniteit), [S/cm]
(geleidbaarheid) of [Ω.cm] (resistiviteit).
∗Bij het starten van een titratie op Àdrukken om het actuele
meetbereik te blokkeren zodat omschakelfouten, te wijten aan
verschillen in de meetfrekwentie, worden vermeden. Druk op MODE
om weer in het normale meetbereik terug te keren.
∗De oplossing roeren tijdens de meting verhoogt de homogeniteit en
is dus sterk aan te bevelen.
1. Kies het geleidbaarheidsbereik door op MODE te drukken tot [µS] of
[MS] op de aflezing verschijnt.
2. Spoel de cel enkele malen met de meetoplossing en dompel ze dan
in deze oplossing.
3. Lees de meter af (opgelet: herleid naar de referentietemperatuur!).
Door de automatische bereikomschakeling wordt steeds het hoogst
mogelijk aantal cijfers + overeenkomstige eenheid weergegeven.
4. Spoel de cel steeds schoon na gebruik en bewaar ze dan in
gedistilleerd water (voeg een kleine hoeveelheid detergent toe om
het sponsachtige platina-oppervlak in optimale conditie te houden).
Geleidbaar-
heidsmeting
TEMPERATUURMETING
1. Druk op CAL om de °C-schaal te verschuiven t.o.v. een referentie-
temperatuur. Dompel de Pt1000 in een oplossing van gekende
temperatuur.
2. Op de aflezing verschijnt b.v. [°C =22.3]. IJk met ¿of Àde juiste
waarde en druk terug op CAL of druk op RES om naar absolute
aflezingen terug te keren.
IJking
Meting
1. Lees de temperatuur af door op °C te drukken.
2. Zonder Pt1000, stel de manuele temperatuurcompensatie in met ¿
of Àen druk op MODE om verder te gaan.
Table of contents
Languages:
Other Consort Measuring Instrument manuals

Consort
Consort R311 User manual

Consort
Consort C6010 User manual

Consort
Consort LabArt C51 User manual

Consort
Consort C3010 User manual

Consort
Consort T871 User manual

Consort
Consort C3010 User manual

Consort
Consort C931 User manual

Consort
Consort D230 User manual

Consort
Consort R735 User manual

Consort
Consort C861 User manual