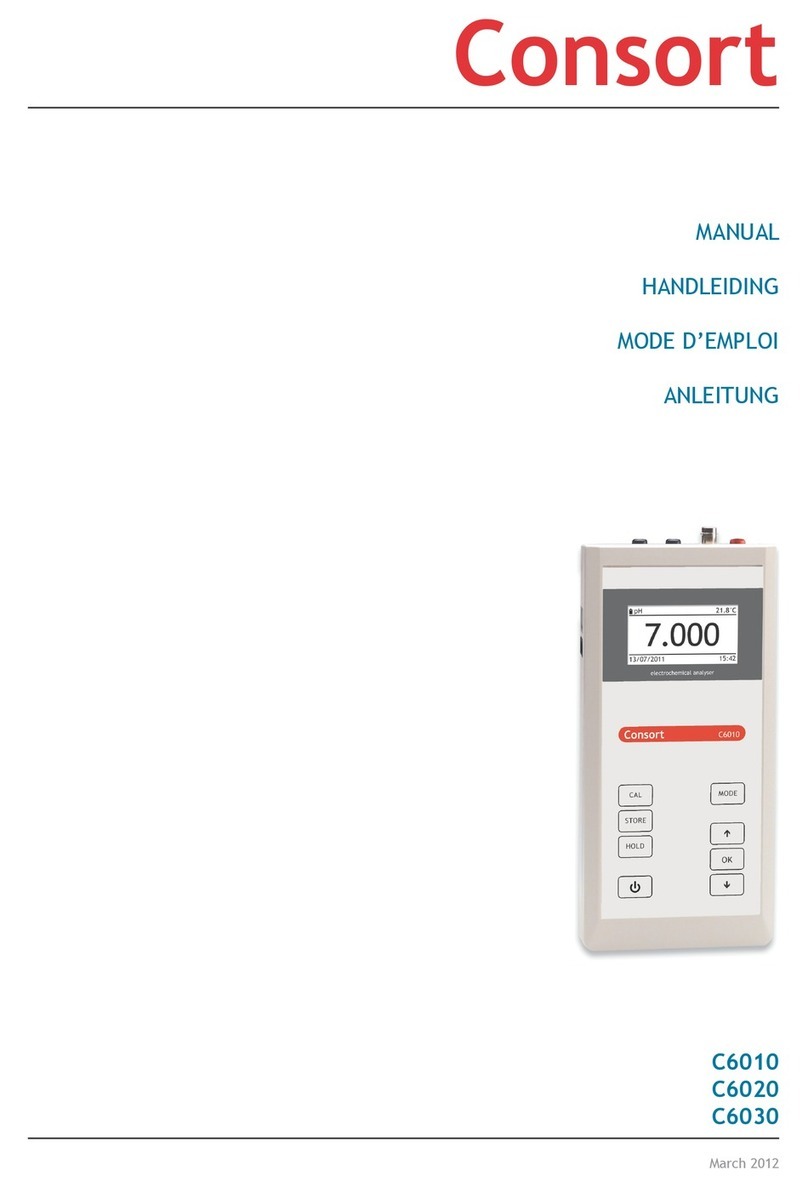
Consort Z621 User manual

CONSORT
MANUAL
HANDLEIDING
MODE D’EMPLOI
ANLEITUNG
Z621
January 1997

Table of contents
Introduction ................................. 1
Manufacturer ............................... 1
Warranty .................................... 1
Servicing .................................... 1
Specifications .............................. 2
Keyboard .................................... 2
Error codes ................................. 3
SET-UP . . . . . . . . . . . . . . . . . . . . . . . . . . . . . . . . . . . . . . . . . 3
Beeper ...................................... 3
Alarm ........................................ 3
Printer ....................................... 4
Identification number ...................... 4
Secret code ................................ 4
DATA-ACQUISITION ......................... 4
Logging data ............................... 5
Adding data ................................ 5
Recalling data .............................. 5
Printing data ................................ 6
Inputs ........................................ 6
MEASUREMENTS ........................... 6
Theory ....................................... 6
Maintenance ............................... 7
Measurements
with 1-point calibration ................ 7
with 2-point calibration ................ 8
Relative measurement .................... 9
Temperature measurement .............. 9
DATA COMMUNICATION .................... 9
Recorder output ........................... 9
GLP-protocol ............................... 9
Digital output ............................... 10
Printer connection ......................... 11
Computer connection ..................... 11
TROUBLE SHOOTING ...................... 12
Calibrate .................................... 12
Reset ........................................ 12
Inhoudsopgave
Inleiding . . . . . . . . . . . . . . . . . . . . . . . . . . . . . . . . . . . . . 13
Fabrikant .................................... 13
Waarborg ................................... 13
Onderhoud ................................. 13
Specificaties ................................ 14
Toetsenbord ................................ 14
Foutmeldingen ............................. 15
INSTELLEN .................................... 15
Zoemer ...................................... 15
Alarm ........................................ 15
Afdrukken ................................... 16
Identificatie ................................. 16
Kode . . . . . . . . . . . . . . . . . . . . . . . . . . . . . . . . . . . . . . . . . 16
METINGEN OPSLAAN ...................... 16
Gegevens opslaan ........................ 17
Gegevens toevoegen ..................... 17
Gegevens oproepen ...................... 17
Gegevens afdrukken ...................... 18
Ingangen .................................... 18
METING ........................................ 18
Theorie ...................................... 18
Onderhoud ................................. 19
Meten
met 1-punts ijking ...................... 19
met 2-punts ijking ...................... 20
Relatieve meting ........................... 21
Temperatuur meting ....................... 21
GEGEVENS-UITWISSELING ............... 21
Analoge uitgang ........................... 21
GLP-protocol ............................... 21
Digitale uitgang ............................ 22
Verbinden met printer ..................... 23
Verbinden met computer ................. 23
FOUTEN ONDERZOEK ..................... 24
Afregelen ................................... 24
Herzetten ................................... 24
ii

Table de matières
Préface ...................................... 25
Fabricant .................................... 25
Garantie ..................................... 25
Service ...................................... 25
Spécifications .............................. 26
Le clavier ................................... 26
Code d’erreur .............................. 27
INSTALLATION ................................ 27
Signal acoustique ......................... 27
Alarme ...................................... 27
Imprimante ................................. 28
Numéro d’identification ................... 28
Code personnel ............................ 28
COLLECTEUR DE DONNEES ............. 28
Mémoriser des données ................. 29
Ajouter des données ...................... 29
Afficher des données ..................... 29
Imprimer .................................... 30
Branchement ............................... 30
MESURES ..................................... 30
Théorie ...................................... 30
Entretien .................................... 31
Mesure
avec étalonnage sur 1 point .......... 31
avec étalonnage sur 2 points ........ 32
Mesure relative en O2. . . . . . . . . . . . . . . . . . . . 33
La mesure de température .............. 33
TRANSFERT DE DONNEES ............... 33
Sortie analogique .......................... 33
Protocole GLP ............................. 33
Sortie numérique .......................... 34
Imprimante ................................. 35
Ordinateur .................................. 35
DIAGNOSTIC .................................. 36
Calibrage ................................... 36
Remise en état ............................. 36
Inhaltsverzeichnis
Einführung .................................. 37
Hersteller ................................... 37
Garantie ..................................... 37
Service ...................................... 37
Technische Daten ......................... 38
Bedienungsfeld ............................ 38
Fehlermeldungen .......................... 39
EINSTELLUNG ................................ 39
Summer . . . . . . . . . . . . . . . . . . . . . . . . . . . . . . . . . . . . . 39
Alarm ........................................ 39
Drucker . . . . . . . . . . . . . . . . . . . . . . . . . . . . . . . . . . . . . . 40
Identifikation ................................ 40
Code ......................................... 40
DATENVERARBEITUNG .................... 40
Daten speichern ........................... 41
Daten zufügen ............................. 41
Daten auflisten ............................. 41
Daten ausdrucken ......................... 42
Eingänge .................................... 42
MESSUNG ..................................... 42
Theorie ...................................... 42
Lagerung .................................... 43
Messung
mit 1-punkt Eichung ................... 43
mit 2-punkt Eichung ................... 44
Relative O2-Messung ..................... 45
Temperatur Messung ..................... 45
DATEN-AUSTAUSCH ......................... 45
Analogausgang ............................ 45
GLP-protokoll .............................. 45
Digitalausgang ............................. 46
Druckeranschluß .......................... 47
Datenübertragung ......................... 47
FEHLERFUNKTIONEN ...................... 48
Eichung ..................................... 48
Wiedereinstellen ........................... 48
iii

1
This instrument is manufactured with the latest technology and needs no
particular maitenance. CONSORT certifies that this instrument was
thoroughly inspected and tested at the factory prior to shipment and found
to meet all requirements defined by contract under which it is furnished.
However, dimensions and other physical characteristics may differ.
The normal operating temperature should be between 4° and 40°C. Never
store the instrument in a room with high humidity or at very low
temperatures (condensation water!).
If it is equipped with rechargeable batteries, the instrument should be
connected permanently to the mains in order to keep the batteries in good
condition. Do not store the instrument for longer than 1 month without
recharging the batteries. The batteries can be replaced by opening the
bottom compartment of the cabinet.
Introduction
Manufacturer
Warranty
Servicing
This instrument (excluding all accessories) is warranted against defective
material and workmanship for a period of thirty-six (36) months from the
date of shipment ex factory. CONSORT will repair all defective equipment
returned to it during the warranty period without charge, provided the
equipment has been used under normal laboratory conditions and in
accordance with the operating limitations and maintenance procedures in
this instruction manual and when not having been subject to accident,
alteration, misuse or abuse. A return authorisation must be obtained from
CONSORT before returning any product for warranty repair on a freight
prepaid basis!
CONSORT is not liable for consequential damages arising out of the use
or handling of its products.
In the event of this instrument being returned for servicing, the owner is
requested to remove the power supply lead and NOT to send the following
items unless they are suspect:
Manual
Cables
Accessories
If serious malfunctioning occurs, stop using the unit immediately and
consult your local CONSORT dealer.
CONSORT nv
Parklaan 36 Tel (++32)(14)41 12 79
B2300 Turnhout Fax (++32)(14)42 91 79
Belgium

2
Ranges O20 ... 60 ppm
Saturation 0 ... 600 %
°C 0 ... 50°C
Accuracy 0.01 ppm/ 0.1 %/ 0.1°C or 1% of reading
Inputs BNC + BANANA input for oxygen electrode
Temp. comp. automatic with NTC (100 kΩ), built-in O2-probe
Digital output programmable RS232, 2400 b/s, for bi-directional
communication with a computer or printer
Analogue output 0 ... 2 V, ca 8 kΩ, 8 bit D/A
Display 8 digit/character, 12 mm LCD display, shows
readings, °C & messages
Keys 10 tactile membrane keys
Ambient temp. 4 ... 40°C
Rel. Humidity 0 ... 90 % (non-condensing!)
Power supply 210-250 V~ (* 105-125 V~), 50/60 Hz, max. 2 VA, &
4 NiCd batteries, size AA
Cabinet IP65 cabinet
Dimensions 252 x 121 x 50 mm
Weight 600 g
Specifications
Each time the instrument is switched on, it will check briefly its internal
calibrations while showing all functions of the display and the software-
version. An error message appears when something is wrong.
MODE = Selects all modes (except temperature) or escapes from
error traps, calibration procedures..., by returning to the
original mode.
°C = Reads temperature.
¿/À= Button for entering a value or for selecting a function.
CAL = Starts or proceeds a calibration or function.
HOLD = Holds the display when measuring.
RES = Changes the resolution of the display.
PRINT = Displayed value is printed through the RS232 output.
ON/OFF = Switches the instument on or off.
Keyboard

3
[Or.PPM] = Overrange ppm (e.g. defective electrode).
[Or.%] = Overrange % (e.g. defective electrode).
[Or.°C] = Overrange °C (measured degrees out of range).
[no dAtA] = Data-logging memory empty.
[not.CAL] = Calibration procedure interrupted (the previous calibration
remains valid!).
[Err.°C] = Temperature probe not connected.
[Err.Prb] = Zero-point too large (e.g. defective membrane).
[Err.Stb] = Electrode not stable during a calibration.
[Err.CAL] = Calibration error (check electrode & standard solutions).
[Err.COM] = General communication error.
[Err.Prt] = Communication error with the attached printer.
[Err.bAt] = Battery charger defective (disconnect the AC-cord
immediately from the mains, remove the batteries and have
your instrument serviced!)
[Err.MEM] = Fatal memory error (all factory settings are cleared. Have
your instrument serviced!).
[ILLEGAL] = An unauthorised person has failed to repair the unit.
Warranty is elapsed from now on!
Error codes
SET-UP
The built-in beeper can be programmed to sound each time a key-path
is pressed.
Beeper
1. Select the set-up procedure by pressing MODE.
2. Press CAL until you can choose with ¿or Àbetween [bEEP on] or
[bEEP OFF]. Decide whether or not the beeper should sound each
time the keyboard is touched.
3. Press CAL to continue or press MODE to cancel.
An audible alert can be given when the displayed values stray outside a
programmable high- and low-level.
Alarm
1. Select the set-up procedure by pressing MODE.
2. Press CAL until you can choose with ¿or Àbetween [ALrM OFF],
[ALrM PPM] or [ALrM %]. Select [ALrM OFF] if no alarm is required.
Press CAL.
3. The display shows e.g. [L=4.00PPM] or [L=60.0%]. Select the desired
minimum level with ¿or Àand press CAL. Each time the
measurements are below this level, the beeper will sound an alarm.
4. The display shows e.g. [H=6.00PPM] or [H=80.0%]. Select the
desired maximum level with ¿or À. Each time the measurements
are above this level, the beeper will sound an alarm.
5. Press CAL to continue or press MODE to cancel.

4
[no LOG] : No data-logging.
[SEt LOG] : Permits to pre-set the data-logging parameters.
[LSt LOG] : Permits to view the stored values on the display.
[Prt LOG] : Permits to send the stored values to a printer or computer.
[Cnt LOG] : Permits to continue with a next series of measurements,
without erasing the previous data-logging.
Up to 100 values can be stored in the non-volatile memory of the
instrument.
The measured values can be printed automatically at timed intervals or
manually on operator command.
Printer
1. Select the set-up procedure by pressing MODE.
2. Press CAL until the display shows e.g. [Pt=120]. Select the desired
time interval (0...9999 s) between the transmitted data to a printer,
with ¿or À. Pre-set to zero if no automatic printing is required.
3. Press CAL to continue or press MODE to cancel.
The instrument can be identified by e.g. a computer when a specific
number is allocated to it.
Identification
number
Secret code
A private code can be programmed to avoid undesired access to the
instrument.
1. Select the set-up procedure by pressing MODE.
2. Press CAL until the display shows [Code on], [Code OFF], or [Code
CAL]. Decide, with ¿or À, whether the access to all future
calibrations should be by entering a code (on) or not (off). Press CAL
to continue or press MODE to cancel. Select [Code CAL] to enter
your personal code.
3. The display shows [E=-----] while [=] is blinking. Enter your secret
sequence of 5 keys to proceed. Press CAL to continue or press
MODE to cancel.
1. Select the set-up procedure by pressing MODE.
2. Press CAL until the display shows e.g. [Id.no=5]. Select the desired
identification number (0...999) for your meter with ¿or À. Pre-set to
zero if this number should not be mentioned while printing.
3. Press CAL to continue or press MODE to cancel.
DATA-ACQUISITION

5
[Lst LOG]: permits to view the stored values on the display.
1. Select the set-up procedure by pressing MODE and press CAL.
2. Select [Lst LOG] with ¿or Àand press CAL
3. The display shows the first data-logged value in memory (a blinking
[n] appears). Press ¿or Àto view all other values.
4. While pressing HOLD the corresponding date is shown (not relevant
when a manual or continued data-logging has been performed).
5. While pressing RES the corresponding time shown (or: series + log-
number, e.g. [2-017], when a continued data-logging has been
performed).
6. While pressing °C the corresponding temperature is shown.
7. Press PRINT to send the recalled data to a printer.
8. Press MODE to return to cancel.
Recalling data
[Cnt LOG]: Permits to continue with a next series of measurements,
without erasing the previous data-logging
1. Select the set-up procedure by pressing MODE and press CAL.
2. Select [Cnt LOG] with ¿or Àto continue with a next series of
measurements, without erasing the previous data-logging, provided
the memory has enough capacity left and press CAL.
Adding data
Set log: Procedure to pre-set the data-logging parameters.
1. Select the set-up procedure by pressing MODE and press CAL.
2. Choose [SEt LOG] with ¿or À. Select [no LOG] if no data-logging is
required and press MODE to return to the original mode.
3. Press CAL untill you can choose with ¿or Àbetween [LOG PPM]
or [LOG %]. Select the desired mode and press CAL.
4. The display shows e.g. [dt=100]. Select the desired time interval
(0...9999 s) between the data-logging, with ¿or Àand press CAL.
Pre-set to zero for manual data-logging, each time PRINT is pressed
(the next points 5 to 7 are skipped and press CAL).
5. The display shows e.g. [n=40]. Select the desired number of values
(1...100) to be data-logged with ¿or Àand press CAL.
6. The display shows e.g. [d=31.12.91] while the year is blinking.
Program the desired starting date with ¿or Àand press CAL.
Program similarly the month and the day.
7. The display shows e.g. [t=23.59] while the minutes are blinking.
Program the desired starting time with ¿or Àand press CAL.
Program similarly the hours.
8. The display shows [StArt ?]. Press CAL to start the data-logging
according the previous settings (a blinking [L] appears) or press
MODE to cancel. After the last value has been catalogued the display
will show [End LOG]. When manual data-logging has been selected,
press PRINT to put a next measurement into memory. In the
meantime the display shows the logging-number e.g. [LOG 7]. Press
MODE to cancel.
Logging data

[Prt LOG]: Permits to send the stored values to a printer or computer.
1. Select the set-up procedure by pressing MODE and press CAL.
2. Choose [Prt LOG] with ¿or Àand press CAL
3. The display shows [PrintinG] while all data-logged values, including
corresponding dates and times, are sent to the RS232 output in the
following format, compatible with EXCEL™, LOTUS 123™,... The
columns are separated by a TAB character.
6
Printing data
MEASUREMENTS
The measuring electrode should be connected to the coaxial INPUT
connector. Its banana plugs should be inserted in the °C terminals.
Inputs
Theory
Principle:
The oxygenmeter and its electrode function according to the Clark
principle with platinum as cathode and silver as anode in an electrolyte
cell to which a polarisation voltage of 800 mV is applied. Oxygen gas
present in the electrolyte is reduced to OH ions at the platinum cathode.
The resulting current is diffusion limited and therefore proportional to the
oxygen concentration in the sample solution. This current is amplified,
corrected, and displayed in mg/l, ppm or % dissolved oxygen.
Electrode:
The anode and cathode of the electrode are immersed in a special buffer
solution inside the electrode, to give high stability readings and short
polarisation times. The electrolyte compartment is separated by a PTFE
film from the sample solution. Only gases, but no ions, can diffuse through
this film from the sample solution into the internal electrolyte.
Temperature compensation:
Speed of electrode reactions depends on temperature. Therefore, for a
given oxygen concentration, the electrode current becomes greater at
higher temperature, and conversely. This temperature effect is
compensated with the NTC resistor incorporated in the electrode. For
aqueous solutions the oxygen meter therefore always gives correct
readings in ppm, independent of the actual temperature.
Log# VALUE UNIT C H D
001 7.34 ppm 23.7 13:19:57 29/01/95
002 7.21 ppm 23.7 13:20:57 29/01/95
003 7.08 ppm 23.8 13:21:57 29/01/95
004 6.71 ppm 23.8 13:22:57 29/01/95
005 6.49 ppm 23.9 13:23:57 29/01/95

7
Interferences:
All substances which can diffuse through the membrane and for which
800 mV potential suffices for polarographic reduction, will be reduced in
the electrode. This will give a corresponding current contribution, if they
are present. Interference can be caused by ions entering the electrode
through porous or mechanically damaged membranes and by diffusion of
other reactive gases apart from oxygen, e.g. CO2, Cl2, SO2, and H2S.
These substances react in undesired manner with the electrode.
Acidic or basic gases change the pH value of the electrolyte solution and
thus disturb the reading, particularly when measuring small oxygen
concentrations. High salt concentrations in the sample solution can falsify
readings too.
Always store the electrode in distilled water after use! The membrane may
cease to function correctly after prolonged use or mechanical damage.
This will falsify the readings and the electrolyte may drain out. To replace
the membrane (see page 49), unscrew the measuring head and dismantle
it further to remove the old membrane. Take a new membrane and mount
it carefully, fill the measuring head with electrolyte solution, and then
slowly screw it onto the electrode. The electrode is now ready for use
again.
The electrode body consisting of the electrode shaft and the plug head
has almost unlimited life and requires no maintenance. After prolonged
use of the electrode in solutions containing high concentrations of oxygen,
the silver anode may become deactivated by undesired deposits. An
indication is that the electrode no longer responds correctly to calibration.
In this case, screw off the measuring head and cautiously remove the
precipitated deposits from the silver electrode surface with the aid of filter
paper. The electrode is then ready again for operation after refilling the
measurement head with new electrolyte solution.
Maintenance
Measurements
with 1-point
calibration
Start this method only with a well polarised electrode!
1. Before making measurements, check that the membrane is
undamaged and that there are no gas bubbles present in the
electrolyte space.
2. Connect the electrode and switch the instrument on. After a few
minutes, the electrode is polarised and ready for making
measurements.
3. Select the ppm (mg/l) or % range by pressing MODE. The display will
immediately show the measured oxygen according to the previous
calibration. Should you want to restandardise, press CAL.
4. The display shows the salinity correction, e.g. [SAL=2.1%]. Leave this
value to zero unless you are going to measure in heavily salted
solutions such as e.g. sea-water (3.5%). Pre-set the proper value with
¿or Àand press CAL or MODE to cancel.
5. The display shows the pressure correction, e.g. [P=1023hP]. Pre-set
the actual air pressure (hP) with ¿or Àand press CAL or MODE to
cancel.
6. Press ¿or Àuntil the display shows [1.Point]. Press CAL to start the
calibration procedure.

8
7. The electrode exposed in this manner to the air reaches an
equilibrium corresponding to the partial pressure of oxygen and thus
to saturation in water at the given temperature. Alternatively, rinse the
electrode with distilled water and then dip it into freshly air saturated
distilled water for calibration. The advection rate must be at least 10
cm/s (stir!). Air saturated water can be prepared by shaking or
vigorously stirring distilled water for 10 minutes with free access of
air. The instrument shows the measured saturation, e.g. [SAt.=8.3]
and will calibrate automatically when readings are stable ([=] stops
blinking).
8. After rinsing the electrodes with distilled water, immerse them in the
samples and read the display. The advection rate must be at least 10
cm/s (stir!).
Measurements
with 2-point
calibration
1. Before making measurements, check that the membrane is
undamaged and that there are no gas bubbles present in the
electrolyte space.
2. Connect the electrode and switch the instrument on. After a few
minutes, the electrode is polarised and ready for making
measurements.
3. Select the ppm (mg/l) or % range by pressing MODE. The display will
immediately show the measured oxygen according to the previous
calibration. Should you want to restandardise, press CAL.
4. The display shows the salinity correction, e.g. [SAL=2.1%]. Leave this
value to zero unless you are going to measure in heavily salted
solutions such as e.g. sea-water (3.5%). Pre-set the proper value with
¿or Àand press CAL or MODE to cancel.
5. The display shows the pressure correction, e.g. [P=1023hP]. Pre-set
the actual air pressure (hP) with ¿or Àand press CAL or MODE to
cancel.
6. Press ¿or Àuntil the display shows [2.Point]. Press CAL to start the
calibration procedure.
7. Dip the electrode into a saturated sodium sulphite solution (without
stirring). The instrument shows the measured zero-current (nA) of the
electrode, e.g. [O2.o=1.3] and will calibrate automatically when
readings are stable ([=] stops blinking).
8. Rinse the electrode with distilled water and cautiously dry it without
rubbing (use cotton wool or soft filter paper). The electrode exposed
in this manner to the air reaches an equilibrium corresponding to the
partial pressure of oxygen and thus to saturation in water at the given
temperature. Alternatively, rinse the electrode with distilled water and
then dip it into freshly air saturated distilled water for calibration. The
advection rate must be at least 10 cm/s (stir!). Air saturated water
can be prepared by shaking or vigorously stirring distilled water for 10
minutes with free access of air. The instrument shows the measured
saturation, e.g. [SAt.=8.3] and will calibrate automatically when
readings are stable ([=] stops blinking).
9. After rinsing the electrodes with distilled water, immerse them in the
samples and read the display. The advection rate must be at least 10
cm/s (stir!).

9
Relative O2measurement:
1. While in the O2range, press ¿. At that moment the instrument stores
the actual value and automatically subtracts it from all next
measurements. You can repeat this as many times as required. A
blinking [r] in the display appears.
2. To cancel relative readings, press MODE and you will be in the
normal measuring mode again.
Relative
measurement
∗You can also check the saturation-current (nA) and the saturation-
point (ppm) by pressing Àsequentially: e.g. [Cur=67.9] & [Sat=8.73].
See also GLP-protocol.
∗The instrument will refuse automatic standardisation when the
electrode is unstable. A worn electrode may be the cause. Select a
lower resolution for a more rapid standardisation or replace the
membrane and electrolyte of the electrode!
∗After replacement or refilling of the measuring head the first
polarisation of the electrode could last ±15 minutes!
∗Press RES to change the resolution from 0.1 to 0.01 ppm or from 1
to 0.1 %.
Measurement:
1. Read temperature by pressing °C.
Calibration:
1. Press CAL to calibrate the °C scale with any reference. Immerse the
electrode in a solution of known temperature.
2. The display shows e.g. [°C=22.3]. Calibrate to the proper value with
¿or Àand press CAL again or press RES to reset the absolute
readings.
Temperature
measurement
Recorder output
A recorder can be connected to the (+) and (-) terminals. The 0 to 2 V
output range corresponds with 0 to 60 ppm or 600 %. Use only laboratory
recorders with a high input impedance!
GLP-protocol
1. Select the O2range (ppm or %) by pressing MODE.
2. Check the saturation-current (nA) and the saturation-point (ppm) by
pressing Àsequentially: e.g. [Cur=67.9] & [Sat=8.73].
3. Press PRINT to print a complete calibration report, e.g.:
DATA COMMUNICATION

10
CONSORT Oxygenmeter Z621
------------------------
SETTINGS
--------
Identification No : 004
Software Version : 3.0
User Code : off
Relative O2: off
NTC Cal.Temp. (C) : 30.0
Salinity (%) : 0.0
Pressure.(hP) : 1005
Alarm O2:on
Alarm High (ppm) : 10.7
Alarm Low (ppm) : 5.0
Batt.Capacity (%) : 87
CALIBRATION
-----------
Cal. points : 2
Salinity (%) : 0.0
Pressure (hP) : 1035
Temperature (C) : 19.4
Saturation (ppm) : 7.48
Zero-point (nA) : 1.2
Response Time (s) : 96
STATISTICS
----------
Salinity (%) : -0.3
Pressure (hP) : +25
Temperature (C) : -1.4
Zero-point (nA) : +0.2
Response Time (s): -16
Digital output
A standard RS232 output terminal (DP9) is provided for interfacing the
instrument with a printer or computer. Data is sent in the ASCII code at a
BAUD rate of 2400 b/s (8 bit, no parity, 1 start and 2 stopbits, automatic
line feed ON, data transfer protocol Xon/Xoff).

11
Interfacing with a printer:
Press PRINT each time you want to print the measured values. Run the
‘printing data’procedure (page 6) for automatic printing at timed intervals,
while you are measuring. The PRINT keypath does not function in this
case. It is also disabled during an automatic data-logging.
Printer
connection
Computer
connection
Using WINDOWS™ to collect data:
1. Connect the computer with the RS232 terminal, using the optional
AK2310 cable (eventually with adapter AB3190 for connection with a
25 pole RS232 terminal).
2. Start WINDOWS™ and select
Terminal
in the
Accessories Group.
3. Choose
Receive Text File
in the
Transfer Menu
and create a file name
(TXT format) for the data to receive.
4. Select the
Settings Menu
and make sure the following parameters
are programmed:
Baud Rate : 2400
Data bits : 8
Stop bits : 2
Parity : None
Flow control: Xon/Xoff
5. Start the oxygenmeter in the desired measuring mode for manual or
automatic data collection (see ‘Data acquisition’page 4 for more
details).
6. When finished, open the created file with a standard spreadsheet
(e.g. EXCEL™) or wordprocessor (e.g. WORD™) for further
processing.
Serial port pinout specifications:
pin 1: RLSD, received line signal detector
pin 2: TxD, transmit data
pin 3: RxD, receive data
pin 4: not connected
pin 5: Gnd, signal ground
pin 6: DSR, data set ready
pin 7: not connected
pin 8: CTS, clear to send
pin 9: not connected
#VALUE UNIT C
0001 7.34 ppm 23.7
0002 7.21 ppm 23.7
0003 7.08 ppm 23.8
0004 6.71 ppm 23.8
0005 6.49 ppm 23.9

12
Interfacing with a computer:
Send a single character to the instrument and it will execute the
corresponding command as follows:
"1" = press MODE.
"2" = press °C.
"3" = press ¿.
"4" = press À.
"5" = press CAL.
"6" = press HOLD.
"7" = press RES.
"8" = press PRINT.
"?" = send display to computer.
"+" = keyboard on (manual operation remains possible).
"-" = keyboard off (manual operation disabled).
Follow exactly the same measuring or calibration procedures, as
described in this manual, to include any desired command in your
computer data-acquisition program.
This example continuously prints the measured values on the computer
screen:
10 ON ERROR GOTO 70 'makes sure no error occurs
20 OPEN "COM1:2400,N,8,2" AS #1 'prepares computer input
30 PRINT #1,"8" 'PRINT button pressed
40 INPUT #1,V$ ‘measured values transmitted
50 PRINT V$ 'received values printed
60 GOTO 30 'repeat procedure
70 RUN
This procedure permits to calibrate automatically all amplifiers of the
instrument.
Calibrate
1. Leave all inputs open.
2. Switch the instrument ON while holding CAL pressed.
3. The display shows [SELFCAL] for a while and returns to the
measurements.
Reset
This procedure resets the instrument to the original factory settings.
1. Switch the instrument ON while holding MODE pressed.
2. The display shows [rESEt] for a while and returns to the
measurements.
TROUBLE SHOOTING

13
Dit toestel is gebouwd volgens de modernste technologie en hoeft niet
speciaal te worden onderhouden. CONSORT bevestigt dat dit toestel
grondig werd nagekeken en getest alvorens te worden verstuurd, en
beantwoordt aan alle vereisten van het aankoopkontrakt. Er kunnen
echter wel afwijkingen optreden in de afmetingen en andere fysische
eigenschappen.
De normale werktemperatuur moet tussen 4°en 40°C liggen. Bewaar het
toestel nooit in een ruimte met hoge vochtigheidsgraad of bij lage
temperaturen (condenswater!).
Verwijder de siliconen beschermstop uit de DC-bus en verbind de jack-
stekker van een geschikte netadapter (model 4070 voor 230 V~ of model
4071 voor 115 V~) met de DC-bus. Zorg er steeds voor met droge handen
te werken.
Indien dit toestel uitgerust is met oplaadbare batterijen, moet het
permanent op het net worden aangesloten om de batterijen steeds
optimaal te houden. Leg het toestel nooit voor langer dan een maand weg
zonder eerst de batterijen te hebben opgeladen. De batterijen kunnen
worden vervangen na het deksel in de bodem van de kast te hebben
geopend.
Inleiding
Dit toestel (uitgezonderd alle toebehoren) is gewaarborgd tegen defect
materiaal of constructiefouten voor een periode van zesendertig (36)
maanden vanaf de verzenddatum af fabriek. CONSORT zal elk toestel
gratis herstellen, binnen de waarborgperiode, voor zover het werd
gebruikt onder normale laboratorium omstandigheden volgens de
werkvoorschriften en onderhoudsprocedures uit deze gebruiksaanwijzing
en wanneer de oorzaak van het defect niet een ongeluk, een aanpassing,
verkeerd gebruik of misbruik is. Er moet eerst een toelating van
CONSORT verkregen worden vooraleer eender welk toestel franco terug
te sturen voor herstelling onder waarborg!
CONSORT kan niet aansprakelijk worden gesteld voor eventuele
schadelijke gevolgen van het gebruik of behandeling van zijn produkten.
Fabrikant
Waarborg
Mocht dit toestel worden teruggestuurd voor onderhoud, gelieve het
netsnoer af te koppelen en volgende toebehoren NIET mee te sturen,
tenzij ze verdacht zijn:
Handleiding
Kabels
Toebehoren
In geval van ernstige storing, stop onmiddellijk het gebruik van het toestel
en raadpleeg uw plaatselijke CONSORT verdeler.
Onderhoud
CONSORT nv
Parklaan 36 Tel (++32)(14)41 12 79
B2300 Turnhout Fax (++32)(14)42 91 79
Belgie

14
Meetbereiken O20 ... 60 ppm
Verzadiging 0 ... 600 %
°C 0 ... 50°C
Nauwkeurigheid 0.01 ppm/ 0.1 %/ 0.1°C of 1% van de aflezing
Ingangen BNC + BANAAN ingang voor zuurstofelektrode
Temp. Comp. automatisch met NTC (100 kΩ), ingebouwd in de O2-
elektrode
Digitaaluitgang programmeerbare RS232, 2400 b/s, voor bidirec-
tionele communicatie met een computer of printer
Analooguitgang 0 ... 2 V, ca 8 kΩ, 8 bit D/A
Aflezing 8 cijfers/karakters, 12 mm LCD aflezing, toont
metingen, °C & boodschappen
Toetsen 10 membraantoetsen
Omg. Temp. 4 ... 40°C
Rel.Vochtigheid 0 ... 90 % (niet condenserend!)
Voeding 210-250 V~ (* 105-125 V~), 50/60 Hz, max. 2 VA, &
4 NiCd batterijen, type AA
Kast waterdichte (IP65) kast
Afmetingen 252 x 121 x 50 mm
Gewicht 600 g
Specificaties
MODE = Kiest alle mogelijke funkties (behalve temperatuur) of
ontsnapt uit foutmeldingen, ijkprocedures..., door terug te
keren naar de oorspronkelijk funktie.
°C = Leest de temperatuur af.
¿/À= Toetsen voor het instellen van een waarde of voor het
kiezen van een funktie.
CAL = Begint of vervolgt een ijking of een funktie.
HOLD = Houdt de aflezing vast tijdens het meten.
RES = Wijzigt de resolutie van de aflezing.
PRINT = De getoonde waarde wordt via de RS232 uitgang afge-
drukt.
ON/OFF = Aan- en uitschakelen van het toestel.
Toetsenbord
Bij het inschakelen van het toestel worden de inwendige ijkingen even
nagegaan, terwijl alle uitleesmogelijkheden en de programmaversie in
het afleesvenster worden getoond. Er verschijnt een foutmelding
wanneer iets niet in orde is.

15
[Or.PPM] = ppm-overschrijding (b.v. defecte elektrode).
[Or.%] = %-overschrijding (b.v. defecte elektrode).
[Or.°C] =°C-overschrijding (gemeten temperatuur valt buiten het
bereik).
[no dAtA] = Gegevensgeheugen is leeg.
[not.CAL] = IJking onderbroken (de vorige ijking blijft geldig!).
[Err.°C] = Temperatuursonde niet aangesloten.
[Err.Prb] = Nulpunt te groot (defect membraan).
[Err.Stb] = Elektroden onstabiel tijdens het ijken.
[Err.CAL] = IJkfout (kijk elektrode en standaard-oplossing na).
[Err.COM] = Algemene verbindingsstoring.
[Err.Prt] = Verbinding met de printer gestoord.
[Err.bAt] = Defecte batterijlader (trek het netsnoer onmiddellijk uit
het stopcontact, verwijder de batterijen en laat uw toestel
nakijken!).
[Err.MEM] = Fatale geheugenfout (alle fabrieksinstellingen zijn
verdwenen. Laat uw toestel nakijken!).
[ILLEGAL] = Een onbevoegd persoon heeft tevergeefs getracht.het
toestel te herstellen. Vanaf nu is uw recht op waarborg
vervallen!
Foutmeldingen
INSTELLEN
De ingebouwde zoemer kan ingesteld worden om een toon te geven
telkens als er op een toets wordt gedrukt.
Zoemer
1. Druk op de MODE-toets tot [SEtuP] op het scherm verschijnt.
2. Druk vervolgens op CAL tot er met ¿of Àkan gekozen worden
tussen [bEEP ON] of [bEEP OFF]. Hierdoor wordt beslist of de
zoemer respectievelijk wel of niet moet werken bij indrukken van het
toetsenbord.
3. Druk op CAL om verder te gaan of op MODE om te eindigen.
Het is mogelijk om telkens een geluidssignaal te geven wanneer de
metingen buiten vooraf geprogrammeerde waarden vallen.
1. Druk op de MODE-toets tot [SEtuP] op het scherm verschijnt.
2. Druk vervolgens op CAL tot er met ¿of Àkan worden gekozen
tussen [ALrM OFF], [ALrM PPM] of [ALrM %]. Kies voor [ALrM OFF]
indien geen alarm gewenst is. Druk op CAL.
3. Op de aflezing verschijnt b.v. [L=4.00PPM] of [L=60.0%]. Kies het
gewenste minimum met ¿of Àen druk op CAL. Telkens wanneer de
metingen kleiner zijn dan dit minimum, zal de zoemer een
alarmsignaal laten horen.
4. Op de aflezing verschijnt nu b.v. [H=6.00PPM] of [H=80.0%]. Kies het
gewenste maximum met ¿of À. Telkens wanneer de metingen dit
maximum overschrijden, zal de zoemer een signaal laten horen.
5. Druk op CAL om verder te gaan of op MODE om te eindigen.
Alarm

16
De metingen kunnen zowel manueel als automatisch, met elk gewenst
tijdinterval, worden gedrukt.
Afdrukken
1. Druk op de MODE-toets tot [SEtuP] op het scherm verschijnt.
2. Druk vervolgens op CAL tot op de aflezing b.v. [Pt=120] verschijnt.
Kies met ¿of Àhet gewenste tijdinterval (0...9999 s) tussen de naar
de printer gestuurde gegevens. Stel in op nul indien er geen
automatisch drukken gewenst is.
3. Druk op CAL om verder te gaan of op MODE om te eindigen.
Het toestel kan een specifiek nummer worden toegekend om
identificatie door b.v. een computer mogelijk te maken.
Identificatie
1. Druk op de MODE-toets tot [SEtuP] op het scherm verschijnt.
2. Druk op CAL tot op de aflezing b.v. [Id.no=5] verschijnt. Kies met ¿
of Àhet gewenste identificatie (0...999) nummer voor uw toestel.
Stel in op nul indien dit nummer niet vermeld dient te worden bij het
drukken.
3. Druk op CAL om verder te gaan of op MODE om te eindigen.
Om ongewenste toegang tot het toestel te vrijwaren, kan een
persoonlijke kode worden geprogrammeerd.
Kode
1. Druk op de MODE-toets tot [SEtuP] op het scherm verschijnt.
2. Druk op CAL tot de aflezing [Code on], [Code OFF], of [Code CAL]
aangeeft. Beslis met ¿of Àof de toegang tot alle verdere ijkingen
moet gebeuren door een kode in te voeren ja [Code on] dan nee
[Code OFF] en druk vervolgens op CAL om verder te gaan of op
MODE om te eindigen.
3. Kies [Code CAL] om uw persoonlijke kode in te geven.
4. Op de aflezing verschijnt [E=-----] terwijl [=] knippert. Geef uw
geheime volgorde van 5 toetsen in om verder te gaan. Druk op CAL
om verder te gaan of op MODE om te eindigen.
Er kunnen tot 100 waarden in het geheugen van het toestel worden
verwerkt.
[no LOG] : Geen gegevensverwerking.
[SEt LOG] : Instellen van de gegevensverwerking.
[LSt LOG] : Toont de verwerkte gegevens in het uitleesvenster.
[Prt LOG] : Zendt de verwerkte gegevens naar een printer of computer.
[Cnt LOG] : Verwerkt een volgende reeks gegevens zonder de voor-
gaande te wissen.
METINGEN OPSLAAN

17
Gegevens
opslaan
[Set log]: Procedure om de gegevensverwerking in te stellen.
1. Kies de instellingsprocedure [SEtuP] met MODE en druk op CAL.
2. Kies met ¿of Àtot [SEt LoG] op het scherm verschijnt. Kies [no
LOG] indien er geen gegevensverwerking nodig is en druk op MODE
om te eindigen en terug te keren naar de oorspronkelijke functie.
3. Druk. vervolgens op CAL.en kies met ¿of Àtussen [LOG PPM] of
[LOG %] en druk op CAL.
4. Op de aflezing verschijnt b.v. [dt=100]. Kies het gewenste tijd- interval
(0...9999 s) tussen elke opslag van gegevens mett ¿of À. Stel deze
waarde op nul in, om manueel gegevens op te slaan. De gegevens
kunnen nu opgeslagen worden door telkens op PRINT te drukken
tijdens de meting. (De volgende punten 5-7 worden hierdoor
overgeslagen en druk op CAL).
5. Druk vervolgens op CAL. Op de aflezing verschijnt b.v. [n=40]. Kies
het aantal op te slagen metingen (1..100) met ¿of À. Druk op CAL.
6. Op de aflezing verschijnt b.v. [d=31.12.91] terwijl het jaar knippert.
Programmeer de gewenste begindatum met ¿of Àen druk op CAL.
Programmeer op gelijkaardige wijze maand en dag.
7. Op de aflezing verschijnt b.v. [t=23.59] terwijl de minuten knipperen.
Programmeer de gewenste begintijd met ¿of Àen druk op CAL.
Programmeer op gelijkaardige wijze de uren.
8. Op de aflezing verschijnt [StArt ?]. Druk op CAL om het opslaan te
beginnen volgens de voorafgaande instellingen (er verschijnt, samen
met de af te lezen waarde, een knipperende [L]) of druk op MODE om
te eindigen. Op het scherm verschijnt [StoP?], drukken op CAL zet
het toestel terug in de oorspronkelijk gekozen functies. Wanneer de
laatste waarde is opgeslagen, verschijnt op de aflezing [End LOG].
Bij manuele gegevensverwerking drukt men telkens op PRINT om
een volgende meting in het geheugen op te slaan. Ondertussen
verschijnt op de aflezing het opslagnummer b.v. [LOG 7]. Druk op
MODE om te eindigen.
[Lst loG]: Toont de verwerkte gegevens in het uitleesvenster.
1. Kies de instellingsprocedure [SEtuP] met MODE en druk op CAL.
2. Kies met ¿of Àtot [LstLoG] op het scherm verschijnt en druk.
vervolgens op CAL.
3. De eerst opgeslagen waarde wordt getoond (er verschijnt een
knipperende [n]). Druk ¿of Àom alle andere waarden te zien.
4. Houd de HOLD toets ingedrukt om de datum af te lezen. (niet
relevant bij manuele verwerking of verwerking in reeksen).
5. Houd de RES toets ingedrukt om de tijd af te lezen (of: reeks +
volgnummer, b.v. [2-017], bij een verwerking in reeksen).
6. Houd de °C toets ingedrukt om de temperatuur af te lezen.
7. Druk op PRINT om de opgeroepen gegevens naar een printer te
sturen.
8. Druk op MODE om te eindigen.
Gegevens
oproepen
[Cnt LOG]: Verwerkt een volgende reeks metingen zonder de
voorgaande te wissen.
1. Kies de instellingsprocedure [SEtuP] met MODE en druk op CAL.
2. Kies met ¿of Àtot [Cnt LOG] op het scherm verschijnt, op
voorwaarde dat er voldoende geheugencapaciteit overgebleven is,
en druk vervolgens op CAL.
Gegevens
toevoegen
Table of contents
Languages:
Other Consort Measuring Instrument manuals

Consort
Consort R735 User manual

Consort
Consort R311 User manual

Consort
Consort K611 User manual

Consort
Consort C561 User manual

Consort
Consort C3010 User manual

Consort
Consort C3010 User manual

Consort
Consort T871 User manual

Consort
Consort C6010 User manual

Consort
Consort R305 User manual

Consort
Consort D230 User manual