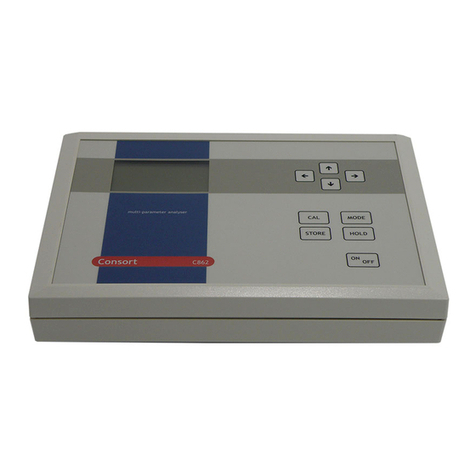
Consort R305 User manual

R305
R315
April 2005
Consort
MANUAL
HANDLEIDING
MODE D’EMPLOI
ANLEITUNG

R305 • R315 2 / 42

R305 • R315 3 / 42
DECLARATION OF CONFORMITY
We declare under our sole responsibility that the product
Multi-channel analysers
content of the type numbers
R305, R315
to which this declaration relates is in conformity
with the following standards
EN61010
LOW VOLTAGE DIRECTIVE 73/23/EEG
EN50081-1
EN50082-1
EN60555-2
EMC DIRECTIVE 89/336/EEG
Turnhout, September 8, 1998
on behalf of CONSORT nv
WARRANTY CERTIFICATE
This instrument (excluding all accessories) is warranted against defective material and workmanship
for a period of thirty-six (36) months from the date of shipment ex factory.
CONSORT will repair all defective equipment returned to it during the warranty period without
charge, provided the equipment has been used under normal laboratory conditions and in accordance
with the operating limitations and maintenance procedures in this instruction manual and when not
having been subject to accident, alteration, misuse or abuse.
A return authorisation must be obtained from CONSORT before returning any product for warranty
repair on a freight prepaid basis!

R305 • R315 4 / 42
Table of contents
Introduction ...................................... 5
Manufacturer ..................................... 5
Warranty .......................................... 5
Servicing........................................... 5
Keyboard .......................................... 5
Connections....................................... 6
Sample point ..................................... 7
Language .......................................... 7
Date and Time.................................... 7
Recorder........................................... 7
Password .......................................... 7
Channels........................................... 8
Data-logging ...................................... 8
RS485 .............................................. 8
Measurements (R305) ........................... 9
Measurements (R315) ........................... 10
Maintenance ...................................... 11
GLP................................................. 12
Calibration reminder ............................ 12
Inhoudsopgave
Inleiding ........................................... 13
Fabrikant .......................................... 13
Waarborg .......................................... 13
Onderhoud ........................................ 13
Toetsenbord....................................... 13
Verbindingen...................................... 14
Meetpunt .......................................... 15
Taal................................................. 15
Datum en Tijd .................................... 15
Schrijver........................................... 15
Wachtwoord ...................................... 15
Kanalen............................................ 16
Data-opslag ....................................... 16
RS485 .............................................. 16
Metingen (R305).................................. 17
Metingen (R315).................................. 18
Onderhoud ........................................ 19
GLP................................................. 20
IJkwaarschuwing ................................. 20
Forms
Specifications................................................................................................................. 37
Buffers, standards ........................................................................................................... 38
Technical assistance form - pH ............................................................................................ 39
Technical assistance form - Oxygen ...................................................................................... 40
Technical assistance form - Conductivity ................................................................................ 41
Your satisfaction ............................................................................................................. 42
Table de matières
Préface ............................................ 21
Fabricant .......................................... 21
Garantie ........................................... 21
Service............................................. 21
Le clavier ......................................... 21
Branchement ..................................... 22
Point de mesure.................................. 23
Langage............................................ 23
Date et Heure .................................... 23
Enregistreur....................................... 23
Mot de passe...................................... 23
Canaux............................................. 24
Collecteur......................................... 24
RS485 .............................................. 24
Mesures (R305) ................................... 25
Mesures (R315) ................................... 26
Entretien .......................................... 27
BPL ................................................. 28
Avertisement d'étalonnage ..................... 28
Inhaltsverzeichnis
Einführung ........................................ 29
Hersteller ......................................... 29
Garantie ........................................... 29
Service............................................. 29
Bedienungsfeld ................................... 29
Verbindungen ..................................... 30
Meßpunkt.......................................... 31
Sprache............................................ 31
Datum und Zeit .................................. 31
Schreiber .......................................... 31
Kennwort .......................................... 31
Kanäle ............................................. 32
Datenverarbeitung............................... 32
RS485 .............................................. 32
Messungen (R305)................................ 33
Messungen (R305)................................ 34
Wartung ........................................... 35
GLP................................................. 36
Kalibrierwarnung................................. 36

R305 • R315 5 / 42
Introduction
This instrument is manufactured with the latest technology and needs no particu-
lar maintenance. Consort certifies that this instrument was thoroughly inspected
and tested at the factory prior to shipment and found to meet all requirements
defined by contract under which it is furnished. However, dimensions and other
physical characteristics may differ.
The normal operating temperature should be between 0° and 40°C. Never use
the instrument in a room with high humidity (>95 %) or at very low temperatures
(condensation water!).
Manufacturer
Consort nv
Parklaan 36 Tel (+32)(14)41 12 79
B2300 Turnhout Fax (+32)(14)42 91 79
Belgium E-mail: [email protected]
Warranty
This instrument (excluding all accessories) is warranted against defective material
and workmanship for a period of thirty-six (36) months from the date of shipment
ex factory. Consort will repair all defective equipment returned to it during the
warranty period without charge, provided the equipment has been used under
normal laboratory conditions and in accordance with the operating limitations
and maintenance procedures in this instruction manual and when not having
been subject to accident, alteration, misuse or abuse. A return authorisation must
be obtained from Consort before returning any product for warranty repair on a
freight prepaid basis!
Consort is not liable for consequential damages arising out of the use or handling
of its products.
Servicing
In the event of this instrument being returned for servicing, the owner is request-
ed to remove the power supply lead and NOT to send the following items unless
they are suspect:
Manual
Cables
Accessories
If serious malfunctioning occurs, stop using the unit immediately and consult your
local Consort dealer.
Keyboard
MODE = Selects all modes or escapes from error traps, calibration procedures,
etc..by returning to the original mode.
çèéê = Button for entering a value or for selecting a function.
CAL = Starts or proceeds a calibration or a function.
STOP = Stops the control without interrupting the measurements.
HELP = Built-in manual.

R305 • R315 6 / 42
Connections
pH/mV/O2 electrode
Both channels are provided with floating inputs. The maximum common mode
voltage (potential between the (-) terminals of CHAN.1 and CHAN.2) should not
exceed ±1 V. Connect the internal wire of the electrode cable to terminal (+) and
the screening of the cable to terminal (-) of (CHAN1 or CHAN2). Ground loops can
be avoided by immersing an earthing rod in the process liquid close to the elec-
trodes. Connect it only to terminal (M)!
Temperature probe
A separate automatic temperature compensation is provided for each channel but
a common Pt1000 (or Pt100) thermocompensator for both channels can also be
used. Connect the internal wire of the electrode cable to terminal (+) and the
screening of the cable to terminal (-) of (C1 or C2).
Recorder
Two recorders, one for each channel, can be connected to the (+) and (-) terminals
of (OUT1) and (OUT2). Max. impedance = 300 Ω.
Relays
There are three (R315) or four (R305) relays (REL1...REL4) with voltage-free con-
tacts. Connect their two contacts in series with the load. The ratings of the con-
nected load should lie between 12...250 V~, maximum 0.5 A.
Mains
Connect phase to terminal (P), neutral to terminal (N), and earth to earthing
terminal.
• Always short circuit the unused pH/mV/O2
input terminals!
• Special care should be taken when con-
necting a typical pH/mV/O2 coaxial cable.
Make sure that all parts are dry and clean
and do not forget to remove the black
antistatic foil between the inner lead and
the outer screening!
RS485
Only use twisted pair UTP cable to connect up to 31 controllers to a computer!
R305(1)
G B A G
R305(2)
G B A G
R315(3)
G B A G A2002 adaptor RS485/RS232
Verify the dipswitches:
SW1=on
SW2-6=off
A
B
GND

R305 • R315 7 / 42
Language
1. Press SET.
2. Select [LANGUAGE] and press CAL.
3. Select the desired language and press CAL.
Password
1. Press SET.
2. Select [PASSWORD] and press CAL.
3. A private code can be programmed to avoid undesired access to the instru-
ment. Enter your secret sequence of 5 keys and press CAL.
Date and Time
1. Press SET.
2. Select [DATE/TIME] and press CAL.
3. Adjust the date (respectively year, month and day) by pressing CAL each
time.
4. Adjust the time (respectively hour, minutes and seconds) by pressing CAL each
time.
Recorder
1. Press SET.
2. Select [4-20 mA] and press CAL.
3. Select the desired range and press CAL.
4. Select the desired minimum level corresponding to a 4 mA recorder output and
press CAL.
5. Select the desired maximum level corresponding to a 20 mA recorder output
and press CAL.
Adjustment:
1. Select [ADJUST] and press CAL.
2. Connect a mA-meter to the 4-20 mA outputs.
3. Select OUT1 / 4 mA, press CAL and read the mA-meter.
4. Adjust to the correct current and press CAL.
5. Repeat point 3-4 for all other currents.
Sample point
Before the exact location of the electrodes is finalised, it is worthwhile to carry
out a measuring profile of the process stream to ensure that the required homo-
geneity is being achieved. As a general rule the electrodes should protrude into
the process stream by one-third of the pipe width and be positioned so as to avoid
gas pockets or sediments.
Generally the measuring electrodes are inserted into the flow with the sample
pick-up facing downstream in order to reduce the risk of blockage by suspended
material.
All sensors are usually positioned vertically at a suitable point downstream of the
dosing point, where the measurements are stable and reliable. The response of
the dosing system will be affected by the time required to disperse the reagents
and their arrival at the measuring point.

R305 • R315 8 / 42
Channels
1. Press SET.
2. Select [CHANNELS] and press CAL.
3. Select [INPUT] and press CAL.
4. Select the desired range and press CAL.
5. Select [ATC] and press CAL.
6. Select the desired temperature compensation input and press CAL.
7. Select [CONTROL] and press CAL.
8. Select the control type (on/off or proportional).
9. Pre-set the desired low level (Lo).
10. Select the corresponding relay (REL).
11. Pre-set the desired high level (Hi).
12. Select the corresponding relay (REL).
13. Pre-set the desired hysteresis (Hy) between the on and off state of the
relays.
14. Pre-set the desired delay (dt) after which the relays should be activated,
when one of the pre-set levels is exceeded.
Proportional control only:
15. Pre-set the desired the proportional control area (dP), in which proportional
regulation should start.
16. Pre-set the desired pulse-time (Pt) of the relays. The relays will pulse at a rate
proportional to the regulation difference.
Optional alarm procedure:
17. Select [ALARM AFTER] and press CAL.
18. The display shows the alarm time after which the process control should be
interrupted in case of a failure. Pre-set the desired alarm-time and press
CAL.
19. Select [REL] and press CAL.
20. Select the desired relay to be closed in case of an alarm and press CAL.
Data-logging
1. Press SET.
2. Select [DATALOGGER] and press CAL.
3. Select [INTERVAL] and press CAL.
4. Select the desired time interval between the data-logging and press CAL.
View the stored values:
1. Select [TABLE], [GRAPH] or [SEND] and press CAL.
2. Select the desired form to display the stored data or send them to a computer
and press CAL to continue. The scales of a graph can be modified by pressing
CAL. Follow the instructions on the screen.
Erase the stored values:
1. Select [ERASE] and press CAL. Follow the instructions on the screen.
RS485
1. Press SET.
2. Select [RS485] and press CAL.
3. Select [BAUDRATE] and press CAL.
4. Select the desired baudrate and press CAL.
5. Select [IDENTIF.NUMBER] and press CAL.
6. Select the desired identification number (0...999) and press CAL. The instru-
ment can be identified by e.g. a computer when a specific number is allocated
to it.

R305 • R315 9 / 42
(R305) Measurements
1. Should you want to recalibrate, select the desired measurement and press
CAL. Follow the instructions on the screen. The displayed possibilities depend
on the channel set-up and selected measurement.
pH calibration:
2. Select the proper buffer from one of the values in memory or enter manually
a special value and press CAL. The unused buffers should be switched off.
3. Remove the electrodes from their fittings, rinse them with distilled water and
immerse them in the first buffer solution. Select [CALIBRATE], press CAL and
follow the instructions on the screen until the calibration is finished.
4. After rinsing the electrodes with distilled water, insert them back in their fit-
tings and start the control.
mV calibration:
2. Remove the electrodes from their fittings, rinse them with distilled water,
immerse them in a standard solution of known potential, adjust to the proper
value and press CAL.
3. After rinsing the electrodes with distilled water, insert them back in their fit-
tings and start the control.
Oxygen calibration:
2. The display shows the salinity correction. Select the proper values and press
CAL. Leave salinity correction to zero unless you are going to measure in
heavily salted solutions such as e.g. sea-water (35 g/l). Select [CALIBRATE],
press CAL and follow the instructions on the screen until the calibration is
finished.
3. Remove the electrode from its fitting and rinse it with distilled water. The
electrode exposed to the air reaches an equilibrium corresponding to the par-
tial pressure of oxygen and thus to saturation in water at the given tempera-
ture. The instrument shows the measured saturation, current, temperature,
and will calibrate automatically when readings are stable.
4. After rinsing the electrode with distilled water, insert it back in its fitting and
start the control. Stirring the solution during the measurements promotes the
homogeneity and is obligatory! The advection rate must be at least 10 cm/s.
Temperature calibration:
1. Without Pt1000, adjust the manual temperature compensation and proceed by
pressing SET. Should you want to recalibrate, press CAL.
2. Immerse the Pt1000 in a standard solution of known temperature. Calibrate to
the proper value and press CAL.
Adjustment:
2. Measure the real value of the processed liquid with an other electrode and
meter. Adjust to the real value and press CAL. Press STOP here if you wish to
return to the original readings.
• A blinking decimal point warns you for unstable measurements. Wait to read
the display!
• Stirring the solution during the measurements promotes the homogeneity and
is therefore always recommended.
• Press é to maximum measurement.
• Press ê to minimum measurement.
• Press STOP to stop the control without interrupting the measurements.

R305 • R315 10 / 42
(R315) Measurements
1. Should you want to recalibrate, select the desired measurement and press
CAL. Follow the instructions on the screen. The displayed possibilities depend
on the channel set-up and selected measurement.
Capacitive compensation:
2. Capacitive compensation increases accuracy in the very low conductivity
ranges (<10 µS/cm). Select whether this compensation should be applied or
not. Verify if the attached electrode is completely dry. Select [COMP.ON] or
[COMP.OFF] and press CAL. Follow the instructions on the screen.
Conductivity calibration:
2. Select the proper standard from one of the values in memory or enter manu-
ally a special value and press CAL. Also select the temperature to which all
future measurements will be referred to.
3. Remove the electrode from its fitting.
4. After rinsing the electrode several times with the standard solution, immerse
it in that standard. The solution temperature is not so critical but should lie
between 0°C and 30°C. Select [CALIBRATE], press CAL and follow the instruc-
tions on the screen until the calibration is finished.
5. After rinsing the electrode with distilled water, insert it back in its fitting and
start the control.
Temperature calibration:
2. Without Pt1000, adjust the manual temperature compensation and proceed by
pressing SET. Should you want to recalibrate, press CAL.
3. Immerse the Pt1000 in a standard solution of known temperature. Calibrate to
the proper value and press CAL.
Adjustment:
2. Measure the real value of the processed liquid with an other electrode and
meter. Adjust to the real value and press CAL. Press STOP here if you wish to
return to the original readings.
• A blinking decimal point warns you for unstable measurements. Wait to read
the display!
• Stirring the solution during the measurements promotes the homogeneity and
is therefore always recommended.
• Press é to maximum measurement.
• Press ê to minimum measurement.
• Press STOP to stop the control without interrupting the measurements.

R305 • R315 11 / 42
Maintenance of pH electrodes
A pH electrode is active and stable only after wetting! For this purpose it must
be immersed for at least ten hours in a 3...4 M KCl solution. During short inter-
ruptions (e.g. storage) the electrode should be immersed in a 3...4 M KCl solution.
In doing this it is always kept ready for use. When the interruption is longer than
a month, refill the closing cap with 3...4 M KCl and plug it on the electrode tip in
order to protect the glass bulb. Before use, ensure that the reference part of the
electrode is topped up with a 3...4 M KCl solution.
Avoid a low pressure inside the electrode! Therefore always remove the clo-
sure from the refilling aperture during the measurements as well as during the
calibration. This allows the saltbridge solution to flow through the ceramic liquid
junction and prevents contamination of the electrolyte. For the same reason, the
inside level should always be higher than the outside level of the measuring solu-
tion. Close the refilling aperture again when storing the electrode.
A polluted electrode may be cleaned with a soft detergent or 0.1 M HCl. Greasy
substances may be removed with acetone or alcohol (never do this with plastic
electrodes!).
If the electrode is polluted by proteinaceous materials (such as blood), it should
stand in a cleaning solution overnight and then be cleaned with distilled water
before use. The pH electrode wears away by being used. If the electrode tends to
respond slower and calibration becomes difficult, even after cleaning, it should
be replaced by a new one.
Maintenance of oxygen electrodes
A dissolved oxygen electrode is active and stable only when polarised! The
electrode body has almost unlimited life and requires no maintenance. After
prolonged use of the electrode, it may become deactivated. An indication is that
the electrode no longer responds correctly to calibration. In this case:
1. Carefully screw off the measuring head.
2. Cautiously remove the precipitated deposits with the aid of filter paper. Do
not use grinding paper or a glass fibre!
3. Rinse several times with distilled water and shake carefully off the water
drops.
4. Take the measuring head, fill it with new electrolyte solution and very slowly
screw it onto the electrode while holding it vertically.
5. Let the electrode rest for a few hours! The electrode is now ready for use
again.
• Replace the membrane only when damaged, not when calibration is no longer
possible!
Maintenance of metal electrodes
Metal electrodes (Pt, Ag, Au): Metal electrodes are always ready for use. During
short interruptions they are immersed in distilled water. They should be cleaned
regularly:
• Silver electrodes are immersed in a concentrated ammonia solution during one
hour.
• Platinum or gold electrodes are immersed in concentrated nitric acid during
one hour.
Maintenance of conductivity electrodes
A conductivity cell is active and stable only after wetting! For this purpose it
must be immersed for at least one hour in distilled water. Rinse the cell always
after use and store it in distilled water (add some detergent to keep the spongy
platinum surface in perfect condition).
A polluted cell may be cleaned with a soft detergent or diluted nitric acid. Greasy
substances may be removed with acetone or alcohol (never do this with plastic
electrodes!).

R305 • R315 12 / 42
GLP
1. Press SET.
2. Select [GLP] and press CAL.
3. Select [SHOW REPORT] and press CAL. Browse with çèéê to show a com-
plete calibration report.
4. Select [SEND] and press CAL to send the report to a computer.
pH/mV/O2/°C-controller R305
----------------------------
Date : 15/09/1998
Time : 11:32:04
Version : 1.0
SETTINGS
--------
Identification No : 003
Password : OFF
GLP reminder (h) : ---
Channel1 : pH
ATC : °C1
Manual temp. (°C) : 23.4
Channel2 : mV
pH1
---
CALIBRATION
-----------
Date : 15/09/1998
Time : 11:20:06
Buffer 4.01/6.87
Slope (%) : 98.4
Zero point (pH) : 6.87
AVERAGE VALUES
--------------
Response time (s) : 11
Temperature (°C) : 22.6
STATISTICS
----------
Slope (%) : +0.4
Zero point (pH) : +0.02
Response time (s) : -1
mV2
---
Date : 15/09/1998
Time : 11:20:06
Calibr. at (mV) : 235
Calibration reminder
1. Select [INTERVAL] and press CAL.
2. Select the desired time interval between each automatic warning for a new
calibration of the electrodes and press CAL.

R305 • R315 13 / 42
Inleiding
Dit toestel is gebouwd volgens de modernste technologie en hoeft niet speciaal te
worden onderhouden. Consort bevestigt dat dit toestel grondig werd nagekeken
en getest alvorens te worden verstuurd, en beantwoordt aan alle vereisten van
het aankoopkontrakt. Er kunnen echter wel afwijkingen optreden in de afmetin-
gen en andere fysische eigenschappen. De normale werktemperatuur moet tussen
0° en 40°C liggen. Gebruik het toestel nooit in een ruimte met hoge vochtigheids-
graad (>95 %) of bij zeer lage temperaturen (condenswater!).
Fabrikant
Consort nv
Parklaan 36 Tel (+32)(14)41 12 79
B2300 Turnhout Fax (+32)(14)42 91 79
België E-mail: [email protected]
Waarborg
Dit toestel (uitgezonderd alle toebehoren) is gewaarborgd tegen defect materi-
aal of constructiefouten voor een periode van zesendertig (36) maanden vanaf
de verzenddatum af fabriek. Consort zal elk toestel gratis herstellen, binnen
de waarborgperiode, voor zover het werd gebruikt onder normale laboratorium
omstandigheden volgens de werkvoorschriften en onderhoudsprocedures uit deze
gebruiksaanwijzing en wanneer de oorzaak van het defect niet een ongeluk, een
aanpassing, verkeerd gebruik of misbruik is. Er moet eerst een toelating van
Consort verkregen worden vooraleer eender welk toestel franco terug te sturen
voor herstelling onder waarborg!
Consort kan niet aansprakelijk worden gesteld voor eventuele schadelijke gevol-
gen van het gebruik of behandeling van zijn producten.
Onderhoud
Mocht dit toestel worden teruggestuurd voor onderhoud, gelieve het netsnoer
af te koppelen en volgende toebehoren NIET mee te sturen, tenzij ze verdacht
zijn:
Handleiding
Kabels
Toebehoren
In geval van ernstige storing, stop onmiddellijk het gebruik van het toestel en
raadpleeg uw plaatselijke Consort verdeler.
Toetsenbord
MODE = Kiest alle mogelijke functies of ontsnapt uit foutmeldingen,
ijkprocedures, enz.. door terug te keren naar de oorspronkelijk
gekozen functie.
çèéê = Toetsen voor het instellen van een waarde of voor het kiezen van een
functie.
CAL = Begint of vervolgt een ijking of een functie.
STOP = Stopt de regeling zonder de metingen te onderbreken.
HELP = Ingebouwde handleiding.

R305 • R315 14 / 42
Verbindingen
pH/mV/O2 elektrode
Beide kanalen zijn voorzien van vlottende ingangen. Het maximum potentiaal
(common-mode voltage) tussen de (-) klemmen van CHAN.1 en CHAN.2 mag de ±1
V niet overschrijden. Verbind de binnen-geleider van de elektrodenkabel aan klem
(+) en de kabelafscherming aan klem (-) van (CHAN.1 of CHAN.2). Bij sommige
toepassingen moet een aardingsstaaf, nabij de elektroden, in de vloeistofstroom
ondergedompeld worden. Verbind deze echter uitsluitend met de elektronische
massa (klem M)!
Temperatuurvoeler
Er is een afzonderlijke automatische temperatuurcompensatie voor elk kanaal,
maar er kan ook een gemeenschappelijke temperatuurcompensator Pt1000 (of
Pt100) gebruikt worden voor de twee kanalen. Verbind de binnen-geleider van
de elektrodenkabel aan klem (+) en de kabelafscherming aan klem (-) van (C1 or
C2).
Schrijver
Twee schrijvers, één voor elk kanaal, kunnen aangesloten worden aan de (+) en (-)
klemmen (OUT1) en (OUT2). Max. impedantie = 300 Ω.
Relais
Er zijn drie (R315) of vier (R315) relais (REL1...REL4) met spanningsvrije contac-
ten. Verbind de twee contacten in serie met de belasting. De aangesloten belas-
ting moet tussen 12...250 V~, max. 0,5 A, liggen.
Netspanning
Verbind fase aan klem (P), neutraal aan klem (N) en aarde aan aardingsklem.
• De niet gebruikte pH/mV/O2-ingangsklem-
men altijd kortsluiten!
• Wees voorzichtig bij het aansluiten van
de speciale pH/mV/O2-coaxiaal kabel. Zie
erop toe dat alle delen droog en zuiver
zijn en vergeet niet de zwarte antistati-
sche folie tussen de inwendige geleider en
de uitwendige afscherming te verwijde-
ren!
RS485
Gebruik uitsluitend "twisted pair" UTP kabel om tot 31 regelaars met een compu-
ter te verbinden!
R305(1)
G B A G
R305(2)
G B A G
R315(3)
G B A G A2002 adapter RS485/RS232
Controleer de dipswitches:
SW1=on
SW2-6=off
A
B
GND

R305 • R315 15 / 42
Taal
1. Druk op SET.
2. Kies [TAAL] en druk op CAL.
3. Kies de gewenste taal en druk op CAL.
Meetpunt
Vooraleer een definitieve keuze wordt gemaakt i.v.m. de plaats van de elektro-
den, is het nuttig een meetprofiel te maken van de vloeistofstroom om zeker te
zijn dat de vereiste homogeniteit bereikt is. De regel wil dat de elektroden één
derde van de buiswijdte diep in de vloeistofstroom steken en zo geplaatst worden
dat zij gasbellen of bezinksel rond het meetpunt vermijden.
Gewoonlijk worden de meetelektroden vertikaal in de stroming geplaatst met de
meetkop stroomafwaarts gericht om het risico voor verstopping door zwevend
materiaal in te dijken.
Alle sensoren worden meestal geplaatst op een geschikte plaats stroomafwaarts
van het doseerpunt, waar de metingen stabiel en betrouwbaar zijn. De respons
van het doseersysteem wordt beïnvloed door de tijd die nodig is om de reagentia
te verspreiden en hun aankomst bij het meetpunt.
Wachtwoord
1. Druk op SET.
2. Kies [WACHTWOORD] en druk op CAL.
3. Om ongewenste toegang tot het toestel te vrijwaren, kan men een wacht-
woord programmeren. Geef uw geheime volgorde van 5 toetsen in en druk op
CAL.
Datum en Tijd
1. Druk op SET.
2. Kies [DATUM/TIJD] en druk op CAL.
3. Programmeer de datum om respectievelijk jaar, maand en dag te kiezen. Druk
telkens op CAL.
4. Programmeer de tijd om respectievelijk uur, minuten en seconden te kiezen.
Druk telkens op CAL.
Schrijver
1. Druk op SET.
2. Kies [4-20 mA] en druk op CAL.
3. Kies het gewenste meetbereik en druk op CAL.
4. Kies de gewenste minimum waarde, die overeenkomt met een analoge uitgang
van 4 mA, en druk op CAL.
5. Kies de gewenste maximum waarde, die overeenkomt met een analoge uit-
gang van 20 mA, en druk op CAL.
Aanpassen:
1. Kies [AANPASSEN] en druk op CAL.
2. Verbind een mA-meter met de 4-20 mA uitgangen.
3. Kies OUT1 / 4 mA, druk op CAL en lees de mA-meter af.
4. Stel de juiste stroom in en druk op CAL.
5. Herhaal punt 3-4 voor het aanpassen van de andere stromen.

R305 • R315 16 / 42
Kanalen
1. Druk op SET.
2. Kies [KANALEN] en druk op CAL.
3. Kies [INGANG] en druk op CAL.
4. Kies het gewenste meetbereik en druk op CAL.
5. Kies [ATC] en druk op CAL.
6. Kies de gewenste temperatuurcompensatie-ingang en druk op CAL.
7. Kies [REGELING] en druk op CAL.
8. Kies het regeltype (aan/uit of proportioneel).
9. Stel het gewenste laag niveau (Lo) in.
10. Kies het corresponderende relais (REL).
11. Stel het gewenste hoog niveau (Hi) in.
12. Kies het corresponderende relais (REL).
13. Stel de hysteresis (Hy) tussen de aan- en uit-stand van de relais in.
14. Stel de tijd (dt) in, waarna de relais in werking moeten treden wanneer één
van de ingestelde niveaus wordt overschreden.
Enkel voor proportionele regeling:
15. Stel het gewenst proportioneel regelgebied (dP) in, vanwaar de proportionele
regeling moet beginnen.
16. Set de gewenste pulstijd (Pt) van de relais in. De relais pulseren met een snel-
heid die evenredig is met het regelverschil.
Optional alarm procedure:
17. Kies [ALARM NA] en druk op CAL.
18. De aflezing toont de alarmtijd waarna de regeling moet onderbroken worden
in geval van een fout. Stel de gewenste tijd in en druk op CAL.
19. Kies [REL] en druk op CAL.
20. Kies het gewenste relais dat moet sluiten in geval van alarm en druk op CAL.
Data-opslag
1. Druk op SET.
2. Kies [DATA-OPSLAG] en druk op CAL.
3. Kies [INTERVAL] en druk op CAL.
4. Kies het gewenste tijdinterval tussen elke data-opslag en druk op CAL.
De verwerkte gegevens tonen:
1. Kies [TABEL], [GRAFIEK] of [ZENDEN] en druk op CAL.
2. Kies de gewenste vorm om de opgeslagen data te tonen of naar een compu-
ter te sturen en druk op CAL om verder te gaan. De schalen van de grafiek
kunnen worden aangepast door op CAL te drukken. Volg de instructies op het
scherm.
De verwerkte gegevens wissen:
1. Kies [WISSEN] en druk op CAL. Volg de instructies op het scherm.
RS485
1. Druk op SET.
2. Kies [RS485] en druk op CAL.
3. Kies [BAUDRATE] en druk op CAL.
4. Kies de gewenste baudwaarde en druk op CAL.
5. Kies [IDENTIF.NUMMER] en druk op CAL.
6. Kies het gewenste identificatienummer (0...999) en druk op CAL. Het instru-
ment kan worden geïdentificeerd door een computer wanneer er een specifiek
nummer aan toegewezen is.

R305 • R315 17 / 42
(R305) Metingen
1. Druk op CAL om opnieuw te ijken. Volg de instructies op het scherm. De
getoonde mogelijkheden hangen af van de kanaalinstellingen en het meetbe-
reik.
pH-ijking:
2. Kies de gewenste buffers uit één van de opgeslagen waarden of geef manueel
een eigen waarde in en druk op CAL. De niet gebruikte buffers uitschakelen.
3. Schroef de elektroden los, reinig ze met gedistilleerd water en dompel ze in
de eerste bufferoplossing. Kies [IJKEN], druk vervolgens op CAL en volg de
instructies op het scherm.
4. Spoel de elektroden met gedistilleerd water en schroef hen weer vast om de
regeling te beginnen.
mV-ijking:
2. Schroef de elektroden los, reinig ze met gedistilleerd water, dompel ze in een
ijkoplossing van gekend potentiaal, stel de juiste waarde in en druk op CAL.
3. Spoel de elektroden met gedistilleerd water en schroef hen weer vast om de
regeling te beginnen.
Zuurstof-ijking:
2. De aflezing toont de luchtdrukcorrectie. Kies de gewenste waarde en druk op
CAL. Stel de saliniteit in op nul tenzij u gaat meten in oplossingen met een
hoog zoutgehalte zoals b.v. zeewater (35 g/l). Kies [IJKEN], druk op CAL en
volg de instructies op het scherm.
3. Schroef de elektroden los en reinig ze met gedistilleerd water. De elektrode
blootgesteld aan de lucht, bereikt een evenwichtstoestand die overeen komt
met de partiële zuurstofdruk zoals in een waterige oplossing verzadigd met
lucht. Het toestel toont de mg/l, stroom, temperatuur van de elektrode, en
ijkt automatisch wanneer de metingen stabiel zijn.
4. Spoel de elektroden met gedistilleerd water en schroef hen weer vast om
de regeling te beginnen. Tijdens het meten is het verplicht de oplossing te
roeren om de homogeniteit te bevorderen! De stroomsnelheid moet hierbij
minstens 10 cm/s bedragen.
Temperatuur-ijking:
1. Zonder Pt1000, de manuele temperatuur-compensatie instellen en verder
gaan door op SET te drukken. Druk op CAL om opnieuw te ijken.
2. Dompel de Pt1000 in een oplossing van gekende temperatuur, stel de juiste
waarde in en druk terug op CAL.
Aanpassing:
2. Meet de echte waarde van de vloeistofstroom met een andere elektrode en
meter. Stel de werkelijke waarde in en druk op CAL. Druk echter op STOP om
terug te keren naar de oorspronkelijke metingen.
• Een knipperende komma waarschuwt voor onstabiele metingen. Wacht nog
even met aflezen!
• Tijdens het meten is het aangeraden de oplossing te roeren om de homogeni-
teit te bevorderen.
• Druk op é om het gemeten maximum te tonen.
• Druk op ê om het gemeten mimimum te tonen.
• Druk op STOP om de regeling te stoppen zonder de metingen te onderbre-
ken.

R305 • R315 18 / 42
(R315) Metingen
1. Druk op CAL om opnieuw te ijken. Volg de instructies op het scherm. De
getoonde mogelijkheden hangen af van de kanaalinstellingen en het meetbe-
reik.
Capacitieve compensatie:
2. De capacitieve compensatie verhoogt de nauwkeurigheid in de zeer lage
meetbereiken (<10 µS/cm). Kies of deze compensatie al dan niet moet wor-
den toegepast. Controleer of de aangesloten elektrode wel volledig droog is.
Kies [COMP.AAN] of [COMP.UIT] en druk op CAL. Volg de instructies op het
scherm.
Geleidbaarheidsijking:
2. Kies de gewenste standaard uit één van de opgeslagen waarden of geef
manueel een eigen waarde in en druk op CAL. Kies ook de temperatuur waar-
naar alle volgende geleidbaarheidsmetingen zullen verwijzen.
3. Schroef de elektrode los.
4. Spoel de elektrode enkele malen met de standaardoplossing en dompel ze in
deze standaard. De temperatuur van de oplossing is niet zo belangrijk maar
moet wel tussen 0°C en 30°C liggen. Kies [IJKEN], druk op CAL en volg de
instructies op het scherm.
5. Spoel de elektrode met gedistilleerd water en schroef ze weer vast om de
regeling te beginnen.
Temperatuur-ijking:
2. Zonder Pt1000, de manuele temperatuur-compensatie instellen en verder
gaan door op SET te drukken. Druk op CAL om opnieuw te ijken.
3. Dompel de Pt1000 in een oplossing van gekende temperatuur, stel de juiste
waarde in en druk terug op CAL.
Aanpassing:
2. Meet de echte waarde van de vloeistofstroom met een andere elektrode en
meter. Stel de werkelijke waarde in en druk op CAL. Druk echter op STOP om
terug te keren naar de oorspronkelijke metingen.
• Een knipperende komma waarschuwt voor onstabiele metingen. Wacht nog
even met aflezen!
• Tijdens het meten is het aangeraden de oplossing te roeren om de homogeni-
teit te bevorderen.
• Druk op é om het gemeten maximum te tonen.
• Druk op ê om het gemeten mimimum te tonen.
• Druk op STOP om de regeling te stoppen zonder de metingen te onderbre-
ken.

R305 • R315 19 / 42
Onderhoud van pH elektroden
Een pH-elektrode wordt slechts werkzaam en stabiel na bevochtiging! Hiertoe
moet ze minstens een tiental uren worden gedompeld in een 3...4 M KCl oplossing.
Tijdens korte onderbrekingen (b.v. bewaren) wordt de elektrode best gedompeld
in een 3...4 M KCl oplossing. Hierdoor blijft ze gereed voor gebruik. Voor onder-
brekingen langer dan een maand, vul het afdekkapje met 3...4 M KCl en schuif het
over de elektrode ter bescherming van het glazen bolletje. Bij ingebruikneming
moet men nagaan of de elektrode wel volledig is gevuld met 3...4 M KCl.
Vermijd een mogelijke onderdruk in een navulbare elektrode! Verwijder hier-
toe steeds de rubber afdekking van de vulopening tijdens de metingen evenals
tijdens de ijkingen. Hierdoor kan de brugvloeistof langzaam door het diafragma
stromen en wordt verontreiniging van het elektrolyt vermeden. Om dezelfde
reden moet het vloeistofpeil in de elektrode steeds hoger zijn dan dat van de
meetoplossing. Plaats de rubberafdekking terug over de vulopening bij het opber-
gen van de elektrode.
Een bevuilde elektrode kan worden gereinigd met een licht detergent of 0,1 M
HCl. Vettige substanties kunnen best met aceton of alcohol worden verwijderd
(doe dit echter nooit met kunststof elektroden!).
Indien de elektrode in proteïne houdende stoffen (zoals bloed) wordt gebruikt,
moet ze overnachten in een reinigingsoplossing en vervolgens worden gereinigd
met gedistilleerd water voor gebruik. Door het gebruik verslijt de pH-elektrode.
Indien ze trager reageert en de ijking is, ook na reiniging, niet meer juist in te
stellen, dan moet ze vervangen worden door een nieuwe.
Onderhoud van zuurstofelektroden
Slechts na lang gebruik van de zuurstofelektrode kan ze inactief worden. Men
merkt dit aan het niet meer te ijken zijn van de elektrode. In dit geval:
1. Schroef de meetkop voorzichtig los.
2. Verwijder voorzichtig de neerslag met filtreerpapier. Gebruik nooit schuurpa-
pier of glasvezel!
3. Grondig met gedistilleerd water afspoelen en de overtollige waterdruppels
afschudden.
4. Neem de meetkop, vul deze met nieuw elektrolyt en schroef hem zeer lang-
zaam op de elektrode in vertikale positie. Zorg er voor dat er zich geen
luchtbellen in de meetkop bevinden!
5. Laat de elektrode enkele uren rusten! Nu is de elektrode opnieuw gereed
voor gebruik.
• Neem enkel een nieuw membraan indien beschadigd, niet indien de ijking
onmogelijk blijkt!
Onderhoud van metaalelektroden
Metaalelektroden (Pt, Ag, Au): Metaalelektroden zijn steeds gebruiksklaar.
Tijdens korte onderbrekingen worden ze gedompeld in gedistilleerd water.
Metaalelektroden moeten regelmatig worden gereinigd:
• Zilver elektroden plaatst men gedurende een uur in een geconcentreerde
ammoniakoplossing.
• Platina of goudelektroden worden gedurende een uur in geconcentreerd sal-
peterzuur geplaatst.
Onderhoud van geleidbaarheidscellen
Een geleidbaarheidscel wordt slechts werkzaam en stabiel na bevochtiging!
Hiertoe moet ze minstens één uur worden gedompeld in gedistilleerd water.
Spoel de cel steeds schoon na gebruik en bewaar ze dan in gedistilleerd water
(voeg een kleine hoeveelheid detergent toe om het sponsachtige platina-opper-
vlak in optimale conditie te houden).
Een bevuilde cel kan worden gereinigd met een licht detergent of verdund salpe-
terzuur. Vettige substanties kunnen best met aceton of alcohol worden verwijderd
(doe dit echter nooit met kunststof elektroden!).

R305 • R315 20 / 42
GLP
1. Druk op SET.
2. Kies [GLP] en druk op CAL.
3. Kies [VERSLAG TONEN] en druk op CAL. Blader met çèéê om een volledig
calibratierapport te tonen.
4. Kies [ZENDEN] en druk op CAL om het rapport naar een computer te zenden.
pH/mV/O2/°C-regelaar R305
--------------------------
Datum : 15/09/1998
Tiid : 11:32:04
Versie : 1.0
INSTELLINGEN
------------
Identificatie Nr : 003
Wachtwoord : UIT
GLP-herinnering (h) : ---
Kanaal1 : pH
ATC : °C1
Manuele temp. (°C) : 23.4
Kanaal2 : mV
pH1
---
IJKING
------
Datum : 15/09/1998
Tijd : 11:20:06
Buffer 4.01/6.87
Steilheid (%) : 98.4
Nulpunt (pH) : 6.87
GEMIDDELDE WAARDEN
------------------
Responstijd (s) : 11
Temperatuur (°C) : 22.6
STATISTIEK
----------
Steilheid (%) : +0.4
Nulpunt (pH) : +0.02
Responstijd (s) : -1
mV2
---
Datum : 15/09/1998
Tijd : 11:20:06
Geijkt bij (mV) : 235
IJkwaarschuwing
1. Kies [INTERVAL] en druk op CAL.
2. Kies het gewenste tijd-interval tussen elke automatische verwittiging om de
elektroden opnieuw te ijken en druk op CAL.
This manual suits for next models
1
Table of contents
Languages:
Other Consort Measuring Instrument manuals

Consort
Consort D230 User manual

Consort
Consort C561 User manual

Consort
Consort K912 User manual

Consort
Consort C3010 User manual

Consort
Consort R735 User manual

Consort
Consort K611 User manual

Consort
Consort T871 User manual

Consort
Consort R311 User manual

Consort
Consort LabArt C51 User manual

Consort
Consort Z621 User manual