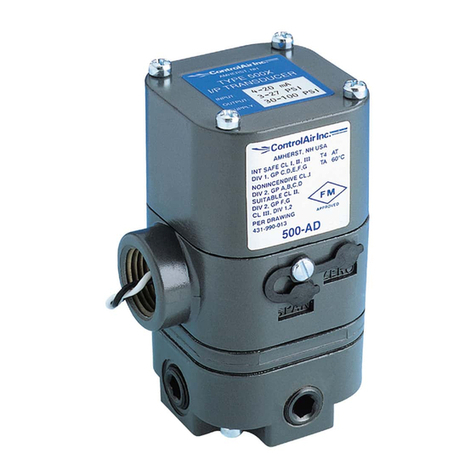
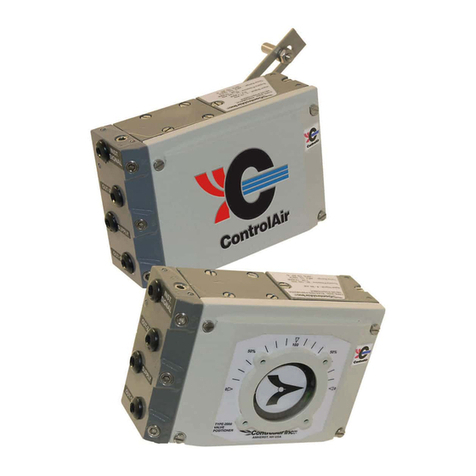
controlair 595XP Manual

441-622-099 Type 595XP
8 Columbia Drive, Amherst, New Hampshire 03031 USA
Phone: (603) 886-9400 Fax: (603) 889-1844
sales@controlair.com www.controlair.com
Contents
Section Description Page
1.0 Installation & Approvals 3
2.0 Operation 7
3.0 Maintenance 7
4.0 Troubleshooting 8
5.0 Warranty 8
5.16
[131.0]
1.27
[32.1]
1/2 NPT CONDUIT PORT
M20 X 1.5-6H "K" OPTION
1/2 NPT "K2" OPTION
1/8 NPT GAUGE PORT
1/4 NPT SUPPLY PORT
.40
[10.0]
.59
[15.0]
2.25
[57.1]
.65
[16.4]
Ø2.90
[73.7]
3.19
[81.0]
2.89
[73.3]
4.23
[107.4]
1.34
[33.9]
3.19
[81.0]
1.06
[27.0]
0.34
[8.5]
1.00
[25.4]
1/16[1.6] SUPPLY PORT
1/16[1.6] OUTPUT PORT
.29 THRU
MOUNTING
1/2 NPT CONDUIT PORT
M20 X 1.5-6H "K" OPTION
1/2 NPT "K2" OPTION
0.43
[11.0]
1.42
[36.0]
0.94
[23.9]
0.43
[11.0]
0.41
[10.5]
1/4 NPT OUTPUT PORT 1/4 NPT SUPPLY PORT
1/2 NPT CONDUIT PORT
M20 X 1.5-6H "K" OPTION
1/2 NPT "K2" OPTION
3.19
[81.0]
2.90
[73.7]
1.42
[36.1]
1.89
[47.9]
4.80
[121.8]
1.27
[32.1]
.33
[8.4]
.48
[12.1]
.30
[7.7]
(Drawing downloads available at http://www.controlair.com)
Use this coding system to order:
Type 595XP Explosion Proof I/P Transducer
Installation, Operation and
Maintenance Instructions
MANIFOLD WITHOUT
FLOW BOOSTER (M)
UNIT WITHOUT FLOW
BOOSTER (N)
UNIT WITH FLOW
BOOSTER (P)
* ATEX Ex ia INTRINSICALLY SAFE, Ex nL and Ex nAnL APPROVAL ONLY
**R OPTION MUST BE COMBINED WITH “K” OR “K2” OPTION
8 Columbia Drive, Amherst, New Hampshire 03031 USA
Phone: (603) 886-9400 Fax: (603) 889-1844

441-622-099 Type 595XP Page 2
WARNING
CAUTION
ALL DANGER, WARNING, AND CAUTION NOTICES MUST BE COMPLIED WITH IN FULL.
Functional Specifications P Connection (with Flow Booster) M & N Connection (without Flow Booster)
INPUT 4-20 MA
Outputs 3-15 psig 0.20-1.0 BAR
3-27 psig 0.20-1.8 BAR
6-30 psig 0.40-2.0 BAR
Air Consumption
0.1 scfm (2.83 Nl/min) 2.00 scfh (1 Nl/min) @ 20 psig supply (1.4 BAR)
4.94 scfh (2.47 Nl/min) @ 85 psig supply (6.0 BAR)
8.36 scfh (4.18 Nl/min) @150 psig supply (10.0 BAR)
Supply Pressure
Note: Supply pressure must be a minimum of
5 psig (0.3 BAR) above maximum output
3-15: 22 psig (1.5 BAR) max
3-27, 6-30: 42 psig (2.8 BAR) max 150 psig (10.0 BAR) max.
Flow Capacity 2.4 scfm (67.92 Nl/min) max. Same as Air Consumption
Temperature Limits -400F to 1580F (-400C to 700C) *Low Temperature (L) Option: -670F to 1580F (-550C to 700C)
Relative Humidity 75% average - 95% short time non-condensing
Impedance 260 Ohms @ 700F
Loop Load 5.2 Volts @ 700F
Performance Specifications
Linearity (Independent) <±0.5% of span
Hysteresis <±0.3% of span
Deadband <±0.1% of span
Repeatability <±0.3% of span; <±0.15% of span typical
Mounting Orientation <±0.5% / 90 degree change
Air Supply Sensitivity < .3% / 1.5 psig (0.10 BAR) change <±0.6% / 25 psig (1.72 BAR) change
Vibration Effect <±1% up to 10g and 20-80 Hz
Temperature Effect <±0.75% / 100F change
Physical Specifications
Housing NEMA 4X (IP 65)
Port Sizes Pneumatic 1/4” NPT, & 1/16 manifold mount
Electric 1/2" NPT , M20 x 1.5 (ATEX “K”) or 1/2" NPT (ATEX “K2”)
Media Clean, dry, oil-free, instrument air, filtered to 40 micron
Electrical Connections Terminal block
Mounting Direct (standard) or 2” pipe (optional)
Materials Housing: Chromate-treated aluminum with epoxy paint. NEMA 4X (IP65)
Elastomers: Buna-N
Trim: Stainless steel; brass; zinc-plated steel
Weight 1.4 lb
DANGER, WARNING, CAUTION and NOTE statements
DANGER
NOTE
Refers to conditions or hazards which could result in serious personal injury or death.
Refers to conditions or hazards which could result in personal injury.
Refers to conditions or hazards which could result in equipment or property damage.
Alerts you to facts or special instructions.
SPECIFICATIONS
* ATEX Ex ia INTRINSICALLY SAFE, Ex nL and Ex nAnL APPROVAL ONLY

441-622-099 Type 595XP Page 3
1.1 Pre-Installation Requirements
1.1.1 Environment: Suitable for installation in the following locations:
Intrinsically safe operation in hazardous locations outdoors (NEMA 4X, CSA. ENC. 4 & IP65)
Explosion Proof Installation in hazardous locations outdoors (NEMA 4X, CSA. ENC. 4 & IP65)
See section 1.5, 1.6 and 1.7 for Factory Mutual (FM), Canadian Standards (CSA) and ATEX
approvals.
The I/P transducer enclosure contains aluminum and is considered to constitute a potential
risk of ignition by impact or friction. Care must be taken into account during installation
to prevent impact or friction.
All wiring must be made to all local and national codes appropriate to the area of
installation.
1.1.2 Electrical Input: 4-20 mA dc current source. It is recommended that shielded cable be used and that the
shield be grounded to unit and earth ground. See Figure 1 on page 4 for location of ground screw.
1.1.3 Air supply: Clean, dry, oil free instrument air filtered to 40 micron.
Clean all pipe lines to remove dirt and scale prior to installation. Failures attributable to
instrument air supply contamination are not covered by the warranty.
1.1.4 ATEX Specific Conditions of Use
The user shall permanently mark the protection type chosen by adding a tick mark in the appropriate
box that corresponds to the type of hazardous area installation (i.e. Ex db, Ex tb, Ex ia, Ex nAnL or
Ex nL). See figure 2.
Once the type of protection has been marked, it shall not be changed.
The flameproof joints of the equipment are not intended to be repaired.
Consult the manufacturer if repair of the flameproof joints is necessary.
Refer to the manufacturer’s instructions to reduce the potential of an electrostatic charging hazard
due to impact or friction on the equipment enclosure.
1.2 Mounting
1.2.1 The Type 595XP has been designed to mount inline, to a standard valve yoke (bracket included with
unit), or to a 2” (5.1 cm) pipe (optional mounting kit 448-542-016 required).
1.3 Pneumatic Connections
1.3.1 Clean all pipe lines to remove dirt and scale prior to installation.
1.3.2 Supply air must be filtered to 40 microns and free of moisture and lubricants.
1.4 Electrical Connections
1.4.1 The Type 595XP is supplied with a 1/2" NPT electrical conduit connection as standard and “K2” option,
M20 x 1.5 for ATEX “K” option (see Figure 1).
1.4.2 A two (2) position terminal block that is wire ready is supplied for 22-12 AWG wire. Wire should be
stripped approximately 1/4" before insertion. The terminals are labeled “+” and “-“ on the terminal board
(see Figure 1).
1.4.3 It is recommended that shielded cable be used and that the shield be grounded at the unit (ground screw
provided) and to earth ground.
Observe polarity. Reverse polarity will not damage the unit, but unit will not operate.
Conduit should be connected to prevent condensation from collecting in the unit.
1. INSTALLATION AND APPROVALS
WARNING
NOTE
NOTE
DANGER
CAUTION

441-622-099 Type 595XP Page 4
Ex ia
TYPE 595XP
ControlAir Inc.
1.5 FM Approvals (FM) & Canadian Standards Association (CSA) Approvals
Intrinsically Safe: Non-Incendive:
Class I, Div. 1, Groups A, B, C & D Class I, Div. 2, Groups A, B, C & D
Class II, Div. 1, Groups E, F & G Class II, Div. 2, Groups E, F & G
Class III, Div. 1, Fibers Class III, Div. 2, Fibers
Enclosure Nema 4X (IP65) Enclosure Nema 4X (IP65)
Rated 4-20 mA, 40 VDC Max. Temp. Code T6
Temp. Code T4 Ta = + 700C
Explosion Proof: Entity Parameters:
Class I, Div. 1, Groups B, C & D Vmax = 40 VDC Ci = 0 uF
Enclosure Nema 4X (IP65) Imax = 150 mA Li = 0 mH
Temp. Code T6
Dust Ignition Proof: Entity Installation Requirements:
Class II & III, Div. 1, Groups E, F & G Vmax > Vt OR Voc
Enclosure Nema 4X (IP65) Imax > It OR Isc
Temp. Code T6 Ca > Ci + Ccable
La > Li + Lcable
Note: Cable capacitance and inductance must be
considered when connecting to pressure transducer.
Fi
g
ure 1 Fi
g
ure 2
GROUND
ATEX COVER LOCK
SPAN
ADJUSTMENT
ZERO
ADJUSTMENT
M20 x 1.5-6H
FOR ATEX (K)
OPTION
NEGATIVE TERMINAL (-)
POSITIVE TERMINAL (+)
1/2 NPT FOR
A
TEX (K2)
OPTION
A
ND STANDARD
FM/CSA

441-622-099 Type 595XP Page 5
1.6 ATEX Approvals (Option K)
Entity Parameters:
Ui (Vmax) = 40 VDC Ci = 0 uF
Ii (Imax) = 150 mA Li = 0 mH
Pi = .7 W Max.
ATEX (FM) Flame proof
FM 08ATEX0049X II 2 G Ex db IIB + H2 T6 Gb Ta = -400C to +750C
II 2 D Ex tb IIIC T850C Db Ta = -400C to +750C
1.7 EC Declaration of Conformity
We, ControlAir, Inc.
8 Columbia Drive
Amherst, NH 03031
Declare that the Type 595XP Transducer family to which this declaration applies, comply with these standards:
EN 60079-0:2012 + A11 :2013
EN 60079-1:2014
EN 60079-11:2012
EN 60079-15:2005
EN 60079-31:2014
EN 60529:1991 + A1:2000 + A2:2013
EN 1127-1:2011
Following the provisions of EMC directive 2014/34/EU
1725
II 1G
II 3G
II 2G
II 2D

441-622-099 Type 595XP Page 6
1.8 INSTALLATION DRAWING
NO. 431-990-055
3
+
-
NONHAZARDOUS
HAZARDOUS
(RED)
(BLACK) 4
CONTROLLER
1
2
28V
SINGLE
CHANNEL
POLARIZED
4-20mA
0V
T595XP
(BLACK)
(RED)
-
+ 4-20mA
POLARIZED
CHANNEL
TWO-
28V
2
1
CONTROLLER
4
3
1-5V
RAIL
0V
RAIL
4-20mA
DIODE
+
-
(RED)
(BLACK) 10V
4-20mA
RAIL
0V
1-5V
3
4
CONTROLLER
1
2
28V
TWO-
CHANNEL
POLARIZED
4-20mA
TYPE 1
SYSTEM
SYSTEM
TYPE 2
SYSTEM
TYPE 3
LOCATION LOCATION
TRANSDUCER
T595XP
TRANSDUCER
T595XP
TRANSDUCER
1. (North America) Control equipment connected to the Associated Apparatus must not use or
generate more than 250 Vrms or Vdc.
2. (North America) The IS Barriers or Equipment (Associated Apparatus) must be FM Approved and
CSA certified and the configuration of associated Apparatus must be FM Approved and CSA
certified under the Entity Concept. The Associated Apparatus may be installed within the
Hazardous (Classified) location for which it is certified. The Associated Apparatus and hazardous
location loop apparatus manufacturer's control drawings must be followed when installing this
equipment. An AEx [ib] Associated Apparatus is suitable only for connection to Class I, Zone 1,
Hazardous (Classified) Locations and is not suitable for Class I, Zone 0, or Class I, Division 1
Hazardous (Classified) Locations.
(ATEX) The IS Barriers or other Associated Apparatus shall comply with the ATEX directive
2014 / 34 / EU.
3. (US) Installation should be in accordance with ANSI/ISA RP12.06.01 "Installation of Intrinsically
Safe Systems for Hazardous (Classified) Locations" and Article 500 of the National Electrical Code
(ANSI/NFPA 70)
(Canada) Installation should be in accordance with Section 18 of the Canadian Electrical Code.
(ATEX) Installation shall be in accordance with the applicable local installation rules Energy
Limitation Parameters specified.
4. (North America) All units suitable for Type 4X installations.
5. (North America) Units are suitable for Class I, Division 2, Groups A, B, C, and D hazardous
(classified) locations. Transducers to be installed in accordance with the
(US) National Electrical Code (ANSI/NFPA 70) Division 2 hazardous (classified) location wiring
techniques
(Canada) Canadian Electrical Code.
6. The Intrinsic Safety Entity concept allows the interconnection of two Intrinsically safe devices with
entity parameters not specifically examined in combination as a system when:
Entity Parameters for: MODELS TYPE 595 Ui or Vmax >Uo or Voc
Ui (Vmax) = 40 V Ii or Imax > Io or Isc or It
Ii (Imax) = 150 mA Ca or Co > Ci + Ccable
Ci=0 La or Lo > Li ÷ Lcable
Li=0 Pi > Po.
Pi = 0.7 watts
7. No revision to this drawing is permitted without prior FM Approval and CSA Certification.
431-990-055

441-622-099 Type 595XP Page 7
2.1 Calibration
2.1.1 All units are shipped from the factory calibrated, direct acting.
Factory calibration is susceptible to shift due to handling during transit. ControlAir
recommends that all units be recalibrated prior to use.
2.1.2 Though the units are shipped fully calibrated it is suggested that the user
check the calibration to ensure that settings and operation match the application requirements.
2.2 Calibration
2.2.1 In direct acting operation, the unit is calibrated so that minimum input signal corresponds to minimum
output pressure and increasing input signal results in increasing output pressure.
2.2.2 Apply the minimum input signal of the range being used (e.g. 4 mA).
2.2.3 Observe the output pressure. If necessary, adjust the zero screw until reaching minimum output
pressure setting. Turn zero screw clockwise to increase and counter clockwise to decrease.
2.2.4 Apply the maximum input signal of the range being used (e.g. 20 mA).
2.2.5 Observe the output pressure. If necessary, adjust the span screw until reaching maximum output
pressure setting. Turn span screw clockwise to increase pressure, counter clockwise to decrease
pressure.
2.2.6 After setting the span it will be necessary to recheck the zero. Repeat steps 1-4 until both end points
are at required values.
Under normal circumstances, no maintenance should be required.
3.1 Instrument Air Filtration
3.1.1 Failures due to instrument supply air contamination are not covered by warranty.
3.1.2 Use of oil and/or water saturated instrument air can cause erratic operation.
3.1.3 Poor quality instrument air can result in unit failure. It is recommended that a filter regulator (such as
ControlAir Type 300) be placed upstream of each unit where oil and/or water laded instrument air is
suspected.
3.2 Factory Repairs
3.2.1 In the event of unit failure, the Type 595XP can be returned to the factory through point of purchase for
warranty repair if the warranty period has not expired.
3.2.2 All units returned for repair must be authorized prior to receipt at the factory. Contact a representative
at the point of purchase to receive a Return Authorization Number.
2. OPERATION
NOTE
3. MAINTENANCE AND REPAIRS
NOTE
NOTE
NOTE
ATEX option units come with a factory installed cover lock screw. Screw must be
removed before removing cover. Screw must be replaced upon replacing cover.
See Figure 1, Section 1.4
It is not necessary to remove the plastic cover of the unit for calibration.

441-622-099 rev. 04/30/18 Type 595XP Page 8
3.3 Filter Replacement
3.3.1 Supply pressure can become obstructed should the felt filter element become clogged. To replace
filter (P/N: 445-777-018), remove slotted plug and carefully remove filter using tweezers. Insure no
dust or dirt particles remain in filter chamber. Insert new filter into chamber in orientation as shown in
figure 3. Replace slotted plug, insuring o-ring is properly seated. For N-connection, remove Nema cap
screw using a 5/64 hex key.
Figure 3 – Replacing Filter
PROBLEM LOOK FOR SOLUTION
No or low output Wires reversed
Zero adjustment
Clogged filter
Supply pressure too low
Reverse input wires (see Figure 1)
Reset zero (2.2.3)
Replace filter (see Figure 3)
Increase supply pressure (see specs)
Unstable / low output Electrical connection Check connection/signal (1.1.2)
Erratic operation Liquid/contamination in air supply
Supply pressure Clean air supply (1.1.3)
Verify supply pressure (see specs)
Output equals supply pressure Improper pneumatic connections Insure that supply is connected to “IN” port and
output is connected to “OUT” port (1.3.3, 1.3.4)
If problems are not solved by troubleshooting procedures, contact a factory applications
engineer at (603) 886-9400 for further assistance.
ControlAir, Inc. products are warranted to be free from defects in materials and workmanship for a period of
eighteen months from the date of sale, provided said products are used according to ControlAir, Inc.
recommended usages. ControlAir, Inc.’s liability is limited to the repair, purchase price refund, or replacement in
kind, at ControlAir, Inc.’s sole option, of any products proved defective. ControlAir, Inc. reserves the right to
discontinue manufacture of any products or change products materials, designs or specifications without notice.
Note: ControlAir does not assume responsibility for the selection, use, or maintenance of any product.
Responsibility for the proper selection, use, and maintenance of any ControlAir product remains solely with the
purchaser and end user.
Before using these products with fluids other than air, for non-industrial application, life-support systems, or other
applications not within published specifications, consult ControlAir, Inc.
These products are intended for use in industrial compressed-air systems only. Do not use
these
p
roducts where
p
ressures and tem
p
eratures can exceed those listed under
4. TROUBLESHOOTING
NOTE
5. WARRANTY & DISCLAIMER
WARNING
FILTER
FILTER
NEMA CAP SCREW
P - Connection N - Connection
Other controlair Transducer manuals
Popular Transducer manuals by other brands

Baumer
Baumer GCA5-Analog Assembly instruction and safety regulations

Airmar
Airmar R299 Owner's guide and installation instructions

Ulthera
Ulthera DeepSEE DS 4 - 4.5 Instructions for use

Daiichi Electronics
Daiichi Electronics FSPTT2-92A-33 instruction manual

Honeywell
Honeywell PPT user manual

MG
MG MUWT instruction manual

Simrad
Simrad STEEL BLISTER ES38-B - SCHEMA REV A manual

novotechnik
novotechnik RSM-2800 user manual

Mianyang Weibo Electronic
Mianyang Weibo Electronic WBV412U01 user manual

Camille Bauer
Camille Bauer SINEAX G 537 operating instructions

Furuno
Furuno 165T/265LH Owner's guide and installation instructions

Endress+Hauser
Endress+Hauser Cerabar T PMP131 manual