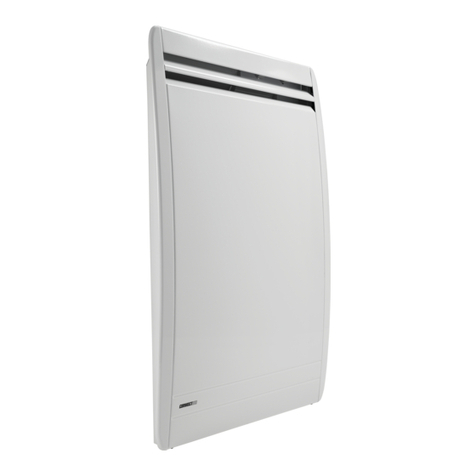
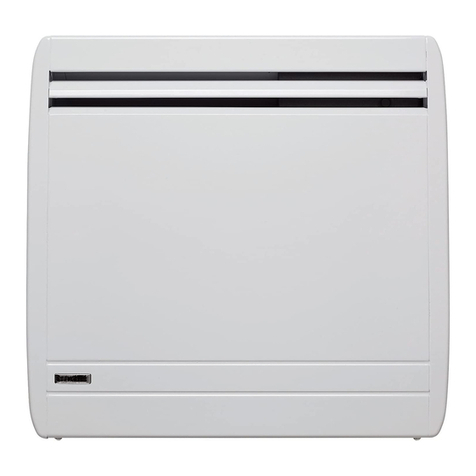
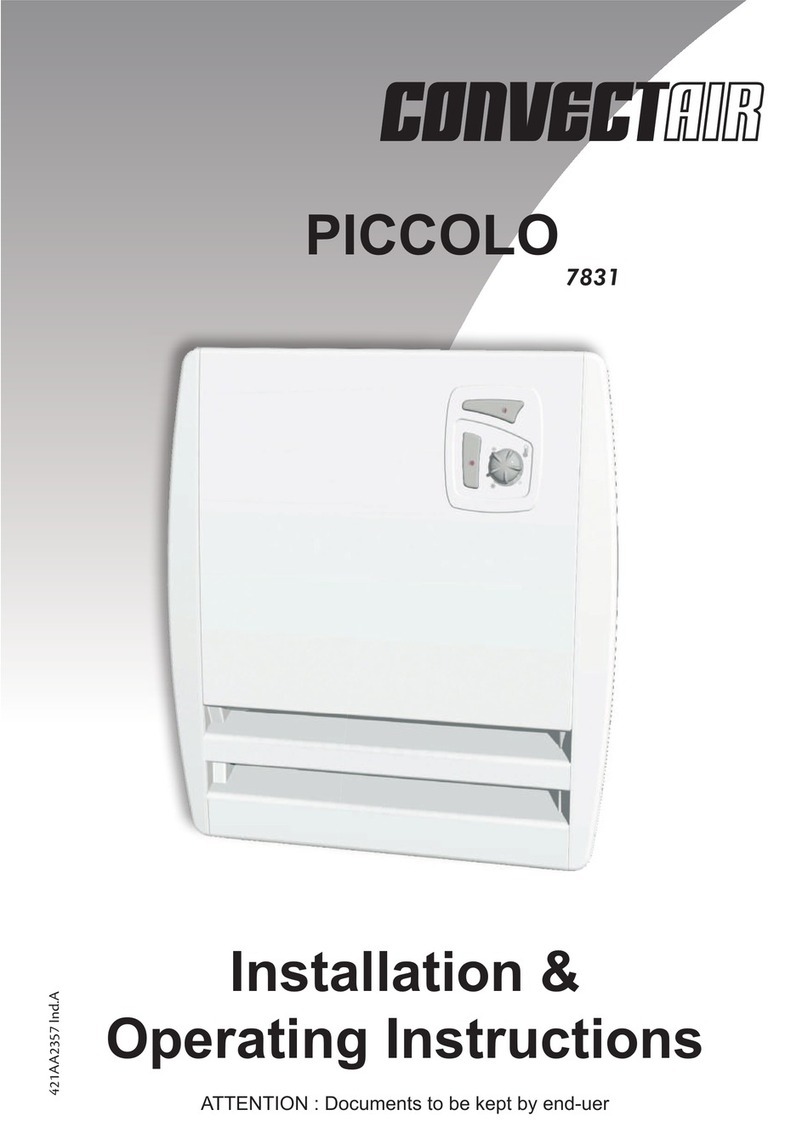
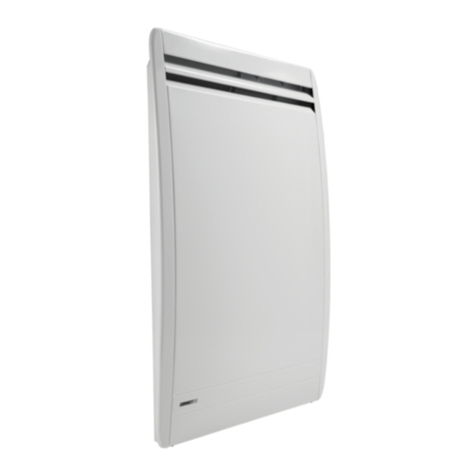
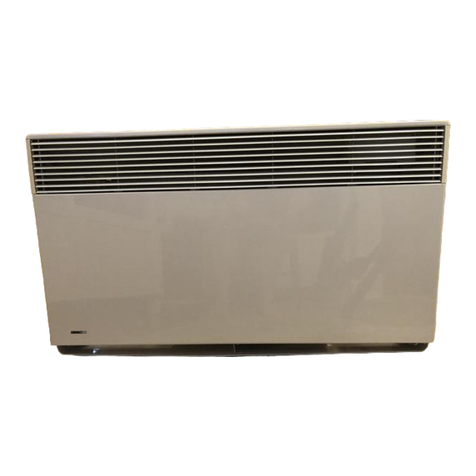
CONVECTAIR opera 12 7732-C07 Manual

Installation &
Operating Instructions
ATTENTION : Documents to be kept by the end-user.
Please read before any operation.
R
ad
i
ant
p
anel heater hor
i
zontal,vert
i
cal and low
Installation &
OPERA 12,17 & 4
6
421AA2814.B00
09-2016

Dear owner,
Congratulations on the purchase of this premium electric heater.
CONVECTAIRdevelopsandproducesthehighestqualityheatingproductin
the electrical industry.
To obtain the best results and the ultimate in performance and comfort,
please take a moment to read the installation, operation and maintenance
instructions detailed in this manual.
WARNING :
<RXUKHDWHULVDOUHDG\HTXLSSHGZLWKDSUHFLVHHOHFWURQLFWKHUPRVWDW. IT
MUST NOT BE CONNECTED TO A WALL THERMOSTAT.
;HISLVMJVU[LU[Z
2
-69,>69+
1- RECOMMENDED SET-UP............................................................PAGE 3
2- INSTALLATION AND MOUNTING...............................................PAGE 6
3- ELECTRICAL CONNECTION......................................................PAGE 8
4- QUICKSTART GUIDE...................................................................PAGE 9
5- OPERATING INSTRUCTIONS.....................................................PAGE 10
6- OVERHEAT CONTROL................................................................PAGE 24
7- MAINTENANCE............................................................................PAGE 25
8-TROUBLESHOOTING.................................................................PAGE 26
9- IDENTIFICATION OF YOUR HEATER......................................PAGE 27
10-WARRANTY INFORMATION.....................................................PAGE 28

7SLHZLYLHKJHYLM\SS`[OL^OVSLPUZ[HSSH[PVUHUK
VWLYH[PUNPUZ[Y\J[PVUZHUKPUWHY[PJ\SHY[OLMVSSV^PUN
*(<;065/6;:<9-(*,
:VTLWHY[ZVM[OLHWWSPHUJLTH`ILJVTLOV[HUKJH\ZLSPNO[I\YUZ
(]LY`JSVZLH[[LU[PVUOHZ[VIL[HRLUPMJOPSKYLUVY]\SULYHISLWLYZVUZ
HYLWYLZLU[
;OPZHWWSPHUJLPZUV[PU[LUKLKMVY\ZLI`WLYZVUZPUJS\KPUNJOPSKYLU
^P[O YLK\JLK WO`ZPJHS ZLUZVY` VY TLU[HS JHWHIPSP[PLZ VY SHJR VM
L_WLYPLUJLHUKRUV^SLKNL\USLZZ[OL`OH]LILLUNP]LUZ\WLY]PZPVU
VYPUZ[Y\J[PVUJVUJLYUPUN\ZLVM[OLHWWSPHUJLI`HWLYZVUYLZWVUZPISL
MVY[OLPYZHML[`
*OPSKYLU \UKLY [OL HNL VM [OYLL ZOV\SK IL RLW[ H^H` MYVT [OL
HWWSPHUJL\USLZZ[OL`HYLJVU[PU\V\ZS`Z\WLY]PZLK
*OPSKYLUMYVT[OYLL[VLPNO[`LHYZVSKZOV\SKULP[OLYWSH`UVYWS\N
UVYZL[UVYJSLHUUVYTHPU[HPU[OLHWWSPHUJL
3
9,*644,5+,+:,;<7
!Safety

>(9505.!+656;*6=,9
0M[OLHWWSPHUJLPZJV]LYLK[OLYLPZHYPZRVMV]LYOLH[PUN;OLSVNV
YLTPUKZ[OPZYPZR
+VUV[JV]LYVYVIZ[Y\J[[OLHPYPUSL[VYV\[SL[HZ[OPZJV\SKJH\ZL
V]LYOLH[PUNHUKKHTHNL[OLHWWSPHUJL
+VUV[PUZLY[HU`[OPUNPU[OLHWWSPHUJL
;OPZHWWSPHUJLOHZ[VILJVUULJ[LKI`HX\HSPÄLKWLYZVUULS(S^H`Z
KPZJVUULJ[WV^LYZ\WWS`ILMVYLHU`JVUULJ[PVUVYYLWHPY
0UZ[HSSH[PVUHUKLSLJ[YPJHSJVUULJ[PVUZT\Z[ILPUHJJVYKHUJL^P[O
[OLUH[PVUHSHUKSVJHSJVKLZ
;OL LSLJ[YPJHS J\YYLU[ ZOV\SK IL WYV[LJ[LK I` H YLZPK\HS J\YYLU[
KL]PJLPU[OLJHZLVMHUPUZ[HSSH[PVUPUHIH[OYVVT^P[OHIH[O[\I
ZOV^LYVYZPUR
;OLOLH[LYT\Z[UV[ILPUZ[HSSLKILSV^HULSLJ[YPJHSZVJRL[
;OPZOLH[PUNKL]PJLPZKLPZNULK[VWYV]PKLHTIPHU[OLH[MVYUL^VY
L_PZ[PUNYLZPKLU[PHSVYJVTTLYJPHS[`WLI\PSKPUN
+V UV[ PUZ[HSS [OL OLH[LY PU H aVUL ^P[O HPY J\YYLU[Z JHWHISL VM
KPZY\W[PUNP[ZYLN\SH[PVU
;OLZLPUZ[Y\J[PVUZOH]LILLULZ[HISPZOLKH[[OLTVTLU[VM[OLOLH[LY»ZTHU\
MHJ[\YPUNHUKPUJVUMVYTP[`^P[O[OLZ[HUKHYKPaH[PVUH[[OH[TVTLU[
4
04769;(5;!
+656;*6=,9;/,/,(;,9

9LZWLJ[[OLTPUPT\TYLX\PYLKJSLHYHUJLZOLPNO[MYVTÅVVYKPZ[HUJLZMYVTZPKL
^HSSZVYM\YUP[\YLKYHWLZL[JZLL-PN(
/LH[LYPUZ[HSSH[PVU
;OPZOLH[LYT\Z[ILPUZ[HSSLKPUHJJVYKHUJL^P[OUH[PVUHSHUKSVJHSJVKLZ
HUK*65=,*;(09YLJVTTLUKZHUPUZ[HSSH[PVUI`HX\HSPÄLKLSLJ[YPJPHU
!
CONVECTAIR RECOMMENDS AN INSTALLATION HEIGHT OF 15 CM (6 IN).
CAUTION: PLEASE MAINTAIN THE MINIMUM REQUIRED CLEARANCES (Fig. A).
Minimum
clearances In front (A) Sides (B) Above (C) Underneath (E) Recommended height
7732-CXX-FS 75 cm
(30 in)
15 cm
(6 in)
20 cm
(8 in)
2.5 cm
(1 in)
15 cm
(6 in)
7733-CXX-FS 75 cm
(30 in)
15 cm
(6 in)
20 cm
(8 in)
2.5 cm
(1 in)
15 cm
(6 in)
7734-CXX-FS 75 cm
(30 in)
15 cm
(6 in)
20 cm
(8 in)
2.5 cm
(1 in)
15 cm
(6 in)
0.2 m
0.2 m
0.2 m
1 m
0,15 m
Tout obstacle
ex : voilages
Sol
-PN(
(6 in)
(6 in)
(30 in)
75 cm
15 cm
15 cm
20 cm
(8 in)
A
E
B
C
B
Any obstacle
ex: curtains
Floor
2.5 cm
(1 in)
04769;(5;!
+656;*6=,9;/,/,(;,9

Encombrement
de l’appareil
Hauteur
Largeur
Sol
150
C
-PN*
(6 in)
15 cm
Junction
box
(10 in)
25 cm
Outline of
unit
+eiJKt
:iGtK
*UounG
05:;(33(;065(5+46<5;05.
-PN\YL)
3VJRPUN
[HI
6WLYH
Capacity (W)
Measures JT PU
Heater width
Heater height
C
-PN*
Cap. (W)
Measures JT PU JT PU JT PU
Hole
spacing
Heater
width
Heater
height
A
B
C
6WLYH -PN+
7R LQVWDOO \RX KHDWHU DW FP LQ IURP WKH JURXQG UHFRPPHQGHG KHLJKW E\
CONVECTAIR), follow these directions:
28
B
104
258
2
AA
500=>1250W
igure B2
xample of
mounting bracket:
7733 500 W
Measure C
2
2- Place the center of the mounting bracket's bottom holes (no. 2 Fig. B2) at the
measure C (see tables Fig. C - D - - F) from the ground and make a mark.
3- Check horizontality of the mounting bracket, then mark the two top holes and
pierce the 4 holes for fastening.
1- Free mounting brackets by pressing and pulling both locking tabs on the back of
the heater (Fig. B).
4- Replace mounting bracket and fasten it
appropriately with screws (not included).
Encombrement
de l•appareil
Entaxe
DA
B
Hauteur
Largeur
Sol
150
C
Hole
spacing
-PN+
(6 in)
15 cm
Junction
box
(10 in)
25 cm
Outline of
unit
+eiJKt
:iGtK
*UounG

Sol
150
Entraxe
Encombrement
de l!appareil
Largeur
Hauteur
A
D
B
C
-PN-
Cap. (W)
Measures JT PU JT PU
Hole spacing
Heater width
Hauteur
height
A
B
C
-PN-6WLYH
(6 in)
15 cm
Junction
box
(8 in)
20 cm
Entaxe
Encombrement
de l•appareil
DA
B
C
150
Sol
Largeur
Hauteur
-PN,
Hole spacing
(6 in)
15 cm
Junction
box
(18 in)
45 cm
Outline of
unit
+eiJKt
:iGtK
*UounG
Outline
of unit
+eiJKt
:iGtK
*UounG
Hole spacing
6WLYH
Cap. (W)
Measures JT PU JT PU JT PU
Hole
spacing
Heater
width
Heater
height
A
B
C
D
-PN,

!
Please read carefully the whole installation and operating
instructions before connecting the heater
- <ou PuVt FonneFt tKe JUounGZiUe of tKe KeDteUJUeen ZiUe witKtKe FoSSeUwiUe.
- &onneFt tKe SoweUFDEleVto tKe UeGDnGElDFN FDEleV.
- 1eYeUFonneFt tKe Silot-wiUe SuUSle wiUeto tKe eleFtUiFDl VuSSl\noUJUounGit.
- 7Ke SuUSle wiUe witKtKe VeDl Dt tKe e[tUePit\VKoulGnot Ee uVeGfoUtKe eleFtUiFDl
FonneFtion. ,t iVuVeGonl\if tKe KeDteUiVFonneFteGwitKtKe &O19(&7$,5
3UoJUDPPeUV\VtePoUtKe wDll Pount FontUolleU$:&.
- )i[tKe unit on tKe wDll EUDFNet EefoUe tuUninJtKe SoweUEDFN on.
WARNING : To prevent short circuits and electrical shocks
turn the power off at the main panel before attempting
the installation or making any repairs. If you are using a
programmer system, make sure to cut the power off ALL
electrical heating circuits of the heaters wired to the pilot
wire.
- &O19(&7$,5 UeFoPPenGV tKDt \ouUKeDteUEe inVtDlleGE\ D
TuDli¿eGeleFtUiFiDn DnGin DFFoUGDnFe witKnDtionDl DnGloFDl
codes.
- 7Kis KeDteUPust Ee connected to D240 9olt 60 c\clesciUcuit
Dnd witKDn DSSUoSUiDte EUeDNeU. &ut Dll electUicDl cuUUent
EefoUe connectinJtKe KeDteUto DYoid sKocNs Dnd dDPDJes to
tKe unit.
- 7Ke ¿Ust tiPe \ouU&onYectDiUKeDtsDliJKt sPoNe could Ee
UeleDsed due to tKe EuUninJof SUoduction Uesidues. 7Kis is
noUPDl Dnd sKould disDSSeDU DfteU2 to 3 Pinutes.
!
RESPECT WIRE COLOR WIRING
CANADA CANADA
PP
P (PW) = PURP LE R = RED B = BLAC K G = GREEN C = COP P ER
= Cables 3/12 or FAS
105 18/2 approved 300
volt.
*
*
,3,*;90*(3*655,*;065

- 7urninJO1/S7A1'%< tKe Keater
-
7urninJO1/S7A1'%< tKe Keater
J
3ress tKe Ne\to turn tKe Keater O1or S7A1'%<.
- 7o set tKe tePperature
- 7Ke 0O'( selector
-
7o
s
et
t
Ke
t
ePpera
tu
re
p
;VZL[[OLKLZPYLK[LTWLYH[\YLWYLZZ or .
-«Open Window detector»
-
«Open Window detector»
p
7o enable or disable tKis function3ress tKe Ne\for 3
seconds to enable or disable tKis function .
- Ideal Temperature «°C idéal» function
-
Ideal Temperature «°C idéal» function
p
%rieÀ\ press tKe Ne\to reset tKe standard operatinJmode
factor\settinJs19 °C for comfort and 155 °C for (CO.
-
TKe 0
O
'( selector
3ress on tKe Mode Ne\
to cKoose tKe opera-
ting mode.
YOU WISH PRESS USE THE
FONCTION
SCREEN
DISPLAY
To maintain tKe room at tKe
desired comfort temperature. COMFORT
To maintain tKe room at tKe desi-
red setbacNtemperature. SETBACK
To maintain tKe room at frost
protection temperature.
FROST
PROTECTION
An automatic setbacN
during your absence. ABSENCE
DETECTOR
%efore activating any programming modeplease refer to page 14 Setting tKe time
and date.
To apply tKe settings sent
by your central programming
system or power management
system.
« AUTO »
PROGRAMMING
To apply a preset or
customised program. « PRESET »
PROGRAMMING
UTO
32
P2
3 seconds
Mode
Mode
Mode
Mode
Mode
3ressing on tKe Mode Ney for
3 seconds toggles between
tKe A8TO and 35(S(T
programming modes.
8<0*2:;(9;.<0+,

5.1 - Turning O1/STA1'%< tKe Keater
To turn tKe unit onpress . TKe screen will dis-
play tKe Comfort temperature.
To place tKe Keater on STA1'%< modepress .
TKe screen turns off.
MaNe sure you remove tKe protective ¿lm from tKe control panel.
i
+eating O1/STA1'%< Ney
Heating
indicator
3ress botKNeys to
- 3rogram tKe
Keater
- Set tKe time
Reset to ideal
temperature
setting
« Open Window»
function
Temperature
setting Neys
Mode selection Ney
Consumption
indicator
3rogram
- 3reset 31/32/33
- Custom 34/35/36
i
/ocation of tKe
programming
cassette
optional.
67,9(;05.05:;9<*;065:
TKe Keater Neeps tKe current settings on ¿leeven during a
power outage for a ma[imum of 12 Kours.

5.2 - Comfort Mode / Setting the desired temperature: :
3ress tKe or Neys to raise or lower tKe desi-
red Comfort temperature in steps of 0.5°C 1°F.
3ress repeatedly on tKe Mode Ney.
5.3 - The MODE selector :
TKe Mode selector enables selecting up to 6 functions
i
i
i
i
i
i
i
YOU WISH PRESS USE THE
FUNCTION
SCREEN
DISPLAY
To maintain tKe room at tKe
desired comfort temperature. COMFORT
To maintain tKe room at tKe
desired setbacNtemperature. SETBACK
To maintain tKe room at frost
protection temperature.
FROST
PROTECTION
An automatic setbacNduring
your absence.
ABSENCE
DETECTOR
Before activating any programming mode, please refer to page 14
section µµSetting tKe time and date¶¶.
To apply tKe settings sent
by your central programming
system or power manage-
ment system.
« AUTO »
PROGRAMMING
To apply a preset or
customised program.
« PRESET »
PROGRAMMING
Mode
UTO
3 seconds 32
P2
e[emple 32
*
Mode
Mode
Mode
Mode
To ensure tKat tKe temperature stabilises at tKe desired
temperature, tKe doors and windows of tKe room sKould
be closed.
*3ressing on tKe Mode Ney for 3 seconds toggles between tKe A8TO and
3R(S(T programming modes.

5.4 - AUTO Programming mode
3ress successively on tKe Mode Ney until tKe
A8TO symbol is displayed.
COMMANDS SENT
OVER PILOT WIRE
SCREEN
DISPLAY
RESULT
Heating OFF Heating is immediately turned
off.
Setback
TKe temperature is lowered
by 3.5°C compared to tKe
Comfort setting, or as desi-
red.
Frost Protection TKe temperature is maintai-
ned at about 7°C.
i
Mode
UTO
UTO
UTO
UTO
Note 3ressing on tKeMode for 3 seconds toggles between tKe A8TO and 3R(S(T
programming modes see p. 19.
TKis mode enables automatic operation of tKe Keater over pilot
wirefrom a central programming system e[ CON9(CTAIR¶S
3rogrammer systemor power management system.

Speci¿c conditions
i
Selected
functions
Central Programming System
or Energy Management System
Command over pilot wire:
Frost Protection
Command over pilot wire :
Heating OFF
19,0°C
ECO
HG UTO
UTO
''
''
''
''
3RO*
5.6 - Time display :
3ress brieÀy on and Neys to display tKe
current time.
5.5 - Controls lock :
TKis function disables any operations from tKe control
panel in any operating mode to prevent tKe settings from
being cKanged, for e[ample, by cKildren.
i
Simultaneously press tKe and Neys for tKree
seconds to locNor unlocNtKe Neypad.
TKen, if you press any Ney on tKe Neypad,tKe
screen will display «NON».
TKe Neypad is locNed and no operation is possible.
In Comfort, (conomy and Frost 3rotection override mode, Frost 3rotection and
Heating OFF commands sent by tKe central programming e[ CON9(CTAIR¶S
3rogrammer systemor energy management systems will Kave a priority. TKis is
indicated by a blinNing A8TO symbol.

5.7 - Setting the time and date :
A- Setting tKe time
-In all cases, to use tKe preset programs, you ¿rst must set tKe time
and date of your Keater factory default 0000.
-In case of a power outage e[ceeding 12 Kours, you must reset tKe
time on your device.
i
TKe «3r» symbol is displayed.
3ress tKe or to select tKe time setting func-
tion in tKe drop-down menu «Hr» and con¿rm
by pressing tKe Mode Ney.
CKange tKe Kour setting using tKeand Neys
and con¿rm by pressing tKe Mode Ney.
CKange tKe minute setting using tKeand
Neys and con¿rm by pressing tKe Mode Ney.
B - Setting tKe weeNday
CKange tKe weeNday -O /8 = Monday,
-O MA = Tuesday, -O M(= Wednesday,etc.
using tKe and Neys.
Con¿rm by pressing tKe Mode Ney.
To exit, press on or Neys until tKe (xit option
appears in tKe drop-down menu.
3ress Mode to con¿rm and exit.
4VKL
4VKL
4VKL
3 seconds
Pr
Hr P4
P5
P6
Exit
¬
¬
¬
+
4VKL
Pr
Hr P4
P5
P6
,_P[
¬
¬
¬
+
4VKL
[VL_P[
3RO*
Firmly press tKeand Neys for 3
seconds to access tKe programming menu.

Mode
Mode
5.8 - Setback functions:
Mode
4.8.1- SetbacN(CO Mode
To view tKe (CO set point, press brieÀy tKe
or Neys.
To cKange tKe (CO set point temperature
3ress on tKe Mode Ney for 3 seconds until tKe (CO set point temperature ÀasKes.
3ress tKe or Neys until obtaining tKe desired (CO temperature.
3ress tKe Mode Ney to con¿rm.
3ress successively tKe Mode Ney until tKe SetbacN
Mode (COis displayed.
It is recommended to use tKis mode for temporary absences between 2 and 24 Kours,
or overnigKt. TKis mode lowers room temperature by approximately 3.5°C relative to tKe
Comfort temperature set point.
i
3ress successively on tKe Mode Ney to select tKe
absence detection mode. TKe symbol will be
displayed.
5.8.3 - Absence detector
TKe Absence 'etector mode allows to lower tKe Keating
degree in tKe case of an absence and to acKieve Keating
savings. TKere are tKree absence detection operating options
see following pages.
i
3ress successively on tKe Mode Ney until tKe Frost
3rotection mode H* is displayed.
5.8.2- Frost 3rotection Mode H*
For maximum energy savings, in case of longer term
absence 24 Krs. or more, it is recommended to use
tKis setting, wKicKwill maintain tKe room temperature at
about 7°C.
i

Note in all cases tKe orders for Frost 3rotection and Heat OFF from tKe pilot
wire are priority.
i
Priority to energy savings
Movement detection mode
and programming
Gradual transition
to ECO (in 1:30 hr)
Immediate switch
to Comfort
ECO Mode
ECO Mode
Result
Pr
P
P
Detection
absence
movement
g
s
ul
t
ECO
Comfort
ECO
Comfort
Px
Command over Pilot Wire
or interne programming
P1
or
AUTO
P1
or P2
...P6
Turnofftheheater,press
simultaneously the
and NH\V IRU
seconds until detection
RSWLRQRU
appears.
- Select the desired
detection option using
the +or keys.
- Press the MODE key
WRFRQÀUP
+
+
*VUÄN\YPUN[OLHIZLUJLKL[LJ[VYVWLYH[PUNTVKL
ECO order from internal pro-
gramming or pilot wire is
prioritary even if a presence
has been detected.
Option 1 :
(default mode) :
Option 2 :
ECO order from program-
ming is not prioritary. In
case of a presence detec-
tion, the heater goes on
comfort mode.
Option 3 :
The heater doesn’t follow
programming orders.
Auto
Auto

5.8.4 - Open Window detector
To enable or disable tKis function, press tKe Ney
for 3 seconds. TKe symbol will be displayed on
tKe screen.
i
To cancel tKe STAN'B<order, press tKe Ney to
restart tKe Keater.
CO ode
movement
Priority to comfort
Movement detection mode
and programming
Comfort Mode
Result
Detection
absence
movement
Comfort Mode
Result
Detection
absence
movement
ECO
Comfort
-
-
ECO
u
l
t
Px
P1
or P2
...P6
or
AUTO
Priority to energy savings
Movement detection mode
without programming
Gradual transition
to ECO (in 1:30 hr)
Gradual transition
to ECO (in 1:30 hr)
Command over Pilot Wire
or interne programming
Command over Pilot Wire
or interne programming
TKis function automatically sKuts off tKe Keater wKen a drop in room temperature is
detected sucKas an open window or door.
TKe symbol will blinNif tKe unit Kas ceased
Keating following tKe detection on an open window or
door.

5.8.7 - Ideal temperature
BrieÀy press tKe Ney to reset tKe standard operating
mode factory settings
- S(TBAC.mode setting at 15.5°C 60°F
- COMFORT mode setting at 19°C 66°F
TKe indicator sKows tKat your Keater is warming
up. WKen tKe desired temperature Kas stabilised, tKis
indicator turns on and off according to Keating needs.
5.8.6 - Heating indicator
ndicateur de
consommation
It is an indicator of beKaviour tKat allows viewing tKe
energy consumption status of your Keater.
- *reen indicator ligKt = economical
- Indicator ligKt sKifting toward red = less economical.
TKis indicator allows to monitor and adMust tKe desired
temperature depending on its impact on consumption.
5.8.5 - Consumption indicator
i
Automatic return to tKe recommended temperatures
Optimised setting :
3ress tKe Ney for 10 seconds to con¿gure tKe operating
mode and acKieve maximum savings of energy
- SETBACK mode setting at 15.5°C 60°F
- COMFORT mode setting at 19°C 66°F
- Activation of tKe Open Window function
- Activation of tKe A8TOprogramming mode .
Long press
iTKis function automatically adMusts tKe Keater for an
optimal comfort / economy ratio.
Consumption
indicator

5.8.8 - Operating Mode
3reset programs 31/32/33 or customi-
sable programmes 34/35/36
If you wisKto assign a daily program for eacK
day of tKe weeN
- 3ress simultaneously for 3 seconds tKe
and Neys.
- TKe screen displays «3r».3ress tKe Mode Ney.
- Assign one of tKe available programs prede¿-
ned or customfor eacKday of tKe weeN
using tKe and Neys to scroll tKrougKtKe drop-
down menu.
- 3ress tKe Mode Ney to con¿rm.TKe screen dis-
plays «3r».
- To exit, press tKe or Neys until tKe «Exit»
option is displayed in tKe drop-down menu.
- 3ress tKe Mode Ney to con¿rm and exit.
In tKis mode, tKe Keater operates in automatic daily
mode according to tKe Comfort set point or tKe SetbacN
set point. TKe date and time must be set beforeKand in
order to be able to create tKe programs see p. 14.
i
3 seconds
3RO*
to exit
P1
P2 P3
P4
P5
7
¬
¬
¬
+
P1
P2 P3
P4
P5
7
¬
¬
¬
+
Pr
Hr P4
P5
P6
Exit
¬
¬
¬
+
P1
P2 P3
P4
P5
7
¬
¬
¬
+
4VKL
4VKL
4VKL
4VKL
4VKL

Preset
programme Select Meaning
P1
TKe 31 program sets tKe Comfort temperature
set point in tKe morning from 500 to 900 and
from 1700 to 2300 in tKe evening.
P2
TKe 32 program sets tKe Comfort temperature
set point in tKe morning from 500 to 900,at noon
from 1200 to 1400 and in tKe evening from
1700 to 2300.
P3 TKe 33 program sets tKe Comfort temperature
set point on weeNends from 500 to 2300.
Customisable programs
see pages 23 and 24.
P4
P5
P6
TKe customisable programs allow you to set set
point time intervals in tKe Comfort mode accor-
ding to your needs.
0h 2 4 6 8 10 12 14 16 18 20 22 24
5h à 9h 17h à 23h
{
{
du Lundi au Vendredi
2
{
12h à 14h
0h 2 4 6 8 10 12 14 16 18 20 22 24
5h à 9h 17h à 23h
{
{
du Lundi au Vendredi
1
iIf no operations using tKe and Neys are performed for 15 seconds, tKe display returns
to its original position.
+,:*907;0656-;/,79,:,;796.9(4:777
69*<:;640:()3,796.9(4:777
Monday to Friday
Monday to Friday
5h à 23h
{
0h 2 4 6 8 10 12 14 16 18 20 22 24
Le week end
3
Saturday and Sunday
This manual suits for next models
8
Table of contents
Other CONVECTAIR Heater manuals

CONVECTAIR
CONVECTAIR Samba Operation and maintenance manual

CONVECTAIR
CONVECTAIR Piccolo 7831 Installation instructions

CONVECTAIR
CONVECTAIR ALTO 7375 C User manual

CONVECTAIR
CONVECTAIR SOPRANO Installation guide

CONVECTAIR
CONVECTAIR CALYPSO 7826 User manual

CONVECTAIR
CONVECTAIR 7359 - C05 User manual

CONVECTAIR
CONVECTAIR DIVA 7648 User manual

CONVECTAIR
CONVECTAIR ALLEGRO II User manual

CONVECTAIR
CONVECTAIR Allegro 7300-C07 Quick start guide

CONVECTAIR
CONVECTAIR Allegro 26 7304 Manual