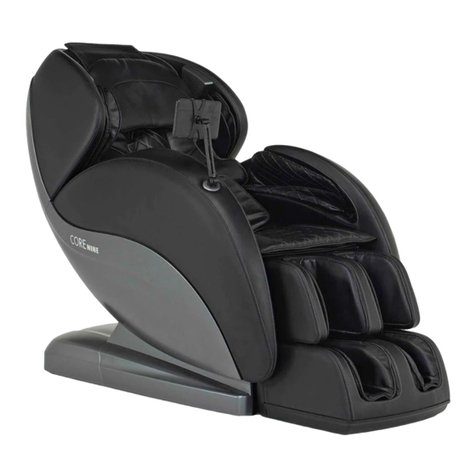
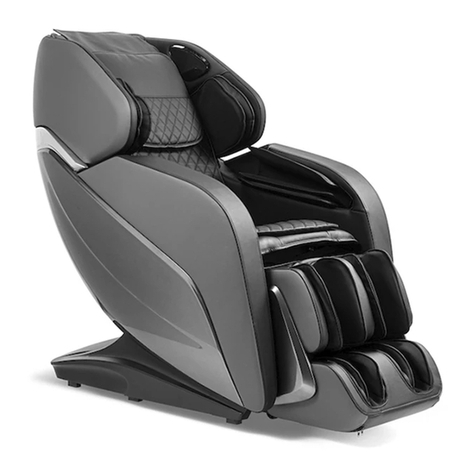
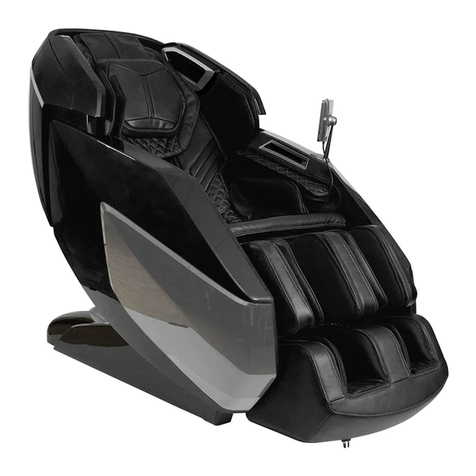
Core Nine 9900 User manual

9900 RECHARGE MASSAGE CHAIR
INSTRUCTION MANUAL

Thank you for purchasing the Core Nine Massage Technology 9900
Recharge Massage Chair. Please read the contents of this instruction
manual before using your chair and refer to it when needed.
Safety Precautions 01
Chair Components 06
Chair Requirements/Moving 13
Controller Instructions 16
Chair Installation 07
Product Care/Maintenance 15
Key Features 05
Troubleshooting 21
22
TABLE OF CONTENTS
© 2016 Core Nine Massage Technology
The images in this manual are for reference purposes and
may not resemble the massage chair design you purchased.
No medical claims are warranted or implied by the use of this product.
Product Specifications/Warranty

Warning
• Unplug this chair from the electrical outlet immediately after using and
before cleaning to reduce the risk of electric shock.
• This chair should never be left unattended when plugged in.
• Never operate this chair with a damaged power cord or if the plug is
not working.
• To disconnect, turn the power control button to the OFF position, then
remove the plug from the outlet.
• Do not use this chair if the covering shows any sign of deterioration,
such as peeling or cracking or if the fabric is torn and the internal
components exposed.
• Always keep the power cord away from heated surfaces.
• Do not operate this chair if the air openings are blocked. Keep the air
openings free of lint, hair, etc.
• Do not put hands, fingers or feet near the rollers when the massage
mechanism is operating. Injury may result from rollers squeezing together.
• Do not drop or insert any object into any opening of this chair.
• Never use pins or other metallic fasteners with this chair.
• Keep dry. Do not operate in wet, humid or moist conditions.
• Never use this chair when any part of the body is in contact with water.
• Never use wet hands to connect or disconnect the power plug from the
electrical outlet.
• Do not use this chair outdoors or in an excessively hot, humid or dusty
environment.
• Do not operate where flammable products are being used such as
aerosol spray or oxygen.
• Do not operate under a blanket, pillow or electric blanket.
• Do not use this chair while under the influence of drugs or alcohol.
• This chair is not intended for self-treatment of medical conditions that
should be managed by a qualified health care provider.
• Do not use this chair without consulting your physician if you have a
medical condition such as musculoskeletal disorder, hyperstosis, spinal
injury, osteoporosis, back problems, joint dysfunction, pregnancy,
thrombosis, phlebitis, heart trouble, diabetes, cancer, recent surgery,
surgical pins, rheumatism, hammertoe, or gout.
* Do not use this chair if you have a pacemaker or other medical
electronic device inside the body.
!
Warning
Caution
This symbol warns of possible danger to life.
This symbol warns of possible damage to objects.
This symbol indicates
prohibited action that will
void warranty.
This symbol indicates
important operation
instructions.
This symbol cautions that
tampering with or disassembling
chair will void warranty.
This symbol indicates
important cable or power
cord instructions.
GroundingInstructions
This chair is equipped with a cord having an equipment-grounding
conductor and a grounding plug. The plug must be plugged into an
appropriate outlet that has the same configuration as the plug.
To replace a fuse, turn off the power switch and unplug the power.
Remove the fuse cover lid and replace with the same sized fuse.
Contact a qualified electrician if you are unable to replace the fuse.
Symbols
Replacing a Fuse
01 02
SAFETY PRECAUTIONS
SAFETY PRECAUTIONS
SAFETY PRECAUTIONS SAFETY PRECAUTIONS
Caution
• Do not use the chair if the electrical outlet is loose.
• Do not remove the plug from the outlet while the chair is operating.
• Do not place the power cord under any heavy objects.
• Only a qualified technician should replace a damaged power cord.
• The chair should be placed on a flat level surface to avoid tipping.
• The chair should be positioned at least 11 inches from a front wall and
18 inches from a back wall to allow for sufficient reclined space.
• Only use the chair while seated. Do not stand on the chair. Do not stand
or sit on the legrest.
• Do not move the chair during operation or while someone is sitting in
the chair.
• The maximum suggested massage time is 20 minutes. A continuous
massage that exceeds 5 minutes on a particular area of the body is not
recommended.
• Do not massage the abdominal area or knee caps.
•Use special care when massaging your neck and head.
• If you feel any abnormal discomfort while using the chair, stop use and
consult your physician.
• Temperatures sufficiently high enough to cause burns may result from
improper use of this chair.
This massage chair is only intended for in-home use and not for
commercial purposes.
Do not attempt to repair the chair yourself. Any modification, disassembly
or maintenance of the chair by anyone other than an approved service
professional will void the warranty. Contact your retail provider if your chair
is in need of service.
Warning
• Only connect this chair to a properly grounded outlet. Grounding provides
a path of least resistance for electrical current to reduce the risk of electric
shock if the product malfunctions or breaks down. This chair is equipped
with a cord having an equipment-grounding conductor and a grounding
plug.
• The plug must be plugged into an appropriate outlet that is properly
installed and grounded in accordance with all local codes and ordinances.
• This chair uses a normal 12-volt circuit.
• The chair must be connected to an outlet having the same configuration
as the plug. No adapter should be used with this chair.
• An improper connection of the equipment-grounding conductor can result
in risk of electric shock.
• If you are in doubt as to whether this product is properly grounded, do not
modify the plug provided with this chair. Contact a qualified electrician to
install a proper outlet.
• Close supervision is necessary when this chair is used by, or near
children, pets or disabled persons. Keep children and pets away from
reclining backrest and extending legrest.
• Children and pets should not be allowed to play on the chair.
• Immediately turn off the main power switch and disconnect the power
cord from the electrical outlet if any kind of liquid is spilled onto the chair.
• Immediately turn off the main power switch and disconnect the power
cord from the electrical outlet if there is a power failure or if there is
lightning.
• Make sure that the power switch is in the “OFF” position before inserting
the plug into a power outlet.
• Make sure the plug is completely inserted into the power outlet.
• Turn off all controls before removing the plug from the outlet.
• When disconnecting the power plug, pull it by holding the plug, not the
cord.
• Do not wrap the power cord around the chair.
• Do not operate the chair with a damaged cord or extension cord.
Caution
03 04

KEY FEATURES 9900 RECHARGE CHAIR COMPONENTS
Core Nine’s auto scan sensor measures your shape and size and detects
targeted pressure points for a customized massage.
Acupressure air massage and reflexology rollers provide an incomparable
therapeutic Foot and Calf Massage to relieve tired feet and legs.
Our patented U-shaped Head and Temple Massage relieves stress, headache
tension, sinus pressure, and fatigue.
Pre-programmed and targeted spot massages help you achieve maximum
results with four specifically designed health and fitness massages: Ease,
Relax, Decompression, and Bodycare.
Developed by NASA, our Zero Gravity setting reclines to a position that
minimizes back pressure, releases back tension and promotes blood flow to
the muscles.
Our precise 3D Massage Technology replicates a professional massage
with a wide range of motion, speed and intensity for a superior deep-tissue
massage.
Designed to target key acupressure points in the feet, arms, buttocks, and
back, 76 Acupressure Air Bag Cells work on specific areas of your body for
optimal health and well-being.
Carbon fiber infrared Heat Therapy relaxes and loosens your muscles
as it gently warms your back, buttocks, legs, and feet.
Our Stretching Function features a gradual extend and hip twist function to
improve flexibility and posture by lengthening the spine and loosening the
hips and shoulders.
9
9
✔
9
9
✔
9
9
✔
9
9
✔
9
9
✔
9
9
✔
9
9
✔
9
9
✔
9
9
✔
Plug your headphones and MP3 device into the chair’s USB ports to
synchronize your massage with your music.
9
9
✔
Backrest Cushion
Controller
Controller Stand
Head Pillow
Seat Cushion
Foot-Calf Massager
Armrest Massager
Armrest
Backrest Cover
Headphone Port
USB Port
Controller Port
Power Port
Power Switch
Fuse Holder
Wheels
0605

CHAIR INSTALLATION CHAIR INSTALLATION
Secure with screws.
Remove two pins from the accessory box. Secure one pin
into the right seat frame. Secure the other pin into the left seat
frame.
Insert the wheels into the
lower frame of the main body.
main body pillow/cushions controller/stand
electric equipment cover wheel
screw
STEP 4: Lift the backrest.
before lifting after lifting
STEP 5: Secure the backrest.
pin
right installation
STEP I: Unpack the main body, pillow, cushions and accessory box.
STEP 2: Unpack the arm massagers and armrests.
left arm massager right arm massager
left armrest right armrest
STEP 3: Install the wheels.
07 08

CHAIR INSTALLATION CHAIR INSTALLATION
Insert the two pins of the left armrest into the left side of the main body.
Push the armrest towards the main body until it locks into place. Repeat
this step for the right armrest.
Hold the left arm massager up and connect its air hose to the left
armrest’s matching color air hose.
armrest speaker cord
armrest pin & hole
Connect the left armrest air
hose to the left arm massager
and by lifting it up and
connecting its air hose to the
left armrest’s matching colored
air hose (See Figure 4).
Next, insert the left arm
massager connector into the
left armrest connector until it
locks into place (see Figure 5).
STEP 6: Install the Armrest. STEP 7: Install the Arm Massager.
armrest pin & hole
armrest pin
right armrest installation
after installation
air hoses
arm massager connectors
air hoses
Figure 4
arm massager connector
Figure 5
armrest connector
1009

CHAIR INSTALLATION CHAIR INSTALLATION
Insert the controller stand into the right armrest hole.
Use the enclosed screw to secure into place. Insert the backrest cushion into the backrest and zip to
close. Connect the velcro on the bottom of the backrest
cushion to the seat casing.
Connect the backrest cushion air hose to the main body.
Place the pillow on the backrest. Connect the
velcro on the backrest cushion to the backrest.
Connect the heating air hose to the seat cushion
of the main body.
Connect the velcro of the seat cushion to the seat
casing.
Insert the controller cord into the controller port on the back of the chair.
Insert the controller into the
controller stand.
right armrest hole.
controller stand hole
controller port
Connect the massage chair cord to a
working power outlet.
Turn the power switch on the back of the
chair to the “on” position.
Press the power button on the controller
to turn on the massage chair.
controller stand
power switch
STEP 8: Install the Controller Stand. STEP 11: Assemble the cushions and pillow.
STEP 12: Turn on the massage chair.
STEP 9: Install the Controller.
STEP 10: Assemble the Controller.
11 12

CHAIR REQUIREMENTS & MOVING CHAIR REQUIREMENTS & MOVING
I
SPACE NEEDED:
When the massage chair is fully reclined from an upright position it
requires an additional 18 inches of space behind it and 11 inches of
space in front of it.
Check to make sure the power cord is not knotted, entangled with
any objects or crushed under the main body. Keep children and
pets away from the chair as it reclines.
METHOD OF MOVING:
This chair can be easily moved by raising the front and tilting back on its
wheels (pictured below).
WARNING: Do not move the chair when someone is sitting
on it or when the power switch is on.
TIPS FOR MOVING THE CHAIR:
• Unplug and remove the power cord and
remote control before moving the chair.
• Use caution when handling the armrests and
legrest to avoid damaging the leather.
• Remove the armrests before moving the chair
through a narrow door.
• Use caution when rolling the chair across a tile or wood floor.
• To prevent the floor from being scratched, place a towel or
blanket under the wheels or lift the chair using at least four
people.
• The chair should be placed on a flat level surface.
• Place a soft mat underneath the chair to protect your floors.
FINAL ADJUSTMENTS:
• Make sure the massage chair headrest, backrest and legrest
are in their correct upright position before sitting down.
• Remove the backrest cushion or head pillow for a more
intense massage.
• To listen to music, insert your flash drive into the USB port and
your headphone cord into the headphone port on the back of
the massage chair.
13 14
11 in 18 in
53 in
86 in

PRODUCT CARE/MAINTENANCE CONTROLLER INSTRUCTIONS
SYNTHETIC LEATHER CARE:
• For general cleaning, wipe down the leather with a damp cloth,
then a dry cloth.
• Avoid excessive brushing or rubbing while cleaning the leather.
• To remove stains, use a damp cloth with a 3-5% neutral detergent,
then wipe with a dry cloth.
• Do not use benzene, thinner, alcohol, or any other solvent or
abrasive cleansing agent on the leather.
UPHOLSTERY CARE:
• Use a damp cloth with a 3-5% neutral detergent to clean the
upholstery of your massage chair.
• Avoid excessive brushing or rubbing while cleaning the upholstery.
• Allow to air dry.
• Do not use benzene, thinner, alcohol, or any other solvent or
abrasive cleansing agent on the upholstery.
PLASTIC CARE:
• Use a damp cloth with a 3-5% neutral detergent to clean the
plastic components of the massage chair.
• Dry with a cloth or allow to air dry.
CONTROLLER CARE:
• Do not use a damp cloth to clean the controller. Use only
a clean dry cloth.
• Do not use benzene, thinner, alcohol, or any other solvent or
abrasive cleansing agent on the controller.
CAUTION
• Turn the main power switch off and disconnect the power plug
from the electrical outlet before cleaning the chair to reduce the risk
of electric shock.
• Never use wet hands to connect or disconnect the power plug
from the electrical outlet.
• Do not use a damp cloth to clean the power cord.
AUTO MASSAGE PROGRAMS
EASE RELAX DECOMPRESS BODYCARE
PARTIAL AUTO MASSAGES
SHOULDER-
NECK
BACK-
WAIST
On/Off OPERATION
MECHANICAL AIR
PRESSURE
HEAT
THERAPY
Make sure the chair is connected to a working power outlet.
Turn the power switch on
the back of the chair to
the “on” position.
Press the power button on the controller to turn on the
massage chair.
Ease - A full body medium intensity massage.
Relax - A full body deep tissue massage.
Decompression - A full body stretching massage.
Bodycare - A full body relaxation massage.
PRE-PROGRAMMED AUTO MASSAGES
Schoulder/Neck - A partial massage that focuses on the shoulders
and neck.
Back/Waist - A partial massage that focuses on the back and waist.
Mechanical - Press this button to turn on/off the massage roller
mechanism.
Air Pressure - Press this button to turn on/off the air massage.
Heat Therapy - Press this button to turn on/off the heating function.
power switch
1615

CONTROLLER INSTRUCTIONS CONTROLLER INSTRUCTIONS
KNEADING - A focused medium intensity massage that moves
in small circular motions simultaneously.
6 levels of adjustable speed and 5 levels of adjustable width.
• Press the 3D button one time (1) for a more intense kneading
massage for the entire upper body.
• Press the 3D button a second time (2) to return to a focused
kneading massage.
KNOCKING - A focused medium intensity massage that lightly
presses on the muscles and joints with a rocking motion.
6 levels of adjustable speed and 5 levels of adjustable width.
• Press the 3D button one time (1) to combine the knocking and
kneading massage techniques.
• Press the 3D button a second time (2) for a more intense
knocking massage for the entire upper body.
• Press the 3D button a third time (3) for an intense knocking and
kneading massage for the entire upper body.
• Press the 3D button a fourth time (4) to return to a focused
knocking massage.
MANUAL MASSAGE MODES
TAPPING - A focused medium intensity massage of rapid-tapping
strokes.
6 levels of adjustable speed and 5 levels of adjustable width.
• Press the 3D button one time (1) to combine the tapping and
kneading massage techniques.
• Press the 3D button a second time (2) for a more intense tapping
massage for the entire upper body.
• Press the 3D button a third time (3) for an intense tapping and
kneading massage for the entire upper body.
• Press the 3D button a fourth time (4) to return to a focused
tapping massage.
MANIPULATION MASSAGE - A focused spinal kneading massage.
6 levels of adjustable speed and 5 levels of adjustable width.
• Press the 3D button one time (1) for a more intense manipulation
massage for the entire back.
• Press the 3D button a second time (2) to return to a focused
manipulation massage.
3D MASSAGE - Press this button for the kneading, knocking,
tapping, shiatsu, and manipulation massage modes.
ROLLING MASSAGE - A focused massage that gently rolls up
and down the back near the spine.
6 levels of adjustable speed and 5 levels of adjustable width.
UP/DOWN ARROWS - Press and hold these buttons to adjust the
massage mechanism position during a focused manual massage.
SHIATSU MASSAGE - A focused deep tissue massage.
6 levels of adjustable speed and 5 levels of adjustable width.
• Press the 3D button one time (1) to combine the shiatsu and
kneading massage techniques.
• Press the 3D button a second time (2) for a more intense shiatsu
massage for the entire upper body.
• Press the 3D button a third time (3) for an intense shiatsu and
kneading massage for the entire upper body.
• Press the 3D button a fourth time (4) to return to a focused
shiatsu massage.
No function
WIDTH ADJUSTMENT - Press this button to adjust the width of
the kneading, knocking, tapping, manipulation, rolling, and shiatsu
manual massage modes.
SPEED ADJUSTMENT - Press this button to adjust the speed of
the kneading, knocking, tapping, manipulation, rolling, and shiatsu
manual massage modes.
MANUAL MASSAGE MODES
1817

CONTROLLER INSTRUCTIONS CONTROLLER INSTRUCTIONS
BACK INTENSITY ADJUSTMENT - Press this button to adjust
the air pressure massage intensity for the back.
4 levels of adjustable intensity.
ARM INTENSITY ADJUSTMENT - Press this button to adjust
the air pressure massage intensity for the arms.
4 levels of adjustable intensity.
FOOT/CALF MASSAGE - Press this button to turn on the
legrest air pressure and reflexology roller massage function.
• Press this button a second time (2) to stop the reflexology
roller massage.
• Press this button a third time (3) to stop the air pressure
massage.
• Press this button a fourth time (4) to turn on the air pressure
and reflexology roller foot and calf massage.
GLUTEUS MASSAGE - Press this button to turn on the gluteus
massage function.
TEMPERATURE ADJUSTMENT - Press these buttons to adjust
the heating function temperature from 40 º- 70 º C.
Press this button to lower the temperature.
Press this button to raise the temperature.
MANUAL MASSAGE MODES MANUAL MUSIC MODES
MUSIC ON/OFF - Press this button to turn on the chair’s music
function. Press this button a second time (2) to turn off the chair’s
music function.
SYNCHRONOUS MUSIC MASSAGE - Press this button to
synchronize the chair’s massage with your music.
NEXT SONG - Press this button to choose the next song.
PREVIOUS SONG - Press this button to choose the previous song.
INCREASE SOUND - Press this button to increase the volume of
your music.
DECREASE SOUND - Press this button to decrease the volume of
your music.
MP3 MUSIC FUNCTION - Plug your headphones and MP3 device into the
appropriate USB ports on the back of the massage chair to listen to music
as you enjoy your massage.
19 20

TROUBLESHOOTING
Problem Possible Reason for Problem Troubleshooting
If you continue to have problems, turn off the main power switch, unplug the power
cord from the electrical outlet and contact your retailer’s service department.
The massage chair is
connected to the power
supply but the remote
control is not working.
There are sounds
inside the massage chair
when it is being used.
The massage chair
becomes louder when
it is being used.
The massage chair
suddenly stops working
when it is being used.
The massage chair
will not extend, recline or
return to its upright position.
The remote control is
excessively hot.
The massage chair is not
returning to its restored
upright position.
The power cord and
electrical plug are
excessively hot.
The air pump, motor and mechanical
parts of your massage chair will make
various beeping & humming sounds.
Check to make sure the power switch
is turned on.
Check to make sure the plug is properly
connected to a working electrical outlet.
Check to make sure a fuse has not
burned out.
Check to make sure the “On/Off” key
on the remote control is on.
Check to make sure the power cord is
not damaged.
The massage time may be complete.
Check to make sure your home
has not lost its electricity.
Check to make sure your home
has not lost its electricity.
The massage chair may be overloaded
from extended use.
The massage chair may be overloaded
from extended use.
The massage chair may be overloaded
from extended use.
The massage chair may be overloaded
from extended use.
Check to make sure there are no
obstacles in the way.
The massage chair may be overloaded
from extended use.
Check to make sure the power cord is
not damaged.
Check to make sure there are no
obstacles in the way.
Turn on the power switch.
Reconnect the power plug to
a working electrical outlet.
Replace the fuse.
Turn the “On/Off” key on the
remote control to the “On” position.
If damaged, contact your retailer’s
service dept for a new power cord.
Turn off the massage chair and wait
until your electricity is restored.
Choose a new massage mode or
turn off your massage chair.
This is normal.
Turn off the massage chair for at
least 30 minutes.
Turn off the massage chair for at
least 30 minutes.
Turn off the massage chair for at
least 30 minutes.
Turn off the massage chair and wait
until your electricity is restored.
Turn off the massage chair for at
least 30 minutes.
Remove the obstacles.
Turn off the massage chair for at
least 30 minutes.
If damaged, contact your retailer’s
service dept for a new power cord.
2221
PRODUCT SPECIFICATIONS
Model Number: 9900
Operating Voltage: AC100-120V
Power Consumption: 220W
Required Recline Clearance: 11 inches in front / 18 inches in back
Net Weight: 273 lbs Maximum Load Weight: 300 lbs
Assembled Massage Chair Upright Dimensions: L/51” x W/35.5” x H/51”
Assembled Massage Chair Reclined Dimensions: L/79” x W/35.5” x H/33.5”
WARRANTY
Visit Core Nine’s website at www.corenineusa.com to register
your massage chair. All massage chairs must be registered with a serial number
to activate the warranty policy. The serial number is located on the back of the
chair near the power switch.
Core Nine’s 9900 Recharge Massage Chair has a standard 2-year parts and
1-year in-home service warranty.
Consumers may contact their retailer for additional warranty and service
information.
Table of contents
Other Core Nine Massager manuals

Core Nine
Core Nine 7716 User manual

Core Nine
Core Nine 7700 User manual

Core Nine
Core Nine 8835 User manual

Core Nine
Core Nine 8825 User manual

Core Nine
Core Nine 8820 User manual

Core Nine
Core Nine 9910-SL User manual

Core Nine
Core Nine C9000 Pro Series User manual

Core Nine
Core Nine 8830 User manual

Core Nine
Core Nine C9000 Pro Series User manual