www.costway.fr
12
Bienvenue pour visiter notre site et acheter nos produits de qualité!
Points de Récompense
Service à la Clientèle Exclusif
Recommandaons Personnalisées
Panier Permanent
Historique des Commandes
Nous tenons à vous présenter nos remerciements
sincères à tous nos clients qui prennent beaucoup
de temps pour assembler ce produit et nous donner
des commentaires précieux.
www.costway.fr
Vos suggestions et commentaires pour COSTWAY sont vraiment importants pour nous!
Nous vous sollicitons sincèrement de revenir dans notre boutique et de laisser une bonne évaluation en
un simple clic. Ce serait très encourageant si vous pouviez le faire comme ci-dessous:
24 février 2019
Excellents produits jusqu’à présent. Livraison rapide et l’installation facile. Et le fonctionnnement sans problème.
Bons produits jusqu’a présent
Avec votre évaluation inspirante, COSTWAY sera plus professionnel pour vous offrir une
BONNE EXPÉRIENCE D’ACHATS, de BONS PRODUITS et un SERCIVE EFFICACE !
FR office : 26 RUE DU VERTUQUET, 59960 NEUVILLE EN FERRAIN, FRANCE
Évaluation de Cinq-étoiles
merci
www.costway.es
MANUAL DEL USUARIO
ESTE MANUAL DE INSTRUCCIONES CONTIENE IMPORTANTES INFORMACIONES DE SEGURIDAD, POR FAVOR LO LEA Y GUARDE PARA REFERENCIAS FUTURAS.
¡Por favor dénos la oportunidad de hacerlo bien y mejorar!
Primero póngase en contacto con nuestro amable departamento de
servicio al cliente para obtener ayuda. ¡Los reemplazos de piezas faltas o
dañadas se enviarán lo antes posible!
Visítenos: www.costway.es
Siga Costway
13
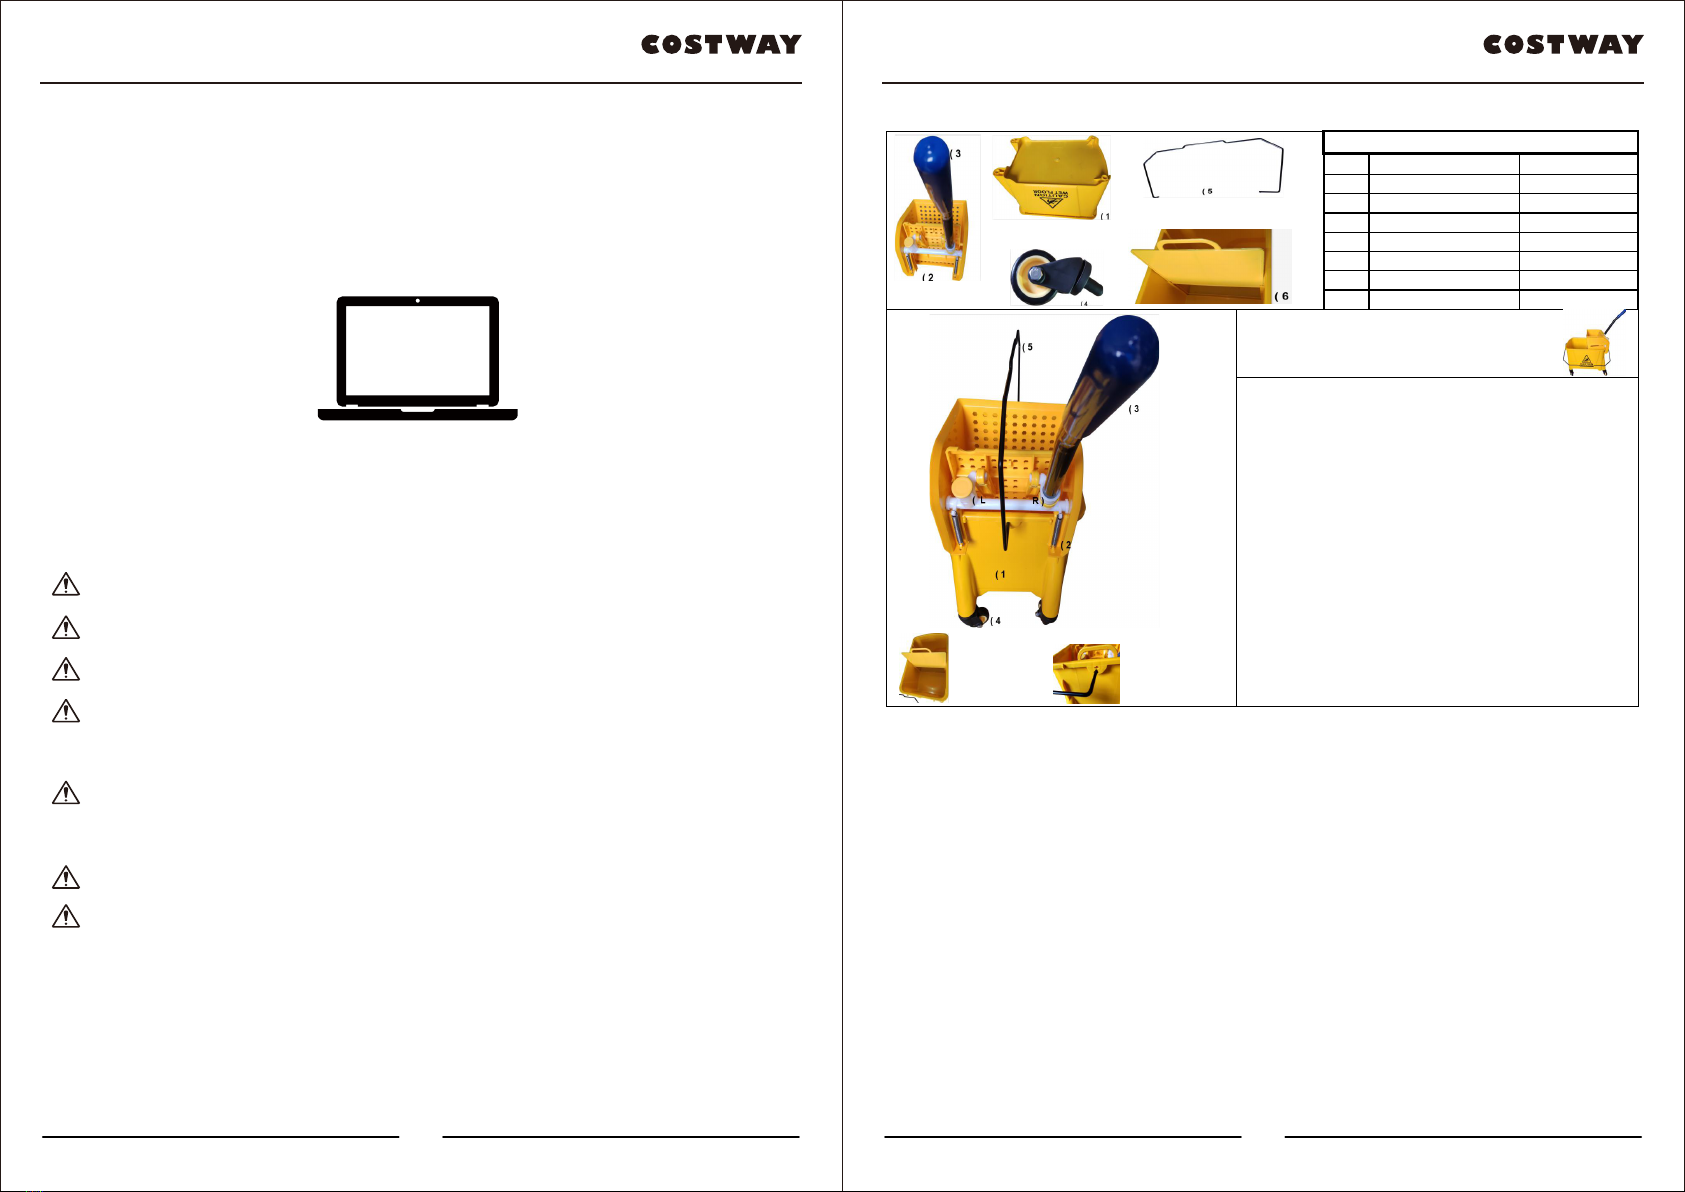
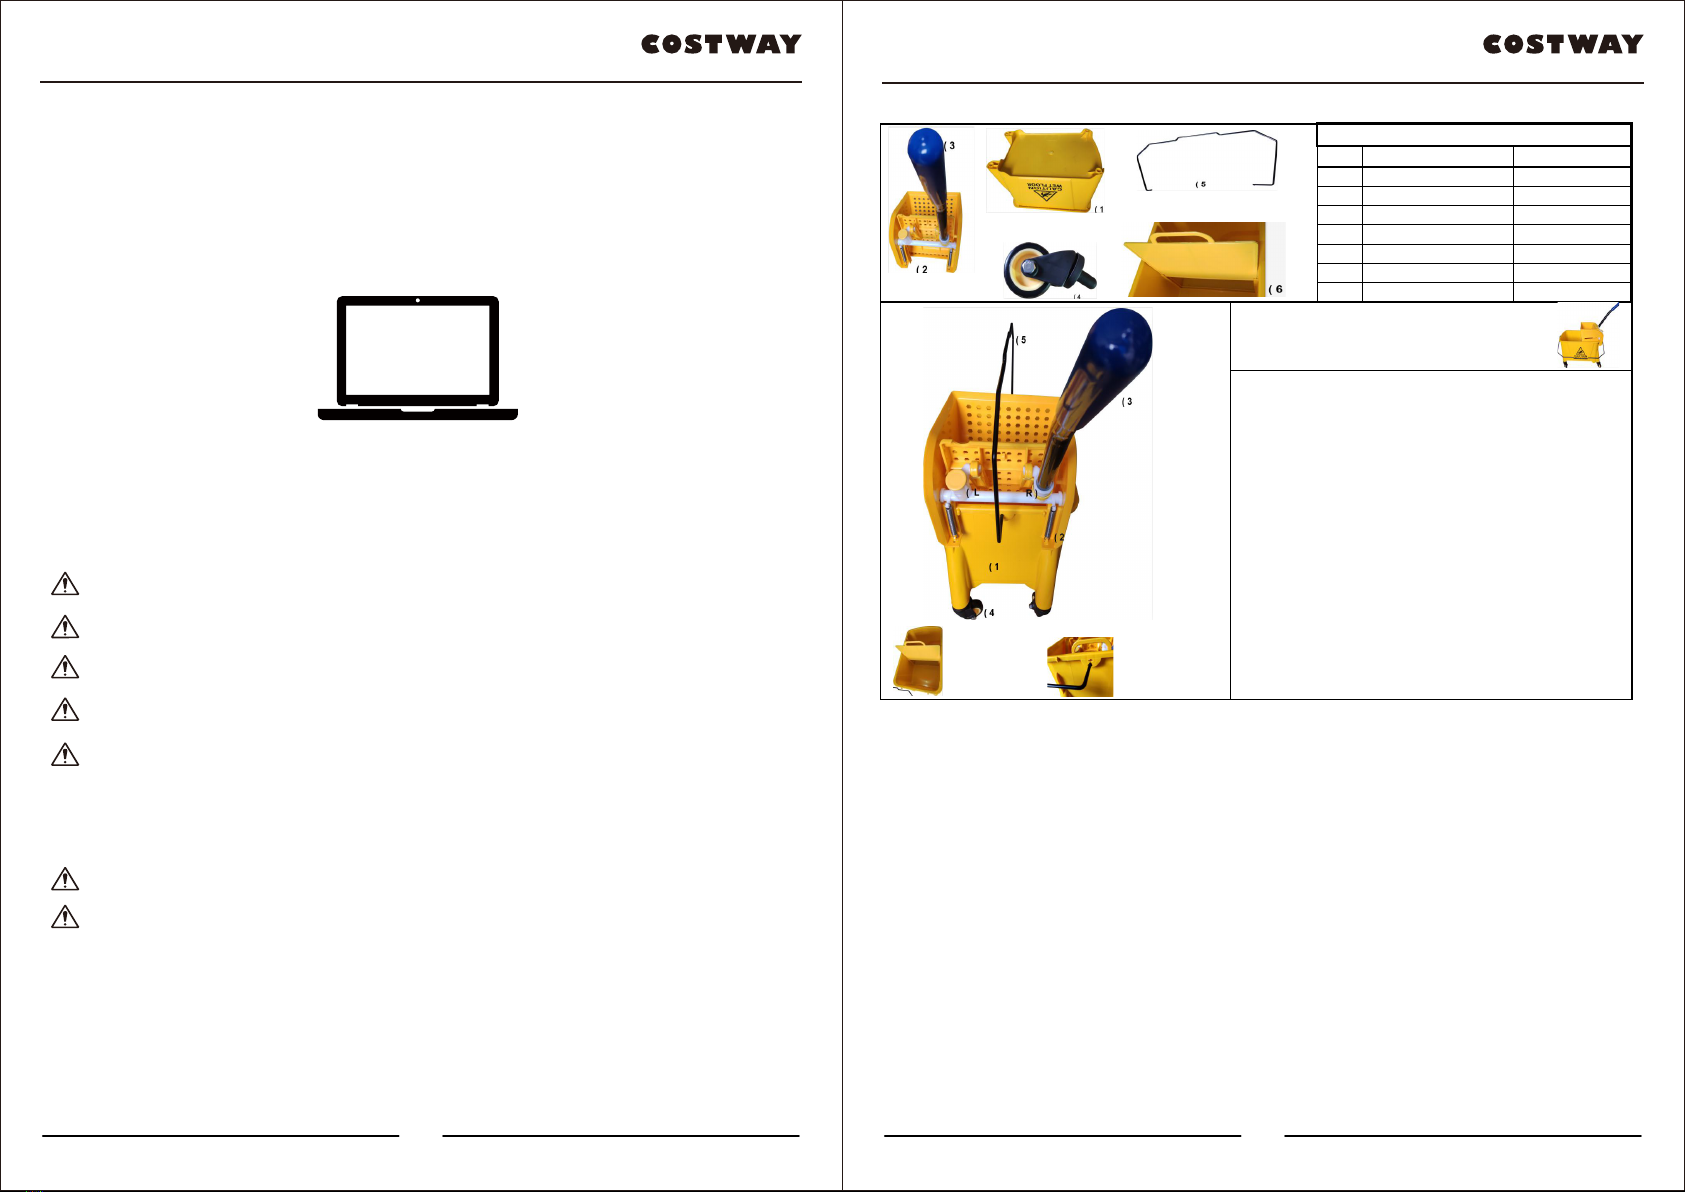
Carro de Limpieza con Escurridor
HW62395
EN DE FR ES IT