Costway MU70009 User manual

Before You Start
Please read all instructions carefully.
Retain instructions for future reference.
Separate and count all parts and hardware.
Read through each step carefully and follow the proper order.
We recommend that, where possible, all items are assembled near to the
area in which they will be placed in use, to avoid moving the product
unnecessarily once assembled.
Always place the product on a flat, steady and stable surface.
Keep all small parts and packaging materials for this product away from
babies and children as they potentially pose a serious choking hazard.
NOTICE
Please read over the NOTICE before use!
NOTICE
● Dedicated power adapter shall be used, and in case of adaptor damage,
replace it immediately
● The keyboard can only be disassembled by professionals, and no change
can be made to the internal structure. In case of any functional abnormality
during performance, stop performing immediately and send the keyboard to
professionals for maintenance.
● When connecting the keyboard to other device, ensure both the keyboard
and the device to be connected are powered off before connection.
● Do not turn and keep the volume to the maximum or to an uncomfortable
degree for a long time when pertorming
● Keep the keyboard away from heat source to protect its parts from damage.
● Prevent liquid, dust, small particle and other foreign matters from entering
the case of the keyboard, so as not to result in element short circuit.
● Pull out the plug before cleaning the keyboard, and do not pull out the plug
with wet hand.
● Please use dry and soft cloth to clean the keyboard. Paint, alcohol or other
chemical solvents shall not be used for cleaning, so as not to damage the
keyboard surface.
● Please pull out the plug after performing or when the keyboard is left
unused for a long time.
Package Contents
* 61-Key Lighting Electric Keyboard Piano with LCD Display X 1 pc
* Keyboard Stand X 1 pc
* Stool X 1 pc
* Power Adaptor X 1 pc
* Headphone X 1 pc
* Microphone X 1 pc
* Music Stand X 1 pc
* Installation Manual X 1 pc
02 03

39) UDISK
40) AUDIO INPUT
41) MIC
42) PHONES/OUTPUT
43) DC 12V
1) Loudspeaker
2) Power
3) Previous/Next
4) Play/Pause
5) Stop
6) MP3 Volume Control
7) Sequence/Random/
Single
8) Sound effect
9) Sync
10) Fill-in
11) Timbre
12) Rhythm
13) Key Lighting
14) Demo Song
15) LCD display
16) Keyboard
Percussion
17) Recording
18) Program
19) Play
20) Split
21) Sustain
22) Vibrato
23) One Key
24) Follow
25) Ensemble
26) Memory
27) Numbers
28) Single Chord
29) Fingered Chord
30) Chord Timbre
31) Chord OFF
32) Metronome
33) Start/Stop
34) Master Volume
35) Accom Volume
36) Tempo
37) Transpose
38) Chord Zone
MP3 Control
II. Preparations before Playing
● Power adaptor
Adedicated power adapter shall be used. Connect the output end of the
adaptor to the power port on the rear panel of the keyboard, and then the
other end to the power socket. (Note: the input voltage of the adaptor shall be
compatible with the power supply voltage)
● Audio output/ external headphone
◆ Audio output: Firstly, turn off the keyboard and the external audio
devices, secondly, connect one end of the audio cable to the
PHONES/OUTPUT port on the rear panel of the keyboard, and then connect
the other end to the audio input port of the audio devices.
◆ Headphone connection: When connecting a headphone to the
PHONES/OUTPUT port on the rear panel of the keyboard, the loudspeaker
will be disabled automatically. In this way, you can play the keyboard without
disturbing others.
※Note! When using the headphone, do not turn up and keep the volume to
the maximum for a long time, which may cause hearing loss.
● Mic Input and Audio Input
◆ Mic input: Connect a microphone to the MIC port to start singing and
playing.
◆ The Keyboard has the stereo input function. Sound signals from mobile
phone, MP3 player, computer and other audio devices can be input into the
keyboard system for playing.
Firstly turn off the Keyboard, then, connect one end of audio cable to the
output port of an audio device, and the other end to the AUDIO INPUT port
on the rear panel of the Keyboard, finally, turn on the keyboard.
● Playing MP3 music
Insert a U disk into the UDISK port on the rear panel of the Keyboard for
MP3 music playing.
Support 32G (max.).
I. Panel Control and External Ports
● Top panel control
● Rear panel port
UDISK AUDIO
INPUT MIC 12V
PHONES/
OUTPUT
39 40 41 42 43
04 05

◆ Press the [ ] bottom to adjust the volume.
◆ Press [ ]to go to the previous track,. press [ ]to go to the next
track, press [ ] to play/pause a track, press [ ] to stop a playing track,
press [ ] to cycle through the repeat modes for continuous,
random, or single playback.
◆ Press [Effect] to adjust the effect among Common, Pop, Rock, Jazz and
Classic. The keyboard is defaulted to be in common effect.
III. Basic Playing Method
Press [Power On/Off], and the keyboard will light up from both sides, and the
LCD display will turn on and show the current timbre, tempo and other
status. Then you may operate the Keyboard as required.
● Key lighting
The Keyboard has luminous function, under the mode of playing, training and
playing demo song, the light hint will be provided. The luminous function is
defaulted to be enabled, press [KEY LIGHTING] to enable or disenable the
luminous function.
● Master volume adjustment
Press [MASTER VOL +/-] to turn up or turn down the master volume.
"VOLUME" and the current volume level will be shown on the display. Press
[MASTER VOL +/-] simultaneously to reset to the default value.
The master volume can also control the accompaniment volume.
● Accompaniment volume adjustment
Press [ACCOM VOL +/-] to turn up or turn down the master volume.
"RC-VOLUME" and the current volume level will show on the display. Press
[ACCOM VOL +/-] simultaneously to reset to the default value.
● Timbre selection
The Keyboard provides 255 timbres from "000" to "254" for your selection.
When turning on the keyboard, the timbre selection function will be enabled
automatically. "TONE" and current timbre number will show on the display.
When under other states, press [TIMBRE] to enable the timbre selection
function. The timbre is defaulted to be "000", and it can be adjusted
by pressing the corresponding number buttons or pressing the "+" / "-"button.
● Playing Percussion
This Keyboard provides 61 kinds of keyboard percussions. Press
[KEYBOARD PERCUSSION] to convert the key to percussion key. Each
key corresponds to one percussion instrument. Press this button again to
disenable the keyboard percussion function.
● Playing demonstration songs
50 demo songs have been stored in the Keyboard from "000" to "049" for
your selection.
Press [DEMO SONG] to play all demonstration songs in order, the luminous
key will flash to the melody. "SONG" and curent demo song number will
show on the display.
Press the number buttons or "+"/"-" buttons to select the demonstration song.
When pressing [TIMBRE] during the demonstration song playing process,
"TONE" will show on the display, press the number buttons or the "+"/"-"
button within 3 seconds to select other timbres for playing the demonstration
song.
Press (START/STOP] or press [DEMO SONG] again to stop playing the
demonstration song.
06 07

V. Auto Bass Chord
● Single chord
Under the state that the rhythm is enabled, press [SINGLE CHORD], and
"SIN" will show on the display, and then you can play a single chord on the
keys in the chord zone of the keyboard.
● Fingered chord
Under the state that the rhythm is enabled, press the [FINGERED CHORD]
button. "FIN" will show on the display, and then you can play a fingered
chord on the keys in the chord zone of the keyboard.
● Chord OFF
Press [CHORD OFF] to disenable the single chord or the fingered chord
function.
Single Chord Fingering
IV. Auto Rhythm
● Rhythm selection
This Keyboard provides 255 rhythms from "000" to "254" for your selection,
and the rhythm is defaulted to be "000". Press [RHYTHM] to enable the
rhythm selection function. "RHYM" and current rhythm number will show on
the display. Then you can press the number buttons or the"/"-" buttons to
select other rhythms.
● Rhythm control
1. Enable rhythm
◆ Press [START/STOP] to start accompaniment rhythm
◆ Press [SYNC], "SYN" will show on the display and the four beat points
will flash simultaneously, then play any key in the chord key zone (the
1st-19th key, from left), the accompaniment rhythm will be enabled.
2. Interlude
After the accompaniment rhythm is activated, press [FILL-IN] to have a
temporary rhythm playing during the accompaniment rhythm. If press and
hold [FILL-IN], the temporary rhythm will continue.
3. Stop rhythm
During the accompaniment rhythm, press [START/STOP] to stop the
accompaniment rhythm.
● Metronome
The metronome contains four tempos, 1/4, 2/4, 3/4 and 4/4, respectively.
Press the [METRONOME] continuously to select the corresponding tempo.
Press the [METRONOME] button again to stop the tempo.
● Tempo adjustment
Press [TEMPO +/ - to increase or decrease the rhythm speed. Press the two
buttons simultaneously to reset to the default value.
08 09

Fingered Chord Fingering (C Key)
(The C key fingered chord fingering is as shown in the following figure, and
the rest can be oblained by analogy)
● Chord Timbre
During single chord or fingered chord accompaniment, you can press
[CHORD TIMBRE| to change the chord tone, and press [CHORD TIMBRE]
again to resume the original chord tone.
VI. Status memory function
With the status memory function, you can save the tone, rhythm, tempo and
other parameters to be changed during playing, for fast shifting. This
keyboard is equipped with 3 status memories, which can be flexibly called at
any time during playing
● Storage of status memory
Set the tone, rhythm, tempo and chord as required, and then press the
[MEMORYJ] button and one of buttons from [MEMORY 1] to [MEMORY
3] to save the current status.
● Calling of status memory
Press any one of buttons from [MEMORY 1]to [MEMORY 3] to call the
setting parameters saved under this memory to replace the current status.
※No power failure prote ction is provided for the saved conte nts, and the
saved contents will loss after the electronic keyboard is restarted after power
cut.
VII. Effect Control
● Transpos ing function
With the transposing function, you can play musicof other tunes with C-tune
fingering method. Press the [TRANSPOSE - ] to decrease the tone by
half-tone (minor second), and the tune in C-tune keybaard zone will change
to B-tune. Press the [TRANSPOSE + ]to increase the tone by half-tone
(minor second), and the tune in C-tune keyboard zone will change to #C tune
or bD tune. When pressing the [TRANSPoSE - ] for twice, C-tune will shift
to bB-tune,
when pressing the [TRANSPOSE + ] for five times, C-tune will shift to
F-tune. Press [TRANSPoSE + ] and [TRANSPOSE - ] simultaneously to
recover to C-tune "00". Press [TRANSPOSE + ] and [TRANSPOSE - ] to
adjust the level from "P-6" to'P06".
● Sustain function
Press [SUSTAIN]. "SUS" will show an the display, and the sustain effect will
be activated.
Press this button again to disenable the sustain effect.
● Vibrato function
Press [VIBRATO]. "VIB" will show on the display, and the vibrato effect will
be activated.
Press this buttan again to disenable the vibrato effet.
● Keyboard splitting function
Press [SPLIT] to enable the keyboard splitting function, "SPLIT" will show
on the display. 24 keys on the left of the keyboard will split with the
remaining keyboard. While the left keyboard zone will increase by one octave
and maintain the original tone, the right keyboard zone will decrease by one
octave to maintain the same pitch with the left keyboard zone. The tone of
the right keyboard zone can be set as needed so different tones can be played
by the left and right keyboard zones at the same time. Press [SPLIT] again to
disenable this function.
10 11

VIII. Recording and Rhythm Programming
● Recording
Press [REC] to enable the recording function, "REC" will show on the
display. Under this mode all playing notes will be recorded. When the storage
is full, "REC" will flash on the display, and recording will stop automatically.
◆ Press [PLAY] to playback the recorded notes, and "PLAY" will show on
the display. On completion of playback, it will enter to the recording mode
and "REC will show on the display.
You can record a new note, or you can press [PLAY] to playback the recorded
note.
◆ Press [Start/Stop] or press [REC] again to disenable the recording
function, and all recorded rhythm will be removed.
● Rhythm programming
Press (PROG] to enable the rhythm programming function, "PRG" will show
on the display, and the keyboard percussion will be activated. Under this
mode, you can create custom rhythms by playing the corresponding
percussion key.
◆ 32 percussions can be recorded at maximum, after that PRG" will flash on
the display, and programming will slop automatically.
◆ Press [PLAY] to playback the programming rhythm. Press [PLAY] again
to stop playback, "PRG" will show on the display and programming function
will be enabled. You can re-program rhythms or you can press [PLAY] again
to playback.
◆ Press [START/STOP] or press [PROG] again to disenable the
programming function, and all recorded rhythm will be removed.
IX. Three-step Smart Teaching With Illuminated Keys
● Trainingl: One Key
Press [ONE KEY] to enable the One Key training function, "LEARN",
"SONG" and the song number will show on the display, and then press
"+"/"-" button to select the song to be learned.
The luminous keyboard will light on according to the main melody notes,
indicating the note to be played, and you can perform by following the
guidance of the lighted key.
Single Key training aims at duration learning, and there is no requirement for
pitch or correctness. This mode allows mistakes when playing the keys, but
the keyboards still plays correct notes, and the luminous keys will light on
according to the correct notes while the key zone in the display will also
show the correct notes.
After one song is finished, repeat the current song to be learned.
Press [Start/Stop] or press [ONE KEY] to disenable the training function.
● Training lI: Follow
Press [FOLLOW] to enable the follow function, "LEARN", "SONG" and the
song number wil show on the display, and then press "+"/"-" button to select
the song to be learned.
With [FOLLOW] function, you can learn by following the correctly playing
notes. You can play according to the demonstration song. the key will light on
according to the melody notes, indicating the notes to be played, and you can
play correctly by following the guidance. You can also learn how to play by
following the indicators in the key zone of the display. It will wait for you to
play the correct note before it moves to the next one.
※Notes: Under this state, the Keyboard plays only the correct notes, and
gives no response to the wrong notes.
Press STARTISTOP] or press [FOLLOW] to disenable the training function.
● Training III: Ensemble
Press [ENSEMBLE] to enable the Ensemble training function, "LEARN",
"SONG" and the song number will show on the display, and then press
"+"/"-" button to select the song to be learned.
12 13

Attach the part (B) to (D) and(C) using
the appropriate screw(F).Repeat this
process for the other side.
Fasten screws (F) for adjusting the
suitable height of the keyboard
stand.
Attach two parts (B) to the part (A)
using four screws (F) to create the
upper part assembly. Fasten screws(G)
for fixing the keyboard on stand.
The Ensemble training aims at the correct and comprehensive learning of the
song duration and notes. The keynote will be shielded for ensemble. The
luminous keyboard will light on according to the main melody notes,
indicating the note to be played, and you can perform by following the
guidance of the lighted key. You need to play the correct note according to the
correct duration of the song. If you fail to play within 3 seconds, the keyboard
will automatically play the keynote, and the keyboard zone in the screen will
display the correct note and tempo.
After one song is finished, repeat the current song to be learned.
Press [START/STOP] or press [ENSEMBLE] to disenable the training
function.
Assembly Instruction of Keyboard Stand
ATTENTION:ADULTASSEMBLY REQUIRED
HTYPE STAND
Find out the parts (D) and (E), align the
holes on the base of the part (D) with the
holes on the part (E). Use nut (I) and bolt
(H) to connect the two parts. Use correct
tools to ensure a firm attachment. Repeat
this process for the other side.
14 15

Vor dem Beginnen
Bitte lesen Sie alle Anweisungen sorgfältig durch.
Bewahren Sie die Anweisungen zum zukünftigen Verwendung auf.
Separieren und zählen Sie alle Teile und Hardware.
Lesen Sie jeden Schritt sorgfältig durch und befolgen Sie die richtige
Reihenfolge.
Wir empfehlen, wenn möglich, alle Artikel in der Nähe des Einsatzortes zu
montieren, um ein unnötiges Bewegung des Artikels zu vermeiden.
Stellen Sie den Artikel immer auf eine glatte, flache und stabile Oberfläche.
Halten Sie alle kleinen Teile und Verpackungsmaterialien dieses Artikels von
Babys und Kindern fern, da sie zur ernsthaften Erstickungsgefahr führen
können.
HINWEIS
Bitte lesen Sie vor dem Gebrauch den HINWEIS durch!
HINWEIS
● Es muss ein spezielles Netzteil verwendet werden. Falls das Adapter
beschädigt ist, muss es sofort ersetzt werden.
● Die Tastatur kann nur von Fachleuten zerlegt werden, und an der internen
Struktur können keine Änderungen vorgenommen werden. Bei
Funktionsstörungen während der Leistung die Leistung sofort einstellen und
die Tastatur zur Wartung an Fachleute senden.
● Stellen Sie beim Anschließen der Tastatur an ein anderes Gerät sicher, dass
sowohl die Tastatur als auch das anzuschließende Gerät vor dem Anschließen
ausgeschaltet sind.
● Drehen Sie die Lautstärke nicht und halten Sie sie während der Aufführung
nicht lange auf das Maximum oder ein unangenehmes Maß.
● Halten Sie die Tastatur von der Wärmequelle fern, um ihre Teile vor
Beschädigungen zu schützen.
●Verhindern Sie, dass Flüssigkeit, Staub, kleine Partikel und andere
Fremdkörper in das Gehäuse der Tastatur gelangen, um einen Kurzschluss der
Elemente zu vermeiden.
● Ziehen Sie den Stecker heraus, bevor Sie die Tastatur reinigen, und ziehen
Sie den Stecker nicht mit nasser Hand heraus.
● Bitte reinigen Sie die Tastatur mit einem trockenen und weichen Tuch. Zur
Reinigung dürfen keine Farben, Alkohol oder andere chemische
Lösungsmittel verwendet werden, um die Tastaturoberfläche nicht zu
beschädigen.
● Bitte ziehen Sie den Stecker nach dem Durchführen oder wenn die Tastatur
längere Zeit nicht benutzt wird.
Packungsinhalt
* 61-Tasten-Beleuchtung Elektrisches Tastaturklavier mit LCD-Display x 1
*Tastaturständer x 1
* Hocker x 1
* Netzteil x 1
* Kopfhörer x 1
* Mikrofon x 1
* Notenständer x 1
* Handbuch x 1
18 19

39) UDISK
40) AUDIO INPUT
41) MIC
42) PHONES/OUTPUT
43) DC 12V
1) Loudspeaker
2) Power
3) Previous/Next
4) Play/Pause
5) Stop
6) MP3 Volume Control
7) Sequence/Random/
Single
8) Sound effect
9) Sync
10) Fill-in
11) Timbre
12) Rhythm
13) Key Lighting
14) Demo Song
15) LCD display
16) Keyboard
Percussion
17) Recording
18) Program
19) Play
20) Split
21) Sustain
22) Vibrato
23) One Key
24) Follow
25) Ensemble
26) Memory
27) Numbers
28) Single Chord
29) Fingered Chord
30) Chord Timbre
31) Chord OFF
32) Metronome
33) Start/Stop
34) Master Volume
35) Accom Volume
36) Tempo
37) Transpose
38) Chord Zone
MP3 Control
II. Vorbereitungen vor dem Spielen
● Netzteil
Es ist ein spezielles Netzteil zu verwenden. Verbinden Sie das Ausgangsende
des Adapters mit dem Stromanschluss auf der Rückseite der Tastatur und das
andere Ende mit der Steckdose. (Hinweis: Die Eingangsspannung des
Adapters muss mit der Versorgungsspannung kompatibel sein.)
●Audioausgang / externer Kopfhörer
◆ Audioausgang: Schalten Sie zum einen die Tastatur und die externen
Audiogeräte aus, zum anderen verbinden Sie ein Ende des Audiokabels mit
dem PHONES / OUTPUT-Anschluss auf der Rückseite der Tastatur und das
andere Ende mit dem Audioeingang von die Audiogeräte.
◆ Kopfhöreranschluss: Wenn Sie einen Kopfhörer an den PHONES /
OUTPUT-Anschluss auf der Rückseite der Tastatur anschließen, wird der
Lautsprecher automatisch deaktiviert. Auf diese Weise können Sie auf der
Tastatur spielen, ohne andere zu stören.
※Hinweis! Wenn Sie den Kopfhörer verwenden, drehen Sie ihn nicht auf
und halten Sie die Lautstärke längere Zeit auf dem Maximum, da dies zu
Hörverlust führen kann.
● Mikrofoneingang und Audioeingang
◆ Mikrofoneingang: Schließen Sie ein Mikrofon an den MIC-Anschluss an,
um zu singen und zu spielen.
◆ Die Tastatur verfügt über die Stereo-Eingangsfunktion. Tonsignale von
Mobiltelefonen, MP3-Playern, Computern und anderen Audiogeräten können
zum Spielen in das Tastatursystem eingegeben werden. Schalten Sie zuerst
die Tastatur aus, schließen Sie dann ein Ende des Audiokabels an den
Ausgangsanschluss eines Audiogeräts und das andere Ende an den AUDIO
INPUT-Anschluss auf der Rückseite der Tastatur an und schalten Sie
schließlich die Tastatur ein.
● MP3-Musik abspielen
Legen Sie eine U-Disk in den UDISK-Anschluss auf der Rückseite der
Tastatur ein, um MP3-Musik abzuspielen. Unterstützt 32G (max.).
I. Bedienfeld und externe Anschlüsse
● Steuerung des oberen Bedienfelds
● Anschluss an der Rückseite
UDISK AUDIO
INPUT MIC 12V
PHONES/
OUTPUT
39 40 41 42 43
20 21

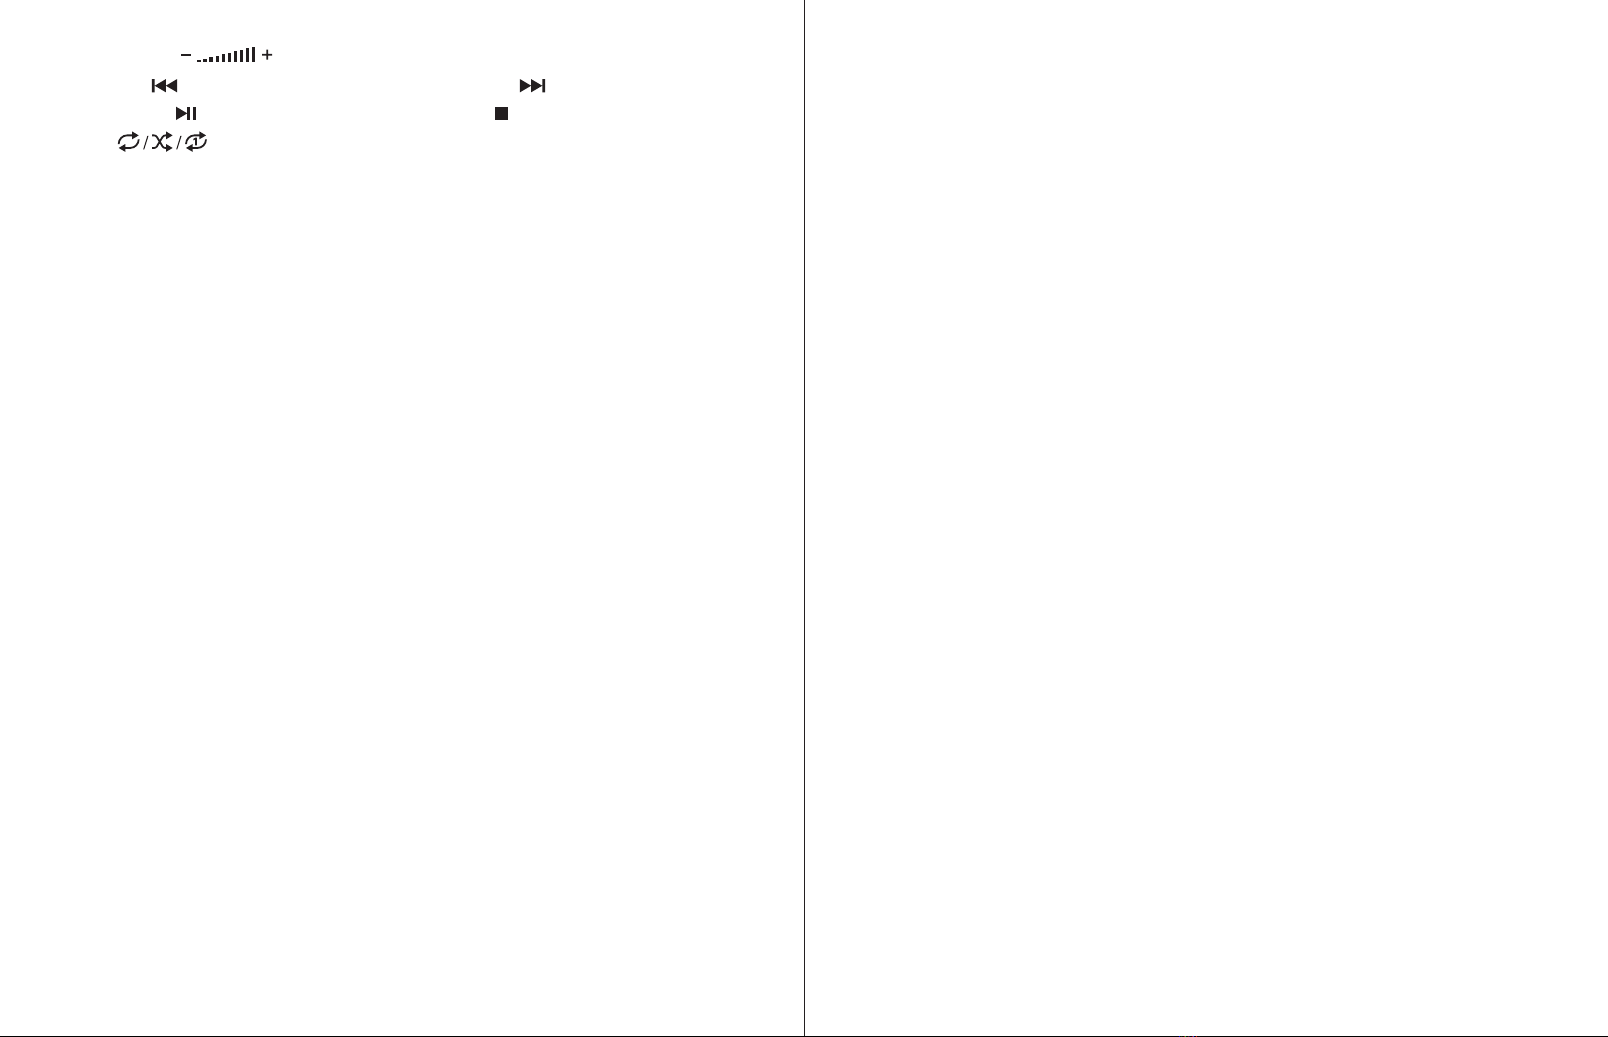
◆ Drücken Sie die Taste [ ], um die Lautstärke anzupassen.
◆ Drücken Sie [ ], um zum vorherigen Titel zu gelangen, drücken Sie
[ ], um zum nächsten Titel zu gelangen, drücken Sie [ ], um einen
Titel abzuspielen / anzuhalten, drücken Sie [ ], um einen abgespielten
Titel anzuhalten, [ ], um durch den Titel zu blättern
Wiederholungsmodi für kontinuierliche, zufällige oder einzelne Wiedergabe.
◆ Drücken Sie [Effekt], um den Effekt zwischen Common, Pop, Rock, Jazz
und Classic anzupassen. Die Tastatur hat standardmäßig einen gemeinsamen
Effekt.
III. Grundlegende Spielmethode
Drücken Sie [Power On/Off], und die Tastatur leuchtet von beiden Seiten auf.
Das LCD-Display schaltet sich ein und zeigt das aktuelle Timbre, Tempo und
den anderen Status an. Anschließend können Sie die Tastatur nach Bedarf
bedienen.
●Tastaturbeleuchtung
Die Tastatur verfügt über eine Leuchtfunktion. Im Modus zum Spielen,
Trainieren und Abspielen von Demo-Songs wird der leichte Hinweis
bereitgestellt. Die Leuchtfunktion ist standardmäßig aktiviert. Drücken Sie
[KEY LIGHTING], um die Leuchtfunktion zu aktivieren oder zu
deaktivieren.
● Master-Lautstärkeregelung
Drücken Sie [MASTER VOL +/-], um die Master-Lautstärke zu erhöhen oder
zu verringern. „VOLUME“ und der aktuelle Lautstärkepegel werden auf dem
Display angezeigt. Drücken Sie gleichzeitig [MASTER VOL +/-], um den
Standardwert wiederherzustellen.
Die Hauptlautstärke kann auch die Begleitlautstärke steuern.
● Einstellung der Begleitlautstärke
Drücken Sie [ACCOM VOL +/-], um die Master-Lautstärke zu erhöhen oder
zu verringern. Auf dem Display werden „RC-VOLUME“ und der aktuelle
Lautstärkepegel angezeigt. Drücken Sie gleichzeitig [ACCOM VOL +/-], um
den Standardwert wiederherzustellen.
● Klangfarbenauswahl
Die Tastatur bietet 255 Klangfarben von „000“ bis „254“ zur Auswahl. Beim
Einschalten der Tastatur wird die Timbre-Auswahlfunktion automatisch
aktiviert. „Timbre“ und die aktuelle Timbre-Nummer werden auf dem
Display angezeigt. Drücken Sie in anderen Zuständen [TIMBRE], um die
Timbre-Auswahlfunktion zu aktivieren. Das Timbre ist standardmäßig „000“
und kann durch Drücken der entsprechenden Zifferntasten oder Drücken der
Taste „+“ / „-“ eingestellt werden.
● Percussion spielen
Diese Tastatur bietet 61 Arten von Tastaturpercussions. Drücken Sie
[KEYBOARD PERCUSSION], um die Taste in eine Percussion-Taste
umzuwandeln. Jede Taste entspricht einem Schlaginstrument. Drücken Sie
diese Taste erneut, um die Keyboard-Percussion-Funktion zu deaktivieren.
● Demonstrationslieder spielen
Auf der Tastatur wurden 50 Demo-Songs von „000“ bis „049“ zur Auswahl
gespeichert. Drücken Sie [DEMO SONG], um alle Demonstrationslieder der
Reihe nach abzuspielen. Die Leuchttaste blinkt zur Melodie. „SONG“ und
die aktuelle Nummer des Demo-Songs werden auf dem Display angezeigt.
Drücken Sie die Zifferntasten oder „+“ / „-“, um das Demonstrationslied
auszuwählen.
Wenn Sie während der Wiedergabe des Demonstrationslieds [TIMBRE]
drücken, wird "TIMBRE" auf dem Display angezeigt. Drücken Sie innerhalb
von 3 Sekunden die Zifferntasten oder die Taste „+“ / „-“, um andere
Klangfarben für die Wiedergabe des Demonstrationslieds auszuwählen.
Drücken Sie [START / STOP] oder erneut [DEMO SONG], um die
Wiedergabe des Demonstrationssongs zu beenden.
22 23

V. Automatischer Bassakkord
● Einzelakkord
Drücken Sie unter der Bedingung, dass der Rhythmus aktiviert ist,
[EINZELKORD], und „SIN“ wird auf dem Display angezeigt. Anschließend
können Sie einen einzelnen Akkord auf den Tasten in der Akkordzone der
Tastatur spielen.
● Multi-Finger-Akkorde
Drücken Sie in dem Zustand, in dem der Rhythmus aktiviert ist, die Taste
[FINGERED CHORD]. Auf dem Display wird „FIN“ angezeigt.
Anschließend können Sie einen Fingerakkord auf den Tasten in der
Akkordzone der Tastatur spielen.
● Akkord AUS
Drücken Sie [CHORD OFF], um den Einzelakkord oder die
Fingerakkordfunktion zu deaktivieren.
Einzelakkord Fingersatz
IV. Automatischer Rhythmus
● Rhythmusauswahl
Diese Tastatur bietet 255 Rhythmen von „000“ bis „254“ für Ihre Auswahl,
und der Rhythmus ist standardmäßig „000“. Drücken Sie [RHYTHM], um
die Rhythmusauswahlfunktion zu aktivieren. „RHYM“ und die aktuelle
Rhythmusnummer werden auf dem angezeigt Anzeige. Anschließend können
Sie die Zifferntasten oder die Tasten „+“ / „-“ drücken, um andere Rhythmen
auszuwählen.
● Rhythmuskontrolle
1. Rhythmus aktivieren
◆ Drücken Sie [START / STOP], um den Begleitrhythmus zu starten.
◆ Drücken Sie [SYNC], „SYN“ wird auf dem Display angezeigt und die
vier Beat-Punkte blinken gleichzeitig. Spielen Sie dann eine beliebige Taste
in der Akkordtastenzone (die 1.-19. Taste von links). Der Begleitrhythmus
wird aktiviert.
2. Zwischenspiel
Nachdem der Begleitrhythmus aktiviert wurde, drücken Sie [FILL-IN], damit
während des Begleitrhythmus ein temporärer Rhythmus abgespielt wird.
Wenn Sie [FILL-IN] gedrückt halten, wird der temporäre Rhythmus
fortgesetzt.
3. Stoppen Sie den Rhythmus
Drücken Sie während des Begleitrhythmus [START / STOP], um den
Begleitrhythmus zu stoppen.
● Metronom
Das Metronom enthält vier Tempi, 1/4, 2/4, 3/4 bzw. 4/4. Drücken Sie
kontinuierlich [METRONOME], um das entsprechende Tempo auszuwählen.
Drücken Sie die [METRONOME] -Taste erneut, um das Tempo zu stoppen.
●Tempoeinstellung
Drücken Sie [TEMPO +/-], um die Rhythmusgeschwindigkeit zu erhöhen
oder zu verringern. Drücken Sie die beiden Tasten gleichzeitig, um den
Standardwert wiederherzustellen.
24 25

Multi-Finger-Akkorde Fingersatz (C-Taste)
(Der Finger-Akkord-Fingersatz der C-Taste ist wie in der folgenden
Abbildung gezeigt, und der Rest kann analog erhalten werden.)
●Akkord Timbre
Während der Begleitung von Einzel- oder Fingerakkorden können Sie
[CHORD TIMBRE] drücken, um den Akkordton zu ändern, und erneut
[CHORD TIMBRE] drücken, um den ursprünglichen Akkordton
fortzusetzen.
VI. Statusspeicherfunktion
Mit der Statusspeicherfunktion können Sie den Ton, den Rhythmus, das
Tempo und andere Parameter speichern, die während des Spielens geändert
werden müssen, um schnell zu schalten. Diese Tastatur ist mit 3
Statusspeichern ausgestattet, die während des Spielens jederzeit flexibel
aufgerufen werden können.
● Speicherung des Statusspeichers
Stellen Sie den Ton, den Rhythmus, das Tempo und den Akkord nach Bedarf
ein und drücken Sie dann die Taste [MEMORY] und eine der Tasten von
[MEMORY 1] bis [MEMORY 3], um den aktuellen Status zu speichern.
● Aufruf des Statusspeichers
Drücken Sie eine der Tasten von [MEMORY 1] bis [MEMORY 3], um die in
diesem Speicher gespeicherten Einstellungsparameter aufzurufen und den
aktuellen Status zu ersetzen.
Für die gespeicherten Inhalte ist kein Stromausfallschutz vorgesehen, und die
gespeicherten Inhalte gehen verloren, nachdem die elektronische Tastatur
nach dem Stromausfall neu gestartet wurde.
VII. Effektkontrolle
● Transponierungsfunktion
Mit der Transponierungsfunktion können Sie Musik anderer Melodien mit der
C-Tune-Fingermethode abspielen. Drücken Sie [TRANSPOSE-], um den Ton
um einen Halbton (kleine Sekunde) zu verringern, und die Melodie in der
C-Tune-Tastaturzone wechselt zu B-Tune. Drücken Sie [TRANSPOSE +],
um den Ton um einen Halbton (kleine Sekunde) zu erhöhen, und die Melodie
in der C-Tune-Tastaturzone ändert sich in # C-Tune oder BD-Tune. Wenn Sie
zweimal [TRANSPOSE-] drücken, wechselt C-Tune zu BB-Tune, wenn Sie
fünfmal [TRANSPOSE +] drücken, wechselt C-Tune zu F-Tune. Drücken Sie
gleichzeitig [TRANSPOSE +] und [TRANSPOSE-], um zu C-Tune „00“
zurückzukehren. Drücken Sie [TRANSPOSE +] und [TRANSPOSE -], um
den Pegel von „P-6“ auf „P06“ einzustellen.
● Funktion aufrechterhalten
Drücken Sie [SUSTAIN], „SUS“ wird auf dem Display angezeigt und der
Sustain-Effekt wird aktiviert. Drücken Sie diese Taste erneut, um den
Sustain-Effekt zu deaktivieren.
● Vibrato-Funktion
Drücken Sie [VIBRATO], „VIB“ wird auf dem Display angezeigt und der
Vibrato-Effekt wird aktiviert. Drücken Sie diese Taste erneut, um den
Vibrato-Effekt zu deaktivieren.
●Tastaturaufteilungsfunktion
Drücken Sie [SPLIT], um die Tastaturaufteilungsfunktion zu aktivieren.
„SPLIT“ wird auf dem Display angezeigt. 24 Tasten auf der linken Seite der
Tastatur werden mit der verbleibenden Tastatur geteilt. Während die linke
Tastaturzone um eine Oktave erhöht wird und der ursprüngliche Ton
beibehalten wird, wird die rechte Tastaturzone um eine Oktave verringert, um
die gleiche Tonhöhe wie die linke Tastaturzone beizubehalten. Der Ton der
rechten Tastaturzone kann nach Bedarf eingestellt werden, sodass die linken
und rechten Tastaturzonen gleichzeitig unterschiedliche Töne spielen können.
Drücken Sie erneut [SPLIT], um diese Funktion zu deaktivieren.
26 27

VIII. Aufnahme und Rhythmusprogrammierung
● Aufzeichnung
Drücken Sie [REC], um die Aufnahmefunktion zu aktivieren. „REC“ wird
auf dem Display angezeigt. In diesem Modus werden alle gespielten Noten
aufgezeichnet. Wenn der Speicher voll ist, blinkt „REC“ auf dem Display und
die Aufnahme wird automatisch gestoppt.
◆ Drücken Sie [PLAY], um die aufgenommenen Noten wiederzugeben, und
„PLAY“ wird auf dem Display angezeigt. Nach Abschluss der Wiedergabe
wechselt es in den Aufnahmemodus und „REC“ wird auf dem Display
angezeigt. Sie können eine neue Note aufnehmen oder [PLAY] drücken, um
die aufgenommene Note wiederzugeben.
◆ Drücken Sie [Start/Stop] oder erneut [REC], um die Aufnahmefunktion
zu deaktivieren, und alle aufgenommenen Rhythmen werden entfernt.
● Rhythmusprogrammierung
Drücken Sie [PROG], um die Rhythmusprogrammierungsfunktion zu
aktivieren. „PRG“ wird auf dem Display angezeigt und die
Tastaturpercussion wird aktiviert. In diesem Modus können Sie
benutzerdefinierte Rhythmen erstellen, indem Sie die entsprechende
Percussion-Taste spielen.
◆ Es können maximal 32 Percussions aufgezeichnet werden. Danach blinkt
„PRG“ auf dem Display und die Programmierung stoppt automatisch.
◆ Drücken Sie [PLAY], um den Programmierrhythmus abzuspielen.
Drücken Sie erneut [PLAY], um die Wiedergabe zu stoppen. „PRG“ wird auf
dem Display angezeigt und die Programmierfunktion wird aktiviert. Sie
können Rhythmen neu programmieren oder zur Wiedergabe erneut [PLAY]
drücken.
◆ Drücken Sie [START/STOP] oder erneut [PROG], um die
Programmierfunktion zu deaktivieren, und alle aufgenommenen Rhythmen
werden entfernt.
IX. Dreistufiges intelligentes Lehren mit beleuchteten
Tasten
● Übung I: ein Schlüssel
Drücken Sie [One Key], um die Ein-Tasten-Trainingsfunktion zu aktivieren.
„LEARN“, „SONG“ und die Song-Nummer werden auf dem Bildschirm
angezeigt. Drücken Sie dann die Taste „+“ / „-“, um den zu lernenden Song
auszuwählen. Ein Schlüsseltraining zielt auf Dauerunterricht ab, und es gibt
keine Anforderungen an Tonhöhe oder Kreativität. Dieser Modus lässt Fehler
beim Spielen der Tasten zu, aber die Tastatur spielt immer noch die richtigen
Noten und der Bildschirm zeigt die richtigen Noten an.
Wenn ein Lied fertig ist, wiederholen Sie das aktuell zu lernende Lied.
Drücken Sie [Start/Stop] oder drücken Sie die [One Key] -Taste, um die
Trainingsfunktion zu deaktivieren.
● Übung II: Follow
Drücken Sie [Follow], um die Follow-Funktion zu aktivieren. „LEARN“,
„SONG“ und die Song-Nummer werden auf dem Bildschirm angezeigt.
Drücken Sie dann die Taste „+“ / „-“, um den zu lernenden Song
auszuwählen.
Mit der Funktion [FOLLOW] können Sie lernen, indem Sie den korrekt
gespielten Noten folgen. Sie können gemäß dem Demonstrationslied spielen,
die Taste leuchtet entsprechend den Melodienoten auf und zeigt die zu
spielenden Noten an, und Sie können korrekt spielen, indem Sie den
Anweisungen folgen. Sie können auch lernen, wie man spielt, indem Sie den
Anzeigen in der Tastenzone des Displays folgen. Es wartet darauf, dass Sie
die richtige Note spielen, bevor es zur nächsten übergeht.
Hinweis: In diesem Zustand spielt die Tastatur nur die richtigen Noten und
gibt keine Antwort auf die falschen Noten.
Drücken Sie [Start/Stop] oder [Follow], um die Trainingsfunktion zu
deaktivieren.
28 29

Befestigen Sie das Teil (B) mit der
entsprechenden Schraube (F) an (D)
und (C). Wiederholen Sie diesen
Vorgang für die andere Seite.
Stellen Sie die entsprechende Höhe
der Tastaturhalterung ein und
ziehen Sie die Schraube (F) fest.
Befestigen Sie zwei Teile (B) mit vier
Schrauben (F) am Teil (A), um die
obere Teilbaugruppe zu erstellen.
Befestigen Sie die Schrauben (G) zur
Befestigung der Tastatur am Ständer.
● Übung III: Ensemble
Drücken Sie [ENSEMBLE], um die Ensemble-Trainingsfunktion zu
aktivieren. „LEARN“, „SONG“ und die Song-Nummer werden auf dem
Display angezeigt. Drücken Sie dann die Taste „+“ / „-“, um den zu lernenden
Song auszuwählen.
Das Ensemble-Training zielt darauf ab, die Dauer und die Noten des Songs
richtig und umfassend zu lernen. Die Keynote wird für das Ensemble
abgeschirmt. Die leuchtende Tastatur leuchtet entsprechend den
Hauptmelodienoten auf und zeigt die zu spielende Note an. Sie können dies
tun, indem Sie den Anweisungen der beleuchteten Taste folgen. Sie müssen
die richtige Note entsprechend der richtigen Dauer des Songs spielen. Wenn
Sie nicht innerhalb von 3 Sekunden spielen, spielt die Tastatur automatisch
die Keynote und die Tastaturzone auf dem Bildschirm zeigt die richtige Note
und das richtige Tempo an.
Wenn ein Lied fertig ist, wiederholen Sie das aktuell zu lernende Lied.
Drücken Sie [START/STOP] oder [ENSEMBLE], um die Trainingsfunktion
zu deaktivieren.
Montageanleitung des Tastaturständers
ACHTUNG: MONTAGE FÜR ERWACHSENE ERFORDERLICH
H-TYP-STÄNDER
Finden Sie die Teile (D) und (E) heraus und richten
Sie die Löcher an der Basis des Teils (D) an den
Löchern am Teil (E) aus. Verwenden Sie die
Mutter (I) und die Schraube (H), um die Teo-Teile
zu verbinden. Verwenden Sie die richtigen
Werkzeuge, um eine feste Befestigung zu
gewährleisten. Wiederholen Sie diesen Vorgang für
die andere Seite.
30 31

Avant de Commencer
Veuillez lire attentivement toutes les instructions.
Conservez les instructions pour la référence future.
Séparez et comptez toutes les pièces et les outils de matériel.
Lisez attentivement chaque étape et suivez le bon ordre.
Nous recommandons que, si possible, tous les éléments soient
assemblés à proximité de la zone dans laquelle ils seront utilisés, afin
d'éviter de déplacer inutilement le produit une fois assemblé.
Placez toujours le produit sur une surface plane, solide et stable.
Gardez toutes les petites pièces et le matériel d'emballage de ce produit
hors de portée des bébés et des enfants car ils pourraient provoquer un
risque grave d’étouffement.
Précautions
Lisez attentivement avant de poursuivre.
Précautions
● Un adaptateur électrique spécifique doit être utilisé et, en cas
d’endommagement de l’adaptateur, remplacez-le immédiatement
● Le clavier ne peut être démonté que par des professionnels, et aucune
modification ne peut être apportée à la structure interne. En cas d’anomalie de
fonctionnement pendant l'exécution, arrêtez immédiatement l’exécution et
envoyez le clavier à des professionnels pour maintenance.
● Lorsque vous connectez le clavier à un autre appareil, assurez-vous que le
clavier et l'appareil à connecter sont tous deux éteints avant la connexion.
● Ne pas tourner et maintenir le volume au maximum ou à un niveau
inconfortable pendant une longue période lors de l'exécution
● Éloignez le clavier de toute source de chaleur afin de protéger ses parties.
● Empêchez les liquides, la poussière, les petites particules et autres matières
étrangères de pénétrer dans le boîtier du clavier, afin de ne pas provoquer de
court-circuit des éléments.
● Retirez la fiche avant de nettoyer le clavier, et ne retirez pas la fiche avec
une main mouillée.
● Veuillez utiliser un chiffon sec et doux pour nettoyer le clavier. La peinture,
l'alcool ou d'autres solvants chimiques ne doivent pas être utilisés pour le
nettoyage, afin de ne pas endommager la surface du clavier.
●Veuillez retirer la fiche après avoir effectué une opération ou lorsque le
clavier n’est pas utilisé pendant une longue période.
Contenu du paquet
* Piano à clavier électrique de 61 touches avec écran LCD x 1
* Support de clavier x 1
* Tabouret x 1
* Adaptateur électrique x 1
* Casquex 1
* Microphone x 1
* Support musicalx 1
* Manuel d'installation x 1
34 35

39) UDISK
40) AUDIO INPUT
41) MIC
42) PHONES/OUTPUT
43) DC 12V
1) Loudspeaker
2) Power
3) Previous/Next
4) Play/Pause
5) Stop
6) MP3 Volume Control
7) Sequence/Random/
Single
8) Sound effect
9) Sync
10) Fill-in
11) Timbre
12) Rhythm
13) Key Lighting
14) Demo Song
15) LCD display
16) Keyboard
Percussion
17) Recording
18) Program
19) Play
20) Split
21) Sustain
22) Vibrato
23) One Key
24) Follow
25) Ensemble
26) Memory
27) Numbers
28) Single Chord
29) Fingered Chord
30) Chord Timbre
31) Chord OFF
32) Metronome
33) Start/Stop
34) Master Volume
35) Accom Volume
36) Tempo
37) Transpose
38) Chord Zone
MP3 Control
II. Préparation
● Adaptateur secteur
Un adaptateur électrique spécifique doit être utilisé. Connectez l’extrémité de
sortie de l'adaptateur au port d’alimentation situé sur le panneau arrière du
clavier, puis l'autre extrémité à la prise d'alimentation.
# (Note : la tension d’entrée de l'adaptateur doit être compatible avec la
tension d'alimentation)
● Sortie audio / Casque d’écoute externe
◆ Sortie audio : premièrement, éteignez le clavier et les appareils audio
externes, deuxièmement, connectez une extrémité du câble audio au port
PHONES/OUTPUT sur le panneau arrière du clavier, puis connectez l'autre
extrémité au port d'entrée audio des appareils audio.
◆ Connexion d'un casque d'écoute : Lorsque vous connectez un casque au
port PHONES/OUTPUT sur le panneau arrière du clavier, le haut-parleur est
automatiquement désactivé. De cette façon, vous pouvez vous donner la
représentation sans déranger les autres.
◆ Attention ! Lorsque vous utilisez un casque, maintenez un volume sonore
approprié pour protéger votre audition.
● Entrée micro et entrée audio
◆ Entrée micro : connectez un micro au port MIC pour chanter tout en
jouant du clavier.
◆ Le clavier est équipé d'une fonction d'entrée stéréo. Les signaux sonores
d'un téléphone portable, d'un lecteur MP3, d'un ordinateur et d'autres
appareils audio peuvent être entrés dans le système de clavier pour être joués.
Il faut d'abord éteindre le clavier, puis connecter une extrémité du câble audio
au port de sortie d'un appareil audio, et l'autre extrémité au port d’ENTRÉE
AUDIO sur le panneau arrière du clavier, enfin, mettre le clavier sous
tension.
● Lecteur de musique MP3
Insérez une clé USB dans le port UDISK sur le panneau arrière du clavier
pour la lecture de musique MP3, jusqu’à 32G.
I. Contrôle des panneaux et ports externes
● Panneau de contrôle supérieur
● Ports externes sur le panneau arrière
UDISK AUDIO
INPUT MIC 12V
PHONES/
OUTPUT
39 40 41 42 43
36 37

◆ Appuyez surle bouton【】pour régler le volume.
◆ Appuyez sur le bouton【】pour la piste précédente, appuyez sur le
bouton【】pour la piste suivante, appuyez sur le bouton【】pour
la Lecture/Pause, appuyez sur le bouton【】 pour arrêter une piste en
cours de lecture, appuyez sur le bouton【 】pour le moded’ordre,
le mode simple et le mode aléatoire.
◆ Appuyez sur [Effet] pour régler l’effet entre Common, Pop, Rock, Jazz et
Classic. Le clavier est configuré par défaut pour avoir un effet commun.
III. Méthode de représentation de base
Lorsque vous appuyez sur [Power ON/OFF], l’écran LCD s’allume et affiche
le timbre, le tempo et d’autres informations. Vous pouvez ensuite utiliser le
clavier selon vos besoins.
● Éclairage des touches
Le clavier a une fonction lumineuse, sous le mode de lecture, d’entraînement
et de lecture de la chanson de démonstration, il y a un rappel d’éclairage. La
fonction lumineuse est activée par défaut, appuyez sur [KEY LIGHTING]
pour activer ou désactiver la fonction lumineuse.
● Ajustement du volume principal
Appuyez sur [Master Vol +] ou [Master Vol -] pour augmenter ou diminuer le
volume principal. Le « VOLUME »et le niveau de volume actuel s’affichent
sur l’écran. Appuyez simultanément sur [Master Vol +] et [Master Vol -] pour
revenir à la valeur par défaut. Le volume principal peut également contrôler
le volume de l'accompagnement.
●Ajustement du volume d’accompagnement
Appuyez sur [ACCOM VOL +/-] pour augmenter ou diminuer le volume
principal. « RC-VOLUME » et le niveau de volume actuel s’afficheront à
l'écran. Appuyez simultanément sur [ACCOM VOL +/-] pour réinitialiser la
valeur par défaut.
● Sélection de timbre
Le clavier offre 255 timbres de « 000 » à « 254 » pour votre sélection.
Lorsque le clavier est allumé, la fonction de sélection des timbres est
automatiquement activée, « TONE » et le numéro de timbre s’affichent à
l’écran. Sous d’autres états, appuyez sur [Timbre] pour activer la fonction de
sélection de timbre.
Le timbre par défaut est « 000 », et il peut être ajusté en appuyant sur les
touches numériques correspondantes ou en appuyant sur la touche « + »/«- ».
● Jouer des percussions
Ce clavier propose 61 types de percussions de clavier. Appuyez sur
[Percussion] pour transformer le clavier en clavier de percussion, et chaque
touche correspond à un instrument de percussion.
Appuyez à nouveau sur ce bouton pour désactiver la fonction de percussion
du clavier.
● Jouer des chansons de démonstration
50 morceaux de démonstration ont été enregistrés dans le clavier, de « 000 »
à « 049 », pour votre sélection. Appuyez sur [DEMO SONG] pour lire tous
les morceaux de démonstration dans l’ordre, la touche lumineuse clignote sur
la mélodie, et « SONG » et le numéro du morceau de démonstration actuel
s’affichent.
Appuyez sur les touches numériques ou sur les touches « + » / « - » pour
sélectionner le morceau de démonstration.
Lorsque vous appuyez sur [TIMBRE] pendant le processus de lecture du
morceau de démonstration, « TONE » s’affiche à l’écran, appuyez sur les
touches numériques ou sur le bouton « + » / « - » dans les 3 secondes pour
sélectionner d’autres timbres pour lire le morceau de démonstration.
38 39

V. Accord de basse automatique
● Single chord (Accord avec un doigt)
Lorsque le rythme est activé, appuyez sur [Single Chord]. Une fois que le «
SIN » est affiché à l'écran, vous pouvez jouer un accord avec un doigt sur les
touches de la zone d'accords du clavier.
●Accord avec des doigts
Lorsque le rythme est activé, appuyez sur [Fingered]. Une fois que le « FIN »
est affiché à l’écran, vous pouvez jouer un « Accord avec des doigts » sur les
touches de la zone d’accord du clavier.
● CHORD OFF (Arrêt d’Accord)
Appuyez sur [CHORD OFF] pour désactiver l’ « Accord avec un doigt » ou
la fonction d’ « Accord avec les doigts ».
Doigté d’accord avec un doigt
IV. Rythme automatique
● Sélection du rythme
Ce clavier propose 255 rythmes, de « 000 » à « 254 », pour votre sélection, et
le rythme est par défaut « 000 ». Appuyez sur [Rhythm], « RHYM » s’affiche
à l'écran. Appuyez ensuite sur les touches numériques ou sur les touches
« + » / « - » pour sélectionner d’autres rythmes.
● Contrôle du rythme
1. Activer le rythme
◆ Appuyez sur [start/stop] pour lancer le rythme d’accompagnement.
◆ Si vous appuyez sur [Sync], « SYN » s’affiche à l’écran,les quatre points
de battement clignoteront simultanément.Ensuite, jouez n'importe quelle
touche dans la zone des touches d'accord (de la 1ère à la 19ème touche, en
partant de la gauche), le rythme d'accompagnement sera activé.
2. Interlude
Après avoir activé le rythme d'accompagnement, appuyez sur [Fill-in] pour
faire jouer un rythme temporaire pendant le rythme d'accompagnement. Si
vous maintenez le bouton [FILL - IN] enfoncé, le rythme temporaire
continuera.
3. Arrêt du rythme
Pendant le rythme d’accompagnement, appuyez sur [Start/Stop] pour arrêter
le rythme d’accompagnement.
● Métronome
Le métronome contient quatre tempos, 1/4, 2/4, 3/4 et 4/4, respectivement.
Appuyez sur le [METRONOME] en continu pour sélectionner le tempo
correspondant. Appuyez à nouveau sur le bouton [METRONOME] pour
arrêter le tempo.
●Ajustement du tempo
Appuyez sur [TEMPO +/-] pour augmenter ou diminuer la vitesse du rythme.
Appuyez sur les deux boutons simultanément pour revenir à la valeur par
défaut.
40 41

Doigté d’accord avec les doigts (Do majeur)
(Le doigté de l’accord avec les doigts de la tonalité de Do majeur est celui de
la figure suivante, et le reste peut être obtenu par analogie)
● CHORD TIMBRE (Timbre des accords)
Pendant l’accompagnement d’accord avec un seul doigt ou d’un accord avec
les doigts, vous pouvez appuyer sur [CHORD TIMBRE] pour changer le
timbre de l’accord, et appuyer à nouveau sur [CHORD TIMBRE] pour
reprendre le timbre de l’accord original.
VI. Fonction de mémoire d’état
Grâce à la fonction de mémoire d’état, vous pouvez enregistrer le timbre, le
rythme, le tempo et d’autres paramètres à modifier en cours de jeu, pour un
changement rapide. Ce clavier est équipé de 3 mémoires d’état, qui peuvent
être appelées de manière flexible à tout moment pendant l’utilisation.
● Stockage de la mémoire d’état
Réglez le timbre, le rythme, le tempo et l’accord selon vos besoins, puis
appuyez sur le bouton [MEMOIRE] et sur l’un des boutons de
[MEMOIRE 1] à [MEMOIRE 3] pour enregistrer l’état actuel.
● Appel de la mémoire d’état
Appuyez sur l’un des boutons de [MEMOIRE 1] à [MEMOIRE 3] pour
appeler les paramètres de réglage enregistrés dans cette mémoire afin de
remplacer l’état actuel.
Aucune protection contre les pannes de courant n’est prévue pour le contenu
sauvegardé, et le contenu sauvegardé sera perdu après le redémarrage du
clavier électronique après une coupure de courant.
VII. Contrôle des effets
● Fonction de transposition
La fonction de transposition vous permet de jouer un morceau dans une autre
tonalité en utilisant le doigté de « Do » (C). Appuyez sur le bouton
[TRANSPOSE -] pour abaisser le clavier complet d’un demi-ton (une
seconde mineure), puis la tonalité C de position du clavier devient une
tonalité de B ; appuyez sur [TRANSPOSE +] pour augmenter le clavier
complet d’un demi-ton (une seconde mineure), puis la tonalité C de position
du clavier devient une tonalité de #C ou bD. Si vous appuyez deux fois sur
[TRANSPOSE -], la tonalité de C devient la tonalité de bB, si vous appuyez
cinq fois sur [TRANSPOSE +], la tonalité de C devient la tonalité de F. Si
vous appuyez sur [TRANSPOSE +] et [TRANSPOSE -] en même temps, la
tonalité de C devient à nouveau « 00 ». En appuyant sur [TRANSPOSE +] ou
[TRANSPOSE -], le niveau peut être ajusté de « P-6 » à « P06 ».
● Fonction de Sustain
Appuyez sur [Sustain], « SUS » s’affiche à l'écran et l'effet sustain est activé.
Appuyez à nouveau sur ce bouton, « SUS » disparaîtra de l'écran, et l'effet de
sustain sera désactivé.
● Fonction de Vibrato
Appuyez sur le bouton [Vibrato], « VIB » apparaîtra à l’écran et l'effet de
Vibrato sera activé. Appuyez à nouveau sur ce bouton, « VIB » disparaîtra de
l'écran, et l'effet Vibrato sera désactivé.
● Fonction de division du clavier
Appuyez sur [SPLIT] pour activer la fonction de division du clavier, « SPLIT
» s’affichera à l’écran. 24 touches à gauche du clavier se sépareront avec le
reste du clavier. Alors que la zone gauche du clavier augmentera d’une octave
et maintiendra le tembre original, la zone droite du clavier diminuera d’une
octave pour maintenir la même hauteur de son avec la zone gauche du clavier.
Le tembre de la zone de clavier droite peut être réglé selon les besoins, de
sorte que des tembres différents peuvent être joués par les zones de clavier
gauche et droite en même temps.
Appuyez à nouveau sur [SPLIT] pour désactiver cette fonction.
42 43

VIII. Enregistrement et programmation du rythme
● Enregistrement
Appuyez sur [Enregistrer] pour activer la fonction d’enregistrement, « REC »
s’affiche à l’écran. Dans ce mode, toutes les notes jouées seront enregistrées.
Lorsque la mémoire est pleine, « REC » clignote à l'écran et l'enregistrement
s'arrête automatiquement.
◆ Appuyez sur [Play] pour lire les notes enregistrées, et « PLAY » s'affiche
à l'écran. Une fois la lecture terminée, « REC » s’affiche à l’écran. Vous
pouvez enregistrer un nouveau rythme, ou vous pouvez appuyer sur [Play]
pour lire le rythme enregistré.
◆ Appuyez sur [Start/Stop] ou appuyez à nouveau sur [Record] pour
désactiver la fonction d’enregistrement, et tous les rythmes enregistrés seront
supprimés.
● Programmation des rythmes
Appuyez sur [Program] pour activer la fonction de programmation du rythme,
« PRG » s’affichera à l’écran et les percussions du clavier seront activées.
Dans ce mode, vous pouvez créer des rythmes personnalisés en jouant la
touche de percussion correspondante.
◆ 32 percussions peuvent être enregistrées au maximum, puis « PRG »
clignote à l’écran, et la programmation s’arrêtera automatiquement.
◆ Appuyez sur [Play] pour lire le rythme de la programmation.Appuyez à
nouveau sur [PLAY] pour arrêter la lecture, « PRG » s’affichera sur l’écran et
la fonction de programmation sera activée. Vous pouvez reprogrammer les
rythmes ou appuyer à nouveau sur [PLAY] pour la lecture.
◆ Appuyez sur [Start/Stop] ou appuyez à nouveau sur [Program] pour
désactiver la fonction de programmation, et tous les rythmes enregistrés
seront supprimés.
IX. Formation intelligente en trois étapes
● Formation I : une touche
Appuyez sur [One Key] pour activer la fonction d’apprentissage par touche
unique, « LEARN » (APPRENDRE), « SONG » (CHANSON) et le numéro
de la chanson s’affichera à l'écran, puis appuyez sur le bouton « + » / « - »
pour sélectionner la chanson à apprendre. La formation par touche unique
vise à apprendre sur la durée, et il n’y a aucune exigence en matière de
tonalité ou de créativité. Ce mode permet de faire des erreurs en jouant les
touches, mais le clavier joue toujours les bonnes notes, les touches
lumineuses s'allumeront selon les notes correctes, et l’écran affiche les
bonnes notes.
Une fois qu’une chanson est terminée, répétez la chanson en cours à
apprendre.
Appuyez sur [Start/Stop] ou sur le bouton [One Key] pour désactiver la
fonction d’apprentissage.
● Formation II : suivre
Appuyez sur [Follow] pour activer la fonction de suivi, « LEARN »
(APPRENDRE), « SONG » (CHANSON) et le numéro de la chanson
s’affichera à l'écran, puis appuyez sur le bouton « + » / « - » pour sélectionner
la chanson à apprendre. Avec la fonction [FOLLOW], vous pouvez apprendre
en suivant les notes correctement jouées. Vous pouvez jouer en fonction de la
chanson de démonstration, la touche s’allume en fonction des notes de la
mélodie, indiquant les notes à jouer, et vous pouvez jouer correctement en
suivant les indications. Vous pouvez également apprendre à jouer en suivant
les indicateurs dans la zone des touches de l'écran. Il attendra que vous jouiez
la bonne note avant de passer à la suivante.
# Notes : Dans cet état, le clavier ne joue que les bonnes notes et ne donne
aucune réponse aux mauvaises notes.
Appuyez sur [Start/Stop] ou sur [Follow] pour désactiver la fonction
d’apprentissage.
44 45
Table of contents
Languages:
Other Costway Musical Instrument manuals

Costway
Costway Sonart MU10079US User manual

Costway
Costway MU70017 User manual

Costway
Costway Sonart MU10082US User manual

Costway
Costway MU10090 User manual

Costway
Costway TM10027 User manual

Costway
Costway MU70008DE User manual

Costway
Costway MU10054 User manual

Costway
Costway MU70012DE User manual

Costway
Costway SONART MU70016DE User manual

Costway
Costway MU70002DE User manual