More Information at CarverCovers.com
or call (888) 48-COVER. Protecting The Things That Move You™
Carver by Covercraft Industries, LLC 212 N. Lyles Ave., Landrum, SC 29356
Image 1
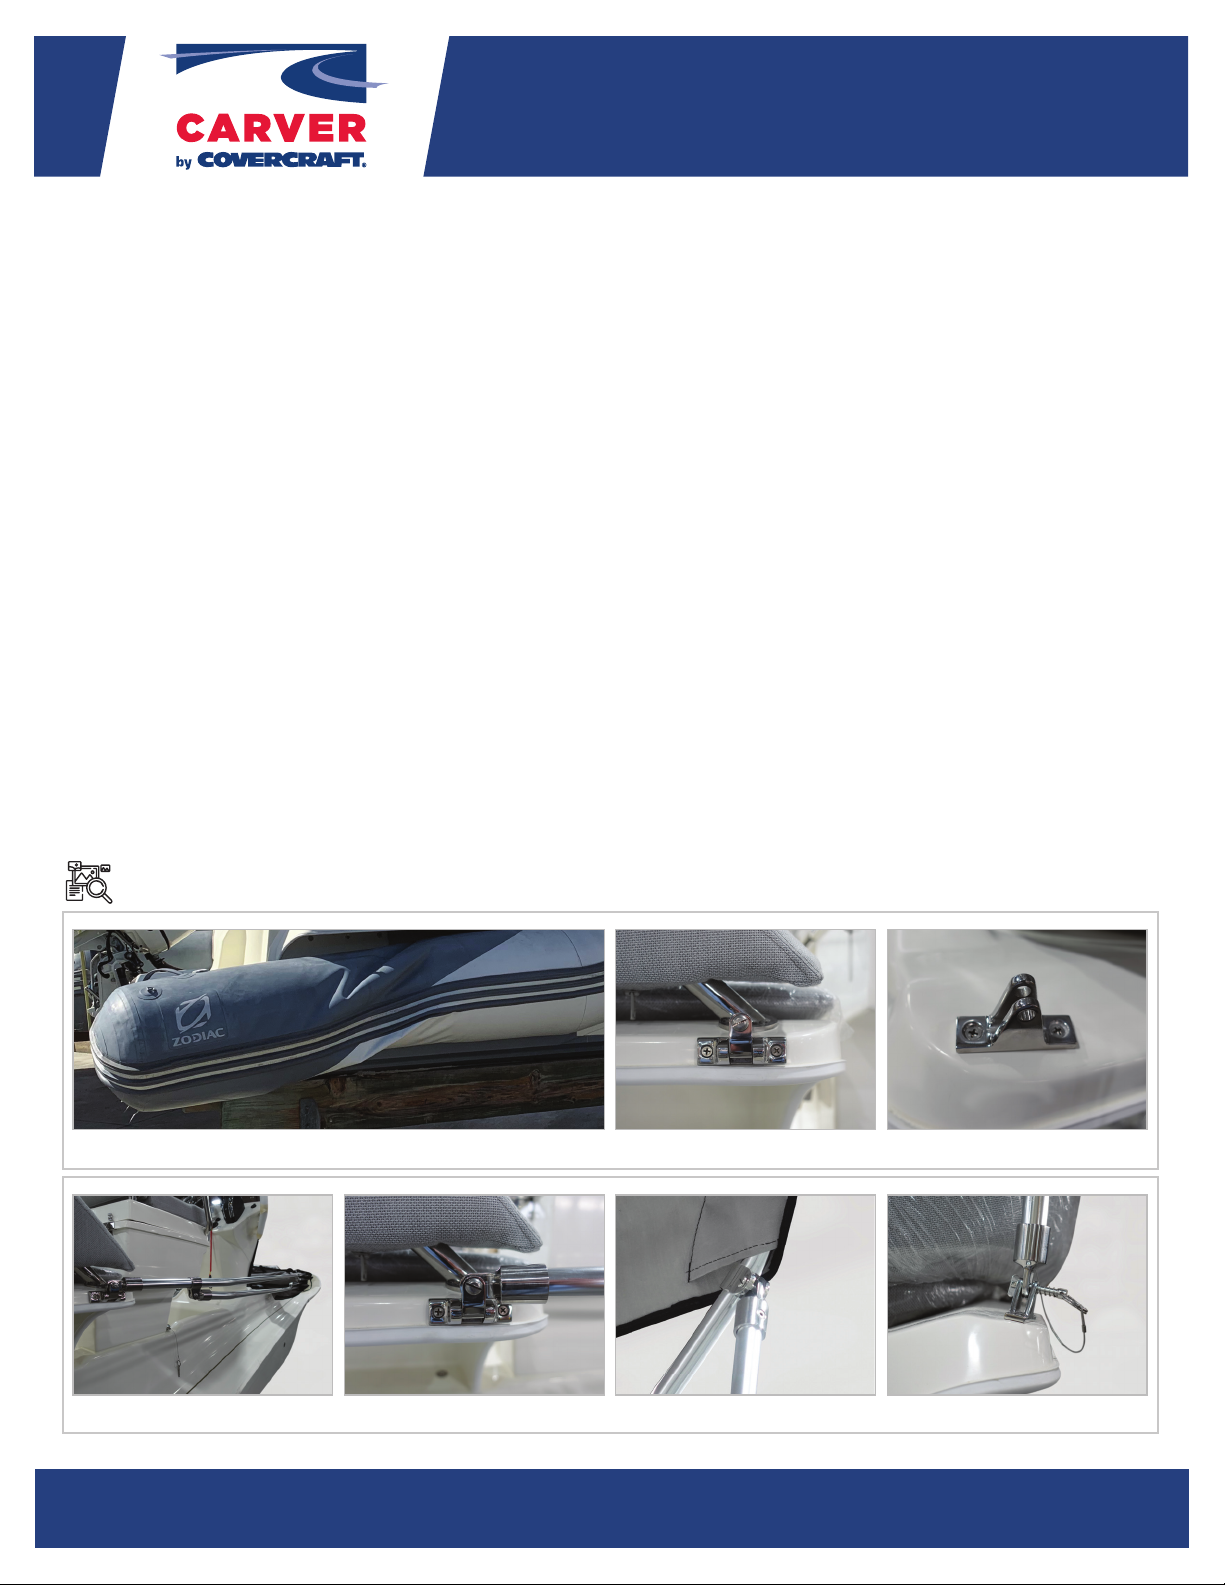
REFERENCE IMAGES: (all images are starboard side)
Image 2 Image 3
Image 5 Image 6 Image 7Image 4
#3058071 (03/22)
4. Place bimini top on top of boat – laying it flat towards the bow of the boat. The Main Bow (A-Bow) must be facing upwards (see
Image 4).
5. Remove storage boot.
6. Attach the Main Bow (A-Bow) ends to the universal deck hinge(s) by aligning the holes of the outside eye end on the long bow
with the hole in the universal deck hinge(s) and secure using the included bolt (see Image 5).
7. Raise the top to desired upright position and adjust each of the attached front hold-down straps. The front hold-down straps
should be adjusted to a length that attaches to the boat by connecting the attached snap hooks to the pre-installed D-Rings
on your boat. Use the D-Rings on the tubes that are closest to the center console on port and starboard sides.
8. Installing the Rear Brace Kit:
a. The 48” brace kit includes: (2) - Aluminum Braces with Stainless Steel Fittings, (2) - hinged jaw slides with screw and bolt,
(2) - quick release pins. Remove braces from pole clips.
b. To attach the braces, the bimini top must be deployed (in its upright position). The Carver label on the top should be at
the underside rear. We recommend positioning the jaw slides at or just below the canvas line (see Image 6). Be sure the
measurement is identical on port and starboard side. Open the hinged jaw slides and fasten each around the Main Bow
(A-Bow) where noted above by tightening the screw securely. Insert the braces into the jaw slides by inserting the eye ends
and securing tightly with the bolts provided. Once the braces are attached to the main bow, proceed to the next step.
c. Use quick release pin to connect braces to the 90° (fixed) deck hinges (see Image 7).
9. Tighten the front hold-down straps with snap hooks so that the top is level. These straps should be “banjo string” tight.
10. After the front hold-down straps are tightened – the final step will be to tighten the four adjuster straps under the top. The
adjuster straps will be used to achieve the desired crown of the bimini top. They should be adjusted until the fabric is tight and
the bows are pulling away from the center. The short bow sleeves should be applying pressure to the support in the opposing
direction of the adjuster straps.
11. Installation is complete. Don’t forget to reinflate your tubes!
Installing a Carver ZO652 / 66006 Custom
Bimini Top for Zodiac N-ZO 680 / N-ZO 600


