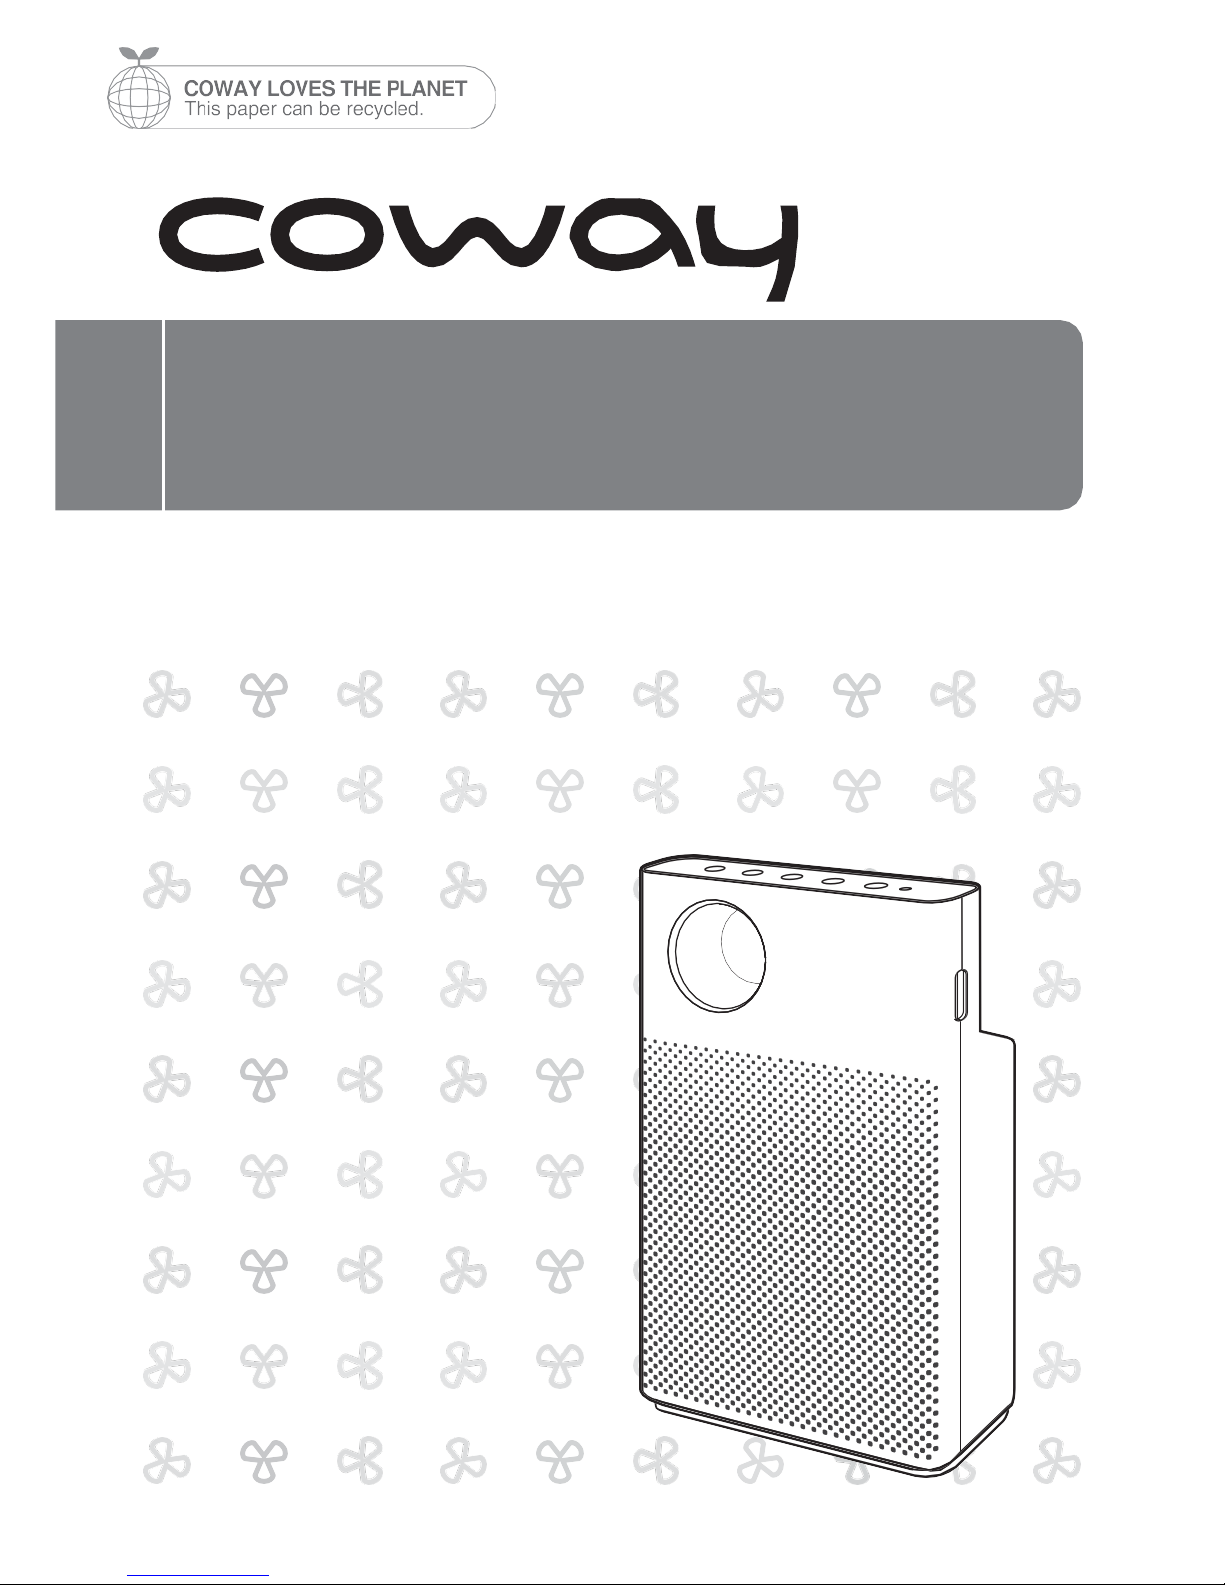
Coway AP-1018F User manual

Coway Air Purifier AP-1018F
•This product is for domestic use only. It cannot be used in an overseas
country where the power voltage is different.
•Warranty card is included in this user’s manual.
•Read and save these instructions.

FEATURES
1.
Smarteco
The smart power saving feature automatically
switches to smart eco mode if the purifier does not
run for a set period of time.
- Enters standby mode when the air stays
clean for at least 10 minutes.
2.
Excellent air purification ability
A powerful HEPA filter removes fine dust from
indoor air as part of an optimized filter system that
quickly eliminates contamination.
3.
Detachable air vent grille
Detachable vent grilles are installed on the purifier
top for easier, more effective cleaning than in other
products with fixed covers.
4.
Elegant design
A slim, neat design makes this purifier blend in anywhere.

DEAR CUSTOMERS
Thank you for using the Coway air purifier.
Please be sure to read this instruction manual to use and maintain your air purifier correctly.
If you experience anyproblems during use, you can referto this instruction manual to resolve
them. This user manual contains the product warranty, so please store it safely.
CONTENTS
| 03 | SAFETY INFORMATION
Danger
Warning
Caution
| 07 | PARTS NAME
| 09 | AIR PURIFICATION
PROCESS
| 10 | BEFORE USE
How to install
filter
| 11 | INDICATORS AND BUTTONS
| 13 | HOW TO USE
| 14 | ADJUST PARTICLE SENSOR
| 15 | CLEANING
METHOD
Produc
t Filter
| 17 | FILTER
REPLACEMENT
| 19 | TROUBLE SHOOTING
| 20 | PRODUCT SPECIFICATION
| 21 | WARRANTY
1
- Keep your instruction manual in a readily accessible or visible place.- 2
OTHER
S
MAINTENANCE
FOR INFORMATION
HOW TO USE
Cowa
y
FEATURES /
CONTENTS

SAFETY INFORMATION
The following information is for user
safety that should be observed.
It is to ensure user safety and prevent property
damage.
Please read the precautions carefully and
use the product correctly.
DANGER : Failing to follow the precautions below may
result in serious injury or even death.
•
Do not use damaged power plugs or loose sockets.
•
Thepowerplugmustbe pluggedinto220 V –240V~ 50 Hz / 60
Hz.
•
Do not pull on the power cord to move the device.
•
Do not touch the powerplug with wet hands.
•
Toavoiddamagingorwarpingthepowercord,donotuse
excessive forcetobendthepowercordorputheavyobjects
ontopof it.
•
Do not repeatedlyconnectand disconnectthe powerplug.
•
Ifwaterentersthepowersupply,unplugthepowerand
completely dry before usingagain.
•
Besuretounplugthepowerduringproductrepair,
maintenanceor part replacement.
•
Ifthepowerplug'spinsorcontactareabecomecoveredin
dustor water, wipe themthoroughly.
•
Donotplugseveralelectricappliancesintoonesocket,anduse
only a dedicatedsocket.
•
Unplug the power when not used for a long time.
•
Do not carelessly connector tamper with the power cord.
•
Ifthepowercordisdamaged,donotreplaceityourself.
Contacta service center to have it replaced.
•
Do not install near electric heaters.
•
Do notputontopof electricproductslikeheatersortelevisions.
for 220 V - 240 V use
only
for 120 V use only

•
Donotinstallinplaceswithalotofhumidityordustorplaces
where water (rainwater)splashes.
•
Donotuseorstorecombustiblegasesorflammablematerials
near this product.
•
Ifthereisastrangesound,burningsmell,orsmokefromthe
device, immediatelyunplugthepowerplugandcontacta
servicecenter.
•
Never immerse the product in water.
•
Donotsprayflammablematerialssuchasinsecticides
orair fresheners on theintake.
•
Do not open, repair, or modify the device yourself.
•
Donotputbowlsofwater,chemicals,food,smallmetal
objects,or flammable materials on top of this product.
•
Unplug the power beforecleaning.
•
Ifthepurifierfallsoverandgetswetduringuse,A/S
maintenanceis required before furtheruse.
•
Donotspraywaterdirectlyonthedeviceorusebenzene,
thinners, etc. to wipe it during cleaning.
•
Do notinsert sharpobjectssuch aspicksintothe airqualitysensor.
•
Donotputfingersorforeignmatter(pins,sticks,coins,etc.)intothevent.
•
Do not let children hangfrom or climb on the purifier.
•
Be careful that children do not put theirhands in the vent.
•
Replace the filter with a new one when the time comes.
•
Do not spray water directly on the purifier.
3
4
For
Information
SAFETY INFORMATION |
Danger

SAFETY INFORMATION
WARNING : Failing to follow the precautions below may
result in considerable physical injury or
property damage.
•
Donotunplugbypullingonthepowercord.
•Plugintoa powersocketconnectedtoan earthleakage circuit
breaker
(currentsensitivity30 mA orless).
•Ifextendingthepowercord,onlyusewithsocketsandcordsof
250V/15A
andusebyitself.
•Do not use in baths, showers, swimmingpools, or other areas
where the
purifiermaybe indirectcontactwithwater.
CAUTION : Failing to follow the precautions below may
result in slight physical injury or property
damage.
•
Donotunplugthepowerormovethepurifierwhileitisoperating.
•If unusualsound,odor,or smokecomesfromthepurifier,
immediately
unplugthepowerandcallourservicecenter.
•
Do notinstallona slope.
•
Donotexcessivelyimpactoruseexcessiveforceonthisproduct.
•
Useatleast20cmawayfromwallsorotherobjectsoneachside.
•
Installthepurifierinaplacewhereitisnotblockedonanyside
soair can circulatewell.
•
Installatleast2m awayfromTVsandotherelectronicitems.
•
DonotuseinBBQorotherrestaurantswhereodor,smoke,or
oilmay occur.
•Donot usein directsunlight.
•Do not installin a highplace.
•
Donot useextremeforceonthepurifier.

•
Donotpushorleanonthepurifier.Thepurifiermayfallover.
•
Donotuseforalongtimeinplacesthataresealedorwhere
children, theelderly,orsickpeopleare.
•
Donot blocktheventwithlaundryor curtains.
•
Removedustfromthepre-filterwithavacuumcleanerorwater.
•
Periodicallywash thepre-filterand dry it wellin a shadyplace
with
goodventilation.
•
Peoplewithphysical,sensory,or mentalimpairmentaswellas
children
mustbesupervisedorguidedwhileusingthedevice.
•
Itisadvisabletosupervisechildrensotheydonotplaywiththedevice.
•
Whenmovingthepurifier,liftthetop
as
wellwithyourthumbasinthe
photo.Thepurifiermayfallover.
5
READ AND SAVE THESE INSTRUCTIONS6
For
Information
SAFETY INFORMATION | Warning |
Caution

PARTS NAME
Rear
/
Front
Contamination
indicator
Rear handle
Air inlet
Front cover
Air vent
Airquality
sensor
Power cord
Top
Detachable
top outlet grille
Indicators/
Buttons

For Information PARTS NAME
Component
s
User
manual
7
8

AIR PURIFICATION PROCESS
■
Pre-filter
Removes large dust and mold, hair, pet fur, etc.
■
Deodorization filter
The granular activated carbon deodorizing filter effectively removes odors including food smells and
unpleasant household odors and harmful gases.
■
HEPAfilter
The high-performance synthetic HEPA filter is excellent at removing cigarette smoke and fine dust.
▶▶
1.Pre-filter
2.Deodorizationfilter
3. HEPAfilter

BEFORE USE
Please check before use
The product is for 220 V –240 V~ 50 Hz / 60 Hz only.
Make sure to connect the power plug to a grounded electric
outlet (220 V –240 V~ 50 Hz / 60 Hz) dedicated to the
product.
How to install filter
Tip
s
-
Be sure to install the filter after removing the plastic packaging.
-
Only use itindoors.
-
When not in use, remove the power plug from the socket.
-
During filter assembly, check the front of the filters.
▶Filter assembly order : HEPA filter → Deodorizing filter → Pre-filter
1.
Open the front cover.
Pull the upper part of the front cover to open.
2.Take out the filter and
remove
the plastic
packaging.
Removetheplasticpackagingfromfilters, ▶
excluding the pre-filter, and assemble them
in the purifier in order.
∗
Filter assembly order : HEPA filter
→
Deodorizing
filter → Pre-filter
3.
Reattach the front cover.
Fit the two tabs on the bottom part of
the frontcoverintotheirslotsandpushto
install.
∗If the front cover is not properly attached,
the product willnot operate. 9
10
How to
Use
AIR PURIFICATION PROCESS /
BEFORE USE

INDICATORS AND BUTTONS
Indicators
1 Auto
mode
indicator
2 Eco
mode
indicato
r
3 Filter
replacement
indicator
4 Air speed
mode
indicator
5 Light sensor
6 Contamination
indicator
1 Auto mode indicator
Thisindicatorisilluminated
if
auto mode ison.
2 Eco mode indicator
This indicator is illuminated if
eco mode is on.
3 Filter replacement indicator
This indicator is illuminated when it
is
time to replace the filters(HEPA,
CARBON).
4 Air speed mode indicator
This indicator is illuminated when
level air speed is on.
5 Light sensor
Itindicates the air speed level
from
1toturbo.Whenitisturbo
level, all LED will be
illuminated.
6 Air quality indicator
Indoor contamination is
shown
by LED color.
Clean (blue)
→
Slight (green)
→
Heavy (yellow) → Severe
(red)

Buttons
1 Power button 2 Mode button 3 Filter
reset
button
4 Airspeedbutton 5 Mood/lockbutton
1 Power button
Use when turning the purifier
on
and off.
The purifier begins operating in auto
modethefirsttime,andifitisturned
off andonagainwhileinoperation,
runsin themodeitwasinbeforeit
stopped.
2 Mode button
Pressthemodebuttontogo
from Auto → Ecomode.
3 Filter reset button
Pressing 3 seconds resets the
filter
change interval.
4 Air speed button
Press the air speed button to
cycle air speed between
1 → 2 → 3 → Turbo
5 Mood/lock button
Turns the air quality indicator on or off.
Pressoncetoturnofftheairqualityindicator,pressagaintoturnoffallindicators,and
pressone more time to turn all indicators on.
Press and hold the lock button for 3 seconds to lock all buttons, and press and hold for another 3 seconds to unlock. 11
12
How to
Use
INDICATORS AND
BUTTONS

HOW TO USE
Tips
-Plug the power plug into a socket before operating the purifier.
-When the purifier is turned on, it starts in auto mode by default.
■
To operatemanually
Press the power button to turn on the
purifier,andpresstheairspeedbutton
to chooseyourdesiredairspeed.
(1 → 2 → 3 → Turbo)
∗
Press the air speed button while
operating
automatically (Auto / Eco) to
immediately
convert to manual operation.
■
Tooperate automatically
Press the power button to turn on the
purifierandpressthemodebutton
to select your desired operating
mode. (Auto →Eco)
▶Auto mode
Operateseffectivelybyautomaticallyadjustingtheairspeed(autolevel1→autolevel2→autolevel3)
depending ontheindoorpollutionlevel detectedbythesensor.
Thisis a convenientoperating mode for most users.
Pollution level 1
Pollution level 2
Pollution level 3,
4
Air speed
Auto level 1
Auto level 2
Auto level 3
∗
Theair speed indicator isoff during auto mode.
▶Eco mode
Enters standby mode when the air stays clean for at least 10 minutes.
▶
▶

ADJUST PARTICLE SENSOR
How to adjust the sensitivity of the pollution sensor
Whenyoufirstturnon thepurifier,theairqualitysensorissettostandard.Youcanadjust
the sensitivityasfollowsiftheairqualityLEDstaysatsevereevenafterthepurifierruns
for2hoursor more with high pollution or the air quality LEDstays at clean even if the
pollution is high.
1.
Pressandholdtheairspeedbuttonand
mode
button simultaneously for about 1
second while
the purifier isrunning.
1 sec.
2.The air speed mode indicator flashes at
intervals of
about 0.5 seconds.
3.
Presstheairspeedbuttontoadjusttoyour
desired
sensor sensitivity.When sensor
sensitivity is selected,
theairspeed mode
indicatorflashes asfollows.
1
2
3
Sensitiv
e
Standar
d
Insensitiv
e
4.
Press the air speed and mode
buttons
simultaneously forat least 3
seconds again
to enter your selected sensitivity to operate
the
purifier normally.
∗Iftheairspeedbuttonandmodebuttonarenotpressed
for
10seconds after selecting sensitivity,the selected
sensitivity is
automatically input.
3 sec.
13
14
How to
Use
HOW TO USE / ADJUST PARTICLE
SENSOR

CLEANING METHOD
Tips
-
Always unplug the power beforecleaning.
-
Do not use detergents containing organic solvents (solvents, thinners,
etc.), bleach, chlorine, or abrasives to clean.
-
Do not immerse the purifier in water or sprinkle water on it.
■
Cleaning the vent and
detachable
vent grille
Liftthedetachableventgrilleontopof
the vent,thencleanthegrillandvent
withasoft brush or vacuumcleaner.
∗Becarefulnottoletdustenterthe
vent while cleaning.
■
Cleaningtheairqualitysensor(cleanevery2
months)
1.
Cleantheairqualitysensorairinletand ventwith asoft brush
or vacuum cleaner.
∗Take care that dust does not fall inside the purifier while cleaning.
Vent
2.Open the air quality sensor cover on the upper rear of the
purifier.
(Usetheslotsonthe airqualitysensorcoverto
openit.)
Wetacottonballwithasmallamountofwater
and wipethe lens,dust inlet, andoutlet,then
wipeagainwithadrycottonballto
remove moisture.
∗Ifcleaningisnotdoneregularly,theair
quality sensor maynot work as well.
∗Clean more often in very dusty environments.
■
Cleaning thefront cover
Remove the front cover from the purifier and then wipe away
dust
stuck to the surface with a soft, dry cloth or soft brush.
∗If there is severe contamination, use a damp cloth (do not use
abrasives).
Dust
outlet
Dust inlet
Air inlet
■
Cleaning thepurifier
Wipe with a soft, dry cloth.
∗If there is severe contamination, use a damp cloth (do not use abrasives).
▶
▶

Tip
s
-
Alwaysunplug the powerbeforecleaning the filters.
-
The pre-filter can be reusedafter removing dust and cleaning with water.
-
If the pre-filter is not cleaned for a long time, the product performance
may decrease and problems mayoccur.
-
Thetailoredfilter,deodorizingfilterandHEPAfiltercannotbereusedafter
cleaning. Never clean them withwater.
■
Pre-filter (clean every 2-4weeks)
1.
Pull the upper part of the front cover to open.
2.
Pull the pre-filter handle to take it out.
∗Be careful that dust doesn't fall out during removal.
3.Remove dust with water or a vacuum cleaner depending on
the
degree of contamination
∗Be careful not to let dust enter the purifier while cleaning.
4.
Pushthecompletelydrypre-filter allthe wayintothe purifiertoinstallit. Closethefrontcoveragain.
▶
15
16
Maintenanc
e
CLEANING
METHOD

FILTER REPLACEMENT
■
How to replace
-
Refer to the filter installation method specified on page 10 to replace the filters.
-
During filter assembly, be sure to check the front.
-
Onlyuse genuine Cowayfilters to keep the purifier at its optimal performance.
-
Always unplug the power plug before replacing filters.
■
Filter cleaning and replacementcycle
Filter
Cleaning /
replacement time
Cleaning /
replacement
Pre-filter
Once / 2-4
weeks
Clean and
wash
Deodorization filter
Once / 12
months
Replace
HEPA filter
Once / 12
months
Replace
∗Based on 24 hour (1 day) use at low air speed
∗The filter replacement cycle is the recommended cycle and may vary depending on usage
environment.

■
How to replace deodorizing/HEPA filters (replace every 12 months)
1.
Openthefrontcoverand removethepre-filter from the purifier,thentake out thedeodorizingfilter
and HEPA filter.
▶▶
2.Replace them with a new deodorizing filter and new HEPAfilter with the plastic packaging
removed.
Reassemblethepurifierinthereverseorderyoudisassembleditandclosethe
frontcover.
∗Check the filters' front display.
▶▶
17
18
Maintenanc
e
FILTER
REPLACEMENT

TROUBLE SHOOTING
The product may not operate correctly due to trivial reasons or inexperienced usage,
although these are not product malfunctions. In such cases, the problem can be solved
easily without the help of a service center if the following items arechecked. Ifthe problem
isnotresolvedevenafter checking the following, please contact a service center.
Problem
Chec
k
Possible Solutions
There is no breeze.
•
Isthepowerpluggedin?
Plug the power cord into a 220 V - 50
Hz
socket.
•
Istheentire displayoff?
Press the power button, then select
your
desired feature.
•
Istherea powerfailure?
After the power comes back on, use
the
purifier.
Air speed
doesn't
change.
•
Istheautomaticindicatoroff?
Youcan only select air speed in
manual
mode (normal).
•
Isthesilent indicatoroff?
Youcan only select air speed in
manual
mode (normal).
Air speed is very
low.
•
Isitpasttimeforfiltercleaning
and replacement?
Check your filter cleaning and
replacement cycle and clean or
replace
filters.
Pollution level
doesn't change.
•
Istheredustontheairquality
sensor
lens ?
Clean the air quality sensor lens (p.
15).
•
Doesthepollutionlevel
continuously
appear high?
Set your pollution sensitivity to
insensitive or standard (p. 14).
•
Doesthepollutionlevel
continuously
appear low?
Set your pollution sensitivity to
sensitive
or standard (p. 14).
There's a smell
from the vent.
•
Isitpasttimeforfiltercleaning
and replacement?
Check your filter cleaning and
replacement cycle and clean or
replace
filters.
The air quality
indicator flashes.
•
Requestservice.
If other functional
flaws occur
•
Checktheproblem,thenunplugthepowerand requestservice.
Other manuals for AP-1018F
3
Table of contents
Other Coway Air Cleaner manuals

Coway
Coway Airmega 160 User manual

Coway
Coway AP-1008CH User manual

Coway
Coway AP-2505CH User manual

Coway
Coway airmega AP-1515G User manual

Coway
Coway AP-1717A User manual

Coway
Coway AP-3008FH User manual

Coway
Coway airmega 400 User manual

Coway
Coway AP-1520C User manual

Coway
Coway AP-0512NH User manual

Coway
Coway AIRMEGA AIM User manual

Coway
Coway AP-0510IH User manual

Coway
Coway Airmega 150 User manual

Coway
Coway AP-1503CHE User manual

Coway
Coway airmega 400S User manual

Coway
Coway AP-0509DH User manual

Coway
Coway AP-1009CH User manual

Coway
Coway Airmega 250 User manual

Coway
Coway Airmega ProX User manual

Coway
Coway AP-0805EH User manual

Coway
Coway AP-1216L User manual