7
SETUP
Before setting up your machine you need
to read and understand the instructions
given in this manual.
The unpainted surfaces of this band saw
are coated with rust prevention waxy oil
and you will want to remove this before
you begin assembly. Use a solvent
cleaner that will not damage painted
surfaces.
UNPACKING
The machine is properly packaged and is
shipped completely in a crate for safe
transportation. When unpacking, carefully
inspect the crate and ensure that nothing
has been damaged during transit. Open
the crate and check that the machine is in
good condition.
Remove the bolts securing the saw on the
skid and place it on a level surface.
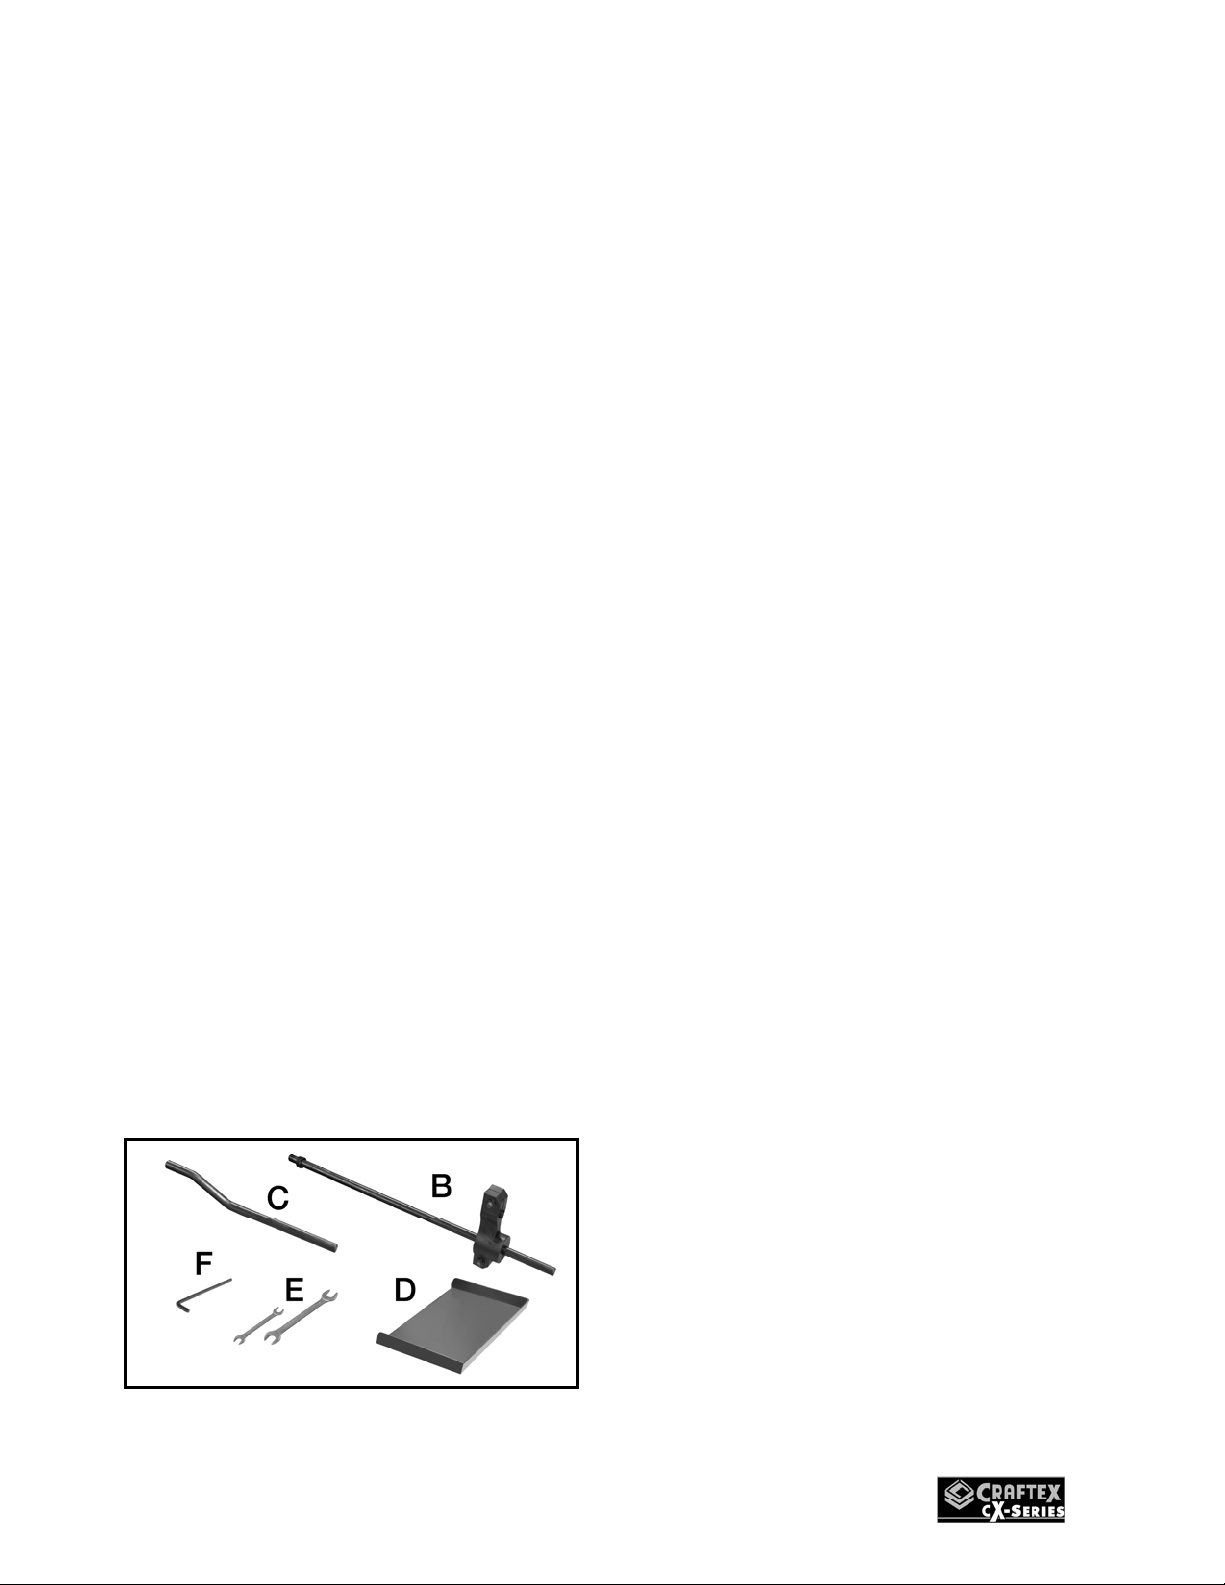
LIST OF CONTENT QTY
A. Band Saw Unit (not shown)................1
B. Work Stop Arm...................................1
C. Work Stop Rod...................................4
D. Splash Unit.........................................2
E. Wrench...............................................2
F. Torx Key.............................................1
Figure-1 Inventory
PROPER GROUNDING
Grounding provides a path of least
resistance for electric current to reduce
the risk of electric shock.
CX117 is equipped with a 220-V single
phase motor and is not supplied with a
power cord.
Connection must be done by a qualified
electrician in accordance with electrical
code and local electrical codes.
Make sure that the machine is connected
to an outlet having the same configuration
as the plug. If an adaptor plug is used, it
must be attached to the metal screw of
the receptacle. To prevent electrical
hazards, have a qualified electrician
ensure that the line is properly wired.
It is strongly recommended not to use
extension cords with your CX117. Always
try to position your machine close to the
power source so that you do not need to
use extension cords.
When it is necessary to use an extension
cord, make sure the extension cord does
not exceed 50-feet in length and the cord
is 12-gauge to prevent motor damage.
Your CX117 should be wired with a plug
having 3-prongs to fit a 3 prong grounded
receptacle. Do not remove the grounding
prong to fit it into a 2-pronged outlet.
Always check with a qualified electrician if
you are in doubt.