manuals.online logo
Brands
  1. Home
  2. •
  3. Brands
  4. •
  5. Crestron
  6. •
  7. Keypad
  8. •
  9. Crestron INET-CBDEX-E Original operating instructions

Crestron INET-CBDEX-E Original operating instructions

INET-CBDEX-E/INET-CBDEX-P
Cameo®Keypads with inNET EX®Technology
Installation & Operation Guide
Assemble the Keypad
Attach the buttons to the keypad.
1. Arrange the button caps in position on the rear housing assembly according to the
program plan.
NOTE: A single button cannot be installed in the lowest position of the keypad.
2. Carefully position the bezel over the button caps on the rear housing assembly and
secure with the two supplied #2-28 x 3/16 in screws.
3. Press and release each button to ensure that the button caps move freely.
Assemble the Keypad
Installation
NOTES: Observe the following points.
• Install and use this product in accordance with appropriate electrical codes and
regulations.
• A licensed electrician should install this product.
NOTE: Before using the INET-CBDEX, ensure the device is using the latest rmware.
Check for the latest rmware for the INET-CBDEX at www.crestron.com/rmware.
Firmware is loaded onto the device using Crestron Toolbox™ software.
Use the following procedure to install the keypad in a standard 1-gang electrical box.
1. Turn the ac power off.
2. Connect the ac power cable to the line, neutral, and ground terminals.
3. Holding the keypad with the LEDs on the left, place it in the electrical box.
4. Secure the keypad using the included #6-32 x 3/4 in screws.
CAUTION: Excess wire pinched between the keypad and electrical box could
short-circuit. Make sure all excess wire is completely inside the electrical box and
not between the box and the keypad.
5. Make sure the keypad is oriented properly (note the location of the LED holes and
light sensor), place it in the electrical box, and attach using the supplied
6-32 x 3/4 in combo head screws.
Mounting the Keypad in a 1-Gang Electrical Box
Description
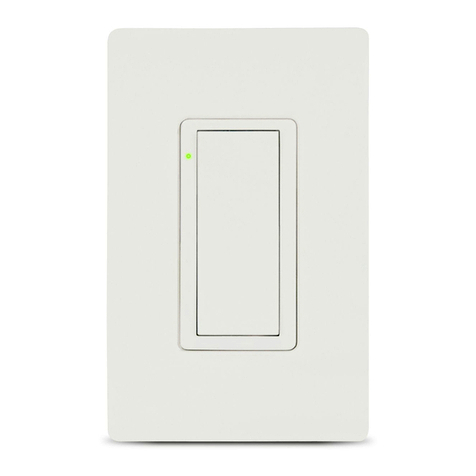
The INET-CBDEX-E and INET-CBDEX-P wireless Cameo keypads present a fresh,
innovative concept in keypad design. They offer cutting-edge wireless performance for
ease of installation, in a highly congurable 1-gang wall mount form factor that is at once
inviting to the touch and appealing to the eye.
The INET-CBDEX-E and INET-CBDEX-P are functionally identical. For simplicity within
this guide, the term “INET-CBDEX” is used except where noted.
Specications
Additional Resources
Visit the product page on the Crestron website
(www.crestron.com) for additional information
and the latest rmware updates. Use a QR
reader application on your mobile device to
scan the QR image.
6. Attach the desired faceplate (not supplied).
7. Turn the ac power on.
INET-CBDEX-E INET-CBDEX-P
Ambient Light Sensor Operation
The INET-CBDEX-P keypads have an ambient light sensor that can be used to
automatically congure the backlight to operate in either Day mode or Night mode.
Backlight operation is based on the ambient light level and a programmed threshold.
Presets based on the keypad color set the optimum backlight level for Day mode and
Night mode.
When presets are used, the following occurs:
• For light-colored keypads with dark engraving, the backlight turns on dim when in
Night mode and off when in Day mode.
• For dark-colored keypads, the backlight turns on dim when in Night mode and on
bright when in Day mode.
NOTE: Backlight levels can also be set manually.
The indicator LEDs automatically adjust their brightness based on ambient light,
becoming bright when the keypad is well lit and becoming dim when the room is dark.
When two or more keypads are to be installed side by side, ensure that the backlights on
all units are in sync. For syncing to occur, there are signals available on the programming
symbol to allow one unit to act as the master backlight controller and the rest as slaves.
Refer to the help le for more information.
LED Hole(s)
Light Sensor
(INET-CBDEX-P Only)
Screw (2)
#6-32 x 7/8 in
Screw (2)
#2-28 x 3/16 in
LED Holes
LED Light
Pipes
Light Sensor
(INET-CBDEX-P Only)
Bezel
Wireless Communications
The device connects to the Crestron network via the inNET EX communications
protocol. Use the procedures outlined below to join or leave an inNET EX network and
to verify communications between the device and the control system.
Joining an inNET EX Network
Before a device can be used in a lighting system, it must rst join an inNET EX network.
To join an inNET EX network, the device must be acquired by an inNET EX gateway.
NOTE: A device can be acquired by only one gateway.
1. Put the inNET EX gateway into Acquire mode from the unit itself or from Crestron
Toolbox™. Refer to the gateway’s manual at www.crestron.com/manuals for
details.
NOTE: In an environment where multiple gateways are installed, only one
gateway should be in Acquire mode at any time.
2. Put the device into Acquire mode:
a. Tap the top button three times and then press and hold it down
(tap-tap-tap-press+hold) until the top LED on the device blinks once (this can
take up to 10 seconds).
b. Release the button to start the acquire process. The top LED blinks slowly to
show that the device is actively scanning the inNET EX network.
• The top LED turns on for 5 seconds to show that the device has been
successfully acquired by the infiNET EX network.
• The top LED blinks fast to indicate that the device was not successfully
acquired by the infiNET EX network. Tap the top button to acknowledge the
failure. Ensure the gateway is in Acquire mode and within range before
attempting the acquire process again.
3. Once all devices have been acquired, take the gateway out of Acquire mode. Refer
to the gateway’s manual for details.
Leaving an inNET EX Network
To leave an inNET EX network, put the device into Acquire mode, as described in
“Joining an inNET EX Network” above, when no gateway is in Acquire mode.
Verifying Communications Status
To check the communications status of the device, tap the top button three times and
then press and hold it down (tap-tap-tap-press+hold) for up to 2 seconds. The LED
blinks to indicate the communications status. Refer to the following table for details.
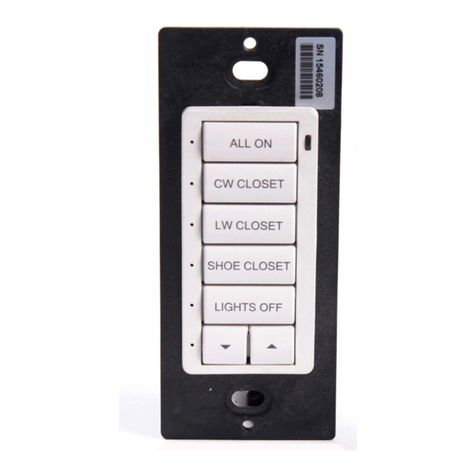
A variety of loose button caps are provided for the INET-CBDEX. The button
arrangements can be mixed and matched to suit the needs of the installation. The
following shows the basic arrangement of the buttons on the keypad.
NOTE: Split small buttons may be installed in the bottom two positions only.
INET-CBDEX Keypad Button Arrangement
2
4
6
3
6
1
2
3
4
5 7
6 8 6 8
1
2
3
4
5
SPECIFICATION DETAILS
Power Requirements (Line):
INET-CBDEX 120 volts ac, 50/60 Hz
INET-CBDEX-230 230 volts ac, 50/60 Hz
INET-CBDEX-277 277 volts ac, 50/60 Hz
Power Requirements (dc):
INET-CBDEX 60 volts dc
INET-CBDEX-230 60 volts dc
INET-CBDEX-277 60 volts dc
Environmental
Temperature 32° to 113° F (0° to 45° C)
Humidity 10% to 90% RH (noncondensing)
Heat Dissipation 1 Btu/h
Dimensions
Height 4.13 in (105 mm) without faceplate
Width 1.75 in (45 mm) without faceplate
Depth 1.87 in (48 mm)
Weight 3 oz (64 g)
LED COMMUNICATIONS STATUS
Turns on for 5 seconds The device is communicating with the control system.
Blinks three times The device is communicating with the gateway, but the
gateway is not communicating with the control system.
Blinks twice The device was previously joined to the network but is
not communicating with the gateway.
Blinks once The device is not joined to the network.
Troubleshooting
The following table provides corrective actions for possible trouble situations. If further
assistance is required, please contact a Crestron customer service representative.
Crestron Electronics, Inc. Installation & Operation Guide - DOC. 6992E
15 Volvo Drive Rockleigh, NJ 07647 (2027651)
Tel: 888.CRESTRON 04.16
Fax: 201.767.7576 Specications subject to
www.crestron.com change without notice.
This product is Listed to applicable UL Standards and requirements by Underwriters Laboratories
Inc.
As of the date of manufacture, the device has been tested and found to comply with specications
for CE marking.
Federal Communications Commission (FCC) Compliance Statement
This device complies with part 15 of the FCC Rules. Operation is subject to the following two
conditions: (1) This device may not cause harmful interference, and (2) this device must accept any
interference received, including interference that may cause undesired operation.
CAUTION: Changes or modications not expressly approved by the manufacturer responsible for
compliance could void the user’s authority to operate the equipment.
NOTE: This equipment has been tested and found to comply with the limits for a Class B digital
device, pursuant to part 15 of the FCC Rules. These limits are designed to provide reasonable
protection against harmful interference when the equipment is operated in a commercial
environment. This equipment generates, uses, and can radiate radio frequency energy and, if not
installed and used in accordance with the instruction manual, may cause harmful interference to
radio communications. Operation of this equipment in a residential area is likely to cause harmful
interference in which case the user will be required to correct the interference at his own expense.
Industry Canada (IC) Compliance Statement
This device complies with Industry Canada licence-exempt RSS standard(s). Operation is subject to the
following two conditions: (1) this device may not cause interference, and (2) this device must accept any
interference, including interference that may cause undesired operation of the device.
Under Industry Canada regulations, this radio transmitter may only operate using an antenna of a type
and maximum (or lesser) gain approved for the transmitter by Industry Canada. To reduce potential radio
interference to other users, the antenna type and its gain should be so chosen that the equivalent
isotropically radiated power (e.i.r.p.) is not more than that necessary for successful communication.
Industrie Canada (IC) Déclaration de conformité
Le présent appareil est conforme aux CNR d'Industrie Canada applicables aux appareils radio exempts
de licence. L'exploitation est autorisée aux deux conditions suivantes : (1) l'appareil ne doit pas produire
de brouillage, et (2) l'utilisateur de l'appareil doit accepter tout brouillage radioélectrique subi, même si le
brouillage est susceptible d'en compromettre le fonctionnement.
Conformément à la réglementation d'Industrie Canada, le présent émetteur radio peut fonctionner avec
une antenne d'un type et d'un gain maximal (ou inférieur) approuvé pour l'émetteur par Industrie Canada.
Dans le but de réduire les risques de brouillage radioélectrique à l'intention des autres utilisateurs, il faut
choisir le type d'antenne et son gain de sorte que la puissance isotrope rayonnée équivalente (p.i.r.e.) ne
dépasse pas l'intensité nécessaire à l'établissement d'une communication satisfaisante.
To satisfy RF exposure requirements, this device and its antenna must operate with a separation distance
of at least 20 centimeters from all persons and must not be colocated or operating in conjunction with
any other antenna or transmitter.
The product warranty can be found at www.crestron.com/warranty.
The specic patents that cover Crestron products are listed at patents.crestron.com.
Certain Crestron products contain open source software. For specic information, please visit
www.crestron.com/opensource.
Crestron, the Crestron logo, Cameo, Crestron Toolbox, and inNET EX are either trademarks or
registered trademarks of Crestron Electronics, Inc. in the United States and/or other countries. UL and
the UL logo are either trademarks or registered trademarks of Underwriters Laboratories, Inc. in the
United States and/or other countries. Other trademarks, registered trademarks, and trade names may be
used in this document to refer to either the entities claiming the marks and names or their products.
Crestron disclaims any proprietary interest in the marks and names of others. Crestron is not responsible
for errors in typography or photography.
This document was written by the Technical Publications department at Crestron.
©2016 Crestron Electronics, Inc.
TROUBLE POSSIBLE CAUSE(S) CORRECTIVE ACTION
The keypad does not
function. No LEDs turn on
when a button is pressed.
The keypad is not
receiving power.
Check the circuit
breaker. Check the
wiring to verify that the
keypad is not connected
to a switch leg.
The program is incorrect. Check that the program
is driving the LED
indicators.
The keypad does not
function. All LEDs blink
when a button is pressed.
The keypad is not
acquired by a gateway.
Perform the acquire
process.
The keypad does not
function. All LEDs blink
three times when a button
is pressed.
The keypad is not
communicating with the
gateway.
Ensure that the gateway
is powered.
Ensure that the keypad
is within range of the
gateway or other
operational inNET EX
devices.

This manual suits for next models

1

Other Crestron Keypad manuals

Crestron Lutron CNWM-LU12 How to use

Crestron

Crestron Lutron CNWM-LU12 How to use

Crestron CNWM-10A User manual

Crestron

Crestron CNWM-10A User manual

Crestron C2N-DB12 How to use

Crestron

Crestron C2N-DB12 How to use

Crestron Horizon HZ-KPCN Series User manual

Crestron

Crestron Horizon HZ-KPCN Series User manual

Crestron CNX-B12 How to use

Crestron

Crestron CNX-B12 How to use

Crestron Cameo C2NI-CB Series User manual

Crestron

Crestron Cameo C2NI-CB Series User manual

Crestron Zum Series User manual

Crestron

Crestron Zum Series User manual

Crestron HTT-B10EX How to use

Crestron

Crestron HTT-B10EX How to use

Crestron AirMedia ZUMMESH-KP10AMBATT User manual

Crestron

Crestron AirMedia ZUMMESH-KP10AMBATT User manual

Crestron HZ-BTN User manual

Crestron

Crestron HZ-BTN User manual

Crestron black nova AXES Series User manual

Crestron

Crestron black nova AXES Series User manual

Crestron CLWI-KPLEX User manual

Crestron

Crestron CLWI-KPLEX User manual

Crestron Zum ZUMMESH-KPBATT User manual

Crestron

Crestron Zum ZUMMESH-KPBATT User manual

Crestron HTT-B2EX-BATT User manual

Crestron

Crestron HTT-B2EX-BATT User manual

Crestron Cameo C2N-CBD-P Quick start guide

Crestron

Crestron Cameo C2N-CBD-P Quick start guide

Crestron C2NI-AG Creslight II How to use

Crestron

Crestron C2NI-AG Creslight II How to use

Crestron ZUMLINK-KP User manual

Crestron

Crestron ZUMLINK-KP User manual

Crestron Cameo INET-CBDEX Series How to use

Crestron

Crestron Cameo INET-CBDEX Series How to use

Crestron Cameo C2NI-CB Series How to use

Crestron

Crestron Cameo C2NI-CB Series How to use

Crestron GLPPA-KP User manual

Crestron

Crestron GLPPA-KP User manual

Crestron Cameo C2N-CBD-P Original operating instructions

Crestron

Crestron Cameo C2N-CBD-P Original operating instructions

Crestron HTT-B10EX How to use

Crestron

Crestron HTT-B10EX How to use

Crestron C2N-DBF12 How to use

Crestron

Crestron C2N-DBF12 How to use

Crestron ZUM  ZUMMESH-KP User manual

Crestron

Crestron ZUM ZUMMESH-KP User manual

Popular Keypad manuals by other brands

AJAX KeyPad user manual

AJAX

AJAX KeyPad user manual

Tecnoautomation TASFD6T manual

Tecnoautomation

Tecnoautomation TASFD6T manual

GE NX-148E - Security NetworX LCD Keypad user manual

GE

GE NX-148E - Security NetworX LCD Keypad user manual

Richmond GTR057 installation manual

Richmond

Richmond GTR057 installation manual

ICT PRT-TS50 user manual

ICT

ICT PRT-TS50 user manual

Protection One 6150RFPL2 Installation and setup guide

Protection One

Protection One 6150RFPL2 Installation and setup guide

EDS SK120 user manual

EDS

EDS SK120 user manual

Allstar 104078 Installation and use guide

Allstar

Allstar 104078 Installation and use guide

KALATEL KTD-404 Installation and operation instructions

KALATEL

KALATEL KTD-404 Installation and operation instructions

Siemens SAK 53 installation instructions

Siemens

Siemens SAK 53 installation instructions

Fermax 100 CODE MEMOKEY cityline User& installer's manual

Fermax

Fermax 100 CODE MEMOKEY cityline User& installer's manual

NetworX NX-1300E user manual

NetworX

NetworX NX-1300E user manual

Overhead door OUK instructions

Overhead door

Overhead door OUK instructions

Bentel Security KYO 32 Programming manual

Bentel Security

Bentel Security KYO 32 Programming manual

Panasonic KX-HNK101AZ operating instructions

Panasonic

Panasonic KX-HNK101AZ operating instructions

TIS TERRE Series installation manual

TIS

TIS TERRE Series installation manual

Rosslare AC-Q4 Series instruction manual

Rosslare

Rosslare AC-Q4 Series instruction manual

Niles Solo-6MD user guide

Niles

Niles Solo-6MD user guide

manuals.online logo
manuals.online logoBrands
  • About & Mission
  • Contact us
  • Privacy Policy
  • Terms and Conditions

Copyright 2025 Manuals.Online. All Rights Reserved.