manuals.online logo
Brands
  1. Home
  2. •
  3. Brands
  4. •
  5. Crestron
  6. •
  7. Keypad
  8. •
  9. Crestron HTT-B2EX-BATT User manual

Crestron HTT-B2EX-BATT User manual

1
quickstart guide
HTT-B2EX-BATT
www.crestron.com
888.273.7876 201.767.3400
Specifications subject to
change without notice.
HTT-B2EX-BATT
For regulatory compliance information, refer to Doc. 7451.
QUICKSTART DOC. 7450D (2036667) 12.15
Battery-Powered infiNET EX®2-Button Wireless Keypad
1
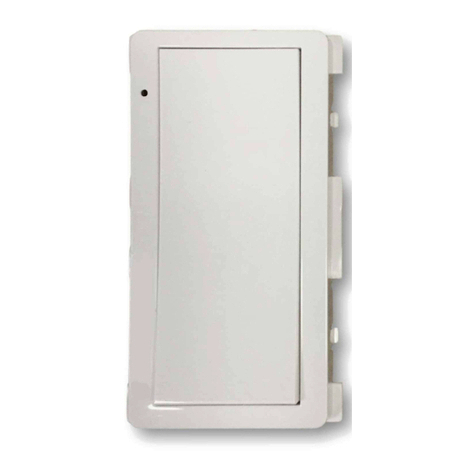
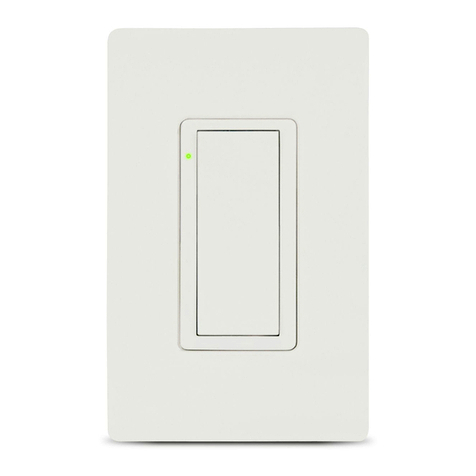
The HTT-B2EX-BATT is a battery-powered, 2-button wireless keypad
designed to control a wide range of applications supported by a
Crestron®control system. Compact and simplistic in design, the
HTT-B2EX-BATT is an ideal tabletop keypad for use as a hotel bedside
controller, a conference room presentation selector, or a simple living
room lighting and shade controller. The HTT-B2EX-BATT is powered
by lithium coin cell batteries that boast high performance and a long
battery life. Outfitted with Crestron infiNET EX®technology, the
HTT-B2EX-BATT can be wirelessly connected to a Crestron control
system. The HTT-B2EX-BATT is available with or without custom
engravings and is available with an optional tether that allows the
device to be secured at its mounting location.
infiNET EX Communication
Ultrareliable infiNET EX wireless technology provides steadfast
two-way RF communications throughout a residential or commercial
structure without the need for physical control wiring. The
HTT-B2EX-BATT works with other infiNET EX devices to communicate
with a Crestron control system via an infiNET EX Wireless Gateway
(sold separately). Up to 100 infiNET EX devices may coexist on a
single infiNET EX network.
Description
Install the HTT-B2EX-BATT by powering the device, placing it on a flat
surface, and securing it to the line cord of a lamp (optional).
Power Device
The HTT-B2EX-BATT is shipped with the batteries installed. To power the
device, pull and remove the plastic tab on the side of the device. Once the
plastic tab is removed, the device is powered and ready to be operated.
Properly discard the plastic tab.
Secure Device (Optional)
A security tether is available on the HTT-B2EX-BATT-B-T W/TETHER,
HTT-B2EX-BATT-W-T W/TETHER,
HTT-B2EX-BATT-B-T_W/TETHER_ENGRAVED, and
HTT-B2EX-BATT-W-T_W/TETHER_ENGRAVED models. The tether is
secured inside the cover of the keypad and attaches to a lamp cord. Use
the following procedure to secure the loose end of the tether to a lamp
cord.
1. Wrap the loose end of the tether around the lamp cord. The loop
should be loose enough to allow the tether to slide along the lamp
cord but not loose enough to allow the tether to slide over the plug.
2. Use the supplied metal crimp and pliers to secure the tether to the
lamp cord.
3. Neatly trim the excess wire from the tether using wire cutters.
2Installation
The device connects to the Crestron network via the infiNET EX
communications protocol. Use the following procedures to join or leave an
infiNET EX network and to verify communications between the device and
the control system.
Joining an infiNET EX Network
Before a device can be used in a lighting system, it must first join an
infiNET EX network.
NOTE: A device can be acquired by only one gateway.
3Wireless Communications
Lamp
Cord
Tether
Metal
Crimp
1. Put the infiNET EX gateway into Acquire mode from the unit itself
or from Crestron Toolbox™. Refer to the gateway’s manual at
www.crestron.com/manuals.
NOTE: In an environment where multiple gateways are installed,
only one gateway should be in Acquire mode at any time.
2. Put the device in Acquire mode by doing the following:
a. Tap the large button three times, and then press and hold it
down (tap-tap-tap-press+hold) until the large button LED on
the device blinks once (this can take up to 10 seconds).
b. Release the button to start the acquire process. The large
button LED blinks slowly to show that the device is actively
scanning the infiNET EX network.
• The large button LED turns on for 5 seconds to show that
the device has been successfully acquired.
• The large button LED blinks 10 times to indicate that the
device was not successfully acquired to the infiNET EX
network. Ensure that the gateway is in Acquire mode and
within range before attempting the acquire process again.
Leaving an infiNET EX Network
To leave an infiNET EX network, put the device into Acquire mode, as
described in “Joining an infiNET EX Network,” when no gateway is in
Acquire mode.
Verifying Communications Status
To check the communication status of the device, tap the large button
three times, and then press and hold it down (tap-tap-tap-press+hold)
for up to 2 seconds.The large button LED indicates the communication
status. Refer to the table for details.
13/16 in
(21 mm)
2-3/4 in
(69 mm) Small
Button
(Button #2)
Small Button
LED
Large
Button
(Button #1)
Large Button
LED
LED COMMUNICATIONS STATUS
Turns on for 5
seconds
Device is communicating with a gateway
and control system.
Blinks twice Device is acquired but not
communicating with a gateway.
Blinks once Device is not acquired to a gateway.
NOTE: Wireless networks composed predominantly of
battery-powered devices may need additional infiNET EX expanders,
such as the CLW-EXPEX or GLA-EXPEX (sold separately), or other
nonbattery powered infiNET EX devices, to ensure proper
functionality of the network and battery life for the devices. Refer to
the Best Practices for Installation and Setup of Crestron RF Products
(Doc. 6689) at www.crestron.com/manuals for complete system
design guidelines, or contact Crestron True Blue Support for
assistance.
2
quickstart guide
HTT-B2EX-BATT
www.crestron.com
888.273.7876 201.767.3400
Specifications subject to
change without notice.
HTT-B2EX-BATT
For regulatory compliance information, refer to Doc. 7451.
QUICKSTART DOC. 7450D (2036667) 12.15
Battery-Powered infiNET EX®2-Button Wireless Keypad
5Firmware
It is recommended to have direct access to the HTT-B2EX-BATT and
to use Crestron Toolbox to set the RF ID of the device. Set the RF ID
for the HTT-B2EX-BATT by following these steps:
1. Wake the device by pressing the large or small button on the
HTT-B2EX-BATT.
2. Set the RF ID of the device using Crestron Toolbox. The RF ID
must match the RF ID specified in the Crestron Studio™ or SIMPL
Windows program.
3. Press the large or small button on the HTT-B2EX-BATT four times
(tap-tap-tap-tap) to ensure that the device is awake and the RF ID
is transferred to the device.
4RF ID
WARNING: Refer to the following warnings before changing the
batteries.
• Do not ingest batteries: chemical burn hazard.
• This product contains coin cell batteries. If a coin cell battery is
swallowed, it can cause severe internal burns in just 2 hours and
can lead to death.
• Keep new and used batteries away from children. If the battery
compartment does not close securely, stop using the product
and keep it away from children.
• If you think batteries have been swallowed or placed inside any
part of the body, seek immediate medical attention.
CAUTION: The battery used in this device may present a risk of fire or
chemical burn if mistreated. Do not recharge, disassemble, heat above
212°F (100°C), or incinerate. Replace batteries with Panasonic®
CR2450 only. Use of another battery may present a risk of fire or
explosion.
Follow the instructions below to replace the batteries in the
HTT-B2EX-BATT:
1. Using a Phillips head screwdriver, remove the two screws that
secure the base to the bottom of the device.
2. Gently separate the base from the device.
6Replace Batteries
The product warranty can be found at www.crestron.com/warranty.
The specific patents that cover Crestron products are listed at patents.crestron.com.
Certain Crestron products contain open source software. For specific information, please visit
www.crestron.com/opensource.
Crestron, the Crestron logo, Crestron Studio, Crestron Toolbox, and infiNET EX are either trademarks or
registered trademarks of Crestron Electronics, Inc. in the United States and/or other countries. Panasonic is
either a trademark or registered trademark of Panasonic, Inc. in the United States and/or other countries.
Other trademarks, registered trademarks, and trade names may be used in this document to refer to either
the entities claiming the marks and names or their products. Crestron disclaims proprietary interest in the
marks and names of others. Crestron is not responsible for errors in typography or photography.
This document was written by the Technical Publications department at Crestron.
©2015 Crestron Electronics, Inc.
!
!
NOTE: Before using the HTT-B2EX-BATT, ensure that the device is
using the latest firmware. Check for the latest firmware for the
HTT-B2EX-BATT at www.crestron.com/firmware. Firmware is loaded
onto the device using Crestron Toolbox.
To upgrade the firmware on the HTT-B2EX-BATT, follow the
procedure below using Crestron Toolbox (v. 2.36.216 or later):
1. Select Tools | Network Device Tree View.
2. Right-click the gateway in the Network Device Tree View window.
3. Select Functions |Firmware Upload (Deep Sleep).
4. Click the Load Firmware File button in the Firmware Upload
(Deep Sleep) window and browse for the firmware in the Open
window.
5. Once the firmware is selected, click Open to add the firmware to
Firmware Images.
6. In the Assignments section, click the device (CTRL + click or
SHIFT + click for multiple devices) that the firmware should be
assigned to. The row turns light gray.
NOTE: If a device is not located in the Assignments section,
click Show all Available IDs.
NOTE: If a deep sleep device has not been acquired by the
gateway, assign the firmware to an ID if the future ID number of
the device is known.
Screws
Tether
(Optional)
Batteries
Base
Device
3. Remove the two batteries from the HTT-B2EX-BATT, and replace
with two new Panasonic CR2450 batteries.
4. Reassemble the HTT-B2EX-BATT, and place it in its original
location.
NOTE: Dispose of the used batteries promptly. Keep the batteries
away from children. Do not disassemble the batteries, and do not
dispose of them in fire.
7. In the Firmware Images section, click the firmware that should be
assigned to the device(s). The row turns light gray.
8. Once the device(s) and firmware are selected, click Assign Selected
Image to Selected Target(s) to assign the firmware to the device(s).
The firmware is stored on the gateway and assigned to the device(s).
9. Select a method to initiate the firmware upgrade on the device:
• Allow the HTT-B2EX-BATT to automatically initiate the firmware
upgrade, which occurs every 8 hours.
• To manually initiate the firmware upgrade, press the large or small
button on the HTT-B2EX-BATT four times (tap-tap-tap-tap).

Other Crestron Keypad manuals

Crestron GLPPA-KP User manual

Crestron

Crestron GLPPA-KP User manual

Crestron INET-CBDEX-E Original operating instructions

Crestron

Crestron INET-CBDEX-E Original operating instructions

Crestron CLWI-KPLEX User manual

Crestron

Crestron CLWI-KPLEX User manual

Crestron Cameo INET-CBDEX Series How to use

Crestron

Crestron Cameo INET-CBDEX Series How to use

Crestron Cameo C2N-CBD-P Original operating instructions

Crestron

Crestron Cameo C2N-CBD-P Original operating instructions

Crestron CNX-B12 How to use

Crestron

Crestron CNX-B12 How to use

Crestron ZUM  ZUMMESH-KP User manual

Crestron

Crestron ZUM ZUMMESH-KP User manual

Crestron CN-WP12FW User manual

Crestron

Crestron CN-WP12FW User manual

Crestron HZ-BTN User manual

Crestron

Crestron HZ-BTN User manual

Crestron AirMedia ZUMMESH-KP10AMBATT User manual

Crestron

Crestron AirMedia ZUMMESH-KP10AMBATT User manual

Crestron ZUMMESH-KP10ABATT User manual

Crestron

Crestron ZUMMESH-KP10ABATT User manual

Crestron Zum Series User manual

Crestron

Crestron Zum Series User manual

Crestron Lutron CNWM-LU12 How to use

Crestron

Crestron Lutron CNWM-LU12 How to use

Crestron C2NI-AG Creslight II How to use

Crestron

Crestron C2NI-AG Creslight II How to use

Crestron Cameo C2N-CBD-P Quick start guide

Crestron

Crestron Cameo C2N-CBD-P Quick start guide

Crestron black nova AXES Series User manual

Crestron

Crestron black nova AXES Series User manual

Crestron Zum ZUMMESH-KPBATT User manual

Crestron

Crestron Zum ZUMMESH-KPBATT User manual

Crestron HTT-B10EX How to use

Crestron

Crestron HTT-B10EX How to use

Crestron Cameo C2NI-CB Series User manual

Crestron

Crestron Cameo C2NI-CB Series User manual

Crestron C2N-LCDB3 Dimensional drawing

Crestron

Crestron C2N-LCDB3 Dimensional drawing

Crestron CLWI-KPLCN User manual

Crestron

Crestron CLWI-KPLCN User manual

Crestron Horizon HZ-KPCN Series User manual

Crestron

Crestron Horizon HZ-KPCN Series User manual

Crestron C2N-DB12 How to use

Crestron

Crestron C2N-DB12 How to use

Crestron CNX-BF12 How to use

Crestron

Crestron CNX-BF12 How to use

Popular Keypad manuals by other brands

SURNQIEE NK601 manual

SURNQIEE

SURNQIEE NK601 manual

Vimar ELVOX 41020 Installer's guide

Vimar

Vimar ELVOX 41020 Installer's guide

Visonic CL-80 installation instructions

Visonic

Visonic CL-80 installation instructions

Risco lightsys RP432KP manual

Risco

Risco lightsys RP432KP manual

Eldes EKB2 user manual

Eldes

Eldes EKB2 user manual

Alarm Controls Corporation KP-100 operating instructions

Alarm Controls Corporation

Alarm Controls Corporation KP-100 operating instructions

Homeworks Signature Series installation instructions

Homeworks

Homeworks Signature Series installation instructions

Climax KP-15 manual

Climax

Climax KP-15 manual

AMX Mio Modero Prestige quick start guide

AMX

AMX Mio Modero Prestige quick start guide

Bosch AMAX 2100 installation guide

Bosch

Bosch AMAX 2100 installation guide

AEI PROTECT-ON SYSTEMS DK-2836A user manual

AEI PROTECT-ON SYSTEMS

AEI PROTECT-ON SYSTEMS DK-2836A user manual

Intratone 04-0107 quick start guide

Intratone

Intratone 04-0107 quick start guide

Select Engineered Systems SPRFC1 user manual

Select Engineered Systems

Select Engineered Systems SPRFC1 user manual

DMP Electronics 9800 Series quick start guide

DMP Electronics

DMP Electronics 9800 Series quick start guide

DMP Electronics easy entry 791 installation manual

DMP Electronics

DMP Electronics easy entry 791 installation manual

ANXELL E-Access E3AK Series instructions

ANXELL

ANXELL E-Access E3AK Series instructions

Digital Monitoring Products Thinline 7070 Installation sheet

Digital Monitoring Products

Digital Monitoring Products Thinline 7070 Installation sheet

urmet domus 1067/022 manual

urmet domus

urmet domus 1067/022 manual

manuals.online logo
manuals.online logoBrands
  • About & Mission
  • Contact us
  • Privacy Policy
  • Terms and Conditions

Copyright 2025 Manuals.Online. All Rights Reserved.