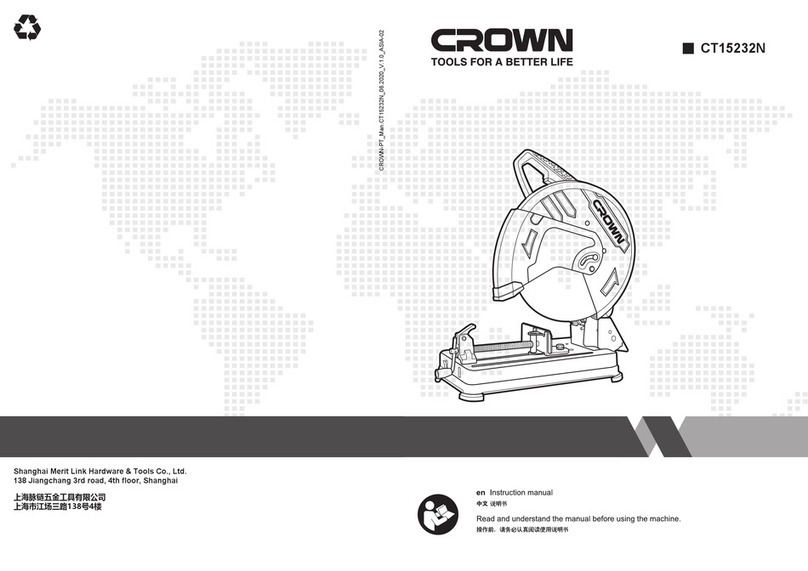
Crown CT15205N User manual

CT15205N
CROWN-PT_Man.CT15205N _08.2019_V.1.0_VIP-6
P.O. Box 641, CH-6855 Stabio
Switzerland
www.meritlink.com
Merit Link International AG
es Manual original
en Original instructions
ru Оригинальное руководство по эксплуатации
kz Пайдалану нұсқаулығының түпнұсқасы
kz

1
Limit button of
the handpiece
1
1
3
1
1
1
2
CT15205N
1
4
6
7
5
2
38
9
10
Clamping nut
Pressing plate of the workpiece
Hand shank of lead screw
3
1 2 3 4 5 6
7
45
6 7
2
2
Self-locking
switch button 3
Switch trigger
89
1
Carbon brush cover
10
11
12
14
13
Bolt
Increasing the distance
2
Bolt
1
2
Crumbs blocking
cover
Adjusting screw
Bolt
1Cushion block

EN
3
EN
4
I. General safety instructions
II. Special safety instructions cut-off saw
Warning! Read all warnings and all instructions. Electric shock, fire and/or serious injury may be
caused if failing to observe following warnings and instructions. Keep all warnings and instruction
books for reference. In all warnings listed below, the term “power tool” refers to power tool driven by
the mains supply (wired) or the battery (wireless).
The following safety precautions for use of electric hammer are required to be followed. Otherwise,
damages may be caused to the tool or your body.
Attention: We should pay attention to the basic safety matters listed below to reduce accidents such as fire,
electric shock or injury when using power tools.
a). Safety of the work site
1. Keep the work site clean and bright. Chaotic and dark site may cause an accident.
2. Do not operate power tools in explosive atmospheres, such as those any flammable liquid, gas or dust. Spark
generated by power tools may ignite the dust or gas.
3. Operate power tools after all children and bystanders leave. Inattention may make the operator lose control
over the tool.
b). Electrical safety
1. Plugs of power tools shall match with sockets. The plugs shall not be modified in any way. No changeover plug
shall be used for power tools to be grounded. Plugs not modified and matching sockets may reduce shock
hazard.
2. Avoid human exposure to the grounded surface, such as the pipeline, cooling fin or refrigerator. Body
grounding may increase shock hazard.
3. Do not expose power tools in the rain or humid environment. Water ingress into power tools may increase
shock hazard.
4. Do not misuse wires. Wires shall not be used to carry or pull power tools or plugs. Keep wires away from heat
source, oil, sharp edge or moving parts. Damaged or winding flexible wire may increase shock hazard.
5. Use external flexible wire suitable for outdoor use when using power tools outdoors. Flexible wire suitable for
outdoor use may reduce shock hazard.
6. Residual current action protector shall be used if electric tool is in humid environment inevitably. Use of RCD
can reduce electric shock.
c). Personal safety
1. Operator shall not operate electric tool when operator feels tired or encounters drug, alcohol or therapeutic
response. Instantaneous negligence during operation of electric tool will lead to serious personal injury.
2. Use personal protective equipment. Always wear the eye protector. Safety device, such as the dust mask,
skidproof safety shoe, safety helmet, ear protection, and other devices used under appropriate conditions may
reduce personal injury.
3. Prevent accidental activation. Ensure the switch in the OFF position when connecting to the power source
and/or battery holder, or picking up or carrying the tool. Plug insertion when the fingers are put on the switch
powered on or the switch is in ON position may cause hazard.
4. Before connection of power tools, take off all regulating keys or wrenches. Wrenches or keys left on rotating
parts of power tools may cause personal injury.
5. Do not stretch out the hands too long. Always pay attention to the foothold and body balance to control power
tools well in emergency.
6. Dress appropriately. Do not wear loose clothes or wear jewelry. Keep the clothes, gloves and hairs away from
moving parts, and do not wear gloves made of materials easy to wind in (such as cotton, wool, thread, etc).
Loose clothes, jewelry or long hair may be wound in easily to moving parts, which will cause injury.
7. Ensure that any device provided for connection to chip removal or dust collection equipment is well connected
and appropriately used. Use of such device may reduce hazard caused by chip or dust.
d). Use and considerations of power tools
1. Do not misuse power tools, and use appropriate power tools based on application. Selection of appropriately
designed power tools may make you work more effectively and safely.2. Power tools whose power source can
not be turned on or turned off with the switch shall not be used. Power tools not available to be controlled with
the switch are dangerous and shall be repaired.
3. Before any adjustment, accessory replacement or power tool storage, pull the plug from power source and/or
separate the battery holder from the tool. Such protective measures may reduce hazard caused by accidental
activation of tools.
4. Store idle power tools beyond the reach of children, and prevent people not familiar with power tools or not
understanding such instructions from operating power tools. It will be dangerous for power tools to be held by
users having not received the training.
5. Maintain power tools. Check to see whether the moving parts are adjusted in place or stuck, and check
breakage of parts and other factors affecting operation of power tools. Repair power tools before use if there is
any damage. Many accidents are caused by poorly maintained power tools.
6. Keep cutters sharp and clean. Well maintained cutters with sharp cutting edges are not easy to get stuck but
easy to control.
7. Use accessories of power tools and tool bits after taking consideration of operating conditions and operation
in progress according to the way required by the operation instruction and special type of the power tool intended
to be used. Use of power tools for operations not matching with their applications may cause hazard.
e). Maintenance
Deliver your power tool to professional maintenance personnel to perform maintenance with the same spare
parts. In this way, it can ensure safety of the power tool to be maintained.
The Particular Requirements for Cutting Machine
1) When the cutting operation is in process, please wait for the motor entering into the normal operation, then the
work shall be continued; if the motor is operated before entering into the normal operation, the cut surface of the
workpiece shall be uneven.
2) The overlarge load shall not be applied to the products; the incorrect operating ways shall result in the
breakage of the grinding wheel, and the motor shall be damaged.
3) The surface bounce of the grinding wheel shall be confirmed; if the bounce of the new grinding wheel is
overlarge, then the grinding wheel shall be broken.If surface runout of grinding wheel is too large, please replace
it with a new one.
4) The eyes protector shall be worn;
5) The broken grinding wheel shall not be used;
6) The proximate matter without shield at the right position shall not be used;
7) The grinding wheel recommended by the manufacture shall only be used, and the indicated speed shall equal
or exceeds the indicated speed of the tools; the grinding wheel with linear speed no less than 4800m/min shall
be adopted.
8) The operating instructions provided by the grinding wheel manufacture shall be read carefully.
9) Do not impact the grinding wheel. If the grinding wheel under rotation is impacted, then the grinding wheel
shall be broken, and the serious injury shall be caused to the human body.
10) Do not use the surface of the grinding wheel to grind the work. If the surface of the grinding wheel is used to
grind the work, then the grinding wheel shall be broken, and the serious injury shall be caused to the human body.
11) Unconcerned personnel shall not be allowed to get close. During the operation, the spark produced shall
make injury to the human body.
12) When the parts (clips, gaskets, screws, etc.) have any breakage, please stop using them. When it is not fixed
and stable while using, the grinding wheel shall be broken, and the injury to the human body shall be caused.

please protect
your fingers
please notice the
power line
1400
355*3* 25.4
13) The direction of the spark produced in the cutting shall against to the place which is not dangerous. If any
inflammable matters exist around the spark, the safety accidents may be caused.
14) The operation shall be executed after the workpiece is reliably clamped to the working chassis. No fixed
clamped workpiece shall be burst out to cause the injury to the human body.
EN
5
EN
6
Attention: Please make sure to identify the product model on nameplates as the same machine can
have different parameters. The voltage range of the model is 220~230 V, 50/60 Hz,which is inapplica
-ble to low-voltage areas and countries with special regulations on power utilization.
Please put on
protective glasses. Please put on earmuff.
Please put on
insulating gloves.
Garbage disposal replaced by material recycling. In response to environmental protection, machines,
accessories and packages, once damaged, shall be classified in details and completely recycled. The
instruction is printed on chloride-free recycled paper, and the plastic portion provides detailed informa
-tion on its components.
Parts shown in the illustration:
1. Handle 2. Self-locking knob 3. Switch 4. Enclosure 5.Carbon brush cover 6.Cable
7.Support 8. Fixed shield 9.Moving shield 10.Spindle lock button 11.Grinding wheel
12.Clamping component of workpiece 13.Base 14.Wrench
Please put on insulating
rubber soled shoes.
Use of signs
III. Product introduction/description and technical parameters
Technical parameters
Rectangular section workpiece
(length x height, 0°/45°mm) 70x180 / 60x110
Angle form workpiece
(length x height, 0°/45°mm) 95x95 / 90x90
IV. Function and operation instructions & accessory installation instructions
Attention: before the use, please read the instruction carefully. When the electric tool and fittings are
going to be maintained, the cable plug must be pulled out from the socket.
2. Operation of the switch (see Fig. 2)
For starting of this tool, you just need to raise the switch trigger. When the trigger is loosen, then the tool shall
stop rotating, if you want to make the machine rotate continuously, you just need to press the self-locking button
after the switch trigger is raised, and if you raise the trigger again, then loosen it, the continuous rotation shall be
stopped.
3. Removal and installation methods of the grinding wheel (see Fig. 3)
1). Remove the grinding wheel. Use the left hand to push the stop pin 1 to the hole of gear 2, and then use the
wrench to loosen the bolt 5, then the grinding wheel 7 shall be taken out.
2). Install the grinding wheel .After the dust in the grinding wheel splint 3, spacer 4 and bolt 5, then the grinding
wheel 7 shall be installed. Then the grinding wheel splint 3, spacer 4 and bolt 5 shall be installed in order. As last,
use the hand to grasp grinding wheel 7 tightly, and use wrench 6 to lock up the bolt 5. After the installation in
finished, the stop pin 1 shall be confirmed that whether it returns to the initial position.
4. Methods of fixing the workpiece (see Fig. 4)
Loosen the workpiece: rotate the hand shank of the lead screw in anticlockwise to loose the thread, then push
the clamping nut to the direction of the hand shank of the lead screw, at this time, pull the lead screw backward
quickly and remove the workpiece.
Clamp the workpiece: push the lead screw to the clamped workpiece of the pressing plate of the workpiece, then
push the clamping nut so as to contact with the lead screw thread, and then rotate the hand shank of the lead
screw in clockwise, then the workpiece shall be fixed.
Operation of the handpiece limit (see Fig. 1)
When the tools need to be fixed, then the operating handle shall be pressed downward, and the handpiece limit
button needs to be inserted into the limit hole, then the tool can be fixed.
When the tool needs to be put into use, the handpiece limit button needs to be pulled out outward, and after the
handpiece of the tool is put up and reset, then it can be put into use.
Attention:If the workpiece needs larger space or distance, then please adjust the space or distance as following
procedures, then refer the front and back adjustment status to Fig. 5.
Remove two bolts which fix the guide plate, then move the guide plate as Fig. 6. Then install the bolts for fixation.
5. Methods of setting up the cutting angle (see Fig. 7)
If the cutting angle needs to be changed, please loose two bolts which are fixing the guide plate, and then rotate
the guide plate to the required angle, lastly the bolts shall be tighten up.
Product description
Product model
Rated power (W)
Output power (W)
No-load speed (r/min)
Safety class
Net weight of tool (kg)
Angle of clamp adjustment (°)
The maxi. Opening of the clamp (mm)
Grinding wheel size (external diameter x thickness
x internal diameter mm)
Circular section workpiece
(length x height, 0°/45°mm) 110 / 90
Square section workpiece
(length x height, 0°/45°mm) 95x95 / 90x90
CT15205N
2200
Current value of the pressure (220V) 10.3 A
3800
14.5
45
200

EN
7
RU
8
The replacement period of the grinding wheel .Use the worn grinding wheel shall affect the working efficiency,
please replace it with the new one. Before use, please inspect whether the grinding wheel has any cracks and
transformation, if any, please replace it in time.Worn grinding wheel will influence work efficiency and please
replace it with a new one promptly.
Inspect the screw of each part .Bolts connecting each part shall be inspected. The screw of each position shall
be inspected regularly so as to check whether any looseness exeists, if any, the loose screw must be screwed
down in time; if the loose screw is used, the danger shall be easily caused.
Storage after the operation. When the operation is completed, the power supply plug shall be pulled out, and the
tool shall be stored in the position which cannot be easily reached.
Dedusting .Each time after the use, the dust in every part of the machine shall be removed so as to prevent the
machine from damaging due to the dust enter into the motor.
The carbon brush needs to be checked and replaced regularly. After the period of using the machine, the carbon
brush shall be shorten, and when the carbon brush is only 5 to 6mm long, please replace the carbon brush so
as to prevent the machines from damage.
Replacement Procedures of the Carbon Brush:
Carbon brush shall be removed and inspected regularly and it shall be replaced when it reaches wear
limit.Please keep carbon brush clean and it shall slide freely in the scope of brush holder. Two carbon brushes
shall be replaced at the same time and please use fittings of original factory.
2) The carbon brush cover shall be removed with flathead screwdriver, put in new carbon brushand then the new
carbon brush shall be inserted and the carbon brush cover shall be tighten up.
6. Adjustment method of crumbs blocking cover (see Fig. 8)
A crumb blocking cover is installed on the support. The angle of crumb blocking cover shall be adjusted by
loosing the screw according to the operation needs, to prevent the splashing of the spark.
7. Cutting schematic of square workpiece (see Fig. 9)
When cutting long workpieces, mat on both sides with cushion block of nonflammable material, and keep
workpieces and base horizontal.
V. Servicing, maintenance and contact information of after-sale services

RU
9
RU
10

RU
12
RU
11
CT15205N

RU
14
RU
13
1.
1. 2.
1.
1.
1.
2.1.
2.
1.
1.
3.
2.

KZ
16
RU
15
1.

KZ
18
KZ
17

CT15205N
1.
KZ
20
KZ
19
355

1.
1.
1.
1.
1.
1.
1.
1. 2.
2. 3.
2.
KZ
22
KZ
21

ES
24
ES
23

ES
26
ES
25

ES
28
ES
27
1.
1. 2.
355

ES
30
ES
29
1.
1.
1.
1.
1.
2.
2.
2.

AR
32
AR
31
1.
1.
1.
1.
1.
2.
2.
2.
.1.2.3

AR
34
AR
33
355

AR
36
AR
35

FA
38
FA
37
Other manuals for CT15205N
1
Table of contents
Other Crown Saw manuals

Crown
Crown CT15286S User manual

Crown
Crown CT15187-165 Operation instructions

Crown
Crown CT15235 User manual

Crown
Crown CT15205N User manual

Crown
Crown CT15232 User manual

Crown
Crown CT29006HX User manual

Crown
Crown CT15258 User manual

Crown
Crown CT15228-110-W User manual

Crown
Crown CT15233P User manual

Crown
Crown CT25002-165HX-2 User manual
Popular Saw manuals by other brands

Skil
Skil 5750 instructions

MasterCraft
MasterCraft Hawkeye Laser 54-8347-0 operating manual

Hilti
Hilti SCW 70 operating instructions

MK Diamond Products
MK Diamond Products MK-100 TRACKER Owner's manual & operating instructions

Makita
Makita 5143R instruction manual

Barranca Diamond
Barranca Diamond BD10 Owner's Manual and Operating Instructions