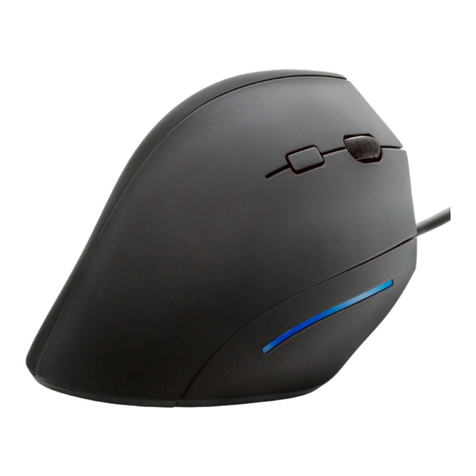
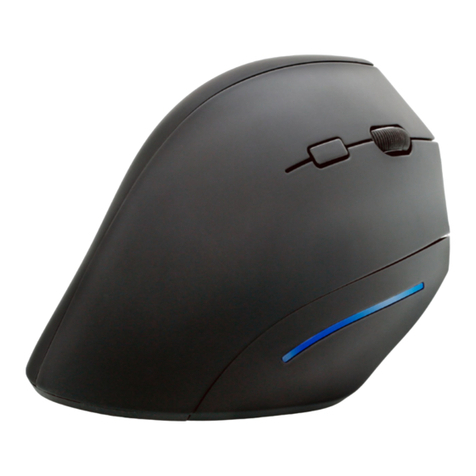
CSL 304471 User manual

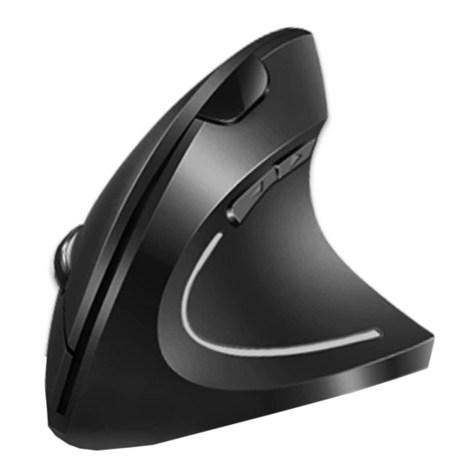
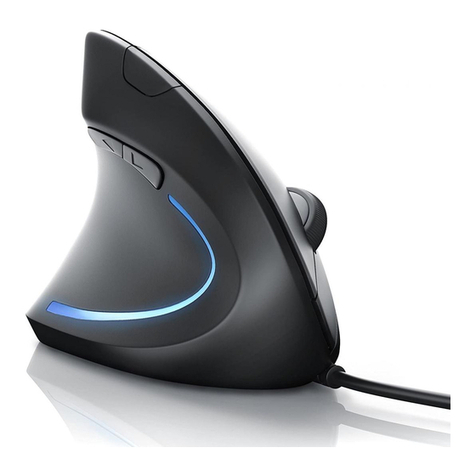
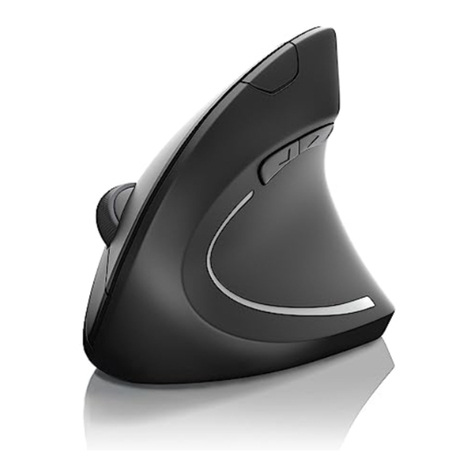
Ergonomic Vercal Mouse
Mod.-Nr.: 304471/20200410DG002
User Manual

Table of contents
1. Deutsch ............................................................................................................... 3
2. English ............................................................................................................... 10
3. Français ............................................................................................................. 17
4. Italiano .............................................................................................................. 24
5. Español.............................................................................................................. 31

3Deutsch
Vielen Dank, dass Sie sich für ein Produkt von CSL entschieden haben. Damit Sie
auch lange Freude mit Ihrem erworbenen Gerät haben werden, lesen Sie sich bie
die nachfolgende Kurzanleitung aufmerksam durch.
1. Lieferumfang
• Ergonomische Verkal-Maus
• 2,4 GHz USB-Empfänger (bendet sich an der Maus-Unterseite)
• Kurzanleitung
2. Technische Daten
Abtastrate 1000 / 1600 / 2400 dpi (wählbar)
Frequenzbereich 2402 - 2480 MHz
Sendeleistung -2,80 dBm
Abtastung opsch
Verbindung • 2,4 GHz (über USB-Empfänger)
• Bluetooth
Funkonen • 5 Tasten
• Verkal-Scrollrad
Stromversorgung 1x AA 1,5V Baerie
Produkt-Abmessungen ca. 122 mm x 63 mm x 76 mm

4Deutsch
3. Produkt-Details
Oberseite:
1rechte Maustaste
2linke Maustaste
3Verkal-Scrollrad / milere Maustaste
4Status-LED
5dpi-Wähltaste
6Schnellnavigaonstaste „Seite vor“
7Schnellnavigaonstaste „Seite zurück“
1
3
4
5
6
7
2

5Deutsch
Unterseite:
1Baeriefach
2ON/OFF-Schalter
3Verbindungs-Taste
1
3
2

6Deutsch
4. Inbetriebnahme
Entnehmen Sie die Computermaus aus der Verpackung. Nehmen Sie die Maus und
önen Sie das Baeriefach an der Unterseite. Setzen Sie dann eine neue 1,5V Bat-
terie vom Typ AA in die vorgesehenen Halterungen ein. Achten Sie beim Einsetzen
auf eine korrekte Richtung. Eine Symbolabbildung auf der Fach-Unterseite zeigt
Ihnen die richge Polarität an.
Hinweis für den Einsatz von Akkus:
Aufgrund der geringeren Akku-Spannung von lediglich 1,2V kann die Funkon der
Maus nicht mit jedem Akku-Typ gewährleistet werden. Ebenso sind Funkonsstö-
rungen wie Mauszeigersprünge oder eine verkürzte Akkulaufzeit möglich.
Wir empfehlen die Verwendung von 1,5V Alkaline Baerien.
Schließen Sie das Baeriefach und schalten Sie den Schieberegler in die Posion
„ON“. Die Maus ist dann betriebsbereit.
4.1. Funkmodi
2.4 G
Drücken Sie die „Verbindungs“-Taste auf der Unterseite der Maus kurz, bis die Sta-
tus-LED an der Oberseite der Maus grün leuchtet. Entnehmen Sie den Empfänger
aus dem Baeriefach auf der Rückseite des Gerätes und schließen Sie diesen an
einen freien USB-Anschluss des gewünschten Endgerätes an. Dank „Plug and Play“
kann dies auch im laufenden Betrieb geschehen.
Die Installaon der Gerätetreiber erfolgt vollautomasch. Eine manuelle Installa-
on von einer Treiber-CD ist nicht erforderlich.
Bluetooth
Betägen Sie die „Verbindungs“-Taste kurz, bis die LED an der Oberseite der Maus
blau leuchtet.
1. Drücken und halten Sie die „Verbindungs“-Taste für ca. 5 Sekunden, um in
den Kopplungszustand zu gelangen. Die Status-LED beginnt schnell blau zu
blinken.
2. Schalten Sie die Bluetooth-Verbindung des gewünschten Endgerätes ein,
mit welcher Sie die Maus verbinden möchten.

7Deutsch
3. Suchen Sie die Maus „Bluetooth Mouse“ in Ihrer Bluetooth-Umgebung.
4. Drücken Sie die „Pairing-Taste“ (11) und warten Sie, bis das Blue-
tooth-Gerät installiert ist.
5. Wenn die Verbindung hergestellt ist, nden Sie auf dem Display der Maus
den „Verbindungsstatus“, welcher „Connected“ anzeigt. Dies bedeutet, dass
Sie die Maus verwenden können.
Sie sollten den Bluetooth-Pairing-Modus innerhalb von 3 Minuten abschließen.
Falls Ihnen dies nicht gelingt, müssen Sie den Kopplungsvorgang wiederholen.
5. Funkonen
Bedingt durch die ergonomische Form ist die mitgelieferte Maus ausschließlich für
Rechtshänder geeignet. Mit der DPI-Taste an der Oberseite können Sie zwischen
verschiedenen Abtastraten wählen. Ihnen stehen 1000, 1600 und 2400 dpi zur
Auswahl.
Zusätzlich bietet die Verkal-Maus Browser-Schnellnavigaonstasten („Seite vor“
und „Seite zurück“), die mit dem Daumen schnell zu erreichen sind.
6. Sicherheitshinweise und Haungsausschluss
Versuchen Sie nie das Gerät zu önen, um Reparaturen oder Umbauten vorzu neh -
men. Vermeiden Sie Kontakt zu den Netzspannungen. Schließen Sie das Produkt
nicht kurz. Das Gerät ist nicht für den Betrieb im Freien zugelassen, verwenden
Sie es nur im Trockenen. Schützen Sie es vor hoher Lufeuchgkeit, Wasser und
Schnee. Halten Sie das Gerät von hohen Temperaturen fern.
Setzen Sie das Gerät keinen plötzlichen Temperaturwechseln oder starken Vibra-
onen aus, da dies die Elektronikteile beschädigen könnte.
Prüfen Sie vor der Verwendung das Gerät auf Beschädigungen. Das Gerät sollte
nicht benutzt werden, wenn es einen Stoß abbekommen hat oder in sonsger
Form beschädigt wurde.

8Deutsch
Beachten Sie bie die naonalen Besmmungen und Beschränkungen. Nutzen Sie
das Gerät nicht für andere Zwecke als die, die in der Anleitung beschrieben sind.
Dieses Produkt ist kein Spielzeug. Bewahren Sie es außerhalb der Reichweite von
Kindern oder geisg beeinträchgten Personen auf. Jede Reparatur oder Verände-
rung am Gerät, die nicht vom ursprünglichen Lieferanten durchgeführt wird, führt
zum Erlöschen der Gewährleistungs- bzw. Garaneansprüche.
Das Gerät darf nur von Personen benutzt werden, die diese Anleitung gelesen und
verstanden haben. Die Gerätespezikaonen können sich ändern, ohne dass vor-
her gesondert darauf hingewiesen wurde.
7. Entsorgungshinweise
Elektrische und elektronische Geräte dürfen nach der europäischen WEEE
Richtlinie nicht mit dem Hausmüll entsorgt werden. Deren Bestandteile müssen
getrennt der Wiederverwertung oder Entsorgung zugeführt werden, weil
giige und gefährliche Bestandteile bei unsachgemäßer Entsorgung die Umwelt
nachhal g schädigen können.
Sie sind als Verbraucher nach dem Elektro- und Elektronikgerätegesetz (ElektroG)
verpichtet, elektrische und elektronische Geräte am Ende ihrer Lebensdauer an
den Hersteller, die Verkaufsstelle oder an dafür eingerichtete, öentliche Sammel-
stellen kostenlos zurückgeben.
Einzelheiten dazu regelt das jeweilige Landesrecht. Das Symbol auf dem Produkt,
der Betriebsanleitung oder/und der Verpackung weist auf diese Besmmungen
hin. Mit dieser Art der Storennung, Verwertung und Entsorgung von Altgeräten
leisten Sie einen wichgen Beitrag zum Schutz unserer Umwelt.
8. Hinweise zur Baerieentsorgung
Im Zusammenhang mit dem Vertrieb von Baerien oder mit der Lieferung von
Geräten, die Baerien enthalten, ist der Anbieter verpichtet, den Kunden auf fol-
gendes hinzuweisen:
Der Kunde ist zur Rückgabe gebrauchter Baerien als Endnutzer gesetzlich ver-
pich tet. Er kann Altbaerien, die der Anbieter als Neubaerien im Sorment

9Deutsch
Hiermit erklärt die Firma WD Plus GmbH, dass sich das Gerät 304471/20200410DG002 in
Übereinsmmung mit den grundlegenden Anforderungen und den übrigen einschlägi-
gen Besmmungen der Richtlinie 2014/53/EU bendet. Eine vollständige Konformitäts-
erklärung erhalten Sie unter: WD Plus GmbH, Wohlenbergstraße 16, 30179 Hannover,
hp://downloads.ganzeinfach.de/search/model/304472
WEEE Richtlinie: 2012/19/EU
WEEE Register-Nr: DE 67896761
führt oder geführt hat, unentgeltlich am Versandlager (Versandadresse) des An-
bie ters zurückgeben. Die auf den Baerien abgebildeten Symbole haben folgende
Bedeutung: Pb = Baerie enthält mehr als 0,004 Masseprozent Blei, Cd = Baerie
enthält mehr als 0,002 Masseprozent Cadmium, Hg = Baerie enthält mehr als
0,0005 Masseprozent Quecksilber.
Das Symbol der durchgekreuzten Mülltonne bedeutet, dass
die Baerie nicht in den Hausmüll gegeben werden darf.

10 English
Thank you for choosing a CSL product. Please read the following user manual care-
fully so as to get the most from the product you have purchased.
1. Scope of delivery
• Ergonomic vercal mouse
• 2.4 GHz receiver (located at the boom of the mouse)
• User manual
2. Technical data
Sampling rate 1000 / 1600 / 2400 dpi (can be selected)
Frequency range 2402 - 2480 MHz
Transming power -2.80 dBm
Sampling opcal
Connecon • 2.4 GHz (via USB receiver)
• Bluetooth
Funcons • 5 buons
• Vercal scroll wheel
Power supply 1x AA 1.5V baery
Product dimensions approx. 122 mm x 63 mm x 76 mm

11English
3. Product details
Top:
1right mouse buon
2le mouse buon
3Vercal scroll wheel/middle mouse buon
4Status LED
5dpi selecon buon
6Quick navigaon buon "Next Page"
7Quick navigaon buon "Previous Page"
1
3
4
5
6
7
2

12 English
Boom:
1Baery compartment
2ON/OFF buon
3Connecon buon
1
3
2

13English
4. Inial use
Remove the computer mouse from its packaging. Take the mouse and open the
baery compartment at the boom. Insert a new 1.5V AA baery into the provid-
ed holders. Ensure that the direcon (polarity) is correct when inserng. A symbol
at the boom of the compartment shows the correct polarity.
Note on using baeries:
Due to the low baery voltage of only 1.2V, the funconing of the mouse cannot
be guaranteed with all types of baeries. Malfuncons such as jumping of the cur-
sor or shortened baery life are also possible. We recommend using 1.5V alkaline
baeries.
Close the baery compartment and push the slider to the "ON" posion. The
mouse is now ready for use.
4.1. Wireless modes
2.4 G
Press the "Connecon" buon at the boom of the mouse briey ll the status
green LED at the top of the mouse starts glowing. Remove the receiver from the
baery compartment at the back of the device and connect it to a free USB port
on the desired device. This can also be done even during ongoing use thanks to
"Plug and Play".
The device driver is installed automacally. Manual installaon from a driver CD
is not required.
Bluetooth
Press the "Connect" buon briey unl the blue LED at the top of the mouse starts
glowing.
1. Press and hold the "Connecon" buon for about 5 seconds to get into the
pairing mode. The status LED starts ashing rapidly in blue.
2. Turn on the Bluetooth connecon of the desired device with which you
want to connect the mouse.
3. Search for the "Bluetooth Mouse" in your Bluetooth environment.
4. Press the "Pairing buon" (11) and wait unl the Bluetooth device is
installed.

14 English
5. Once the connecon is established, you can see the "Connecon status" on
the mouse display which shows "Connected". This means that you can now
use the mouse.
You should complete the Bluetooth pairing process within 3 minutes. If you cannot
do this, you have to repeat the pairing process.
5. Funcons
Due to its ergonomic shape, the supplied mouse is suitable for right-handed people
only. Using the DPI buon on the top, you can choose between dierent sampling
rates. You can choose between 1000, 1600 and 2400 dpi.
The vercal mouse also comes with quick navigaon keys ("Next page" and "Previ-
ous page" for browsers), which can be accessed quickly using the thumb.
6. Safety instrucons and disclaimer
Never try to open the device to repair or make modicaons. Avoid contact with
the mains voltage. Do not short-circuit the product. The device is not approved for
outdoor use. Therefore please use it only in dry surroundings. Protect it from high
humidity, water and snow. Keep the device away from high temperatures.
Do not expose the device to sudden changes in temperature or strong vibraons,
as this could damage the electronic components.
Check the device for any damage before using it. The device should not be used if it
was subject to impact or has been damaged in some other manner.
Please comply with the local regulaons and restricons. Do not use the device
for purposes other than those described in the user manual. This product is not a
toy. Keep it out of the reach of children or mentally disabled persons. Any repair
or modicaon to the device, which is not carried out by the original supplier, will
void any warranty and guarantee claims.
The device should only be used by those who have read and understood this user

15English
manual. The specicaons of the device may be changed without any special prior
nocaon.
7. Disposal instrucons
In line with the European WEEE direcve, electrical and electronic devices should
not be disposed of along with domesc waste. Their components must be sent
separately for recycling or disposal, as improper disposal of toxic and dangerous
components may permanently damage the environment.
According to the electrical and electronic equipment act (ElektroG), you are
obliged (as a consumer) to return (free of charge) electrical and electronic devices
to the manufacturer, the point of sale or public collecon points at the end of their
service life.
The relevant local laws regulate the details in this regard. The symbol displayed
on the product, in the user manual or/and on the packaging refers to these reg-
ulaons. With this manner of sorng, recycling and disposal of used devices, you
make an important contribuon towards protecng our environment.
8. Instrucons for baery disposal
In conjuncon with the sale of baeries along with the supply of devices that in-
clude baeries, the supplier is obliged to point out the following to the customer:
The customer is legally obliged to return used baeries. He can return used bat-
teries which the supplier oers or has oered as new baeries in his assortment
free of charge to the supplier's dispatch warehouse (shipping address). The sym-
bols shown on the baeries indicate the following: Pb = baery contains more
than 0.004 percent lead by weight, Cd = baery contains more than 0.002 percent
cadmium by weight, Hg = baery contains more than 0.0005 percent mercury by
weight.

16 English
The company WD Plus GmbH hereby ceres that the device
304471/20200410DG002 complies with the fundamental requirements and all oth-
er relevant spulaons of the direcve 2014/53/EU. A complete conformity state-
ment can be obtained from: WD Plus GmbH, Wohlenbergstraße 16, 30179 Hannover,
hp://downloads.ganzeinfach.de/search/model/304472
WEEE direcve: 2012/19/EU
WEEE Register no.: DE 67896761
The symbol of the crossed-out dustbin means that the
baery may not be disposed of in household waste.

17Français
Nous vous remercions d'avoir choisi un produit de CSL. Et pour que vous puissiez
proter pendant longtemps de l'appareil que vous avez acheté, lisez aenvement
le mode d'emploi suivant.
1. Contenu de la livraison
• Souris vercale ergonomique
• Récepteur USB 2,4 GHz ( situé sur la face inférieure de la souris)
• Mode d’emploi
2. Caractérisques techniques
Taux de balayage 1000 / 1600 / 2400 dpi (au choix)
Plage de fréquence 2402 - 2480 MHz
Puissance d'émission -2,80 dBm
Balayage opque
Connexion • 2,4 GHz (à travers récepteur USB)
• Bluetooth
Foncons • 5 Touches
• Touche de délement vercale
Alimentaon électrique 1 x baerie AA de 1,5 V
Dimensions du produit env. 122 mm x 63 mm x 76 mm

18 Français
3. Parcularités du produit
Face supérieure :
1touche droite de souris
2touche gauche de souris
3Molee de délement vercale / Touche centrale de souris
4LED d'état
5Touche de sélecon de dpi
6Touche de navigaon rapide « page en avant »
7Touche de navigaon rapide « page en arrière »
1
3
4
5
6
7
2

19Français
Face inférieure :
1Comparment à piles
2Interrupteur ON/OFF
3touche de connexion
1
3
2

20 Français
4. Mise en service
Rerez la souris de l'emballage. Prenez la souris et ouvrez le comparment à bae-
ries sur la face inférieure. Placez ensuite une baerie 1,5 V neuve de type AA dans
les supports prévus. Veillez à une direcon correcte lors du placement. Des sym-
boles sur la face inférieure du comparment vous indiquent la polarité correcte.
Indicaon pour l'emploi d'accumulateurs :
En raison de la faible tension d'accumulateur de seulement 1.2 V, le fonconne-
ment de la souris ne peut pas être garan avec chaque type d'accumulateur. Les
perturbaons de fonconnement telles que sauts de pointeur de souris ou une du-
rée de vie de baeries raccourcies sont aussi possible. Nous recommandons l'uli-
saon de baeries alcalines 1.5 V.
Fermez le comparment de baeries et passez l’interrupteur en posion « ON ».
La souris est opéraonnelle.
4.1. Modes sans l
2.4 G
Appuyez sur la touche de « Connexion » sur la face inférieure de la souris jusqu'à
ce que la LED d'état sur la face supérieure s’allume en vert. Sortez le récepteur du
comparment de baeries au dos de l’appareil et connectez-le à un port USB libre
du disposif souhaité. Grâce à « Plug and Play », vous pouvez le faire aussi durant
le fonconnement.
L'installaon du pilote de disposif s'eectue automaquement. Une installaon
manuelle à parr d'un CD de pilotes n'est pas nécessaire.
Bluetooth
Appuyez brièvement sur la touche de « Connexion » jusqu'à ce que la LED sur la
face supérieure de la souris s’allume en bleu.
1. Maintenez la touche de « Connexion » enfoncée pendant env. 5 secondes
pour parvenir à l'état connecté. La LED d'état commence à clignoter
rapidement en bleu.
2. Démarrez la connexion Bluetooth du disposif souhaité, auquel vous
voulez connecter la souris.
This manual suits for next models
1
Table of contents
Languages:
Other CSL Mouse manuals
