EN • 7
LIMITED WARRANTY
CTEK, issues this limited warranty to the original purchaser of this
product. This limited warranty is not transferable. The warranty applies to
manufacturing faults and material defects. The customer must return the
product together with the receipt of purchase to the point of purchase. This
warranty is void if the product has been opened, handled carelessly or
repaired by anyone other than CTEK or its authorised representatives. One
of the screw holes in the bottom of the product may be sealed. Removing or
damaging the seal will void the warranty. CTEK makes no warranty other
than this limited warranty and is not liable for any other costs other than
those mentioned above, i.e. no consequential damages. Moreover, CTEK is
not obligated to any other warranty other than this warranty.
SUPPORT
For support, FAQ, latest revised manual and more information about CTEK
products: www.ctek.com.
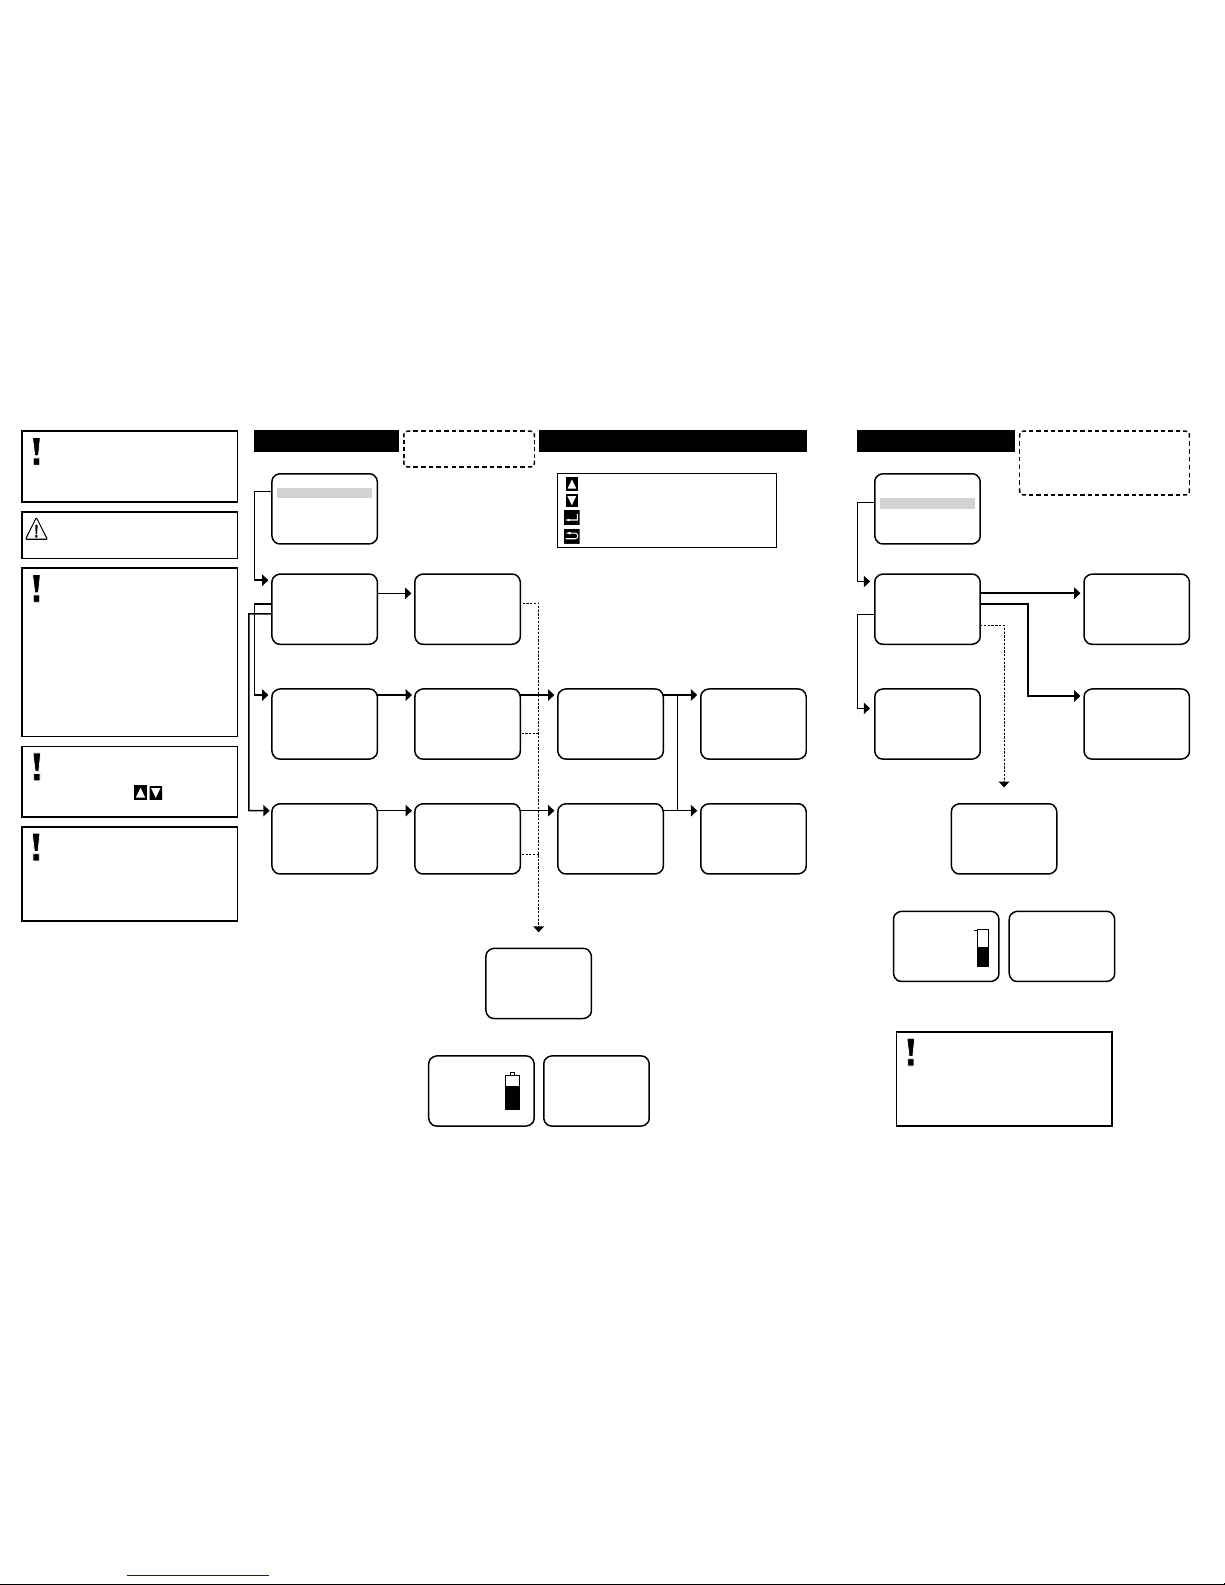
CHARGE MODES
The table explains the different charge mode:
Mode Battery Size
(Ah) Explanation Temp range
NORMAL 10–3600Ah Use to charge GEL, WET and MF batteries. -20°C–+50°C
(-4ºF–+122ºF)
AGM 10–3600Ah Use to charge most AGM batteries including AGM START/STOP types. Some
AGM should use lower voltage (NORMAL Mode), check battery manual if
unsure.
-20°C–+50°C
(-4ºF–+122ºF)
Ca/Ca 10–3600Ah Use to charge Ca/Ca batteries including AGM START/STOP types.
Use Ca/Ca program to maximize charge with minimum loss of fluid. -20°C–+50°C
(-4ºF–+122ºF)
LITHIUM 15–1200Ah Use to charge Lithium batteries. -20°C–+50°C
(-4ºF–+122ºF)
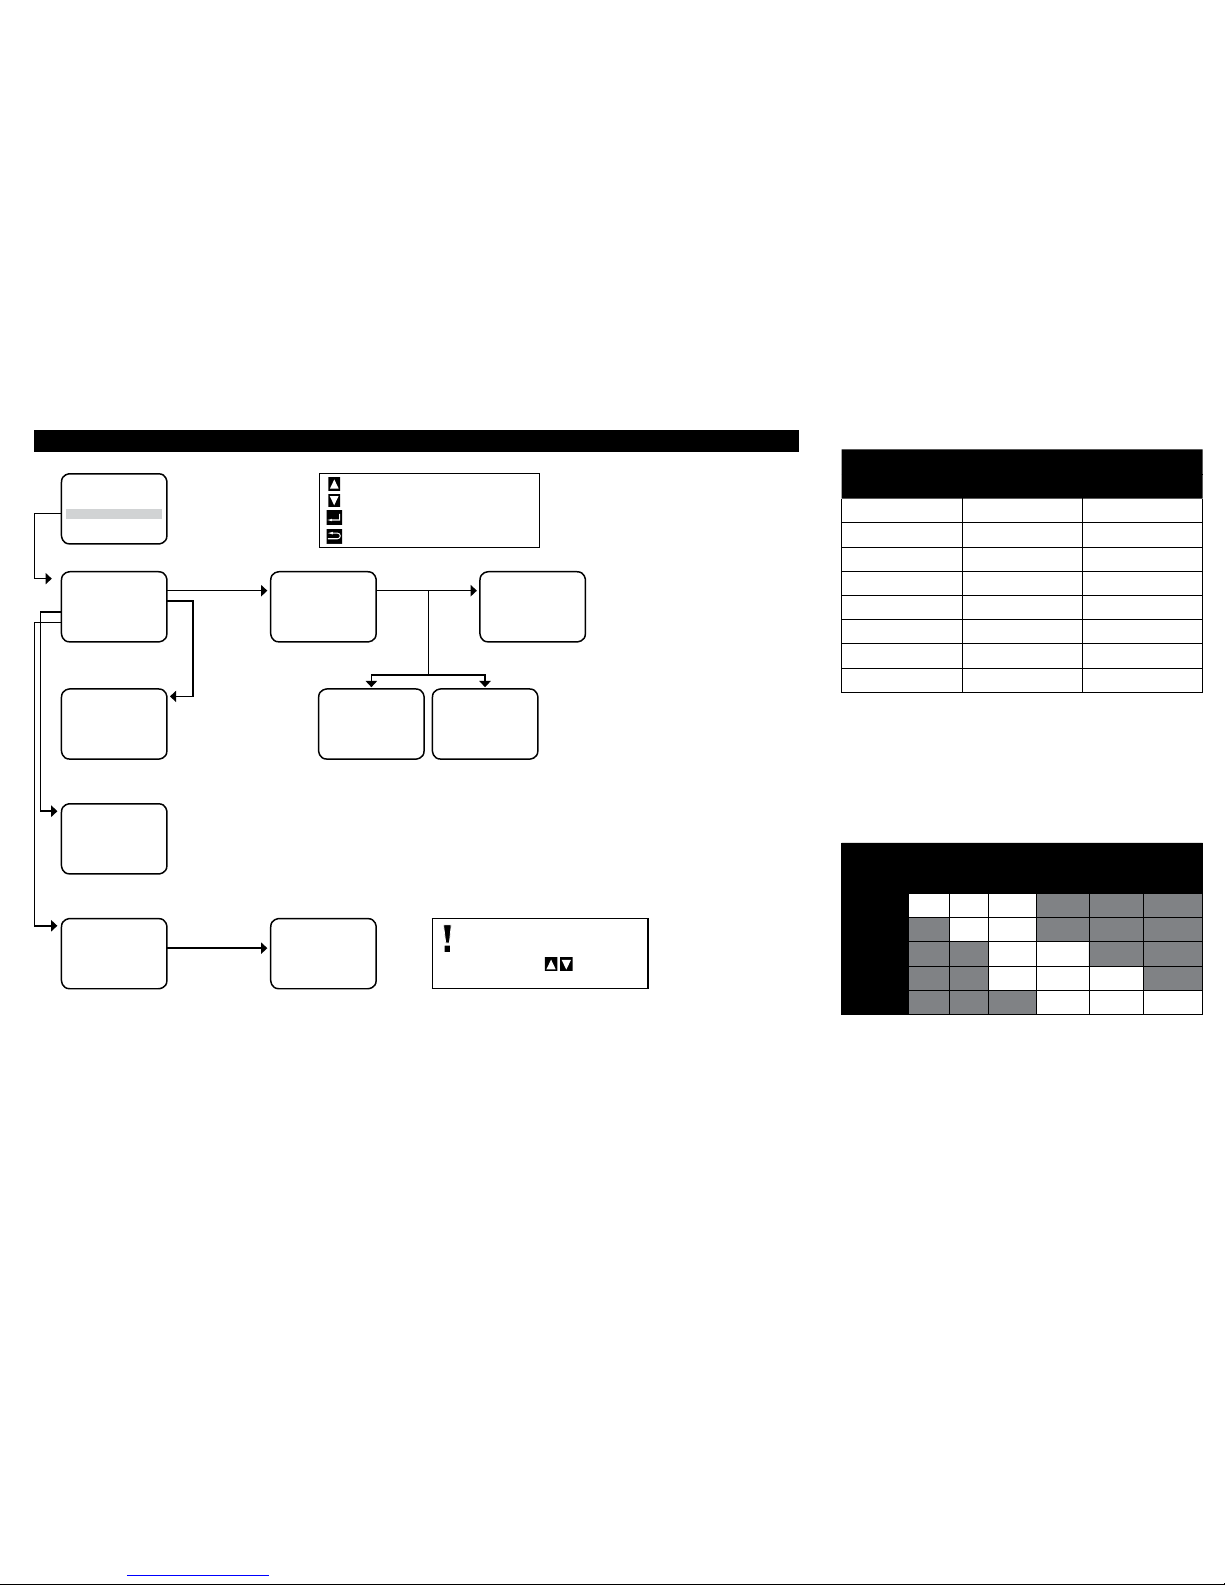
ERROR DISPLAYS
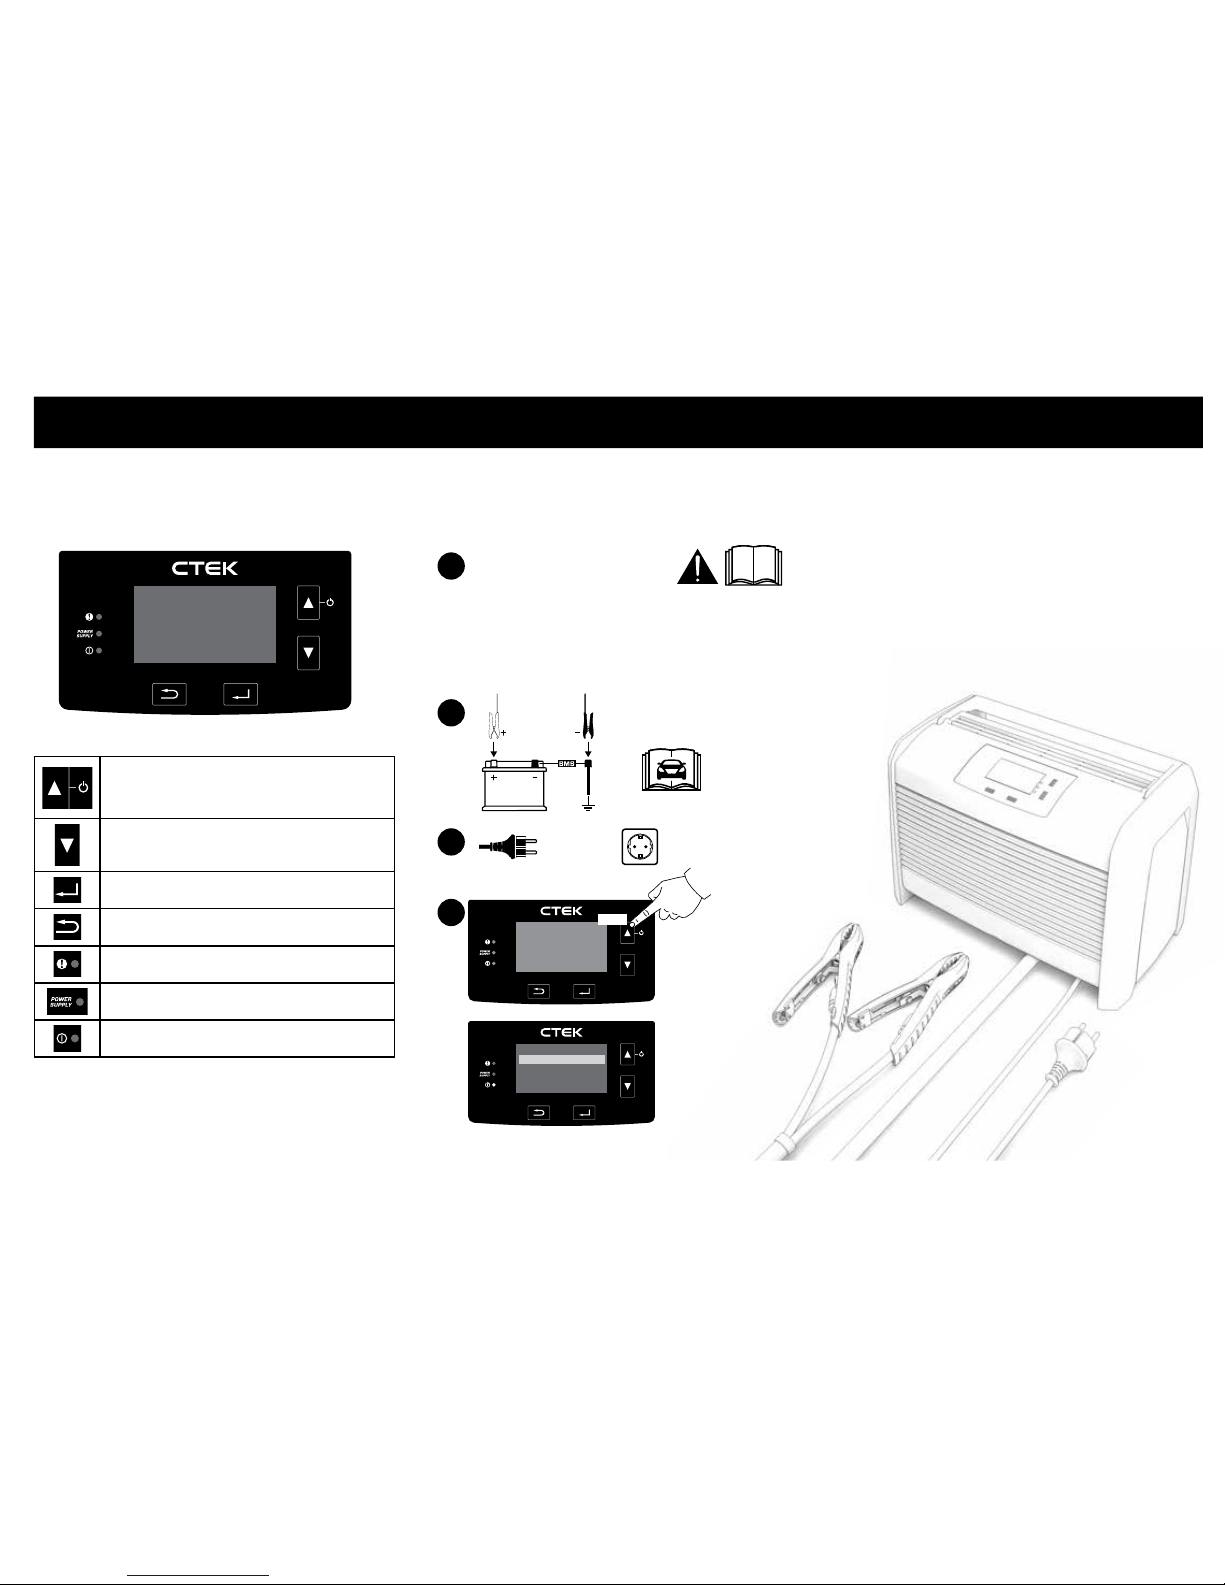
Model number 1092
INPUT 220–240VAC, 50–60Hz, 9.2A
OUTPUT 120A, 12V
Start voltage 2.0V Lead Acid batteries
8.0V LiFePO4batteries
Back current drain* Less than 2Ah/month
Ri p p l e** Less than 4% voltage
Ambient
temperature -20°C to +50°C
(-4°F to +122°F)
Battery types All types of 12V Lead Acid batteries
(WET, EFB, Ca/Ca, AGM and GEL).
12V (4cells) LiFePO4batteries
Battery capacity 10–3600Ah, Lead Acid battery types
15–1200Ah, LiFePO4battery types
Insulation class IP40
Warranty 2 years
*) Back current drain is the current that drains the battery if the charger is not connected
to the mains. CTEK chargers have a very low back current.
**) The quality of the charging voltage and charging current is very important. A high
current ripple heats up the battery which has an aging effect on the positive electrode.
High voltage ripple could harm other equipment that is connected to the battery. CTEK
battery chargers produce very clean voltage and current with low ripple.
TECHNICAL SPECIFICATION
ERROR
!
OK
Broken battery
Action: Check connections and settings, and
retry charging, before replacing the battery.
ERROR
!
OK
Overtemperature
The battery is too hot to charge.
Action: Let the battery cool down or the battery
is damaged and may need to be replaced.
ERROR
!