Battery Life & Low Battery Warning
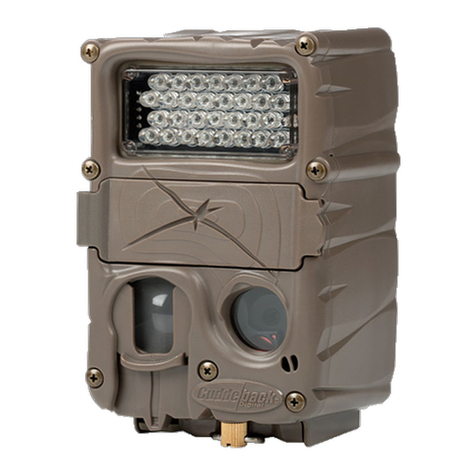
The life of the batteries in your Capture IR will vary depending upon battery
quality, ambient temperature, and the number of images taken. Our testing
shows that Capture IR will take over 2,000 images on a single set of batteries
(at room temperature). You may get more or less than 2,000 depending on
your circumstances. We strongly recommend you use Rayovac, Duracell,
or Energizer brand batteries.
Replace Capture IR batteries when 1) “B LOW” appears on the LCD screen
(which stands for batteries low) or 2) Capture does not appear to operate
correctly (in some cases the batteries may be too low to even turn on the
B LOW icon).
Use your Windows PC to manage Cuddeback
images with Trophy Room Image Management
Software
Trophy Room Image Management Software will revolutionize scouting camera
image management and how you use your images to make you a better hunter.
Trophy Room is a full-featured PC program that:
•Automatically copies images from your SD or CF card to your PC. It even
erases the card when finished.
•Organizes your images by the year and date they were copied to your PC.
• Allows you to rename each folder to make it easy to find your images.
• Displays sun and moon data for each image, including moon phase, moon
rise & set, sunrise & set, and even moon and sun position in the sky at the
time the image was taken.
• Categorizes images as buck, doe, fawn, bear, etc. There are 28 categories
to select from. For whitetail deer, you can enter point count and give the deer
a name to allow easy monitoring of trophy animals.
• Automatically calculates the buck/doe/fawn ratios based upon your images.
• With the CuddeCharts feature you can analyze your images to determine
peak movement patterns based upon sun and moon phase and position.
• With the Crystal Ball feature, you can use the data you collected and analyzed
with CuddeCharts to predict future activity. Think of this as the traditional
moon tables, only much better and tailored to you.
Best of all, Trophy Room is free and works with all Cuddeback cameras.
You can get it at www.cuddebackdigital.com.
STEP 3 – Setting up the Capture IR
Turn the rotary switch to Time position, press A to set hour and B to set minutes.
Time is AM/PM format.
Turn the rotary switch to Date position, press A to set month and B to set day.
Turn the rotary switch to Year position, press A to go back and B to go forward.
STEP 4 – Attaching Capture IR to a Tree
Attach Capture IR to a tree with the supplied strap. For optimum detection of
“deer size” animals we recommend mounting the Capture IR about 3 feet from
the ground. For best image quality, install Capture IR about 10 to 15 feet from
the area animals are expected. However, the Capture IR will detect animals at
distances from directly in front of the camera to about 50 feet. Note that
detection distance varies greatly with air temperature, subject size and
movement speed.
It is best to remove any vegetation and obstructions from the Capture IR’s
field of view as they may interfere with the Capture IR’s sensor or camera.
Aim/align the Capture IR to make sure it is pointed where you expect the animals
to be. You can use the Capture IR’s Test feature, as explained next, to help you
determine the detection zone.
STEP 5 – Checking the Capture IR’s Detection Zone
Turn the rotary switch to the Test position. Close the cover and tighten the
thumb screw.Walk back and forth in front of Capture IR. The red LED will
illuminate when the Capture IR’s sensor has detected you. Using this method
you can accurately position your Capture IR as desired.
STEP 6 – Arming the Capture IR
Turn the rotary switch to one of five Armed delay settings. These settings
represent the amount of time the Capture IR will wait before it will take another
image. This dwell time prevents multiple images of the same animal.
30 seconds – best setting for game trails
1 minute – use on scrapes
5 minutes – food plots or feed stations
15 minutes – feed stations
30 minutes – feed stations
When first armed, the Capture IR will display the indicated delay for 5 seconds
and then begin counting down from 40 to 0. When the counter gets to 0 the
Capture IR will arm and be ready to record images. This gives you time to leave
the area. Once the Capture IR takes a picture, the LCD will display the delay
setting and begin counting down. Once the counter reaches “0” the Capture IR
is ready to record the next image.
STEP 7 – Checking Capture IR
Note - When you approach the Capture IR it will probably take a picture of you.
This should not be a concern as the image can be deleted later. Open the cover
and the LCD display will probably be counting down as the Capture IR will be in
the delay or dwell time after taking your photo.
Press the A or B switch to temporarily suspend the Armed mode. The number
of images on the SD card will be displayed. Press the A or B switch again to
view additional information. Here is the sequence of data that is displayed
each time the A or B key is pressed.
a. Images on SD card. (Note the ARMED, DWELL, & IMAGES icons are displayed.)
b. Free Space on SD card in MB. (Note that ARMED & DWELL icons are displayed.)
c. Time
d. Date
e. Year
f. - -, dashes indicate the Capture IR is in Test mode and will illuminate the red
LED when activity is seen. Capture IR will automatically [auto arm] in about
4 minutes. This allows you to close the cover and leave the area.
Pressing the A or B switch again will auto arm the Capture IR.
STEP 8 – Viewing Images
Once you have the Capture IR in one of these states (athru f- see step 7) remove
the SD card.
Do not remove the SD card if the green LED is illuminated.
There are three ways to view images. First, you can view the images with an optional
viewer or a point-and-shoot camera that is able to read Capture IR images (NOTE: not all
SD-based cameras can view Capture IR images, please test any camera before purchasing).
Second, replace the SD card with a fresh SD card and take the original SD card with
you to view on your PC or other device.
Third, Cuddeback’s CuddeView 4-in-1 viewer will allow you to view the images, copy
the images to a CF card, erase the images from the SD card, and then put the original
SD card back into Capture IR. CuddeView allows you to use one CF card to record
images from multiple cameras. See www.cuddebackdigital.com for more information
on CuddeView.
Using Capture IR without SD Card
When Capture IR is used without an SD card, images are stored in Capture IR’s
internal image memory. Capture IR features an internal memory of about 30 MB.
This may allow storage of up to 100 images. Images can be transferred from internal
memory to an SD card.
If you use the Capture IR without an SD card, follow these steps to transfer the images
from the internal memory to an SD card.
1. Turn the rotary switch to OFF, and wait until the LCD goes blank.
2. Wait until the green LED turns off and then install an SD card.
3. Turn the rotary switch to any other setting, such as Set Time.
The green LED will turn on.
4. When the green LED turns off (NOTE: You may need to wait up to 3 minutes)
the images have been copied from the internal memory to the SD card.
DO NOT REMOVE or INSTALL the SD CARD WHEN THE GREEN LED IS ON.
