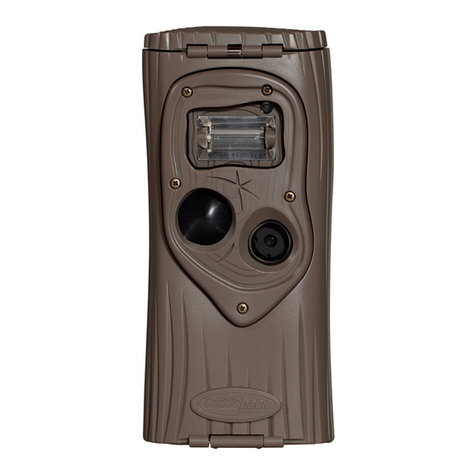
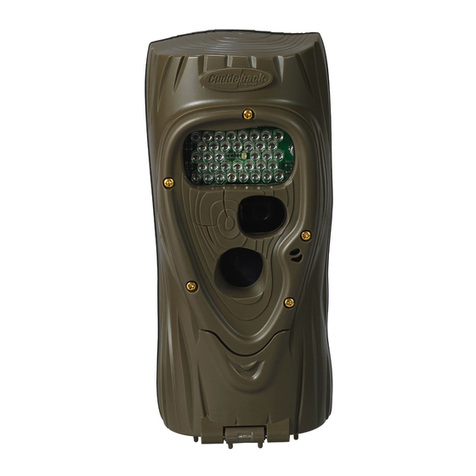
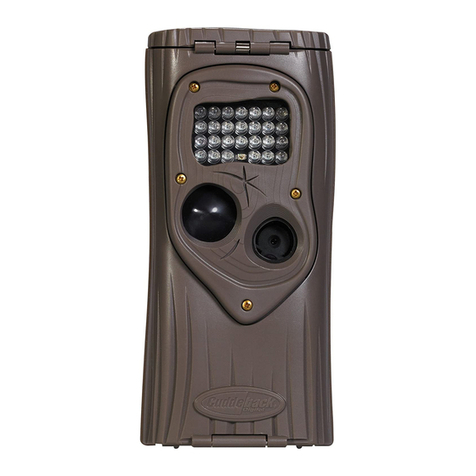
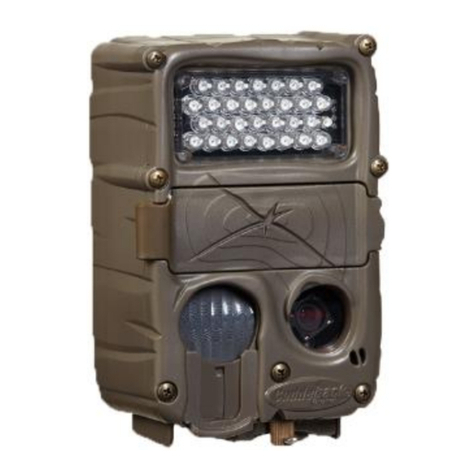
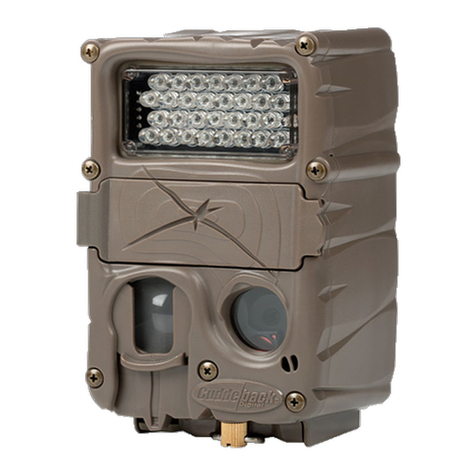
Cuddeback CuddeLink User manual

CuddeLinkManual
Version 2.20.2017 Page 1 of 24
CuddeLink
FCC Notice
Changesormodificationsnotexpresslyapprovedbythepartyresponsibleforcompliancecould
voidtheuser’sauthoritytooperatetheequipment.ThisdevicecomplieswithPart15ofthe
FCCRules.Operationissubjecttothefollowingtwoconditions:(1)thisdevicemaynotcause
harmfulinterference,and(2)thisdevicemustacceptanyinterferencereceived,including
interferencethatmaycauseundesiredoperation.Thisequipmenthasbeentestedandfoundto
complywiththelimitsforaClassBdigitaldevice,pursuanttoPart15oftheFCCRules.These
limitsaredesignedtoprovidereasonableprotectionagainstharmfulinterferenceina
residentialinstallation.Thisequipmentgenerates,usesandcanradiateradiofrequencyenergy
and,ifnotinstalledandusedinaccordancewiththeinstructions,maycauseharmful
interferencetoradiocommunications.However,thereisnoguaranteethatinterferencewill
notoccurinaparticularinstallation.Ifthisequipmentdoescauseharmfulinterferencetoradio
ortelevisionreception,whichcanbedeterminedbyturningtheequipmentoffandon,theuser
isencouragedtotrytocorrecttheinterferencebyoneormoreofthefollowingmeasures:
Reorientorrelocatethereceivingantenna.
Increasetheseparationbetweentheequipmentandreceiver.
Connecttheequipmentintoanoutletonacircuitdifferentfromthattowhichthereceiver
isconnected.
Consultthedealeroranexperiencedradio/TVtechnicianforhelp.
Quick Start Guide
This guide assumes you know how to navigate the camera’s user interface. All the settings
explained in this section are in the CL MENU item. To access the CL MENU press MODE until
COMMANDS is selected, then press MORE until CL MENU appears, then press UP to enter. Use
UP and DOWN to make selections. Press MORE to advance to the next item.
1. One CuddeLink equipped camera must be the HOME camera. HOME is the camera that
collects images from the REMOTE cameras.
2. Set up HOME camera:

CuddeLinkManual
Version 2.20.2017 Page 2 of 24
a. Set the normal camera parameters as explained in the camera’s manual. Date,
time, camera delays, etc.
b. Set CL MODE to HOME
c. Set CL LOC to 001. This is a location id number used to identify each camera.
d. Skip over CL INFO by pressing [MORE]
e. Set CL CHAN to any number. You can leave this at 1 but we recommend you
change this. Pick any channel, but remember what you selected.
f. That is all you need to do.
g. ARM the camera (Press MODE until ARM is selected)
3. Set up the REMOTE camera:
a. Set the normal camera parameters as explained in the camera’s manual. Date,
time, camera delays, etc.
b. Set CL MODE to REMOTE
c. Set CL LOC to 002. IMPORTANT – all cameras should have a unique CL LOC
(location) number. For this quick start set 1 for home, and set remotes as 2, 3, 4
and so on.
d. Set CL CHAN to the same channel you set on the HOME camera. IMPORTANT –
all cameras must be set to the same channel.
e. Leave CL DELAY and CL COUNT in the default settings of CL DELAY 15, and CL
COUNT 100.
f. Press [MORE] to view RF LEVEL and observe the display. A number will appear
that represents the signal strength. If the strength is displayed you can deploy
the camera. IMPORTANT – CuddeLink transmission distance varies with terrain
and distance and can be from 2/10 of a mile to over a mile (1/4 mile typical in a
forest). You must use RF LEVEL to verify you have a signal before you deploy a
remote camera.

CuddeLinkManual
Version 2.20.2017 Page 3 of 24
g. ARM the camera (Press MODE until ARM is selected)
h. Continue to deploy all your Remote cameras in a similar manner.
4. Checking the HOME camera
a. Checking the CuddeLink HOME camera is similar to checking a conventional trail
camera. Remove the SD card and use your normal image viewing method.
b. On the SD card is folder named 400CUDDY. Within this folder are images from
the CuddeLink remote cameras. If you used a unique CL LOC then each remote
camera’s images will be in a different folder within the 400CUDDY folder.
c. The images taken with the HOME camera are in the 100CUDDY folder.
Using CuddeLink is this easy. However, do yourself a favor and read this entire manual as there
is more you should know to get the best from CuddeLink.
Reference Manual
What CuddeLink Does
Hunters long ago realized the importance and benefits of using multiple trail cameras. But
checking these cameras can be a time consuming task that takes away from hunting time, and
pollutes the area with human scent. Cuddeback’s patent pending CuddeLink eliminates checking
multiple cameras and utilizes 1 camera as an image depository for up to 16 CuddeLink cameras.
CuddeLink is a wireless network of cameras that transmit their images to 1 camera. The
depository camera is called the HOME camera, and the transmitting cameras are called REMOTE
cameras. The cameras can be deployed in any arrangement with the only requirement being
that each camera must be in radio contact with another radio and have a link back to Home.
Transmission range is highly terrain dependent, but in a forest a range of over 1/3 mile is
common, allowing for an end-to-end link of over 4 miles. In open terrain we have tested
camera-to-camera transmission to over 1 mile.

CuddeLinkManual
Version 2.20.2017 Page 4 of 24
ROCKET SCIENCE. The technology in CuddeLink is complicated, but using
CuddeLink is not. However, using CuddeLink is not intuitive and does require
some time to learn. You must read this manual, preferably multiple times. We
also recommend you watch our tutorial videos at www.cuddelink.com. Because
of the advanced nature of this technology we do not offer phone support. All
questions must be answered by trained technicians and engineers, which we
cannot afford to have taking phone calls (unless you want to pay much more for
CuddeLink cameras). Therefore, all support must be done via email. Visit
www.cuddelink.com to email us and a qualified technician or engineer will answer
your questions.
The problem with explaining CuddeLink concepts is it is easier to use CuddeLink
then it is to explain. We recommend you read this manual twice. After which
you will find setup and deployment very easy.
TERMS
CuddeLink is Cuddeback’s trademark name for Cuddeback’s network enabled trail cameras.
Network refers to a collection of CuddeLink cameras that are in radio contact with each
other.
Home refers to the camera or device that collects all images.
Remote refers to cameras that transmit images to the HOME node.
Repeater refers to a device that acts as a relay station on a CuddeLink network. The
REPEATER does not take pictures, it only transmits images from one node to the next node.
Node is a general name for any camera, home and repeater device on the network.
Chain is 2 or more cameras that are linked together via the CuddeLink network.
CL is an abbreviation for CuddeLink.

CuddeLinkManual
Version 2.20.2017 Page 5 of 24
EQUIPMENT. CuddeLink enabled cameras are required to build a network. Each CuddeLink
camera can be configured to be a HOME, REMOTE or REPEATER. A network can have only 1
HOME and up to 15 REMOTEs & REPEATERs. Total nodes on a single network is limited to 16.
DEPLOYMENT. CuddeLink cameras use a proprietary mesh network wireless system that allows
the cameras to send images to HOME by
hopping
the images from camera-to-camera. This
daisy chain system allows for simple deployment with the only requirement that the cameras are
in radio contact with each other. Refer to the sample deployment scenarios below.
MORE THAN 16. A single CuddeLink network is limited to 16 cameras. If you require more than
16 cameras you can deploy additional networks. Each network must be assigned a unique CL
CHANNEL.
RETRIEVING IMAGES. The advantage of the CuddeLink system is you can retrieve all your
images from one camera; or have them collected on a PC; or images can be sent to a phone or
PC via the Internet or via a cell phone modem
(additional equipment required for PC or cell
support)
.
HOME Image Collection. All images transmitted from the REMOTE cameras will be saved on
the HOME node’s SD card. You check the HOME camera as if it were a conventional trail
camera.
PC Image Collection. The CuddeLink Home Plus node connects to a Windows PC running
Cuddeback’s Trophy Room PC program. The PC will copy the images from the Home Plus node
to the PC. Cuddeback’s free Windows program Trophy Room can be used to view the images
from all CuddeLink cameras on your network.
Internet Connected Windows PC. If your CuddeLink cameras are deployed where you have
access to an Internet connected PC you can get CuddeLink images anywhere you have internet
access. And you can do this without an additional monthly Internet fee. Most likely this is a

CuddeLinkManual
Version 2.20.2017 Page 6 of 24
dwelling on the property with Internet access. This Internet access can be from a DSL, Cable, or
Cell Modem. Access is accomplished by connecting the CuddeLink Home Plus to a Windows PC
with Cuddeback’s Trophy Room program installed. Trophy Room will copy the images from the
HOME node and place them in Microsoft’s OneDrive folder to allow you to access the images
anywhere with a smart phone, tablet or PC.
Note – this feature is only available when CuddeLink Home Plus is attached to a Windows PC,
however images can be viewed on any Internet capable device.
Cell Modem. Cuddeback offers the CuddeCell Modem that attaches to any CuddeLink camera
and allows images to be emailed or texted to a cell phone. This method requires a cell phone
contract with additional cell connection fees, but only 1 cell phone connection is required to
transmit images from up to 16 cameras.
CuddeLink Setup
CuddeLink is very easy to setup and deploy and only requires a few settings in each camera.
Settings Summary
SETTING RANGE HOME REMOTE DESCRIPTION
CL MODE
OFF,
HOME,
REMOTE,
REPEATER
X X
One camera must be set to HOME. All other cameras must
be REMOTE or REPEATER. Choose OFF if you want
CuddeLink disabled on this camera.
CL LOC 000 thru
999 X X Set this so your cameras can be identified. Each camera
should be assigned a unique number.
CL CHAN 1 thru 16 X X Every camera on the network must be set to the same CL
CHANNEL. You can choose any channel.
CL DELAY 5 sec to
1 hour X
Remote only. Controls how often images are queued for
transfer.
CL COUNT All, 25, X Remote only. Sets the maximum number of images that

CuddeLinkManual
Version 2.20.2017 Page 7 of 24
50, 100,
250
will be queued to send. Deletes the oldest images to make
room for the newest.
CL LEVEL Signal
level X
Remote only. Use this to verify the camera is on the
network and how strong the signal is.
CL NODES Camera
Status X Home only. Displays the status of each remote camera.
Step 1. Program CuddeLink CL MODE
All CuddeLink settings are in the CL MENU in the COMMANDS menu. To access the CL MENU
navigate to the COMMANDS menu and press MORE until CL MENU is displayed, then press UP.
CL MODE is used to select the camera’s CuddeLink mode. Choices are OFF, HOME, REMOTE,
REPEATER. Press UP or DOWN to select, then press MORE to continue programming additional
CuddeLink settings.
OFF – use this if you do not want this camera to be part of a CuddeLink network. The
CuddeLink radio will be disabled.
HOME – Set Home on the camera that collects images. Only 1 camera can be set to
HOME.
REMOTE – Set Remote on the cameras that take pictures and transmit the pictures to the
HOME camera.
REPEATER – use this when you need a repeater to transmit images, but you do not want
the camera to record images. Refer to REPEATER section latter in this manual.
Step 2. Program CL LOC
CL LOCATION (CL LOC) assigns a unique number to each camera on the network. It is
important that each camera on your CuddeLink networks has a unique CL LOC number. Refer to
section CAMERA NAMING for our recommendations on how to use this setting.
Step 3. Program CL CHAN

CuddeLinkManual
Version 2.20.2017 Page 8 of 24
The channel is the radio frequency the cameras use to transmit images. All cameras on your
network must be set to the same channel. CuddeLink has 16 channels available numbered 1
thru 16. You can choose any number you like, but do not choose a channel number used by
another network in the immediate area.
Step 4. Network Control – Overview
This information can be confusing for first time users. You may want to use the default CL
DELAY and CL COUNT setting for the first few weeks and then come back and review this
section.
Background. The CuddeLink network, like all wireless networks, has limits to how much data
can be transmitted in a specific amount of time. Think of the CuddeLink network as highway
where only so much traffic can pass in a given amount of time, and the more traffic on the
highway the slower it moves and the longer it takes to reach a destination. Your cameras can
send all the images they record, but this can create a backlog of images that will require more
time to transfer HOME.
With 5 or more cameras the network limit is about 24MB (about 1000 images) per day. If you
deploy 5 cameras this averages to 200 images per camera per day. For 10 cameras the average
is 100 images per day per camera. Actual throughput will vary with each network setup and
image size.
When a camera records an image the full size image is placed on the SD card, and a
compressed image is placed into a transmission queue where the image waits its turn to
transmit home. Cameras can queue up 100s or even 1000s of images that will eventually be
transmitted home.
However, sending all images is not necessarily best. The network of cameras may record more
images then can be transmitted in a reasonable amount of time, resulting in hours or even days
for an image to get transmitted home. You will want to control how much image traffic you put
on your CuddeLink network. CuddeLink has 2 methods for you to control the images a camera
sends.
Note – all images the camera records are saved on the remote camera’s SD card. This
discussion only applies to images transmitted to the HOME camera.

CuddeLinkManual
Version 2.20.2017 Page 9 of 24
Step 5. Network Control - Program CL DELAY (Remote only)
CL DELAY is somewhat like Camera Delay, except it controls how often images are transmitted.
Let’s use an example to demonstrate how this feature works:
<Insert diagram>
Let’s assume you set a CAMERA DELAY of 5 seconds and a CL DELAY of 30 seconds.
The camera takes a picture at 00 seconds and the image is transmitted and the 30
second CL DELAY is started.
A second picture is taken at 10 second, this picture is not transmitted because the CL
DELAY has not gotten to 30 yet.
A third picture is taken at 33 seconds, this image is transmitted because it is more than
30 seconds since the last image was transmitted.
CL DELAY has settings of 5 seconds to 1 hours. It is important to understand that a
combination of a short CL DELAY (5 seconds) and many images taken per day (100s) will create
a situation where 100s or even thousands of images are queued to transfer, which could require
days to be transmitted home. For this reason we recommend using a reasonable CL DELAY to
limit the number of images sent home. (Daily throughput is about 1000 images combined
across all cameras on the network).
Recommendations:
Trails
– CL Delay of 5 seconds. Most likely a trail will not have much activity in a day so
you may want to send every image home.
Fields and Plots
– CL Delay of 30 seconds or more. In fields the camera may record
dozens to hundreds of images in a day. You will want to use a longer CL Delay to limit
the number of images the camera transmits.
Feed Site
– CL Delay of 1 or even 5 minutes or more. Feed sites are where a camera can
record 100s of images in a day. We recommend you use a longer CL Delay to
compensate for all the images recorded.

CuddeLinkManual
Version 2.20.2017 Page 10 of 24
Experiment. We recommend you monitor the number of images in the camera’s queue
and how quickly the images are getting home then adjust CL DELAY as required.
Step 6. Network Control - Program CL COUNT (Remote only)
CL COUNT allows you to set a maximum number of images that the camera can place in its
transmit queue. Think of this as a safety net to prevent overloading the network and assures
you get the most recent images in a timely manner. Available settings are ALL, 25, 50, 100, 250.
Once this limit is reached the oldest images are removed from the Queue to make room for
newer images.
Say a nuisance animal stops in front of your camera and the camera records 200 images of the
nuisance animal. Then the animal leaves and the camera begins capturing deer as they walk
past the camera. The camera will want to send all the images of the nuisance animal, and the
later images of the deer will have to wait their turn. Depending upon the other cameras on the
network, this could require hours or days before the newer images are sent home. However, if
you set CL COUNT to 50 or 100, you are assured that your camera’s image queue will not get
overloaded with excessive images.
Recommendation – we recommend using the formula 1000 divided by the number of cameras.
For example, if you have 10 cameras deployed, then 1000/10 = 100. Set CL COUNT to 100 on
all cameras. An advantage of this feature is that you can reduce the CL Delay to as low as 5
seconds and not be concerned that a camera will overload the network, as this CL Count will
control the number of images queued for transmission and assure the most recent images are
sent home.
Step 6. Verify CL LEVEL (Remote only)
CL LEVEL is a signal strength meter. The range is 0 (poor) to 99 (best). A level above 20 is
sufficient for reliable image transmission. We have successfully deployed networks with signal
level as low as 10, however, if at all possible try to keep the levels at 20 and above.
It may take up to 1 minute for the CL LEVEL to detect a signal.
CuddeLinkManual
Version 2.20.2017 Page 11 of 24
It is good practice to enable CL LEVEL while next to a deployed camera, and then move
away from that camera with the CL LEVEL displayed. This allows you to monitor the level
as you move farther from the deployed camera.
CL LEVEL can change depending upon vegetation and air conditions. Vegetation, trees,
hills will reduce signal level.
Step 7. CL INFO (Home only)
CL INFO is a special item that only appears only on the HOME camera. CL INFO is used to
verify that remote cameras have been deployed and have connected to the HOME camera.
When CL INFO is displayed press the UP key to display information on each network camera.
Screen 1 is a summary of cameras. It will show CL INFO and the number of cameras on the
network.
<screen shots of the 2 display types>
Press UP and the first camera status will be displayed. Continue to press UP or DOWN to display
the status of each camera. The CL INFO menus allows you to see how many camera are on the
network and what their battery status is. Here is some examples:
1st Screen 2
nd Screen Explanation
01 / HOME 001 OK 1st node is HOME with CL LOC 001. Battery is OK.
02 / CAM 005 OK 2nd node is a remote camera with CL LOC 005, battery OK.
03 / CAM 003 LO 3rd node is a remote camera with CL LOC 003, battery LO.
CL INFO file. The CL INFO information is also on the HOME camera’s SD card. Click the
file Report.html in the DCIM\400CUDDY folder. Your computers web browser will display a
report that shows detailed status of all cameras on the network.

CuddeLinkManual
Version 2.20.2017 Page 12 of 24
Camera Naming: recommended usage of CL LOC & CAM ID
Keeping track of the location and images from 15 remote cameras is not a trivial task. Where is
camera 6? Where was this image taken? To make camera and image management easy
CuddeLink has 2 features to simplify image management.
CL LOC. You probably do not want images from 15 cameras saved in one folder on your SD
card. The Home camera saves the images from each camera in unique folder based upon the
CL LOC setting. We recommend you assign each camera a unique CL LOC number and that
number will determine where images are saved on the HOME camera’s SD card.
If you move a camera to a new location the images from that camera will continue to be saved
in the same folder. If this is acceptable to you then you can keep the CL LOC the same as you
move the camera to a new location. However, if you prefer to organize your images by location
then you should change the CL LOC every time you move the camera. If you do change CL
LOC then you must make sure you do not reuse a CL LOC that another camera might be using.
We have found the following method helps assure there isn’t any CL LOC numbering conflicts:
Use 10-based numbers for CL LOC, such as 010, 020, 030, and so on up to 160 for 16 remote
cameras. As you move a camera you only need to increment the CL LOC one number – CL LOC
030 becomes 031 when moved. If you move the camera again, set the CL LOC to 032.
(Just
remember that when you get to 039 that you shouldn’t advance to 040, but go back to 030 or

CuddeLinkManual
Version 2.20.2017 Page 13 of 24
pick a new 10-based number that is not being used).
This method will assure you never have
duplicate CL LOCs and creates a new image folder each time a camera is moved.
DCIM/400CUDDY/LOC__010 this is folder where images from camera with CL LOC 010
are saved
DCIM/400CUDDY/LOC__020 this is folder where images from camera with CL LOC 020
are saved
DCIM/400CUDDY/LOC__021 this is folder where images from camera with CL LOC 021
are saved
CAM ID. With 15 remote camera it can be difficult to determine where an image was taken.
We recommend you use CAM ID to define the location of the camera as this will make it easy
for you to determine where the images were taken. Each time you move the camera you should
assign a new CAM ID that defines the new location. Some examples of names that we have
used are POND FIELD, VISION TRAIL, HILL TOP. The CAM ID is printed on the image and makes
it easy to determine where an image was taken.
CuddeLink Field Deployment
Setting up a CuddeLink network is easy, but to assure cameras are connected you
must
deploy
cameras in proper sequence. Deploying a network of cameras is comparable to making a chain
and you are adding links to the chain.
Step 1 – Deploy the Home Camera
1. Assign one CuddeLink camera to be HOME by setting the CL MODE to HOME.
2. We recommend you place the included HOME sticker to the inside of the camera’s UI door.
3. Use the COMMANDS menu to assign a CL LOC of 010 to this camera. We recommend you
write 10 on the HOME sticker.
4.
Set the CL CHANNEL. The CL CHANNEL prevents neighboring CuddeLink cameras from
accessing your network. If there are no other networks in your area you can select any
numbers you like. CuddeLink performance is not affected by the channel number. If you

CuddeLinkManual
Version 2.20.2017 Page 14 of 24
suspect interference change the CL Channel. Remember the channel number as all cameras
in your network
must be assigned the same channel number.
5. Set the other camera parameters as required. Selected EZ or ADV mode and set the delays,
time lapse, etc. as desired.
6. Arm the camera and mount it. You will return to this camera after you deploy the remaining
cameras on your network.
You must ARM the Home camera before you deploy additional
cameras.
Step 2 – Deploy the 1st Remote Camera
1. We recommend you setup the camera while at the HOME node.
2. Set basic camera parameters as required. Selected EZ or ADV mode and set the delays, time
lapse, etc. as desired.
3. Assign a CL LOC of 020 to this camera. Each camera should be given a unique CL LOC
number. You can use any CL LOC number between 001 and 999. We recommend Home be
assigned 010, the 1st remote be assigned 020, the second remote 030, and so.
4. Use the CL MENU to set these settings:
a. Set CL MODE = REMOTE.
b. Set the CL CHANNEL to the same number you set on the HOME camera.
c. Set the CL DELAY as required.
d. Set the CL COUNT as required.
5.
Enable the CL LEVEL menu. If you are in range of a camera, within 30 to 60 seconds you
should see a number & text displayed. This is the strength of the signal received from the
HOME node. As long as the signal is GOOD this camera is connected to the HOME node.
If a number is not displayed within a few minutes you are too far from a camera. See topic
Understanding Transmission Range for more details.

CuddeLinkManual
Version 2.20.2017 Page 15 of 24
TIP – It is good practice to program a remote camera while next to the HOME or previously
deployed REMOTE camera. Then enable CL LEVEL while next to the deployed camera. This
will assure you have a CL Signal. Then as you move away from the Home camera and
towards your place of deployment you can observe the CL LEVEL to assure sufficient signal.
6. Arm the camera and mount it as desired.
Note – you must ARM the camera before you
deploy additional cameras.
Step 3 – Deploy Additional Remote Cameras
Deploying additional remote cameras is identical to setting up the 1st remote, except you should
assign a new CL LOC number as explained above.
When you enable the CL LEVEL command the remote will display the signal strength of the
strongest signal received. As long as a signal is received your camera is connected to the
network.
Complete the setup of the camera parameters and then ARM the camera.
Note – you must
ARM the camera before you deploy additional cameras.
Continue deploying additional remote cameras as required.
Step 4 – Verifying the CuddeLink Network
After you have deployed all your cameras you should verify that they all can talk to the HOME
node. Return to the HOME camera and use the CL NODES command to verify that all REMOTE
cameras are connected to HOME, and to determine the REMOTES battery level.
Note – it may take an hour for the network to build. We recommend waiting 1 hour or more
after deploying the last camera before you check the HOME node CL INFO.
1. Visit the HOME node and enable CL MENU, then enable CL NODES.
2. The display will show ## NODES where ## is how many cameras are in the network.
This includes the HOME node.

CuddeLinkManual
Version 2.20.2017 Page 16 of 24
3. Press the UP key to view each of the connected cameras. The CL LOC number and
battery level will be displayed (this is the reason we encourage unique CL LOCs for each
camera).
4. Press the UP key consecutively to see all cameras on the network and their battery level.
5. Once you have verified that all cameras are on the network your deployment is complete.
Step 5 – Checking the Home Camera
Checking the HOME camera is similar to checking a conventional trail camera. Disarm the
camera by pressing the UP key and remove the SD card. We also recommend you use the CL
NODES command (explained above) to check the status of your network and the battery level of
the REMOTE cameras. This allows you to keep track of the REMOTE cameras battery status
without having to visit them.
See section SD CARD below for how images are saved on the
CuddeLink cameras.
Each REMOTE camera will periodically send a status image to the HOME camera. This status
report can be displayed as a conventional image and shows basic stats about the REMOTE
camera. This allows you to verify that the REMOTE cameras are functioning correctly, eliminating
the need to visit the REMOTE cameras.
Note – we recommend using a PC with running our PC Trophy Room to view images. See
section
Trophy Room
.
Step 6 – Moving a Remote Camera
Moving a REMOTE camera can temporarily disrupt your network. Think of your network as a
chain of links and you can see that removing one link may break the chain. This means you
need to take precautions when moving cameras to assure your network remains functioning.
To move a camera we recommend this process:
1. Disarm the camera and put it into CL LEVEL mode. CL LEVEL will keep the camera from
auto-arming for 30 minutes, while keeping the radio enabled. If you require more time

CuddeLinkManual
Version 2.20.2017 Page 17 of 24
pressing the UP or DOWN key while CL LEVEL is displayed will extend the time an
additional 30 minutes
2. Move the camera to the new location and verify you are connected to the network using
the CL LEVEL indicator.
3. This is where the mapping feature on a GPS is valuable. Using the map you can
determine if moving the camera might have broken links to other cameras. If you think
a link may have been broken you must visit the other cameras to verify their CL LEVEL is
good.
4. After moving the cameras, allow sufficient time for the network to adjust. Then visit the
HOME camera and use CL INFO command to verify all cameras are still connected. If
cameras are not connected you will need to visit them to verify the CL LEVEL and
potentially relocate them.
5. We recommend you increment the CL LOC number every time you move a camera. This
will allow HOME node to create a new folder for this new location. We also recommend
changing the CAM ID to name this new location.
This completes the setup guidance section of this manual. As stated above, we recommend you
go back to page 1 and read this section 1 more time. Doing so may save you considerable time
and frustration when you first deploy your CuddeLink cameras.
Understanding Transmission Range
The CL LEVEL command is a signal strength meter you can use to verify radio reception. The
range is -- to +99 with descriptive words to simplify the meaning. A signal of FAIR, GOOD,
BEST is sufficient signal to assure image transmission. It is ok to have a signal strength of POOR,
but we recommend you try to not use POOR unless at the end of a chain.
We recommend using a map based GPS or online aerial photos to help deploy cameras. A
map will allow you to check distance between cameras and verify how the cameras are

CuddeLinkManual
Version 2.20.2017 Page 18 of 24
connected. For example, you may think camera 3 is connected to camera 2 while the map may
show you that camera 2 is actually closer to camera 1.
Note – Google My Maps is an excellent tool to manage camera location. My Maps uses aerial
photos and allows you to place pins where cameras are located and measure the distance
between cameras. Use your web browser and search for Google My Maps for more information.
We have tested transmission to nearly ½ mile in heavy forest and to over 2 miles in open terrain.
Trees, foliage, elevation, terrain, hills, etc. all effect transmission range. You will need to
experiment and use your GPS, maps, and the CL LEVEL to determine optimum deployment.
Generally, the higher the camera is off the ground the better it will receive and transmit images.
Using Genius mounts to place the camera high and aim it down is a good way to increase
transmission range.
SD CARD –HOME
The HOME node will save the CuddeLink images in the folder 400CUDDY. Within the
400CUDDY folder the images will be sorted into subfolders for each remote camera by the
camera’s CL LOC number (this is the second reason we suggest you set unique CL LOCs for each
remote).
100CUDDY – the home node will save the images it records in this folder
400CUDDY – this is the folder where CuddeLink remote images are saved. Within this
folder are subfolders for each remote camera.
LOC__000 – this is where images will reside for REMOTES that do not have a CL
LOC set.
LOC__001 – images from remote with CL LOC 001
LOC__002 – images from remote with CL LOC 002
And so on for each camera on your CuddeLink network.
Status.html – All remote camera sends status data to the home camera. These reports
are displayed in the Status.html file. Click this file to view it with your web browser.

CuddeLinkManual
Version 2.20.2017 Page 19 of 24
Status Folder –This folder contains the status report from each camera. You only need to
view these status images if your web browser cannot display the status.html.
Images – Images are identified with the prefix T_ which indicates this is a low resolution
image. The corresponding full size image is retained on the remotes camera’s SD card.
SD CARD –REMOTE
Images transmitted from the REMOTE cameras will be reduced in size and quality. This is
required due to the limitations of the wireless technology. However, the full size image are
saved on the REMOTE camera SD card in the DCIM 100CUDDY folder. This also means that if
you delete the CuddeLink images you will still have the original hi-resolution images on the
remote camera’s SD card.
TROPHY ROOM
We strongly recommend you use Trophy Room to manage your CuddeLink images. Trophy
Room is a free Windows program that is designed to manage trail camera images from all
brands of trail cameras. It includes advanced features for managing CuddeLink images.
If you are not a PC users, we recommend you consider purchasing a low cost Windows tablet for
CuddeLink image management. Visit www.cuddeback.com/TrophyRoom for details.
Trophy Room has a wealth of features to manage trail camera images, which are explained on
the website and the Trophy Room manual. Here is a brief description of how Trophy Room
functions with CuddeLink images.
1. CuddeLink images are downsized to 50KB to maximize network performance. Trophy
Room will display the images as if they were full size.
2. CuddeLink images saved on the SD card are sorted by camera ID, viewing and manually
copying the images requires special care. Trophy Room handles this for you.
a. Allows viewing the CuddeLink images on the SD card
b. Allows easy copying the CuddeLink images from the SD card to the PC.

CuddeLinkManual
Version 2.20.2017 Page 20 of 24
3. Trophy Room can automatically transfer the images from the HOME PLUS product to the
PC. If the PC is connected to the Internet the images can be accessed from most
Internet connected PC, tablet, or phone (see next section HOME PLUS).
4. Trophy Room has a wealth of training documents and videos to aid you in learning to
use CuddeLink and Cuddeback cameras. Plus, as new documents are released they will
be automatically downloaded to Trophy Room.
REMOTE ACCESS
A great benefit of CuddeLink is that it allows the images to be accessed via the Internet. A few
things are required to do this:
1. CuddeLink HOME PLUS product
2. Windows PC, Notebook, or Windows 10 Tablet
3. Cuddeback’s Trophy Room PC program (free download)**
4. A Microsoft account (free from Microsoft)***
5. A Microsoft OneDrive account (free from Microsoft)***
6. An Internet connection, either DSL, Cable, or Cell Modem.
7. A USB cable to connect the CuddeLink HOME PLUS to the PC**
8. A AC power adapter to power the CuddeLink HOME PLUS**
**Cuddeback can supply the required USB cable and AC adapter. www.com
***Visit www.com for information on Microsoft account and OneDrive.
To setup the CuddeLink HOME PLUS
1. Install Trophy Room on your PC or tablet
2. Assure the CuddeLink HOME PLUS camera has connection to the REMOTE cameras.
Most likely the HOME camera is inside a building, which may limit transmission. If this
Other manuals for CuddeLink
1
Table of contents
Other Cuddeback Scouting Camera manuals

Cuddeback
Cuddeback Capture User manual

Cuddeback
Cuddeback CuddeView X2 User manual

Cuddeback
Cuddeback EXCITE User manual

Cuddeback
Cuddeback Ambush IR series User manual

Cuddeback
Cuddeback Attack User manual

Cuddeback
Cuddeback Attack series User manual

Cuddeback
Cuddeback Silver Series User manual

Cuddeback
Cuddeback Ambush User manual

Cuddeback
Cuddeback CuddeLink User manual

Cuddeback
Cuddeback EXCITE User manual