C.Fn
C.Fn
Attaching to a Camera
Attach the Camera Flash.
1● Slip the camera flash’s
mounting foot into the
camera’s hotshoe all the
way.
Secure the Camera Flash.
2● Rotate the lock ring on the
mounting foot until it locks
up.
Detach the Camera Flash.
3● Rotate the lock ring on the
mounting foot until it is
loosened.
Power Management
Use ON/OFF Power Switch to power the flash unit on or off. Turn off
if it will not be used for an extended period of time. Setting as a
master flash, it will turn the power off automatically after a certain
period (approx. 90 seconds) of idle use. Pressing the camera
shutter halfway or pressing any flash button will wake up the flash
unit. Setting as a slave flash, it will enter sleep mode after a certain
period (adjustable, 60 minutes by default) of idle use. Pressing any
flash button will wake it up.
Disabling Auto Power Off function is recommended
when the flash is used off camera. (C.Fn-APO, Page 74)
Slave Auto Power Off Timer is set to 60 minutes by
default. Another option “30 minutes” is available. (C.Fn-
Sv APOT, Page 74)
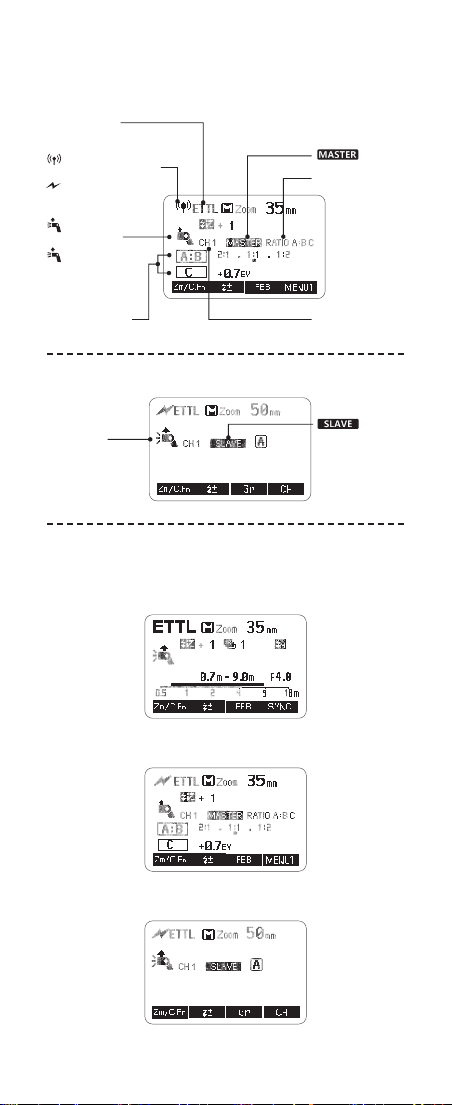
FEC: Flash Exposure Compensation
With FEC function, this flash can adjust from -3 to +3 in 1/3rd stops.
It is useful in situations where minor adjusting of the TTL system is
needed based on the environment.
Setting FEC:
Set the flash exposure
2compensation amount.
● Turn the Select Dial to set
the amount.
● “0.3”means 1/3 step,
“0.7”means 2/3 step.
● To cancel the flash
exposure compensation,
set the amount to “+0”.
Press < SET > button again
3to confirm the setting.
Press Function Button 2
1< >. The icon < >
and flash exposure
compensation amount will be
highlighted on the LCD
panel.
FEB: Flash Exposure Bracketing
You can take three flash shots while automatically changing the
flash output for each shot from -3 to +3 in 1/3rd stops. The camera
will record three images with different exposures: one exposed
according to camera calculations, one over-exposed and another
under-exposed. Over and under exposure amount is user
adjustable. This function helps get correct exposure especially in
shooting moving objects or when environmental lights are complex.
Flash Mode—E-TTL Autoflash
This flash has three flash modes: E-TTL, Manual (M), and Multi
(Stroboscopic). In E-TTL mode, the camera and the flash will work
together to calculate the correct exposure for the subject and the
background. In this mode, multiple TTL functions are available:
FEC, FEB, FEL, HSS, second curtain sync, modeling flash, control
with the camera’s menu screen.
* Press < MODE > Mode Selection Button and three flash modes
will display on the LCD panel one by one with each pressing.
ETTL Mode
Press < MODE > Mode Selection Button to enter E-TTL mode. The
LCD panel will display.
● Press the camera release button halfway to focus. The aperture
and effective flash range will be displayed in the viewfinder.
● When the shutter button is fully pressed, the flash will fire a pre-
flash that the camera will use to calculate exposure and flash
output the instant before the photo is taken.
- 47 - - 48 -
loosened.