manuals.online logo
Brands
  1. Home
  2. •
  3. Brands
  4. •
  5. Curt Group
  6. •
  7. Automobile Accessories
  8. •
  9. Curt Group Aries 2055115 User manual

Curt Group Aries 2055115 User manual

ARIESAUTOMOTIVE.COM •NEED ASSISTANCE? •8 7 7. 2 8 7. 8 6 3 4 •2055115-INS-RC •PAGE 1
INSTALLATION MANUAL 2055115
Parts List
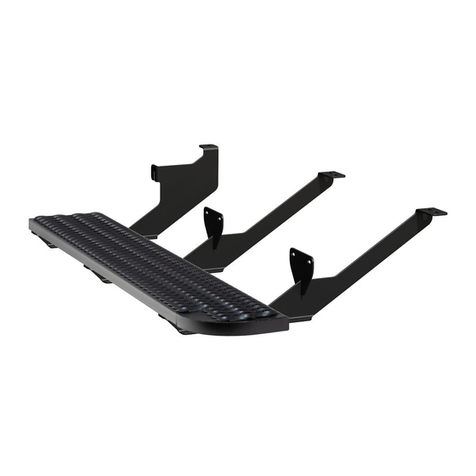
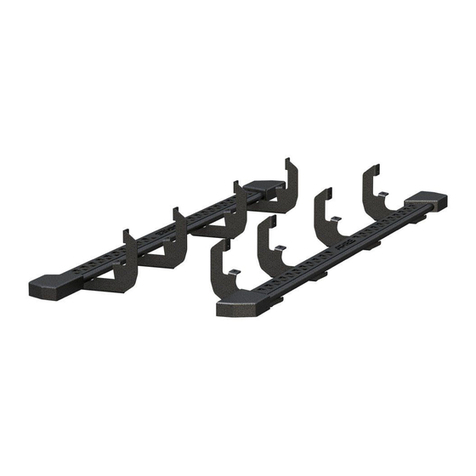
1Driver / left running board*
1Passenger / right running board*
1VersaTrac™ Driver / left
front mounting bracket
1VersaTrac™ Driver / left
rear mounting bracket
1VersaTrac™ Passenger / right
front mounting bracket
1VersaTrac™ Passenger / right
front-middle mounting bracket
1VersaTrac™ Passenger / right
rear-middle mounting bracket
1VersaTrac™ Passenger / right
rear mounting bracket
3Carriage bolt plate
6C-shaped brackets
20 Hex bolt, M8
20 Lock washer, M8
20 Flat washer, M8
6Nut plate, long, M8
2Nut plate, short, M8
1Bolt plate, M10
1Bolt retainer, M10
1Flat washer, M10
1Lock washer, M10
1Hex nut, M10
3Carriage bolt, M12 x 45mm
3Lock washer, M12
3Flat washer, M12
3Hex nut, M12
* Running boards sold separately
Tools Required
Socket set Level
Ratchet --
Maintenance
To protect the product, wax after installing. Regular waxing is recommended
to add a protective layer over the finish. Do not use any type of polish or wax
that may contain abrasives that could damage the finish.
For polished, gloss and other smooth finishes,
polish may be used to clear small scratches and scuffs on the finish.
Mild automotive detergent may be used to clean the product. Do not use dish detergent, abrasive
cleaners, abrasive pads, wire brushes or other similar products that may damage the finish.
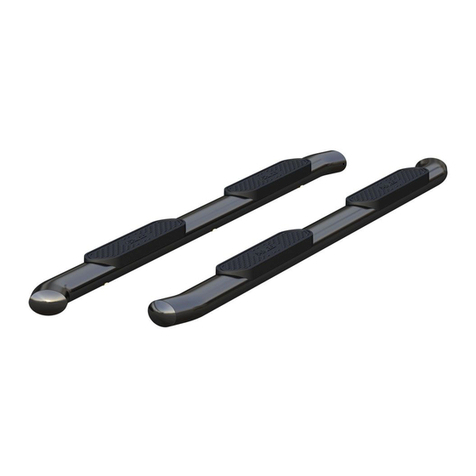
Product Photo
Front
Rear
Torque Specifications
M6 bolt 3 ft-lbs.
M8 bolt 7 ft-lbs.
M10 bolt 16 ft-lbs.
M12 bolt 28 ft-lbs.
Use above torque setting unless otherwise noted
Level of Difficulty
Easy
This is the first of two manuals
required to complete this installation.
The second manual is included with
your side bars / running boards.
NOTICE
Before you begin installation, read all instructions thoroughly.
Proper tools will improve the quality of installation and reduce the time required.
To help prevent damage to the product or vehicle, refer to the specified
torque specifications when securing hardware during the installation process.
Product Registration and Warranty
CURT Group stands behind our products with industry-leading warranties.
Provide feedback and help us to improve our products by registering your purchase at:
warranty.curtgroup.com/surveys

ARIESAUTOMOTIVE.COM •NEED ASSISTANCE? •8 7 7. 2 8 7. 8 6 3 4 •2055115-INS-RC •PAGE 2
Step 1
Starting on the passenger side,
locate the front mounting location
and attachment points. Remove the
plug from the hole in the rocker panel.
Step 4
Locate the second mounting position
behind the front mounting bracket
and remove the plugs.
Insert a long M8 nut plate in the
frame and an M10 bolt plate into the
rocker panel. Hold the bolt plate in place
using the plastic bolt retainer.
Secure the front-middle bracket to the bolt
plate using an M10 flat washer, lock washer
and hex nut. Secure to the nut plate using an
M8 flat washer, lock washer and hex bolt.
Step 2
Through the opening that faces toward the
front of the vehicle, place an M12 carriage
bolt plate along with an M12 carriage bolt.
Insert a long M8 nut plate through
the hole in the rocker panel where
the plug was removed.
Step 3
Hold the passenger-side, front
mounting bracket up to the vehicle
and fasten to the carriage bolt using
an M12 flat washer, lock washer and
hex nut. Fasten to the M8 nut plate using
a flat washer, lock washer and hex bolt.
Snug the hardware,
but do not fully tighten
ARIESAUTOMOTIVE.COM •NEED ASSISTANCE? •8 7 7. 2 8 7. 8 6 3 4 •2055115-INS-RC •PAGE 3
Step 5
Locate the rear-middle mounting position
and its attachment point. Remove the plug
from the rocker panel. Place a short M8 nut
plate in the rocker panel, and an M12 carriage
bolt and bolt plate in the other position.
Secure the rear-middle bracket to
the nut plate using an M8 flat washer,
lock washer and hex bolt. Secure to the
M12 carriage bolt using a flat washer,
lock washer and hex nut.
Step 8
Locate the driver-side rear mounting position
and remove the plugs. Place a long M8 nut
plate in the frame and rocker panel. Attach
the bracket to each point using an M8 flat
washer, lock washer and hex bolt.
NOTICE
To complete the installation,
refer to the manual included with
your running boards / side steps.
Step 6
Locate the rear mounting position
and remove the plugs from the holes
in the frame and rocker panel. Insert
a short M8 nut plate in the rocker panel
and a long M8 nut plate in the frame.
Attach the rear bracket using two M8
flat washers, lock washers and hex bolts.
Step 7
On the driver side, locate the attachment
points for the front mounting bracket.
Remove the plug from the rocker panel.
Repeat steps 2 and 3 to install the front
mounting bracket.

Other Curt Group Automobile Accessories manuals

Curt Group 13387 User manual

Curt Group

Curt Group 13387 User manual

Curt Group Retrac 206820 User manual

Curt Group

Curt Group Retrac 206820 User manual

Curt Group ARIES S224046 User manual

Curt Group

Curt Group ARIES S224046 User manual

Curt Group Q16 User manual

Curt Group

Curt Group Q16 User manual

Curt Group 45143 User manual

Curt Group

Curt Group 45143 User manual

Curt Group Betterweigh User manual

Curt Group

Curt Group Betterweigh User manual

Curt Group 13415 User manual

Curt Group

Curt Group 13415 User manual

Curt Group Liverne 401801 User manual

Curt Group

Curt Group Liverne 401801 User manual

Curt Group 18113 User manual

Curt Group

Curt Group 18113 User manual

Curt Group 60628 User manual

Curt Group

Curt Group 60628 User manual

Curt Group 18151 User manual

Curt Group

Curt Group 18151 User manual

Curt Group 18320 User manual

Curt Group

Curt Group 18320 User manual

Curt Group 13458 User manual

Curt Group

Curt Group 13458 User manual

Curt Group RETRAC 207770 User manual

Curt Group

Curt Group RETRAC 207770 User manual

Curt Group 16190 User manual

Curt Group

Curt Group 16190 User manual

Curt Group Retrac 207700 User manual

Curt Group

Curt Group Retrac 207700 User manual

Curt Group Aries 3025175 User manual

Curt Group

Curt Group Aries 3025175 User manual

Curt Group 70105 User manual

Curt Group

Curt Group 70105 User manual

Curt Group ARIES AL234046 User manual

Curt Group

Curt Group ARIES AL234046 User manual

Curt Group UWS TBV-49 User manual

Curt Group

Curt Group UWS TBV-49 User manual

Curt Group ARIES 2051132 User manual

Curt Group

Curt Group ARIES 2051132 User manual

Curt Group ARIES S225045 User manual

Curt Group

Curt Group ARIES S225045 User manual

Curt Group Aries AL235045 User manual

Curt Group

Curt Group Aries AL235045 User manual

Curt Group Aries TrailCrusher 2156000 User manual

Curt Group

Curt Group Aries TrailCrusher 2156000 User manual

Popular Automobile Accessories manuals by other brands

STO N SHO SNS 335 Installation procedures

STO N SHO

STO N SHO SNS 335 Installation procedures

NavLinkz CAM-N-H130 quick start guide

NavLinkz

NavLinkz CAM-N-H130 quick start guide

Hayman Reese 03379RW installation instructions

Hayman Reese

Hayman Reese 03379RW installation instructions

Scosche MagicGrip MGQWD-XTET manual

Scosche

Scosche MagicGrip MGQWD-XTET manual

Dakota Digital LED Tail Lights LAT-NR401 installation instructions

Dakota Digital

Dakota Digital LED Tail Lights LAT-NR401 installation instructions

Brodit ProClip 804438 installation instructions

Brodit

Brodit ProClip 804438 installation instructions

Ecco REFLEXL 11 Series Installation and operation instruction

Ecco

Ecco REFLEXL 11 Series Installation and operation instruction

Toyota PZ417-70562-00 quick start guide

Toyota

Toyota PZ417-70562-00 quick start guide

Rear view safety RVS-718-MD instruction manual

Rear view safety

Rear view safety RVS-718-MD instruction manual

Comelit KCA2074 Technical manual

Comelit

Comelit KCA2074 Technical manual

Steinhof V-289 FITTING AND OPERATION MANUAL

Steinhof

Steinhof V-289 FITTING AND OPERATION MANUAL

Aerpro FP9450GK user manual

Aerpro

Aerpro FP9450GK user manual

Lantronix FOX3-2G Series Hardware manual

Lantronix

Lantronix FOX3-2G Series Hardware manual

Yakima FatCat 6 installation manual

Yakima

Yakima FatCat 6 installation manual

JAC Mont Blanc H3 Fitting instructions

JAC

JAC Mont Blanc H3 Fitting instructions

Peiying URZ0483 owner's manual

Peiying

Peiying URZ0483 owner's manual

Yakima SkyBox LoPro 15 quick guide

Yakima

Yakima SkyBox LoPro 15 quick guide

InCarTec 27-557 manual

InCarTec

InCarTec 27-557 manual

manuals.online logo
manuals.online logoBrands
  • About & Mission
  • Contact us
  • Privacy Policy
  • Terms and Conditions

Copyright 2025 Manuals.Online. All Rights Reserved.