manuals.online logo
Brands
  1. Home
  2. •
  3. Brands
  4. •
  5. Curt Group
  6. •
  7. Automobile Accessories
  8. •
  9. Curt Group Aries 4490 User manual

Curt Group Aries 4490 User manual

ARIESAUTOMOTIVE.COM •NEED ASSISTANCE? •8 7 7. 2 8 7. 8 6 3 4 •4490-INS-RB •PAGE 1
INSTALLATION MANUAL 4490
Parts List
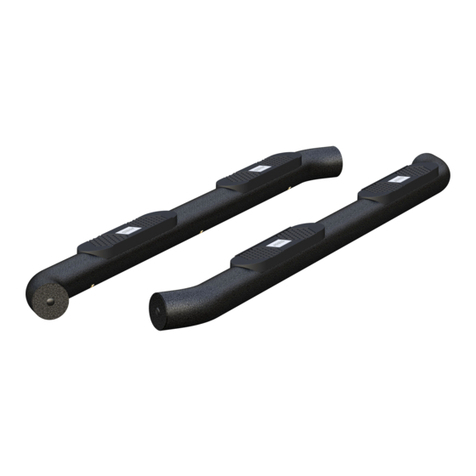
26" oval side bar
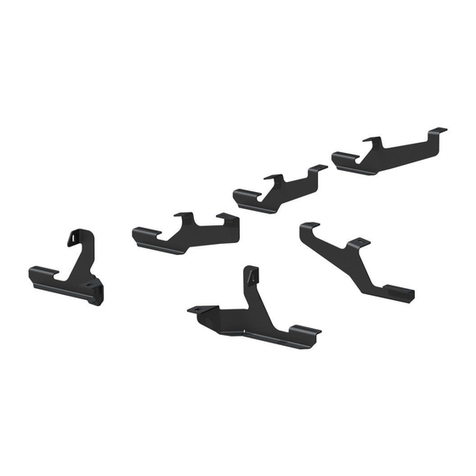
6Universal bracket
6Stainless steel bolt plate
24 Flat washer, M6
24 Nylock nut, M6
12 Flat washer, M8
12 Lock washer, M8
12 Hex head cap screw, M8
12 Clip nut, M8
6Nut, M8
*Not all hardware may be used.
Some hardware is vehicle-specific
Additional Hardware*
24 T-bolt, M8
24 Flat washer, M8
24 Lock washer, M8
24 Hex nut, M8
* Aluminum side bars are supplied with
additional hardware. Quantities listed are in
addition to the standard supplied hardware.
Torque Specifications
Metric
M6 bolt 3 ft-lbs.
M8 bolt 7 ft-lbs.
M10 bolt 16 ft-lbs.
M12 bolt 28 ft-lbs.
SAE
1/4" bolt 3 ft-lbs.
5/16" bolt 7 ft-lbs.
3/8" bolt 16 ft-lbs.
7/16" bolt 20 ft-lbs.
1/2" bolt 28 ft-lbs.
Use above torque setting unless otherwise noted
Tools Required
Ratchet Socket, 10mm
Ratchet extension Socket, 13mm
Level --
Level of Difficulty
Easy
Notes and Maintenance
Before you begin installation, read all instructions thoroughly.
Proper tools will improve the quality of installation and reduce the time required.
To protect the product, wax after installing. Regular waxing is recommended
to add a protective layer over the finish. Do not use any type of polish or wax
that may contain abrasives that could damage the finish.
For polished, gloss and other smooth finishes,
polish may be used to clear small scratches and scuffs on the finish.
Mild automotive detergent may be used to clean the product. Do not use dish detergent, abrasive
cleaners, abrasive pads, wire brushes or other similar products that may damage the finish.
Refer to the table to the left when securing hardware during the
installation process to help prevent damage to the product or vehicle.
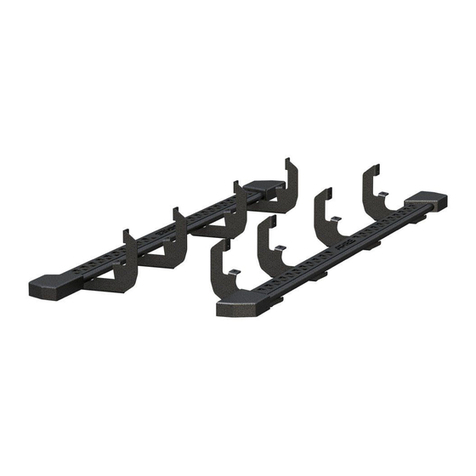
Product Photo
6" Oval Side Bars (not included)
Product Registration
CURT Group stands behind our products with industry leading warranties.
You can help us continue to improve our product line and help us understand
your needs by registering your purchase by visiting:
warranty.curtgroup.com/surveys
At CURT Group, customer is king. We value your feedback and we use that information to make
improvements on our products. Please, take a minute and let us know how we are doing.
ARIESAUTOMOTIVE.COM •NEED ASSISTANCE? •8 7 7. 2 8 7. 8 6 3 4 •4490-INS-RB •PAGE 2
Step 1
Locate the mounting tabs along the
bottom edge of the vehicle body.
For crew cab models, use the first,
second and fifth mounting locations.
For extended and double cab
models, use the first, second and
fourth mounting locations.
Step 2A
Starting on the front driver-side
mounting location, place a universal bracket
over the two factory mounting locations.
Attach the bracket to the body panel using
two M8 hex bolts, lock and flat washers.
Snug the hardware,
but do not fully tighten.
Step 2B
Note: Some models have threaded
studs and require using M8 nuts, clip
nut, lock washers and flat washers.
If required, slide an M8 clip nut
over the mounting tab with the
nut on the top surface.
Attach the bracket to the
body panel using an M8 hex bolt,
lock washer and flat washer.
Step 3
Repeat steps 2A and 2B to install
the second bracket over the second
mounting tab location from step 1.
ARIESAUTOMOTIVE.COM •NEED ASSISTANCE? •8 7 7. 2 8 7. 8 6 3 4 •4490-INS-RB •PAGE 3
Step 4
Locate the fourth mounting location
from step 1 and remove the rubber
plug from the access hole.
Insert a clip nut through the access hole
and align it over the adjacent small hole.
Step 5
Repeat step 2B to secure the bottom
of the bracket with an M8 clip nut,
bolt, lock washer and flat washer.
Secure the bracket to the body panel using
an M8 hex bolt, lock washer and flat washer.
Step 6
Carefully place the side bar on
the brackets with the larger step
pad toward the front of the vehicle.
Step 7A - For Stainless Steel Side Bars
Insert a bolt plate into the bottom
channels of the side bar as shown.
Slide the bolt plate forward to the
front bracket and insert the studs
through the bracket cradle. Repeat
this for the rear brackets.
Secure the side bar to the brackets
using M6 flat washers and nylock nuts.
Snug the hardware,
but do not fully tighten.
ARIESAUTOMOTIVE.COM •NEED ASSISTANCE? •8 7 7. 2 8 7. 8 6 3 4 •4490-INS-RB •PAGE 4
Step 7B - For Aluminum Side Bars
Insert four T-bolts into the bottom
channels of the side bar as shown.
Slide the bolts forward to the front bracket
and insert them through the bracket cradle.
Repeat this for the rear bracket.
Secure the side bar to the brackets using
M8 flat washers, lock washers and nuts.
Snug the hardware,
but do not fully tighten.
Step 8
At this time, adjust the sidebar
to the desired location.
With the sidebar in position, it is recommended
to tighten all brackets to the vehicle first,
followed by the side bar connections.
See page 1 for recommended
torque specifications.
Step 9
Repeat steps 1 through 8 on
the passenger side of the vehicle.
Congratulations on the installation of
your new ARIES 6" oval side bars.
With the side bars installed, periodic
inspections should be performed to ensure
all mounting hardware remains tight.
To protect your investment, see the
'Notes and Maintenance' section on
the first page of this instruction manual.

Other Curt Group Automobile Accessories manuals

Curt Group RETRAC 207770 User manual

Curt Group

Curt Group RETRAC 207770 User manual

Curt Group 11392 User manual

Curt Group

Curt Group 11392 User manual

Curt Group 18113 User manual

Curt Group

Curt Group 18113 User manual

Curt Group Q16 User manual

Curt Group

Curt Group Q16 User manual

Curt Group Aries TrailCrusher 2156000 User manual

Curt Group

Curt Group Aries TrailCrusher 2156000 User manual

Curt Group ARIES 2051132 User manual

Curt Group

Curt Group ARIES 2051132 User manual

Curt Group Retrac 207700 User manual

Curt Group

Curt Group Retrac 207700 User manual

Curt Group 13415 User manual

Curt Group

Curt Group 13415 User manual

Curt Group 18151 User manual

Curt Group

Curt Group 18151 User manual

Curt Group 3025101 User manual

Curt Group

Curt Group 3025101 User manual

Curt Group 48411 User manual

Curt Group

Curt Group 48411 User manual

Curt Group Betterweigh User manual

Curt Group

Curt Group Betterweigh User manual

Curt Group Retrac 207800 User manual

Curt Group

Curt Group Retrac 207800 User manual

Curt Group 19279 User manual

Curt Group

Curt Group 19279 User manual

Curt Group 18118 User manual

Curt Group

Curt Group 18118 User manual

Curt Group 58975 User manual

Curt Group

Curt Group 58975 User manual

Curt Group 51189 User manual

Curt Group

Curt Group 51189 User manual

Curt Group 60638 User manual

Curt Group

Curt Group 60638 User manual

Curt Group Aries S224046-2 User manual

Curt Group

Curt Group Aries S224046-2 User manual

Curt Group ARIES S225045 User manual

Curt Group

Curt Group ARIES S225045 User manual

Curt Group ARIES S224046 User manual

Curt Group

Curt Group ARIES S224046 User manual

Curt Group 60628 User manual

Curt Group

Curt Group 60628 User manual

Curt Group 45144 User manual

Curt Group

Curt Group 45144 User manual

Curt Group Aries 2055115 User manual

Curt Group

Curt Group Aries 2055115 User manual

Popular Automobile Accessories manuals by other brands

Metra Electronics 99-7425 installation instructions

Metra Electronics

Metra Electronics 99-7425 installation instructions

BW 3670 installation instructions

BW

BW 3670 installation instructions

Magellan 930-0015-001 - Swivel Mount - GPS Receiver... instruction manual

Magellan

Magellan 930-0015-001 - Swivel Mount - GPS Receiver... instruction manual

Cruz Optiplus Assembly instructions

Cruz

Cruz Optiplus Assembly instructions

Bully Dog 42215 installation manual

Bully Dog

Bully Dog 42215 installation manual

DMG DMCPIT installation manual

DMG

DMG DMCPIT installation manual

SVC GROUP VTZ 001-404 Fitting instructions

SVC GROUP

SVC GROUP VTZ 001-404 Fitting instructions

Whelen Engineering Company SAK34 installation guide

Whelen Engineering Company

Whelen Engineering Company SAK34 installation guide

Front Runner RRAC018 manual

Front Runner

Front Runner RRAC018 manual

GReddy 12529001 instruction manual

GReddy

GReddy 12529001 instruction manual

K-Mate BTC008L user manual

K-Mate

K-Mate BTC008L user manual

Classic Accessories Fairway Deluxe Technical manual

Classic Accessories

Classic Accessories Fairway Deluxe Technical manual

APEXi Super AFC 401-A007 instruction manual

APEXi

APEXi Super AFC 401-A007 instruction manual

Connects2 Vision CAM-17 user manual

Connects2

Connects2 Vision CAM-17 user manual

PNEUMATIC KU-CE-DS40-00 installation instructions

PNEUMATIC

PNEUMATIC KU-CE-DS40-00 installation instructions

pewag forstgrip Mounting instruction

pewag

pewag forstgrip Mounting instruction

ECS Electronics SY-007-DL user guide

ECS Electronics

ECS Electronics SY-007-DL user guide

Ram Mounts Tough-Dock quick guide

Ram Mounts

Ram Mounts Tough-Dock quick guide

manuals.online logo
manuals.online logoBrands
  • About & Mission
  • Contact us
  • Privacy Policy
  • Terms and Conditions

Copyright 2025 Manuals.Online. All Rights Reserved.