manuals.online logo
Brands
  1. Home
  2. •
  3. Brands
  4. •
  5. Curt Manufacturing
  6. •
  7. Automobile Accessories
  8. •
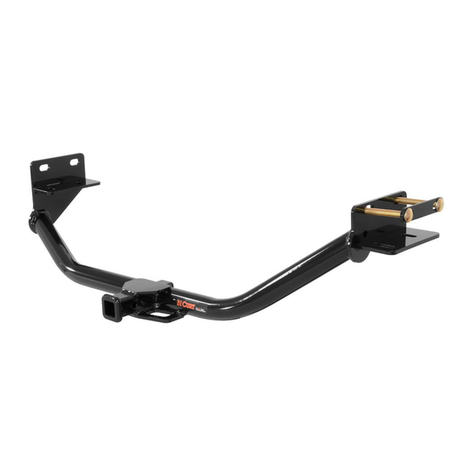
  9. Curt Manufacturing 13081 User manual

Curt Manufacturing 13081 User manual

MAK E: S TY LE:
30
W AR NI NG: NEVE R EX CEED Y OUR V EHI CLE MANUFACTUR ER 'S R ECOMME NDED TOW I NG CAPACIT Y
For more information log ont o w w w .curtmfg.com & for helpful tow ing tip s log ont o w w w . hit chin fo.com
W EI GHT CAR R Y I NG:
INSTALLATION TIPS:
INSTALLATION REQUIRES:
VEHICLE PHOTO:
HITCH ILLUSTRATION:
REPRESENTATIVE PHOTO
MAKE SURE YOUR HITCH MATCHES
LEVEL OF DIFFICULTY:
CHALLENGI NG
MODERAT E CHALLENGI NG
1. BEFORE YOU BEGIN INSTALLATION, READ ALL
INSTRUCTIONS THOROUGHLY.
2. TO EASE INSTALLATION, 2 PEOPLE MAY BE
REQUIRED.
3. USING PROPER TOOLS WILL GREATLY IMPROVE
THE QUALITY OF THE INSTALL AND REDUCE THE
TIME REQUIRED.
4. NEED HELP OR HAVE SOME QUESTIONS?
CALL TECHNICAL SUPPORT AT 877.287.8634
Safety glasses should be
w orn a t all time s w hile
installing this product
.
Y EAR S: 2011-CURR ENT J EEP MODEL: PATR IOT & COMPASS SUV
4,000
400
TR AI LER W EI GHT:
TONGUE W EI GHT:
13081 I NS T ALLAT I ON I NS TR UCTI ONS
LBS.
LBS.
MI N.
MI N.60
IF YOU ARE HESITANT TO UNDERTAKE
THIS TASK ON YOUR OWN, CONTACT AN AUTHORIZED
CURT INSTALLER FOR ADDITIONAL ASSISTANCE.
NOVICE INSTALL TIME:
PRO INSTALL TIME:
PE R IODIC A LL Y C HE C K T HIS R E C E IV E R HIT C H T O E NS UR E A L L F A S TE NE R S AR E TIG HT A ND A L L S T R UC T UR A L C OMP ONE NT S A R E S O UND
C UR T Manufacturing LL C . warrants this product to be free of defects in material and/or workmanship at the time of retail purchase by the original purchaser. If the product is found to be defective,
C UR T Manufacturing LL C . may repair or replace the product at their option, when the product is returned, prepaid, with proof of purchase. Alteration to, misuse of, or improper installation of this product
voids the warranty. C UR T Manufacturing L LC .'s liability is limited to repair or replacement of products found to be defective, and specifically excludes liability for incidental or consequential loss or damage.
F or more information log onto www.curtmfg .com
This product complies with safety specifications and requirements for connecting devices and towing systems of the state of New Y ork, V .E .S .C .R egulation V -5 and S AE J 684.
5/8/2020
EASY
R ATCHE T SOCK ET
5/ 8"
3/ 4"
7mm
11mm
MAR KER
DI E GR I NDER
TAPE
MEASUR E
SAFE TY
GLAS SES
TOR QUE
W R ENCH
LOWE R E XHAUS T BY
RE MOVING
(3) R UBBER IS OLATOR S
FAS C IA TR IMMING
RE QUIR E D
FIS HWIR E HARDWAR E
R OTAR Y T OOL MASK I NG
TAPE
I NS T ALLATI ON W ALKTHROUGH:
For more information log onto www.curtmfg.com, & for helpful towing tips log onto www.hitchinfo.com
Parts List
DES C R IPT IONPAR T NUMBE RQTYITEM
HHCS ,1/2-13 UNC,4,GRD8,Y Z10-1040741
WAS HE R ,F LAT,1/2,Y Z30-0013342
NUT, S E R -F LANGE,1/2-13 UNC,GRD8,Y Z
20-0006243
TR IM
NOTE: T rim dimensions are approximate. C heck fit prior to completing trim.
TR IM DIAGR AM
ENL A R GE HOL E
(B OTH S IDE S )
VE HIC LE
FA S C IA
2
58
in
2
916
in
FA S C IA CE NTER
INS TA L L E D POS ITION
1
2
3
I NS T ALLATI ON W ALKTHROUGH:
For more information log onto www.curtmfg.com, & for helpful towing tips log onto www.hitchinfo.com
2. Lower exhaust by removing (3) rubber isolators. S ee
R UBBE R IS OLATOR R E MOV AL DIAGR AM on page 2.
(Note: S upport exhaust to avoid it possible damage.)
4. Insert 4" hex bolts with washers into the frame rails from
the outside. R aise the hitch into position between the frame
rails. Push front bolts through mounting plates and loosely
install 1/2" flange nuts.
1. Temporarily remove (4) plastic fasteners and (4) hex
screws from fascia.
3. Temporarily remove heat shield by removing (4) nuts.
(Note: If tow loop is present remove and return to
vehicle owner.)
I NS T ALLATI ON W ALKTHROUGH:
For more information log onto www.curtmfg.com, & for helpful towing tips log onto www.hitchinfo.com
6. Trim fascia. S ee TR IM DIAGR AM on page 2.
(Note: Check fit prior to completing trim)
5. R otate hitch up so that it is touching fascia and mark
where to trim.
7. Push hitch in rearmost position and secure
hitch to the frame with (4) flange nuts.
8. Torque all 1/2" fasteners to 110 ft-lbs.
9. R einstall heat shield, fasteners, and exhaust removed in
steps 1 & 2.
GROSS L OA D CAPACIT Y WHE N USED AS A WE IGH T CAR R Y ING HIT C H: L BS. T R AIL E R W E IGHT & L BS. T ONGUE W E IGHT .
***DO N OT E X C E E D V E HIC LE MA NU F AC T UR E R 'S R E C O MM E NDE D T O W IN G C AP A C IT Y .***
WAR NING: AL L NON-T RA IL E R L OA DS APPL IE D TO THIS PR ODUCT MUST BE SUPPORT E D BY 18050 STABIL IZ ING ST R A PS.
** F A IL UR E T O P R OP E R L Y S UP P OR T N O N -T R A IL E R L OA DS WIL L V OID PR ODU C T W A RR AN T Y **
HAV ING INST A L L AT ION QUESTIONS? CAL L TE CHNIC AL SUPPORT A T
1-877-287-8634
HITC H WEIG HT : LBS .
INS TALL TIME
PROFE S S IONAL: MINUTE S
NOV IC E (DIY ): MINUTE S
INS TALL NOTE S :
P E R IODIC A L L Y C H E C K T HIS R E C E IV E R HIT C H T O E NS U R E T HA T A L L F A S T E NE R S
A R E T IG H T A N D T H A T A L L S T R U C T UR A L C OMP ON E NT S A R E S OU ND.
C urt Manufacturing Inc., warrants this product to be free of defects in material and/or workmans hip at the time of retail purchase by the original purchaser. If the product is found to be defective,
C urt Manufacturing Inc., may repair or replace the product, at their option, when the product is returned, prepaid, with proof of purchase. Alteration to, misuse of, or improper installation of
this product voids the warranty. C urt Manufacturing Inc.'s liability is limited to repair or replacement of products found to be defective, and specifically excludes liability for incidental or
consequential loss or damage.
4,000 400
28
30
J E E P PA TR IOT & COMPAS S
5/8/2020
13081
60
PA GE 1 of 2
Parts List
DE SC R IPTION PAR T NUMBERQTY IT E M
HHCS ,1/2-13 UNC ,4,GR D8,Y Z10-1040741
WAS HE R ,FLAT,1/2,Y Z30-0013342
NUT, SER -F LANGE ,1/2-13 UNC,GRD8,Y Z20-0006243
- FASCIA TRIMMING R E QUIRE D
- FISHWIRE HAR DWARE
- LOWE R E XHAUST
TOOLS RE QUIR E D
RATC HE T
3/4", 7mm & 11mm SOC KE TS
DIE GRINDE R
MAR KE R
TAPE ME ASURE
TOR QUE WR E NC H
PA S S E NGE R S IDE
FRAME R A IL
DRIVE R S IDE
FR A ME R A IL
1
2
3
INS TAL LE D POS IT ION
HAV ING INST A L L A T ION QUE ST IONS? CAL L T E CHNICAL SUPPOR T A T
1-877-287-8634
INS TAL L ATION S TEPS
P E R IODIC A L L Y C HE C K T H IS R E C E IV E R H IT C H T O E NS U R E T H A T A L L F A S T E NE R S
A R E T IG H T A N D T HA T A L L S T R U C T UR A L C OMP ON E NT S A R E S OU ND.
Curt Manufacturing Inc., warrants this product to be free of defects in material and/or workmanship at the time of retail purchase by the original purchaser. If the product is found to be defective,
Curt Manufacturing Inc., may repair or replace the product, at their option, when the product is returned, prepaid, with proof of purchase. Alteration to, misuse of, or improper installation of
this product voids the warranty. C urt Manufacturing Inc.'s liability is limited to repair or replacement of products found to be defective, and specifically excludes liability for incidental or
consequential loss or damage.
J E E P P ATRIOT & COMPAS S
5/8/2020
13081
PA GE 2 of 2
TR IM
NOTE : T rim dimensions are approximate. C heck fit prior to completing trim.
TR IM DIA GR A M
1. T emporarily remove (4) plastic fasteners and (4) hex screws from fascia.
2. Lower exhaust by removing (3) rubber isolators. S ee R UBBE R IS OLAT OR RE MOV AL DIAGR AM above.
(Note: S upport exhaust to avoid possible damage.)
3. T emporarily remove heat shield by removing (4) nuts. (Note: If tow loop is present remove and return to
vehicle owner.)
4. Insert 4" hex bolts with washers into the frame rails from the outside. R aise the hitch into position between
the frame rails. Push front bolts through mounting plates and loosely install 1/2" flange nuts.
5. R otate hitch up so that it is touching fascia and mark where to trim.
6. T rim fascia. S ee TR IM DIAGR AM above. (Note: C heck fit prior to completing trim.)
7. S ecure hitch to the frame with (4) flange nuts.
8. T orque all 1/2" fasteners to 110 lb-ft.
9. R einstall heat shield, fasteners, and exhaust removed in steps 1 & 2.
F AS CIA C E NTE R
VE HIC L E F AS CIA
2 9/16
2 5/8

Other Curt Manufacturing Automobile Accessories manuals

Curt Manufacturing A25 User manual

Curt Manufacturing

Curt Manufacturing A25 User manual

Curt Manufacturing 55525 User manual

Curt Manufacturing

Curt Manufacturing 55525 User manual

Curt Manufacturing 70103 User manual

Curt Manufacturing

Curt Manufacturing 70103 User manual

Curt Manufacturing RockerBall 40047 User manual

Curt Manufacturing

Curt Manufacturing RockerBall 40047 User manual

Curt Manufacturing 4501 User manual

Curt Manufacturing

Curt Manufacturing 4501 User manual

Curt Manufacturing 18100 User manual

Curt Manufacturing

Curt Manufacturing 18100 User manual

Curt Manufacturing 111395 User manual

Curt Manufacturing

Curt Manufacturing 111395 User manual

Curt Manufacturing 3025104 User manual

Curt Manufacturing

Curt Manufacturing 3025104 User manual

Curt Manufacturing 13277 User manual

Curt Manufacturing

Curt Manufacturing 13277 User manual

Curt Manufacturing 16320 User manual

Curt Manufacturing

Curt Manufacturing 16320 User manual

Curt Manufacturing 13287 User manual

Curt Manufacturing

Curt Manufacturing 13287 User manual

Curt Manufacturing 13203 User manual

Curt Manufacturing

Curt Manufacturing 13203 User manual

Curt Manufacturing CM18153 User manual

Curt Manufacturing

Curt Manufacturing CM18153 User manual

Curt Manufacturing 13333 User manual

Curt Manufacturing

Curt Manufacturing 13333 User manual

Curt Manufacturing 15809 User manual

Curt Manufacturing

Curt Manufacturing 15809 User manual

Curt Manufacturing 13118 User manual

Curt Manufacturing

Curt Manufacturing 13118 User manual

Curt Manufacturing 45950 User manual

Curt Manufacturing

Curt Manufacturing 45950 User manual

Curt Manufacturing 12070 User manual

Curt Manufacturing

Curt Manufacturing 12070 User manual

Curt Manufacturing 31048 User manual

Curt Manufacturing

Curt Manufacturing 31048 User manual

Curt Manufacturing 18100 Operator's manual

Curt Manufacturing

Curt Manufacturing 18100 Operator's manual

Curt Manufacturing 16600 User manual

Curt Manufacturing

Curt Manufacturing 16600 User manual

Curt Manufacturing 70001 User manual

Curt Manufacturing

Curt Manufacturing 70001 User manual

Curt Manufacturing 12113 User manual

Curt Manufacturing

Curt Manufacturing 12113 User manual

Curt Manufacturing DISCOVERY User manual
Curt Manufacturing

Curt Manufacturing DISCOVERY User manual

Popular Automobile Accessories manuals by other brands

iSimple iSimple ConnectGM owner's manual

iSimple

iSimple iSimple ConnectGM owner's manual

Menabo SHERMAN Fitting instructions

Menabo

Menabo SHERMAN Fitting instructions

Whispbar K896W Fitting instructions

Whispbar

Whispbar K896W Fitting instructions

Thule 2138 Fitting instructions

Thule

Thule 2138 Fitting instructions

Dynojet Power commander V installation instructions

Dynojet

Dynojet Power commander V installation instructions

aldes C.AXPIR Installation and maintenance instructions

aldes

aldes C.AXPIR Installation and maintenance instructions

Hirschmann CGW 70 26 59 SF Series installation instructions

Hirschmann

Hirschmann CGW 70 26 59 SF Series installation instructions

Extang CLASSIC PLATINUM & BLACKMAX 7920 Installation sheet

Extang

Extang CLASSIC PLATINUM & BLACKMAX 7920 Installation sheet

Mobileye AWS-4000 Technical installation guide

Mobileye

Mobileye AWS-4000 Technical installation guide

Webasto Frigo Top 10 I-ES operating instructions

Webasto

Webasto Frigo Top 10 I-ES operating instructions

rough country 921510090 manual

rough country

rough country 921510090 manual

Thule Set-to-Go Saddle 878xt installation instructions

Thule

Thule Set-to-Go Saddle 878xt installation instructions

Audiovox DUO Installation guide & user manual

Audiovox

Audiovox DUO Installation guide & user manual

Quadratec 12057.0261 installation manual

Quadratec

Quadratec 12057.0261 installation manual

Cramaro FARP WORKS CRUSHED CAR manual

Cramaro

Cramaro FARP WORKS CRUSHED CAR manual

SpeedTech Lights K-FORCE 71 instruction manual

SpeedTech Lights

SpeedTech Lights K-FORCE 71 instruction manual

Philips EcoVision 12342ECO Specifications

Philips

Philips EcoVision 12342ECO Specifications

Motoalliance DENALI MA11759 manual

Motoalliance

Motoalliance DENALI MA11759 manual

manuals.online logo
manuals.online logoBrands
  • About & Mission
  • Contact us
  • Privacy Policy
  • Terms and Conditions

Copyright 2025 Manuals.Online. All Rights Reserved.