Need
assist
ance?
C
all
1300 301 368 or email info@curtainandblindco.com.au Need assistance? Call 1300 301 368 or email [email protected]om.auEco PVC Shutter Installation (Recess Fit)
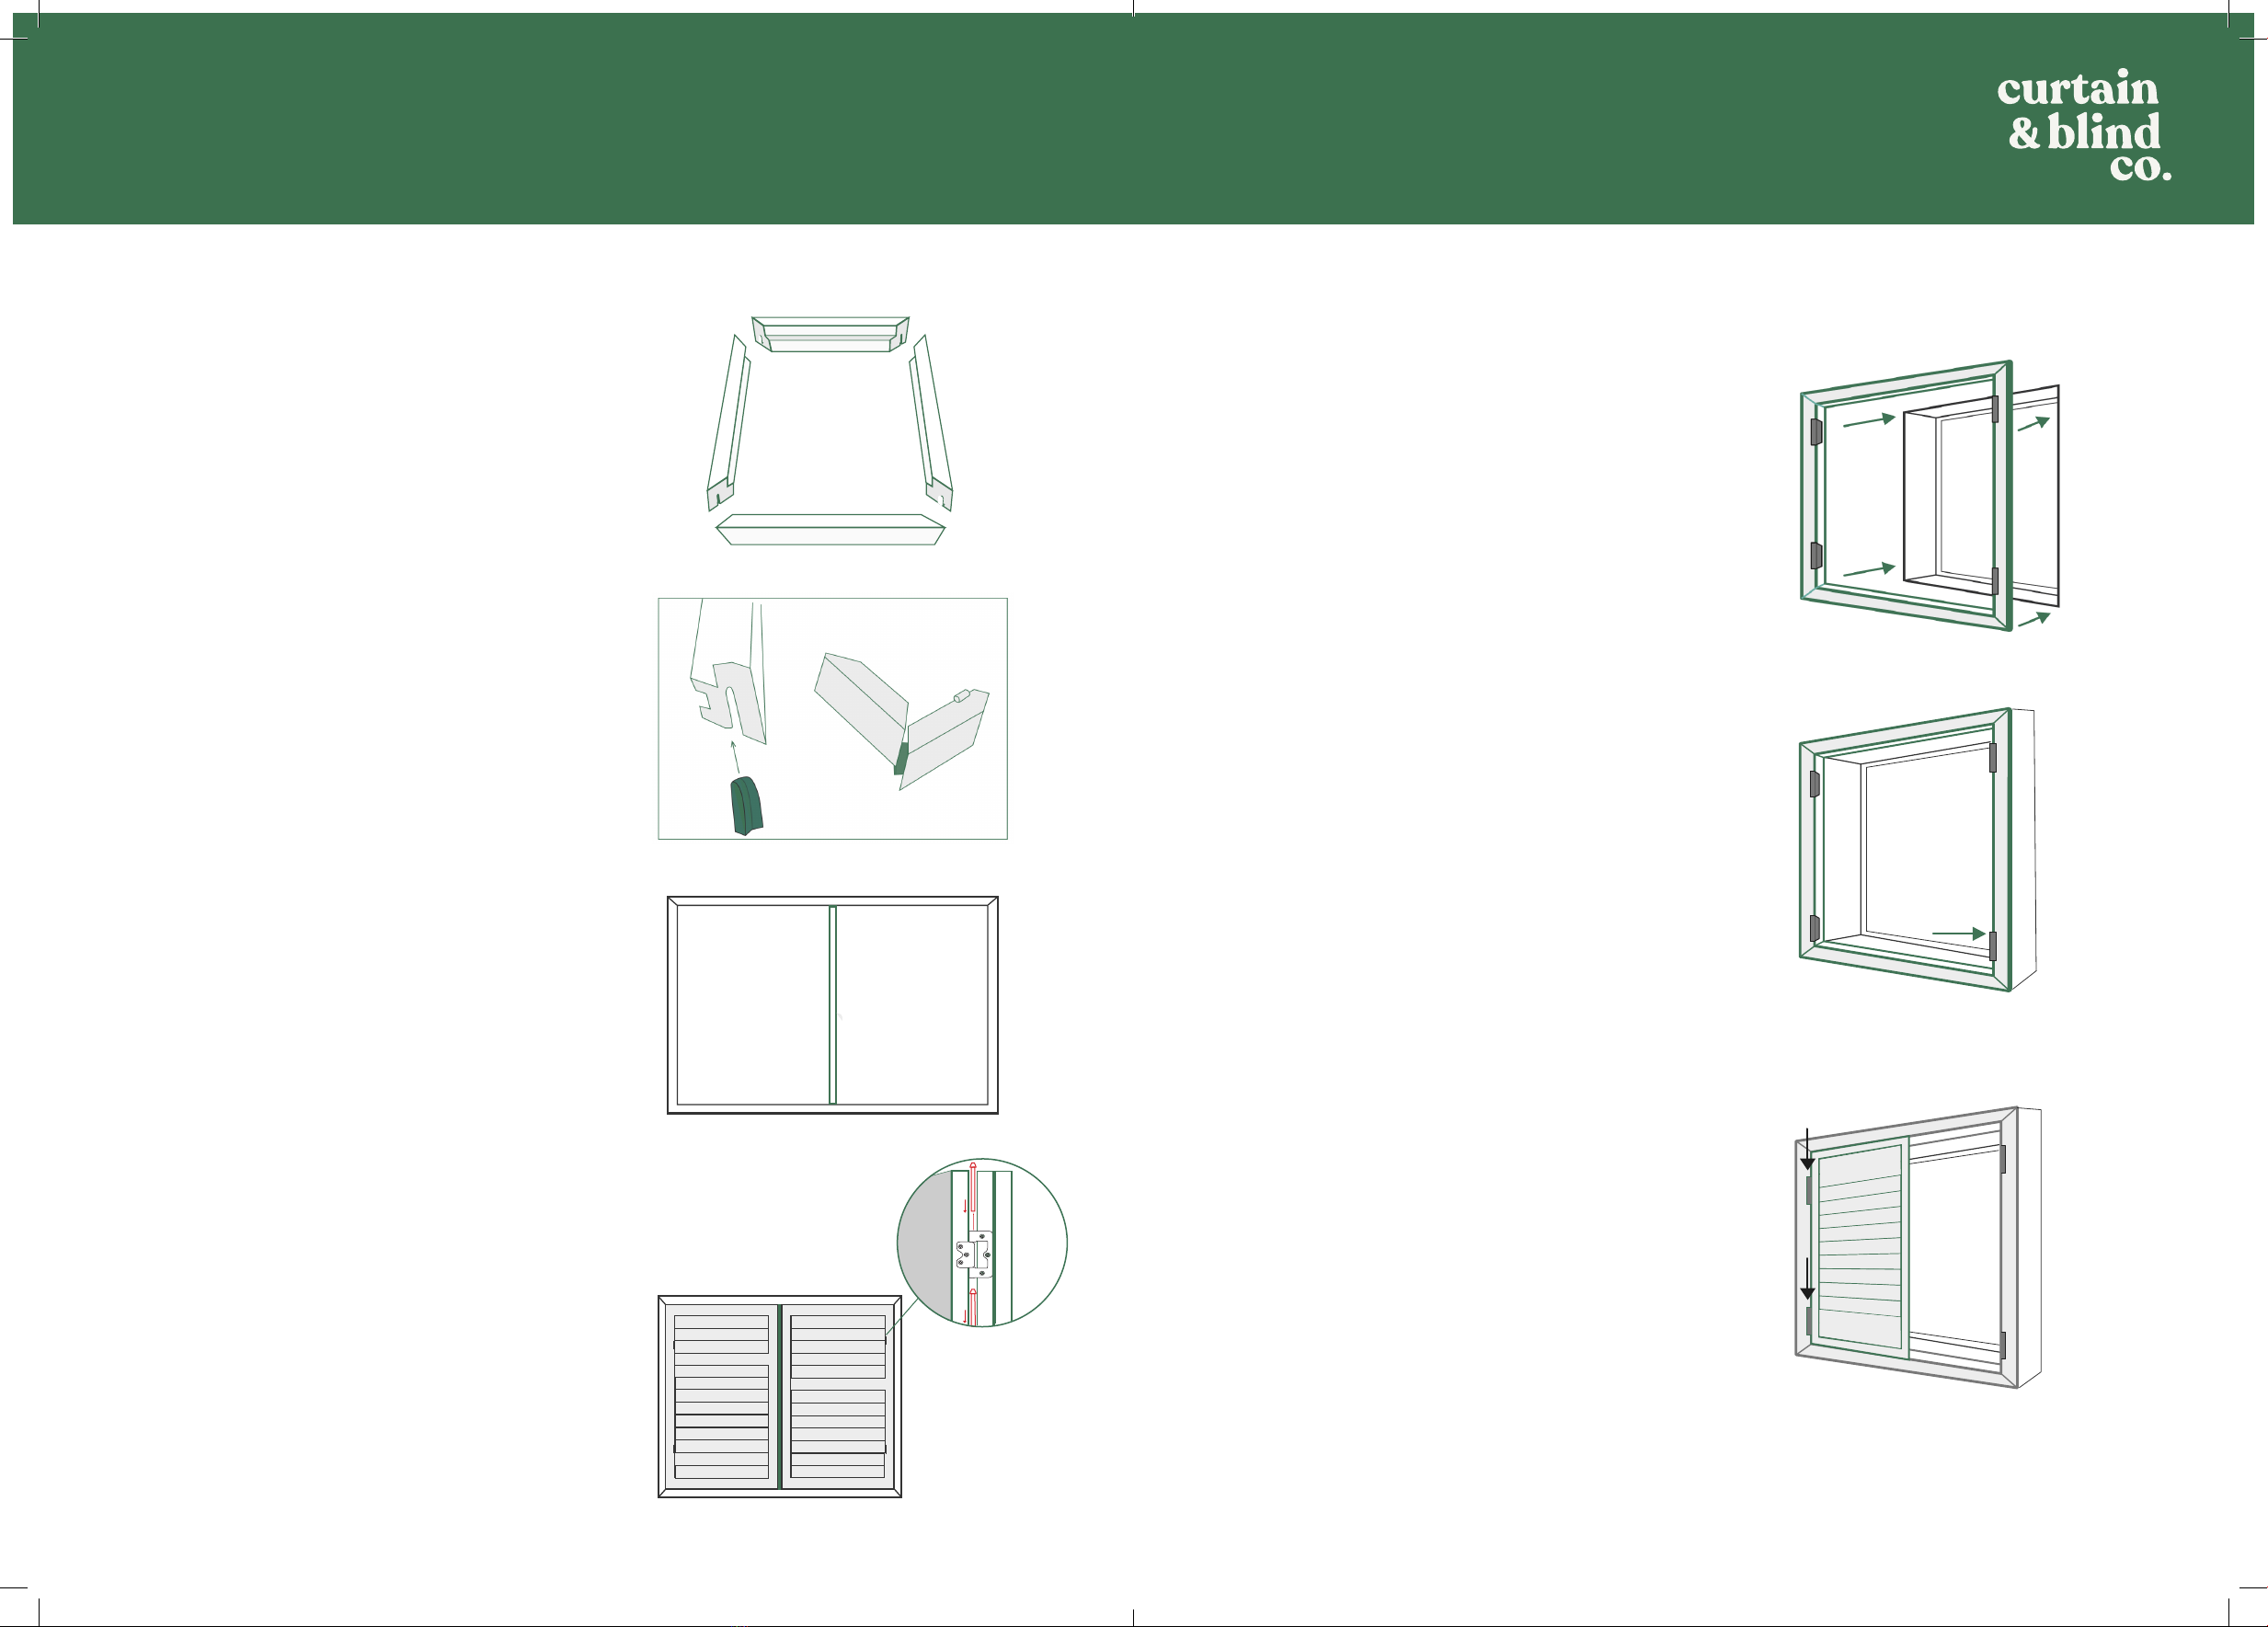
Step 2 - Fitting your shutters
2.1
Place the frame into the window recess. For timber
window frames, pre-drill a hole in the frame rebate behind
the top le hinge and the bottom right hinge. Lightly drive
screws into the holes, but leave the screw heads out at this
stage. This will temporarily hold your frame in the correct
position in the window (see Figs. 4 - 4.1).
If tting into masonry, drill through the frame, marking
the wall inside the recess. Remove the frame and insert
wall plugs where marked. Replace the frame and drive in
the screws, leaving the heads out at this stage. This will
temporarily hold your frame in the correct position in
the window.
2.2
Place the le-hand panel into the opening, lining up the
hinge sections in the le L-frame, and then insert the
hinge pins. Repeat for all other panels, working from le
to right across the opening (see Fig. 5).
Depending on the frame you ordered (Z or L) the process
for tting your shutter into athe recess will be slightly
dierent:
Z-frames are mounted to the inside of the window frame.
The frame wraps around the architrave or plaster.
L-frames are mounted to the inside of the window frame.
They should leave the architrave or plaster visible.
These instructions are relevant to Z and L-frame shutters.
Fig. 4
2.3
Assess the panels for squareness to the frame and to
each other. If gaps are not even or the panels do not line
up to each other at the top and bottom, some further
adjustments will need to be made.
2.4
The frame can be adjusted in four directions to square
the panels to each other and to the frame. Adjust the
four screws as required to make up - down and le - right
adjustments.
2.5
Further minor adjustments may need to be made to
ensure squareness of panels to the frame. Use methods in
steps 2.7 - 2.8 until the panels are square to the frame, and
the tops and bottoms of the adjacent panels line up. The
hinge spacers provided can also be used to adjust gaps
where necessary.
T
Fig. 5
Step 1 - Assembling your shutters
1.1
Use a sharp blade to carefully open the delivery boxes
and remove all contents. Then, place the panels in the
correct order on the oor, making sure they are the right
way up, and any rebates match up.
1.2
The framing pieces must be assembled rst; they will be
labelled Top, Bottom, Le and Right (see Fig. 1). Position all
the frames face up on the oor.
Fig. 1
R
L
B
T
1.3
The mitres are joined using Homan keys. Place the
Homan key on a hard surface (a piece of ply or timber
is recommended to prevent damage to the oor and to
make sure the key nishes ush with the back of the frame)
with the rounded end of the key facing up. Push each half
of the mitre onto the key, until the mitre joins neatly and
ush. Repeat for each corner (see Fig. 2).
Fig. 2
1.4
(i) If the opening requires a T-post, identify the top of
the post and position loosely within the frame (see Fig. 3).
(ii) Place all panels within the frame in their correct order
and insert the hinge pins (see Fig. 3.1).
1.5
Square up the frame so that all hinge and clearance gaps
are even and adjust the position of the T-post so that the
panel gaps are even. Attach the top and bottom frame to
the T-post using the long screws provided.
Pre-drill a pilot hole from the back of the frame to ensure
that when you insert the screw to secure the T-post, the
screw does not punch a hole through the front surface.
1.6
Remove the hinge pins and panels from the frame before
tting the shutter to the window frame. Then reassemble
as before.
Please note, these assembly instructions apply to shutters that have
been ordered with more than one panel. If a single panel shutter has
been ordered, it will be supplied pre-assembled.
Fig. 3
Fig. 3.1
Fig. 4.1
32


