D-Link DIR-455 User manual


iD-Link DIR-455 User Manual
D-Link reserves the right to revise this publication and to make changes in the content hereof without obligation to
notify any person or organization of such revisions or changes.
Trademarks
D-Link and the D-Link logo are trademarks or registered trademarks of D-Link Corporation or its subsidiaries in
the United States or other countries. All other company or product names mentioned herein are trademarks or
registered trademarks of their respective companies.
Copyright © 2009 by D-Link Systems, Inc.
All rights reserved. This publication may not be reproduced, in whole or in part, without prior expressed written
permission from D-Link Systems, Inc.
Preface

iiD-Link DIR-455 User Manual
Table of Contents
Preface...........................................................................i
Trademarks .............................................................. i
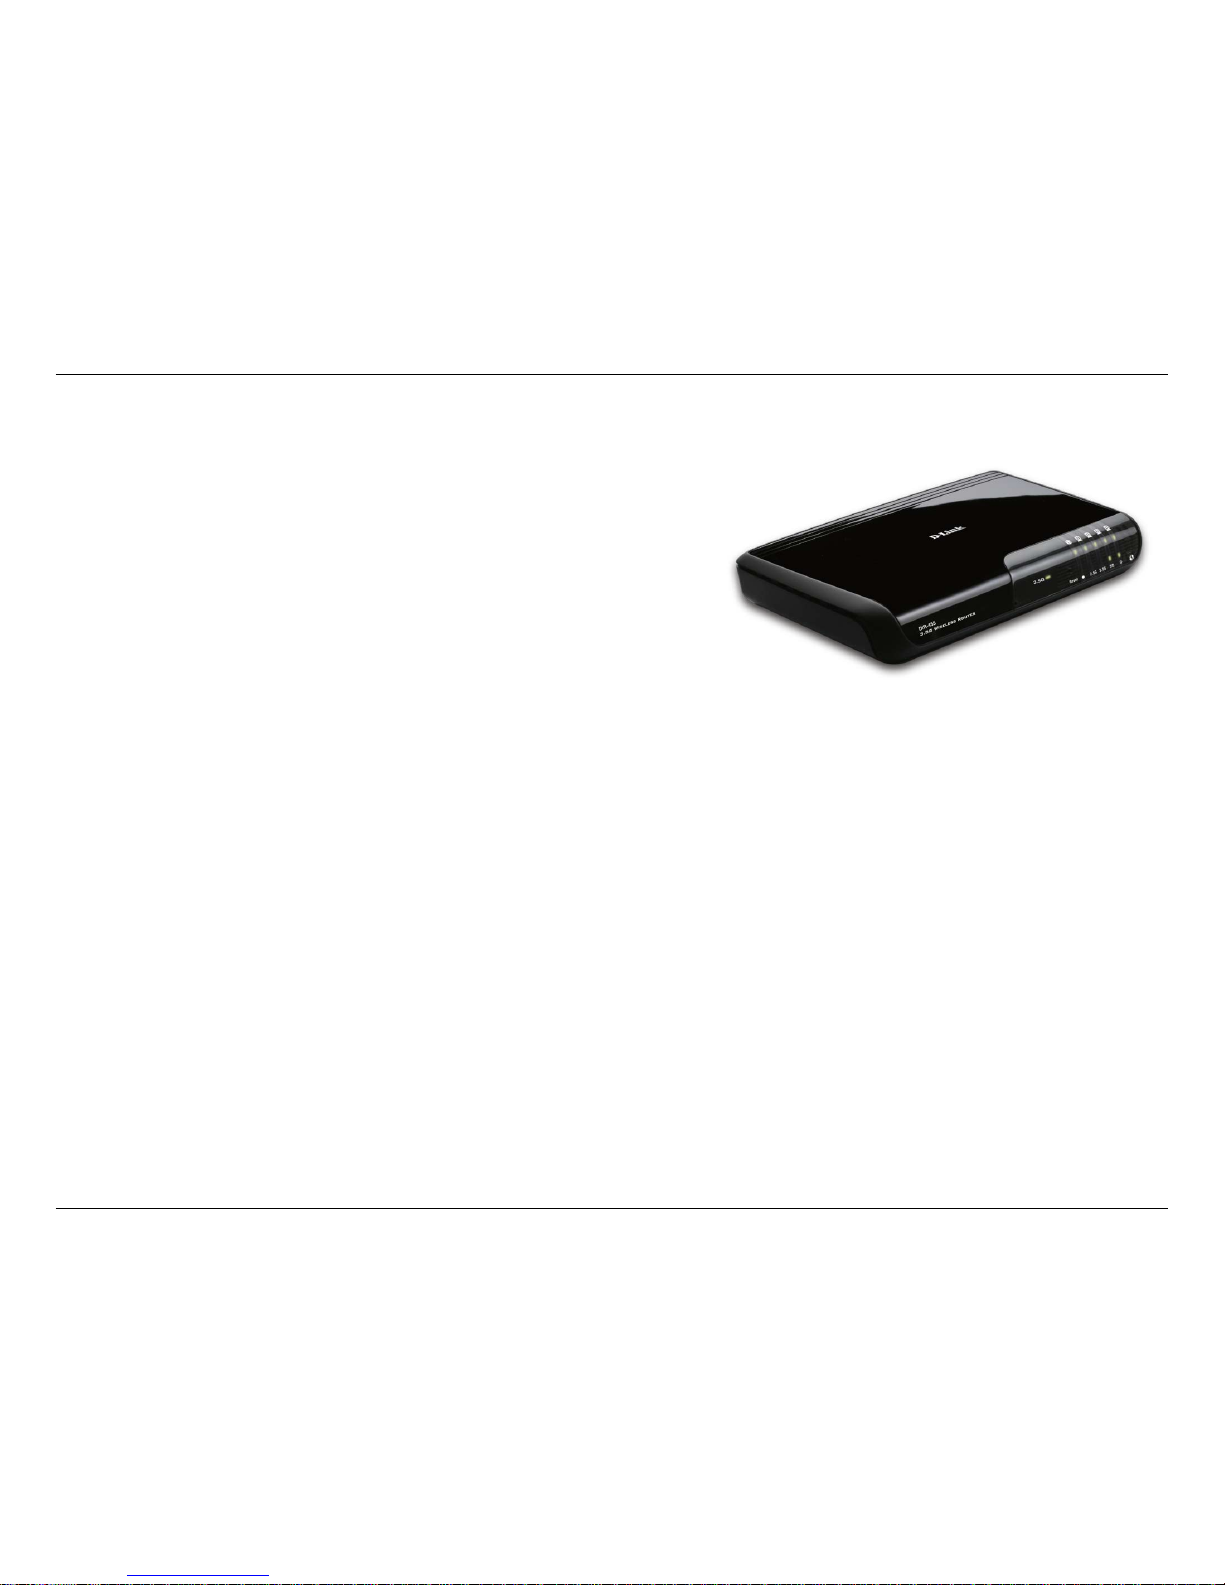
Product Overview ........................................................ 1
Package Contents ................................................... 1
System Requirements ............................................. 1
Introduction .............................................................. 2
Hardware Overview ................................................. 3
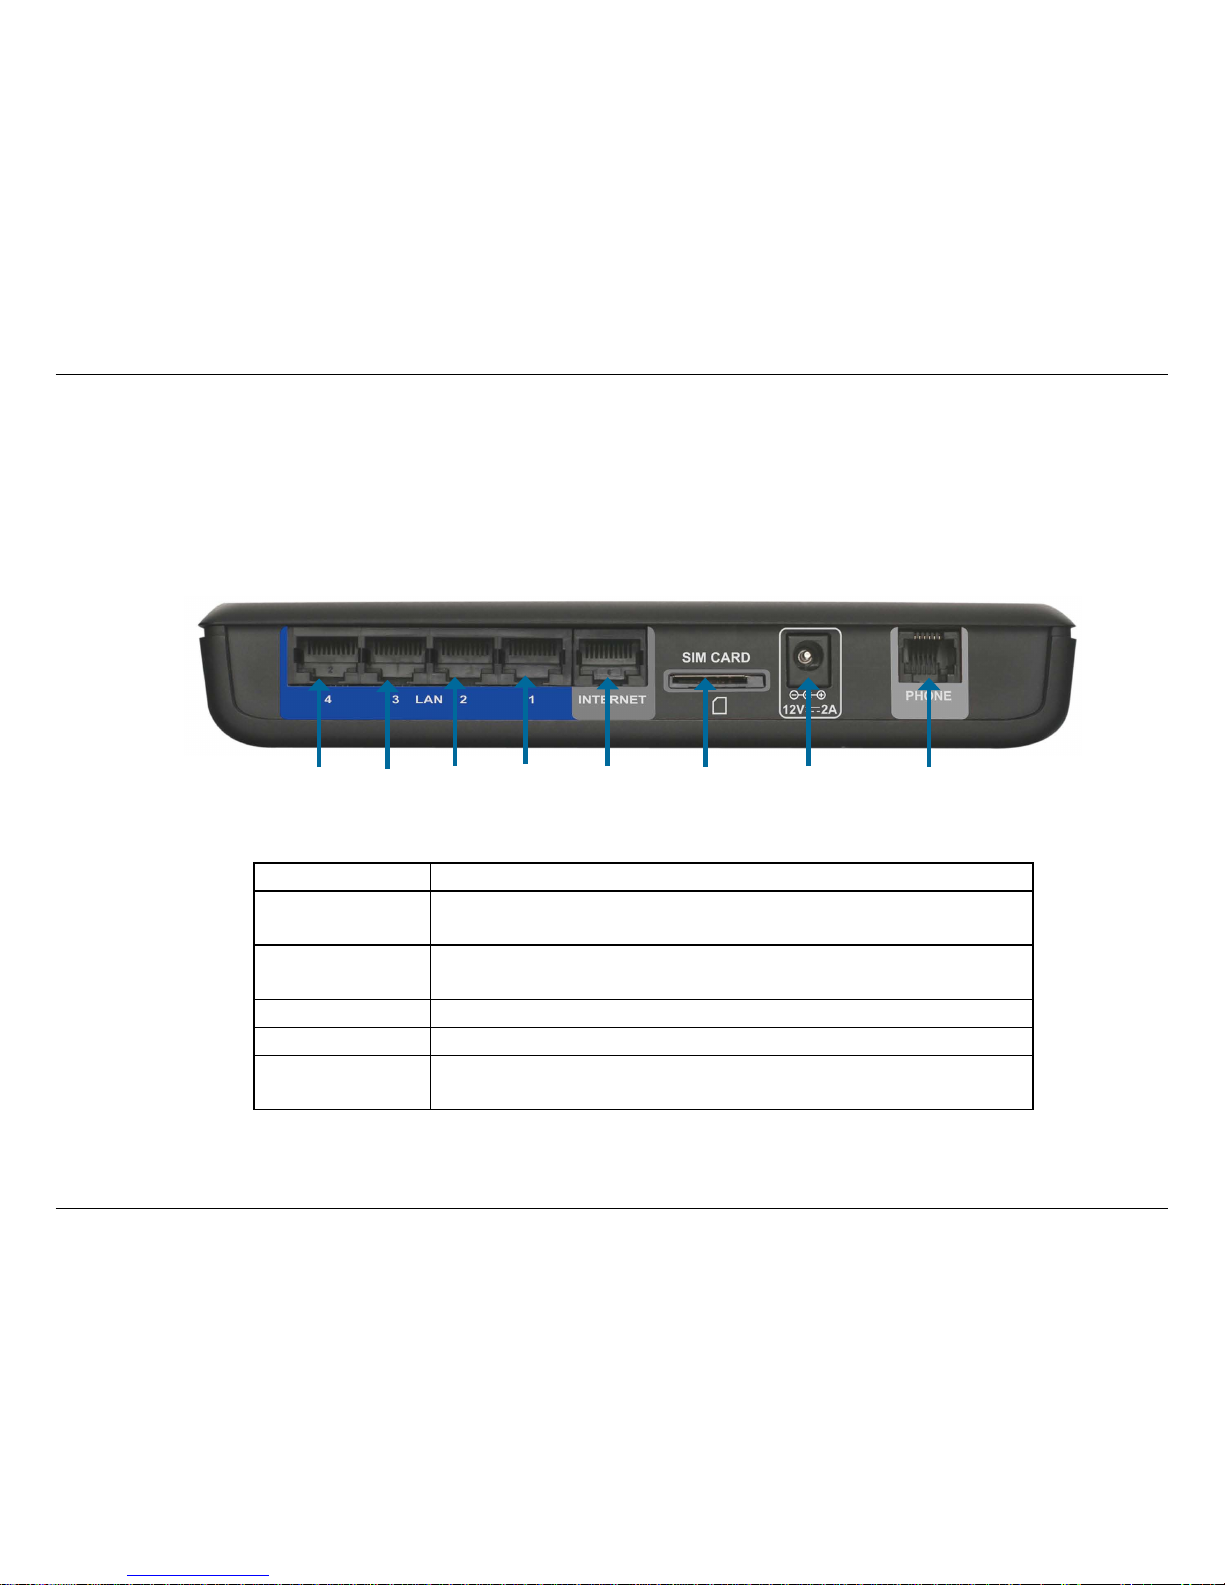
Rear Panel......................................................... 3
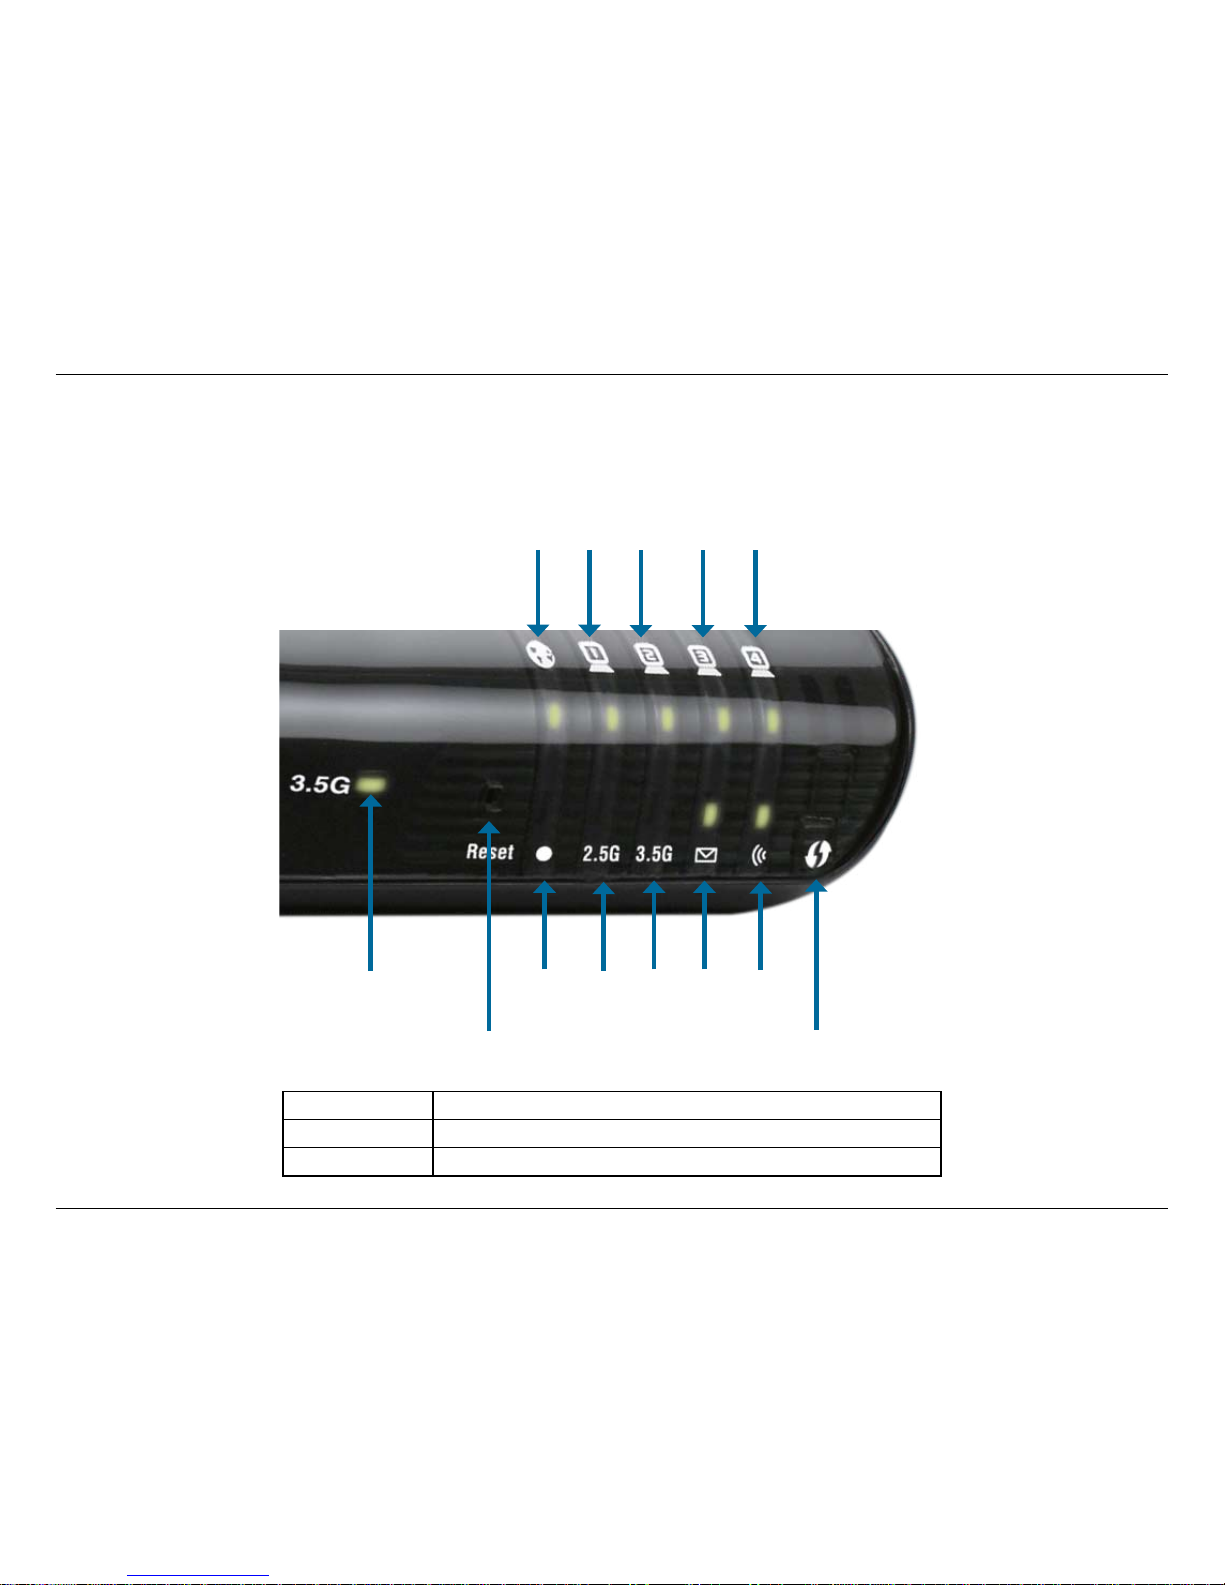
Front Panel ........................................................ 4
LEDs .................................................................. 5
Installation....................................................................6
Connect to Your Network ........................................6
Connect a Telephone ..............................................7
Wireless Installation Considerations........................ 8
Conguration............................................................... 9
Web-based Conguration Utility .............................. 9
Setup Wizard ......................................................... 10
Internet Connection Setup Wizard................... 10
Manual Internet Connection Setup ..................14
Internet Connection ......................................... 15
Internet Connection Type ................................15
Dynamic IP (DHCP)......................................... 16
PPPoE ............................................................. 17
PPTP ............................................................... 18
L2TP ................................................................ 19
3G .................................................................... 20
Static IP ........................................................... 21
GRE Settings ................................................... 22
Wireless Settings ............................................. 24
Network Settings.............................................. 26
Router Settings ............................................ 26
DHCP Server Settings .................................27
VPN Settings ................................................... 28
Tunnel 1 - IKE .............................................. 30
Tunnel 1 - Manual Key ................................. 34
Tunnel 1 - Manual Key ................................. 36
Message Service ............................................. 39
Virtual Server ................................................... 41
Application Rules ............................................. 42
QoS Engine ..................................................... 43
MAC Address Filter..........................................44
URL Filter......................................................... 45
Outbound Filter ................................................ 46
Inbound Filter................................................... 47
SNMP .............................................................. 48
Routing ............................................................ 49
Advanced Wireless .......................................... 50
Advanced Network........................................... 51
Admin............................................................... 52
Time................................................................. 53
Table of Contents

iiiD-Link DIR-455 User Manual
Table of Contents
Syslog .............................................................. 54
E-mail Settings................................................. 55
System............................................................. 56
Firmware.......................................................... 57
Dynamic DNS .................................................. 58
System Check.................................................. 59
Schedules ........................................................ 60
Device Information........................................... 61
Logs ................................................................. 62
Statistics .......................................................... 63
Wireless ........................................................... 64
Support ............................................................ 65
Wireless Security....................................................... 66
What is WEP? .......................................................66
Congure WEP...................................................... 67
What is WPA? .......................................................68
Congure WPA-PSK ............................................. 69
Congure WPA (RADIUS)..................................... 70
Connect to a Wireless Network................................ 71
Using Windows Vista™............................................................................. 71
Congure Wireless Security ............................ 72
Using Windows®XP............................................... 74
Congure WEP ................................................ 75
Congure WPA-PSK........................................ 77
Troubleshooting ........................................................ 79
Wireless Basics ......................................................... 81
What is Wireless?.................................................. 82
Tips........................................................................ 84
Wireless Modes ..................................................... 85
Networking Basics .................................................... 86
Check your IP address .......................................... 86
Statically Assign an IP address ............................. 87
Technical Specications........................................... 88

1D-Link DIR-455 User Manual
Section 1 - Product Overview
• D-Link DIR-455 Mobile Router
• Power Adapter
• Ethernet Cable
• RJ-11 Telephone Cable
• Manual and Warranty on CD
System Requirements
• A compatible (U)SIM card with service.*
• Computers with Windows®, Macintosh®, or Linux-based operating systems with an installed Ethernet
adapter
• Internet Explorer Version 6.0 or Netscape Navigator™ Version 6.0 and above (for conguration)
*Subject to services and service terms available from your carrier.
Product Overview
Package Contents
Note: Using a power supply with a different voltage rating than the one included with the DIR-455 will cause damage and void
the warranty for this product.

2D-Link DIR-455 User Manual
Section 1 - Product Overview
Introduction
The D-Link HSDPA 3.5G Mobile Communication Router allows users to access worldwide mobile broadband
networks. Once connected, users can transfer data, stream media, send SMS messages, and make mobile phone
calls. Simply insert your UMTS/HSDPA SIM card, and share your 3.5G Internet connection through a secure
802.11g wireless network or using any of the four 10/100 Ethernet ports.
While accessing your 3.5G Internet connection, you will still have the ability to answer incoming mobile calls and
respond to SMS messages. An RJ-11 jack allows you to attach a standard analog phone for high-quality mobile
calls over a GSM network. Enjoy the comfort and convenience of your favorite ofce phone anywhere you go.
Keep your wireless network safe with WPA/WPA2 wireless encryption. The DIR-455 utilizes dual-active rewalls
(SPI and NAT) to prevent potential attacks across the Internet, and supports up to ve concurrent IPSec VPN
tunnels.
The 3.5G Mobile Communication Router can be installed quickly and easily almost anywhere. This router is great
for situations where an impromptu wireless network must be set up, or wherever conventional network access is
unavailable. The DIR-455 can even be installed in buses, trains, or boats, allowing passengers to check e-mail or
chat online while commuting.

3D-Link DIR-455 User Manual
Section 1 - Product Overview
Hardware Overview
Rear Panel
LAN4 LAN3 LAN2 LAN1 WAN SIM Power Phone
Port Function
LAN 1-4 (RJ-45) Insert an Ethernet cable connected to a network device such
as a desktop or notebook computer.
WAN (RJ-45) Insert a standard CAT5 Ethernet cable connected to a DSL/
Cable modem or router.
SIM Insert a standard (U)SIM card into this slot.
Power Insert the provided DC power adapter into this socket.
Phone (RJ-11) Insert an RJ-11 telephone cable connected to a standard
landline telephone.

4D-Link DIR-455 User Manual
Section 1 - Product Overview
Hardware Overview
Front Panel
WPS 2.5G 3.5G SMS WLAN
WAN LAN1 LAN2 LAN3 LAN4
Signal
Strength
Reset WPS
Button Name Function
Reset Hold this button down to reset the device.
WPS Press this button to initiate a new WPS connection.

5D-Link DIR-455 User Manual
Section 1 - Product Overview
LED Name Function
WAN Solid Green: Ethernet connection has been established
Blinking Green: Data is being transferred
LAN 1-4 Solid Green: Ethernet connection has been established
Blinking Green: Data is being transferred
Signal
Strength
Blinking Red: No SIM card / signal or unveried PIN code
Solid Red: Signal strength is at level one (weak)
Solid Amber: Signal strength is at level two or three (medium)
Solid Green: Signal strength is at level four or ve (strong)
WPS Slow Blinking Green: WPS is functioning normally
Fast Blinking Green: WPS is functioning in PBC mode
2.5G Solid Green: EDGE or GPRS connection has been established
Blinking Green: Data is being transferred via 2G/2.5G
3.5G Solid Green: UMTS/HSDPA/HSUPA connection is established
Blinking: Data is being transferred via 3G
SMS Solid Green: Lights up when an SMS has been received
WLAN Solid Green: WLAN is active and available
Blinking Green: Data is being transferred via WLAN
Hardware Overview
LEDs

6D-Link DIR-455 User Manual
Section 2 - Installation
Connect to Your Network
Installation
This section will guide you through the installation process. Placement of the router is very important. Do not place the router in an enclosed
area such as a closet, cabinet, or in an attic or garage.
Note: Ensure that your DIR-455 Mobile Router is disconnected and powered off before performing the installation steps below.
1. Insert a standard U(SIM) card into the SIM card slot on the back of the router with the gold contacts facing downwards.
2. Insert your Internet/WAN network cable into the INTERNET port on the back of the router.
Note: The 3.5G connection can also be used as a backup WAN. Once a backup is congured, the router will automatically use 3.5G
for the Internet connection if the Ethernet WAN is not available.
3. Insert the Ethernet cable into the LAN Port 1 on the back panel of the DIR-455 Mobile Router, and an available Ethernet port on the
network adapter in the computer you will use to congure the unit.
Note: The DIR-455 Mobile Router LAN Ports are “Auto-MDI/MDIX.” Therefore, patch or crossover Ethernet cables can be used.
4. Connect the power adapter to the socket on the back panel of your DIR-455 Mobile Router. Plug the other end of the power adapter
into a wall outlet or power strip.
a. The Status LED will light up to indicate that power has been supplied to the router.
b. The LEDs on the front panel will ash on and off as the DIR-455 Mobile Router performs initialization and Internet connection
processes.
c. After a few moments, if a connection has been established, the following LEDs will turn solid green: Power, Status, WAN, WLAN,
and LAN Port 1 (or whichever port(s) your Ethernet cable has been connected to).
Caution! Always unplug/power down the router before installing or removing the SIM card. Never insert or remove the SIM card while
the router is in use.

7D-Link DIR-455 User Manual
Section 2 - Installation
Connect a Telephone
A standard RJ-11 jack on the back of the router allows you to connect a standard analog
telephone for voice calls.
Simply plug the phone cable into the jack labeled PHONE.
You can then use your handset to dial out as you typically would with a standard landline.
Your attached phone will also ring for any incoming voice calls.

8D-Link DIR-455 User Manual
Section 2 - Installation
Wireless Installation Considerations
The DIR-455 can be accessed using a wireless connection from virtually anywhere within the operating range of your wireless network.
Keep in mind, however, that the quantity, thickness and location of walls, ceilings, or other objects that the wireless signals must pass
through, may limit the range. Ranges vary depending on the types of materials and background RF (radio frequency) noise in your home
or ofce. The key to maximizing the wireless range is to follow these basic guidelines:
1. Minimize the number of walls and ceilings between the D-Link router and other network devices. Each wall or ceiling can
reduce your adapter’s range from 3 to 90 feet (1 to 30 meters).
2. Be aware of the direct line between network devices. A wall that is 1.5 feet thick (0.5 meters), at a 45-degree angle
appears to be almost 3 feet (1 meter) thick. At a 2-degree angle it looks over 42 feet (14 meters) thick. Position devices
so that the signal will travel straight through a wall or ceiling (instead of at an angle) for better reception.
3. Try to position access points, wireless routers, and computers so that the signal passes through open doorways and
drywall. Materials such as glass, metal, brick, insulation, concrete and water can affect wireless performance. Large
objects such as sh tanks, mirrors, le cabinets, metal doors and aluminum studs may also have a negative effect on
range.
4. If you are using 2.4GHz cordless phones, make sure that the 2.4GHz phone base is as far away from your wireless device
as possible. The base transmits a signal even if the phone in not in use. In some cases, cordless phones, X-10 wireless
devices, and electronic equipment such as ceiling fans, uorescent lights, and home security systems may dramatically
degrade wireless connectivity.

9D-Link DIR-455 User Manual
Section 3 - Configuration
Configuration
This section will show you how to congure your new D-Link mobile router using the web-based conguration utility.
Web-based Configuration Utility
To access the conguration utility, open a web-browser such
as Internet Explorer and enter the IP address of the router
(192.168.0.1).
Type Admin and then enter the password. By default, the
password is blank.
If you get a Page Cannot be Displayed error, please refer to
the Troubleshooting section for assistance.

10D-Link DIR-455 User Manual
Section 3 - Configuration
Setup Wizard
The setup wizard guides you through the initial setup of your router.
There are two ways to setup your Internet connection. You can use the
Web-based Internet Connection Setup Wizard or you can manually
congure using the Manual Internet Connection Setup wizard.
Click Internet Connection Setup Wizard to begin.
If you want to enter your settings without running the wizard, click
Manual Internet Connection Setup and skip to page 13.
This wizard will guide you through a step-by-step process to congure
your D-Link router to connect to the Internet.
Click Next to continue.
Internet Connection Setup Wizard

11D-Link DIR-455 User Manual
Section 3 - Configuration
Create a new password and then click Next to continue.
Click Prev to go back to the previous page or click Cancel to close the wizard.
Select your time zone from the drop-down box and then click Next to continue.
Click Prev to go back to the previous page or click Cancel to close the wizard.
Select the Internet connection type. The connection types are explained on the
following page. If you are unsure of the correct connection type, you may have to
contact your Internet Service Provider (ISP).
Click Prev to go back to the previous page or click Cancel to close the wizard.
Note: The DIR-455 supports several kinds of WAN interfaces, allowing you to assign
either a WAN or a WWAN(3.5G) connection as the Backup WAN. If the Primary
WAN is down or unavailable, congure the Backup WAN to Enable, and all the
trafc will be routed through Backup WAN. This feature is called WAN Failover.
You can use WAN Failover if you need redundancy to your Internet connection or
any other network.

12D-Link DIR-455 User Manual
Section 3 - Configuration
Choose this if your Internet connection automatically provides you with an IP Address. Most cable modems
use this type of connection. See page 16 for information about how to congure this type of connection.
Choose this option if your Internet connection requires a username and password to connect. Most DSL modems
use this style of connection. See page 17 for information about how to congure this type of connection.
Choose this option if your Internet connection requires Point-to-Point Tunneling Protocol (PPTP). See page
18 for information about how to congure this type of connection.
Choose this option if your Internet connection requires Layer 2 Tunneling Protocol (L2TP). See page 19 for
information about how to congure this type of connection.
Choose this connection if you have installed a SIM card into the DIR-455. See page 20 for information about
how to congure this type of connection.
Choose this option if your Internet Setup Provider provided you with IP Address information that has to be
manually congured. See page 21 for information about how to congure this type of connection.
DHCP Connection
(Dynamic IP Address):
Username / Password
Connection (PPPoE):
Username / Password
Connection (PPTP):
Username / Password
Connection (L2TP):
3G Connection:
Static IP Address
Connection:
The subsequent conguration pages will differ depending on the selection you make on this page.

13D-Link DIR-455 User Manual
Section 3 - Configuration
You have completed the Setup Wizard.
Click Connect to save your settings.
A popup will appear, to conrm your settings.
Click OK to save your settings.

14D-Link DIR-455 User Manual
Section 3 - Configuration
Manual Internet Connection Setup
Click Manual Internet Connection Setup to begin.
If you want to congure your router to connect to the Internet using the
wizard, click Internet Connection Setup Wizard and refer to page 9.

15D-Link DIR-455 User Manual
Section 3 - Configuration
Several different Internet Connection types can be selected depending upon the specications of your Internet Service Provider (ISP).
Select the Internet Connection type
specied by your Internet Service
Provider (ISP). The corresponding
settings will be displayed below.
Please see the following pages for
details on how to congure these
different connection types.
When this box is checked, the
selected connection will act as a
backup for the 3.5G connection.
Enter the IP address of the Internet
host to be used as the backup
connection.
Internet Connection
Internet Connection Type
My Internet Connection is:
Auto-Backup:
Internet Host:

16D-Link DIR-455 User Manual
Section 3 - Configuration
Dynamic IP (DHCP)
(Optional) Required by some ISPs.
(Optional) Fill in with IP address of primary DNS
server.
(Optional) Fill in with IP address of secondary DNS
server.
You may need to change the Maximum Transmission
Unit (MTU) for optimal performance. The default
value is 1500.
The default MAC Address is set to the Internet port’s physical interface MAC address on the Broadband Router.
It is not recommended that you change the default MAC address unless required by your ISP. You can use
the Clone Your PC’s MAC Address button to replace the Internet port’s MAC address with the MAC address
of your PC.
This feature enables this product to renew WAN IP address automatically when the lease time is expiring.
Click Save Settings to save your changes, or click Don’t Save Settings to discard your changes.
This section will help you to obtain IP Address information automatically from your ISP. Use this option if your ISP didn’t provide you with
IP Address information and/or a username and password.
Host Name:
Primary DNS Server:
Secondary DNS Server:
MTU (Maximum
Transmission Unit):
MAC Address:
Auto-reconnect:
Table of contents
Other D-Link Network Router manuals

D-Link
D-Link DIR-506L User manual

D-Link
D-Link DSL-2740B User manual

D-Link
D-Link DI-704GU User manual

D-Link
D-Link DVG-7022S User manual

D-Link
D-Link DES-6000 Series User manual

D-Link
D-Link DIR-868L User manual

D-Link
D-Link DSL-2500U User manual

D-Link
D-Link DSL-2740U User manual

D-Link
D-Link COVR- C1203 User manual

D-Link
D-Link DIR-815 User manual

D-Link
D-Link DIR-813 User manual

D-Link
D-Link GLB-802C User manual

D-Link
D-Link DSL-502T User manual

D-Link
D-Link EBR-2310 - EN Broadband Router User manual

D-Link
D-Link DSL-2750E Manual

D-Link
D-Link DSL-2751 User manual

D-Link
D-Link DSL-2878 User manual

D-Link
D-Link DSS-24+ User manual

D-Link
D-Link DIR-615/X User manual

D-Link
D-Link DWR-932 User manual