manuals.online logo
Brands
  1. Home
  2. •
  3. Brands
  4. •
  5. D-Link
  6. •
  7. Storage
  8. •
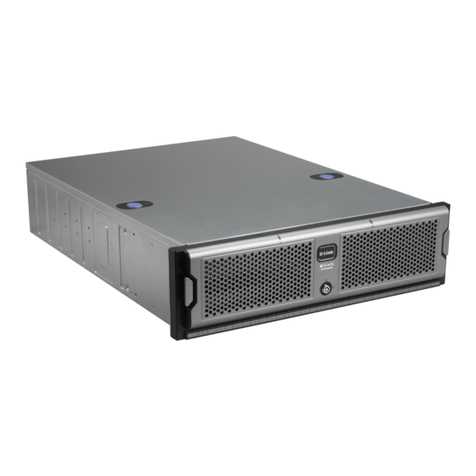
  9. D-Link DSN-3200 - xStack Storage Area Network Array Hard... User manual

D-Link DSN-3200 - xStack Storage Area Network Array Hard... User manual

Other manuals for DSN-3200 - xStack Storage Area Network Array Hard...

2

This manual suits for next models

2

Other D-Link Storage manuals

D-Link MediaLounge DSM-622H User manual

D-Link

D-Link MediaLounge DSM-622H User manual

D-Link ShareCenter DNS-320L User manual

D-Link

D-Link ShareCenter DNS-320L User manual

D-Link DSN-1100 User manual

D-Link

D-Link DSN-1100 User manual

D-Link DNS-323 - Network Storage Enclosure NAS... User manual

D-Link

D-Link DNS-323 - Network Storage Enclosure NAS... User manual

D-Link Storage User manual

D-Link

D-Link Storage User manual

D-Link DSN-3200 - xStack Storage Area Network Array Hard... How to use

D-Link

D-Link DSN-3200 - xStack Storage Area Network Array Hard... How to use

D-Link DSM-600 User manual

D-Link

D-Link DSM-600 User manual

D-Link ShareCenter 2Go - DNS-213 User manual

D-Link

D-Link ShareCenter 2Go - DNS-213 User manual

D-Link ShareCenter Quattro DNS-345 User manual

D-Link

D-Link ShareCenter Quattro DNS-345 User manual

D-Link DNS-321 - Network Storage Enclosure Hard Drive... User manual

D-Link

D-Link DNS-321 - Network Storage Enclosure Hard Drive... User manual

D-Link DNS-346 User manual

D-Link

D-Link DNS-346 User manual

D-Link DNS-313 User manual

D-Link

D-Link DNS-313 User manual

D-Link ShareCenter DNS-320L User manual

D-Link

D-Link ShareCenter DNS-320L User manual

D-Link DSN-2100 How to use

D-Link

D-Link DSN-2100 How to use

D-Link xStack Storage DSN-5210 Operating and maintenance manual

D-Link

D-Link xStack Storage DSN-5210 Operating and maintenance manual

D-Link ShareCenter DNS-320L User manual

D-Link

D-Link ShareCenter DNS-320L User manual

D-Link xStack Storage DSN-3000 Series User manual
D-Link

D-Link xStack Storage DSN-3000 Series User manual

D-Link DSN-6200 User manual

D-Link

D-Link DSN-6200 User manual

D-Link MediaLounge DSM-602H User manual

D-Link

D-Link MediaLounge DSM-602H User manual

D-Link DNS-300 User manual

D-Link

D-Link DNS-300 User manual
D-Link DNS-321 - Network Storage Enclosure Hard Drive... User manual

D-Link

D-Link DNS-321 - Network Storage Enclosure Hard Drive... User manual

D-Link DNS-313 User manual

D-Link

D-Link DNS-313 User manual
D-Link DNS-312H Mounting instructions

D-Link

D-Link DNS-312H Mounting instructions

D-Link ShareCenter Quattro DNS-345 User manual

D-Link

D-Link ShareCenter Quattro DNS-345 User manual

Popular Storage manuals by other brands

IBM 40/80 GB HH DLTVS user guide

IBM

IBM 40/80 GB HH DLTVS user guide

Synology DiskStation DS716+II Quick installation guide

Synology

Synology DiskStation DS716+II Quick installation guide

Vantec NexStar-HX4 user manual

Vantec

Vantec NexStar-HX4 user manual

LaCie Christofle Galet datasheet

LaCie

LaCie Christofle Galet datasheet

LaCie Rugged Thunderbolt user manual

LaCie

LaCie Rugged Thunderbolt user manual

OCZ IBIS datasheet

OCZ

OCZ IBIS datasheet

Transcend JetFlash 110 Brochure & specs

Transcend

Transcend JetFlash 110 Brochure & specs

QNAP TS 32PXU Series user guide

QNAP

QNAP TS 32PXU Series user guide

LaCie RUGGED RAID user manual

LaCie

LaCie RUGGED RAID user manual

Freecom CLS DOCK Quick install guide

Freecom

Freecom CLS DOCK Quick install guide

PNY Attache P-FD64MBATT3 install guide

PNY

PNY Attache P-FD64MBATT3 install guide

OWC Mercury Elite Pro Dual mini Assembly manual

OWC

OWC Mercury Elite Pro Dual mini Assembly manual

OLT 6x6 Maximizer Assembly manual

OLT

OLT 6x6 Maximizer Assembly manual

Transcend JetFlash 160 Specifications

Transcend

Transcend JetFlash 160 Specifications

Thunderbolt 600 user manual

Thunderbolt

Thunderbolt 600 user manual

Intel RAID High Availability user guide

Intel

Intel RAID High Availability user guide

LaCie 12big Thunderbolt 3 Quick install guide

LaCie

LaCie 12big Thunderbolt 3 Quick install guide

Spectra Logic T-Series Spectra T50e quick start guide

Spectra Logic

Spectra Logic T-Series Spectra T50e quick start guide

manuals.online logo
manuals.online logoBrands
  • About & Mission
  • Contact us
  • Privacy Policy
  • Terms and Conditions

Copyright 2025 Manuals.Online. All Rights Reserved.

D-Link Systems, Inc. Page
1
February 7, 2008
D-Link Systems, Inc.™
xStack Storage DSN-3200 & DSN-3400
ECN Drive Activity Light Fix
(rev. 1)
xStack Storage DS -3200 & DS -3400
EC – Drive Activity Light Fix
D-Link Systems, Inc. Page
2
February 7, 2007
© 2008 D-Link Systems, Inc. All Rights Reserved
D-Link Systems, Inc. makes no warranty of any kind with regard to this material, including,
but not limited to, the implied warranties of merchantability and fitness for a particular
purpose. D-Link Systems, Inc. shall not be liable for errors contained herein or for incidental
or consequential damages in connection with the furnishing, performance, or use of this
material.
This document contains proprietary information, which is protected by copyright. o part of
this document may be photocopied, reproduced, or translated into another language without
the prior written consent of D-Link Systems, Inc.
The information is provided “as is” without warranty of any kind and is subject to change
without notice. The only warranties for D-Link Systems products and services are set forth in
the express warranty statements accompanying such products and services. othing herein
should be construed as constituting an additional warranty. D-Link Systems shall not be liable
for technical or editorial errors or omissions contained herein.
Copyright © 2008 D-Link Systems, Inc.™
Trademarks
Adobe
®
and Acrobat
®
are trademarks of Adobe Systems, Incorporated.
Java™ is a U.S. trademark of Sun Microsystems, Incorporated.
Microsoft Windows is a U.S. registered trademarks of Microsoft Corporation.
Oracle
®
is a registered U.S. trademark of Oracle Corporation, Redwood City, California.
U IX
®
is a registered trademark of The Open Group.
All other brand or product names are or may be trademarks or service marks, and are used
to identify products or services, of their respective owners.
D-Link Systems, Inc.
17595 Mount Herrmann Street
Fountain Valley, CA 92708
www.D-Link.com
xStack Storage DS -3200 & DS -3400
EC – Drive Activity Light Fix
D-Link Systems, Inc. Page
3
February 7, 2007
1 Introduction
ote: For the remainder of this document, issues that pertain to both the DS -3200 and DS -3400 units
will be identified as DS -3200/3400.
D-Link Systems, Inc.™ has identified an issue wherein the drive activity light is constantly illuminated
when using a Seagate Barracuda ES.2 1TB SATA-II hard drive (Seagate part number ST31000340 S).
This issue affects DS -3200/3400 units shipped before January 2008. Please review section 1.3 of this
document for a detailed description of how to determine if your system is in need of this resistor pack
update. If you determine that your system is affected, then please proceed to the step-by-step update guide
in Section 2.
1.1 Purpose
The purpose of this document is to communicate the steps required to identify affected DS -3200/3400
units shipped before January 2008. This document will include how to identify affected systems and the
steps required to fix the issue.
1.2 Scope
This document is an EC (Engineering Change otice) concerning the identification of affected DS -
3200/3400 units shipped before January 2008 and the installation of four resistor packs to fix the issue.
This EC relates to any DS -3200/3400 units shipped from D-Link before
January 2008.
This issue does not affect the functionality of the DS -3200/3400 unit, nor
does it affect the data storage functionality of the Seagate ST31000340 S 1TB
hard drive. The drive activity light simply remains illuminated at all times.
1.3 Identification of Affected Systems
DS -3200/3400 units shipped after January 2008 will be modified at the factory to contain the four resistor
packs described in this document. However, any units shipped before this date will need to be examined.
Definitive identification of affected DS -3200/3400 units will require two steps. For this procedure it is
highly recommended that the system be shut down and power cords removed to minimize the electrical
shock risk.
Please follow these steps for inspection:
Step 1) Shut down the DS -3200/3400 through your management GUI. Please follow the instructions in
your xStack Storage User’s Guide.
Step 2) In order to minimize electrical shock risk, remove the three power cords from your DS -3200/3400
unit’s power supply.
xStack Storage DS -3200 & DS -3400
EC – Drive Activity Light Fix
D-Link Systems, Inc. Page
4
February 7, 2008
Step 3) Remove the two right-most drives from the enclosure as shown in figure 1.
Figure 1: Remove the two right-most drive trays
Step 4) Using a flashlight, examine the upper portion of the now visible chassis backplane PCB (Printed
Circuit Board) located at the rear of the space. You should see something similar to that found in figure 2.
Here you will see a revision number. If your backplane has revision 1.4 or later, then your system is up to
date and needs no changes. If your system has Revision 1.1, 1.2 or 1.3, then you will need to continue to
step 5. You may now reinsert the drive trays.
Figure 2: Identifying the backplane revision number
xStack Storage DS -3200 & DS -3400
EC – Drive Activity Light Fix
D-Link Systems, Inc. Page
5
February 7, 2008
Step 5) Remove the top cover from the DS -3200/3400. Located in the middle of the chassis is the chassis
backplane as shown in figure 3.
Figure 3: Identifying the chassis backplane
Step 6) Located on the backplane are four 10-position headers labeled A1315, A0912, A0508 and
A0104. The labels themselves are extremely small and difficult to read. Please see figure 4 to identify
these headers. ote that the two right-most headers are made difficult to see because of the placement of
four (4) four-position Molex power connectors. (In order to better orient you to the position of these
jumpers, please see the bare backplane and identified headers shown in figure 5)
Figure : Identifying the four 10-position headers
xStack Storage DS -3200 & DS -3400
EC – Drive Activity Light Fix
D-Link Systems, Inc. Page
6
February 7, 2008
Figure 5: A bare chassis backplane showing the four 10-position headers
Step 7) If you see a jumper block installed on each of these four headers like that shown in Figure 6, then
you will need to proceed to Section 2 for instructions on installing the new resistor packs. If you see a
modified jumper like that found in figure 7, then your system has been modified with the necessary resistor
packs. You may close your unit’s cover and return to normal operation.
Figure 6: A jumper block installed on a 10-position jumper
xStack Storage DS -3200 & DS -3400
EC – Drive Activity Light Fix
D-Link Systems, Inc. Page
7
February 7, 2008
Figure 7: A resistor pack installed on a 10-position jumper.
xStack Storage DS -3200 & DS -3400
EC – Drive Activity Light Fix
D-Link Systems, Inc. Page
8
February 7, 2008
2 Installing the Resistor Packs
If you have followed the steps outlined in Section 1.3 and determined that you need to install the resistor
pack modification, then please contact D-Link or your reseller to obtain the four (4) necessary resistor
packs. These resistor packs will take the place of each of the four jumpers found on the four 10-position
headers labeled A1315, A0912, A0508 and A0104.
Step 1) Shut down the DS -3200/3400 through your management GUI. Please follow the instructions in
your xStack Storage User’s Guide.
Step 2) In order to minimize electrical shock risk, remove the three power cords from your DS -3200/3400
unit’s power supply.
Step 3) Please remove the cover from your DS -3200/3400 to gain access to the chassis backplane PCB.
The backplane is identified in figure 3.
Step 4) Identify the four 10-position headers as shown in figures 4 & 5. The two right-most headers are
blocked by the power connectors. Remove the two (2) Molex power connectors labeled C 4 and C 7 to
gain easier access to the two (2) 10-position jumpers found below them. Please see figure 8 for details.
Figure 8: Removing the CN and CN7 Molex power connectors
xStack Storage DS -3200 & DS -3400
EC – Drive Activity Light Fix
D-Link Systems, Inc. Page
9
February 7, 2008
Step 6) For each 10-position header, you must remove the 4-position jumper block as seen in figure 6. You
will then see an empty 10-position header like that shown in figure 9. The top-right pin is removed and
will provide a guide for installation of the new resistor pack.
Figure 9: The empty 10-position header
Step 7) Familiarize yourself with the resistor pack. ote that two of the positions are empty as seen in
figure 10. Also be aware that one of the holes on the connector has been blocked as shown in figure 11.
This blocked hole will need to match with the missing pin shown in figure 9.
Figure 10: The resistor pack: side view
xStack Storage DS -3200 & DS -3400
EC – Drive Activity Light Fix
D-Link Systems, Inc. Page
10
February 7, 2008
Figure 11: The resistor pack: connector view
Step 8) Carefully orient the resistor pack over the 10-position header, making sure the keyed hole matches
the missing pin on the header. Press the resistor pack inwards until it is firmly seated. Figures 12 & 13
will give you a guide to what it will look like.
Figure 12: An installed resistor pack